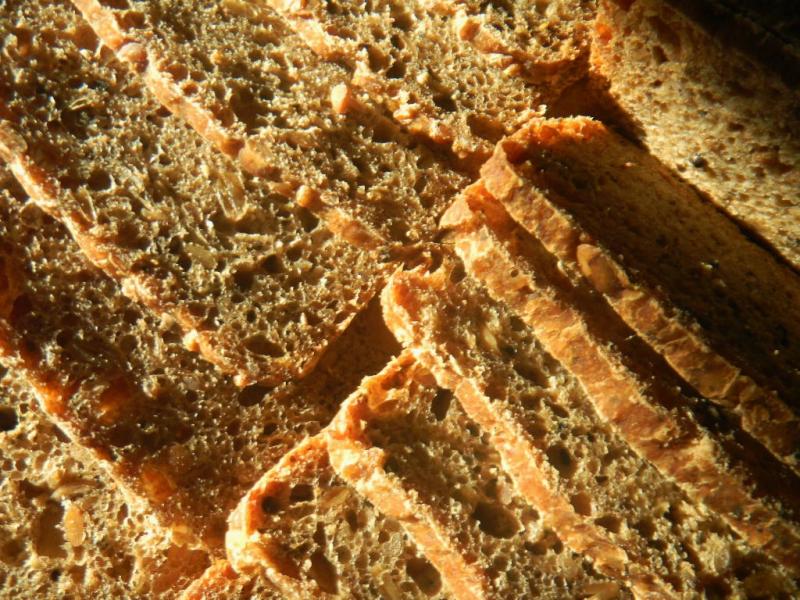
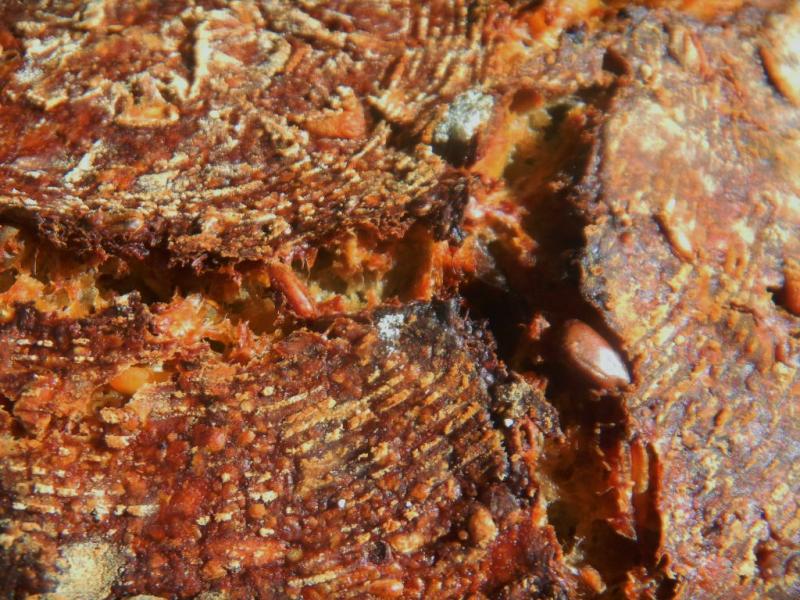
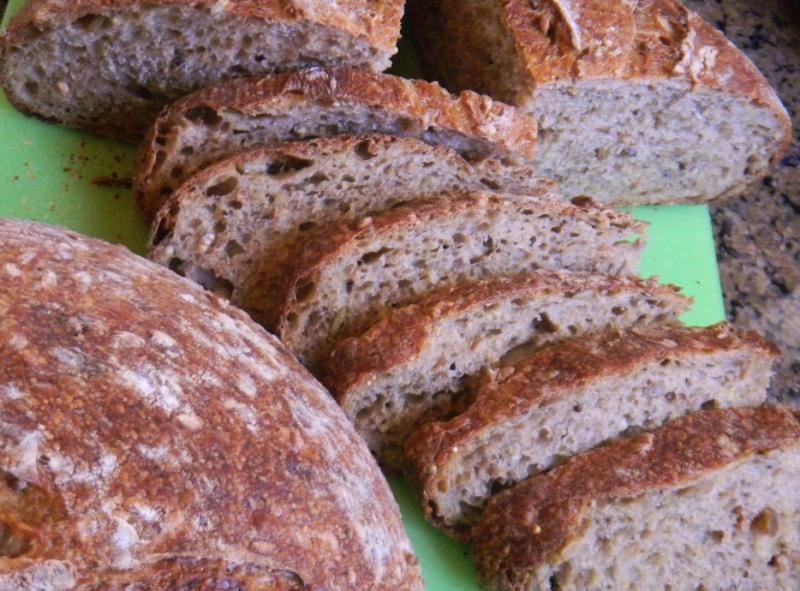
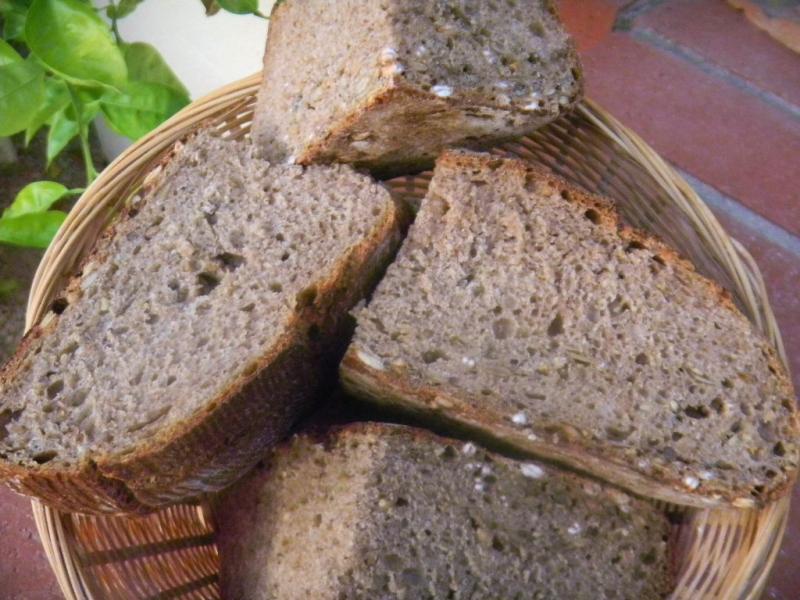
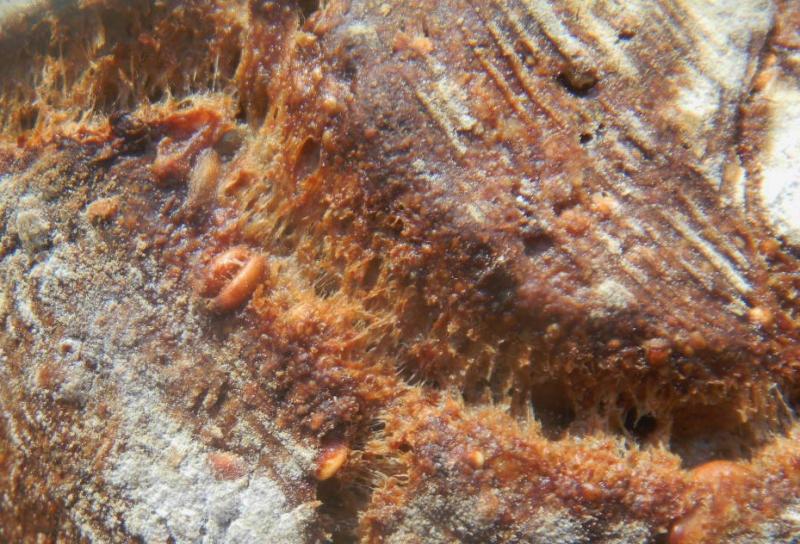
Update: The round boule was wrapped in parchment and a towel for 30 hours to see what difference it might make. It cut much cleaner and tasted twice as sour. A quartered pix and another one with one of the quarters sliced.


This one is for Ian. After coming back from China his first bread viciously turned on him and became a disaster. We have wanted to bake off his wonderful looking Mocha Multi-Grain SD bread for some time.


He spoke highly of how it tasted and it sure looked tasty even though it didn’t have his newly brewed cherry YW in it. David Snyder’s take on Horst Bandel’s Black Pumpernickel from a year and half ago popped up this past week. txfarmer’s chocolate 36 hour baggies from a year ago came up too and they too looked delicious. Breaducation’s wonderfully over-seeded and add in’s take of Chad Robertson’s Rugbrot appeared. It was just beautiful. Then Mebake’s Multi-grain Struan with soaker and seeds showed up. Very nice indeed. All were inspirational for this unique bread.


So, we thought we would combine something from all 5 and commemorate Ian’s recent bread disaster with a long retarded, ‘Mocha Disaster Chacon’ in multi-grains, mega seeds, super soak with YW and SD combo starter. You have to pay homage to the bread gods as the Maya did to their gods when it didin't rain enough for their liking and needs. gods like the attention when things go bad and if you don't comply with a suitable offering then who knows what bad and terrible things will happen to you. So we hope the bread gods will accept this gift and let Ian's future bakes be fruitful, delicious, well risen with blistered, dark, crispy, thick crust and moist, airy crumbs.


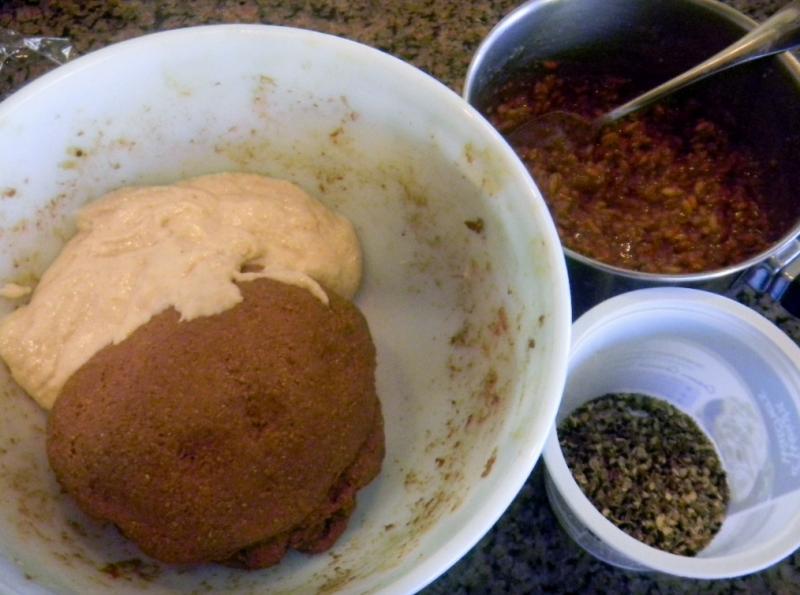
The flours used included durum atta, semolina, dark rye, whole wheat and AP. The soaker included rye, WW and spelt berries, buckwheat groats, cracked bulgar and barley, steel cut oats and quinoa. The seeds included; pumpkin, sunflower, millet, hemp and flax.


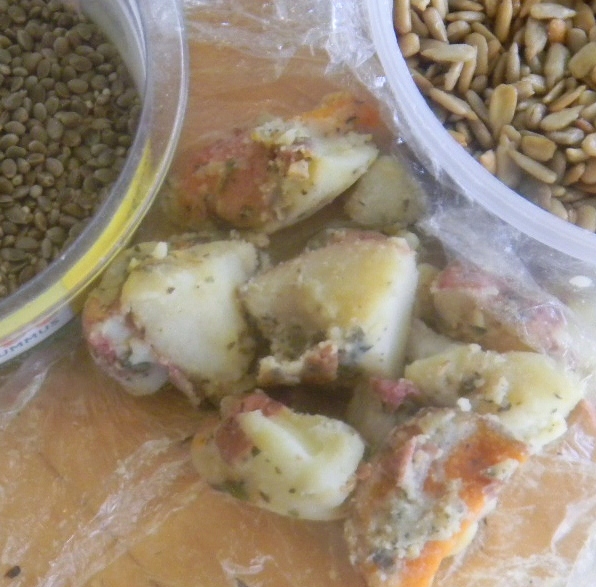
Ian loves his pistachio oil but we used walnut oil here. What would an Ian bread be without potatoes? So we put some in. Sorry no caramelized onions, I feel a little guilty since they too would have been a nice addition. In this case, grilled left over red and sweet potatoes were sautéed in butter, olive oil, and herbs.


We had some possum pelt and armadillo nectar but decided not to use them thinking they might get lost in the mix. My apprentice was heartbroken since she had risked life and limb to catch these critters. We will leave these exotic ingredients and those from the auto parts store to the Ian – the master of bread ingredient combinations, if not, scientific oddities.


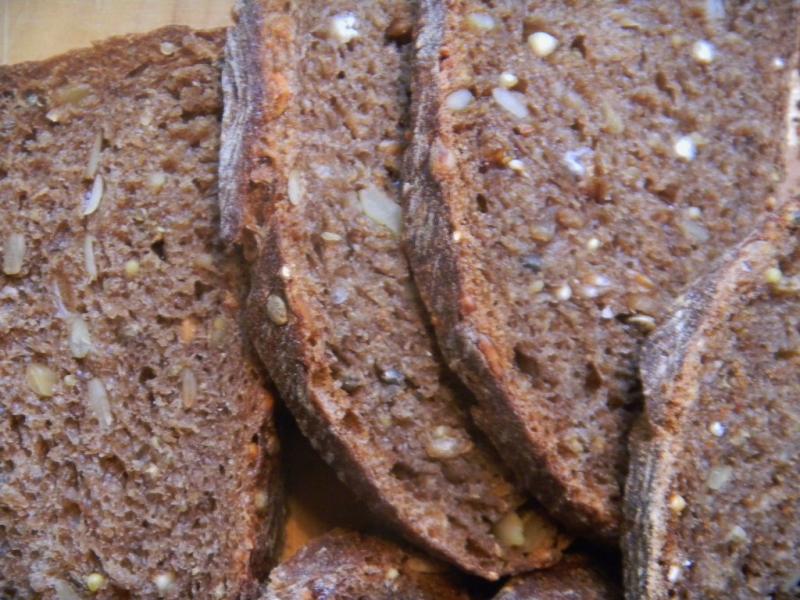
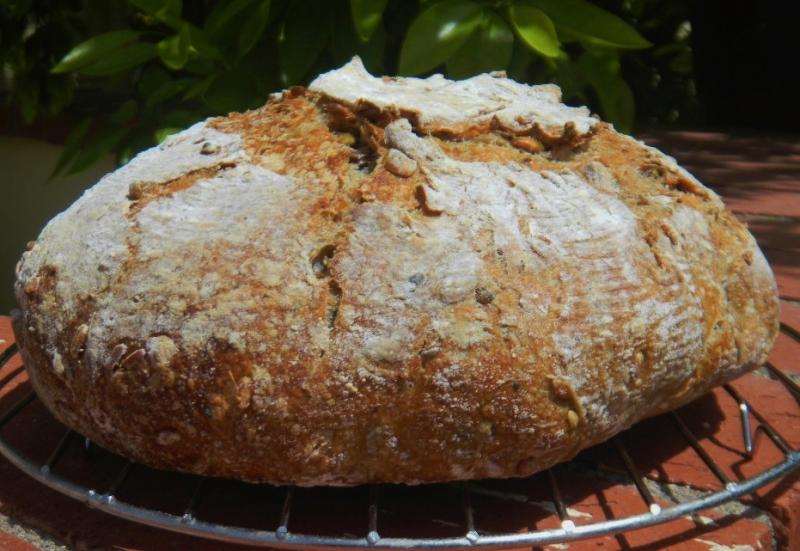
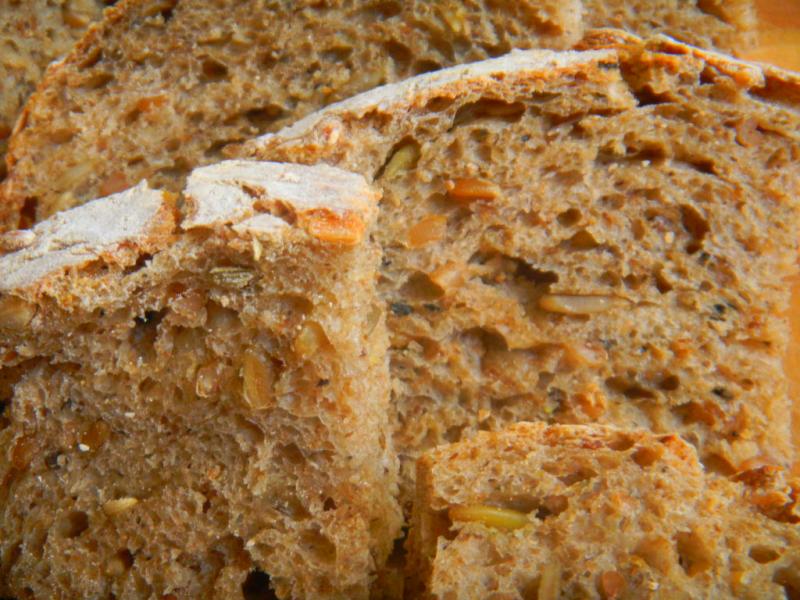
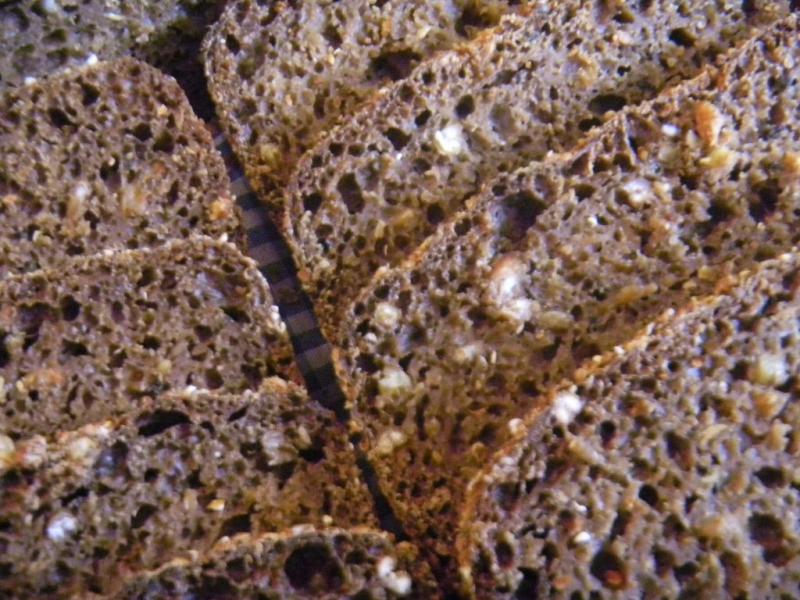
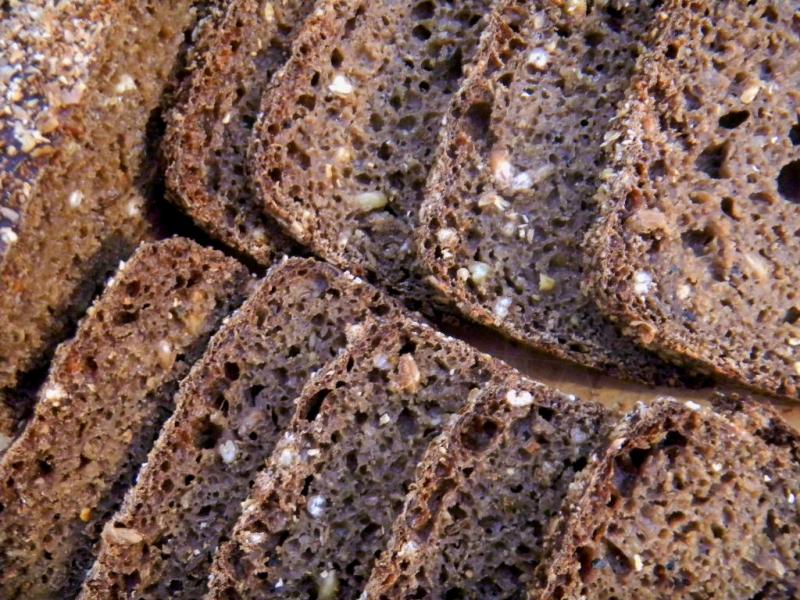
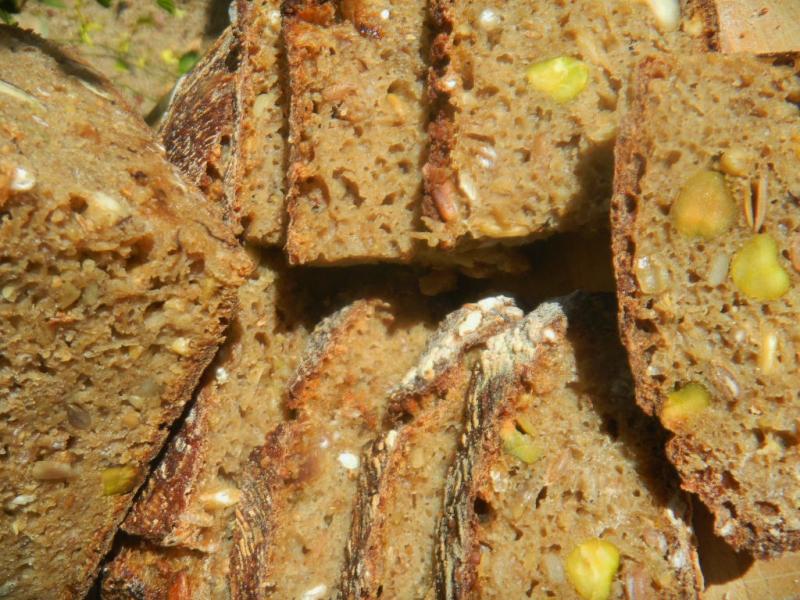
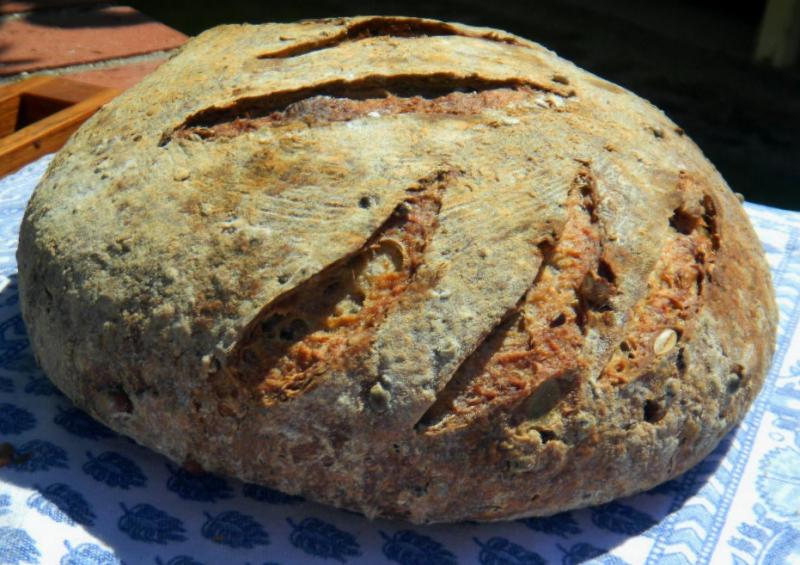
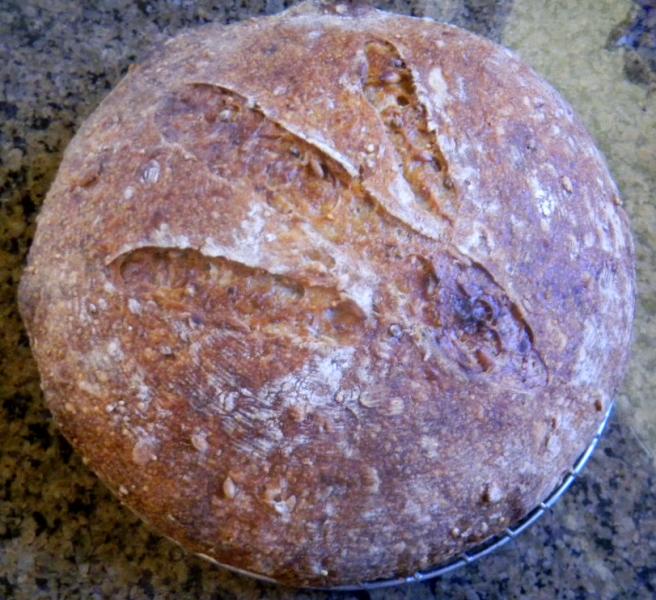
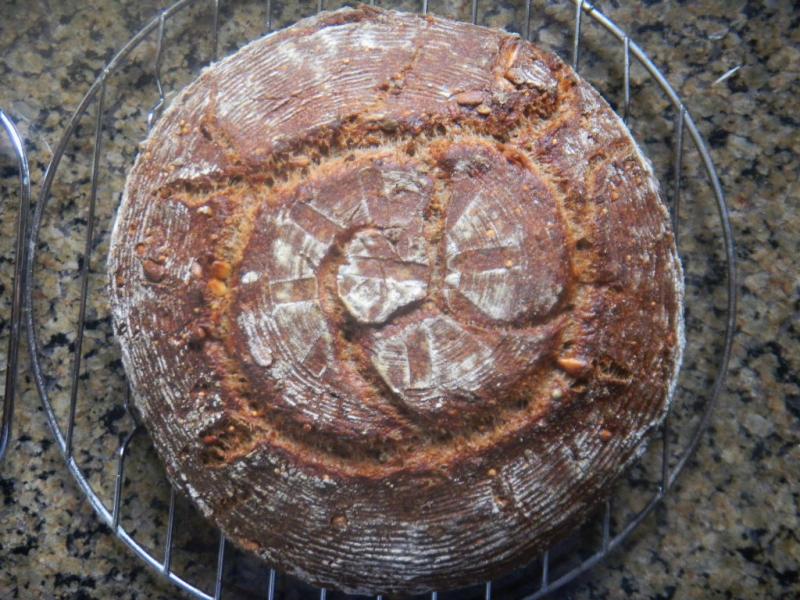
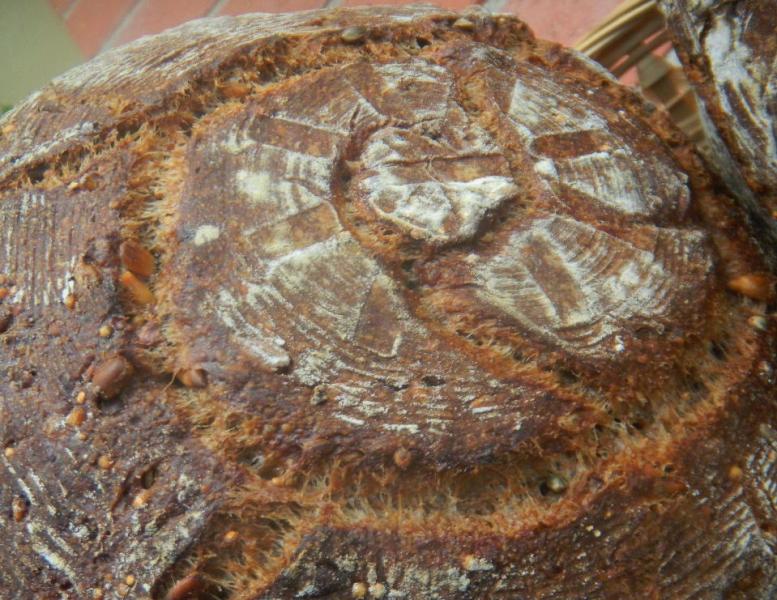
These boules were not total disasters, were deeply browned and cracked as Chacons are wont to do. Sadly, no blisters as Big Old Betsy just doesn't provide them as well as the mini oven does. Small is beautiful they say and, when it comes to ovens, they are correct. Can’t wait to cut into one to see how open the crumb promises to be - even with 122% soaker and seeds.

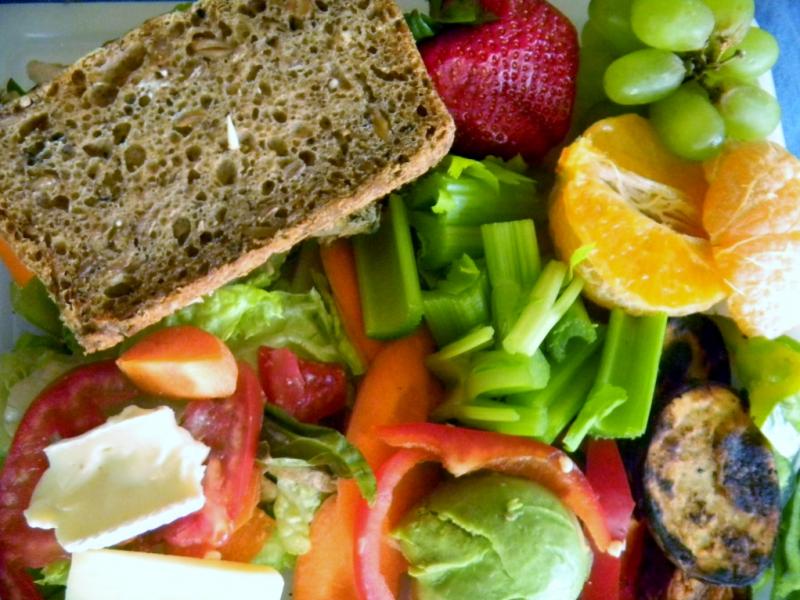
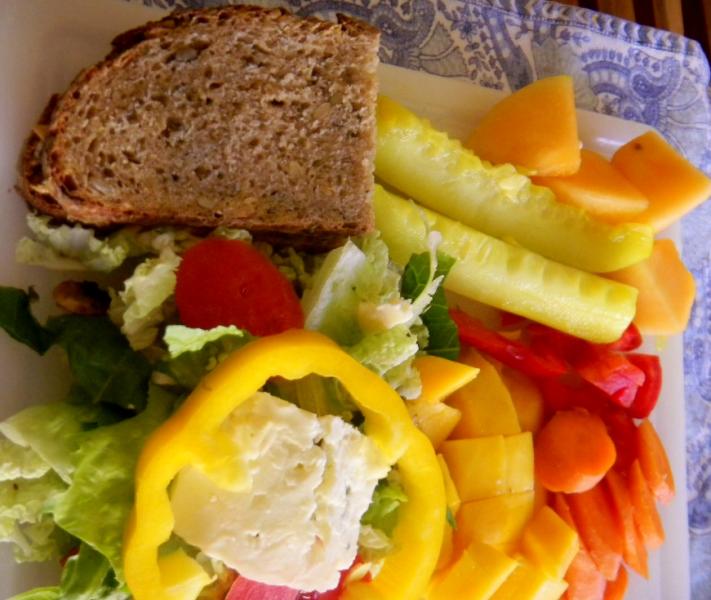
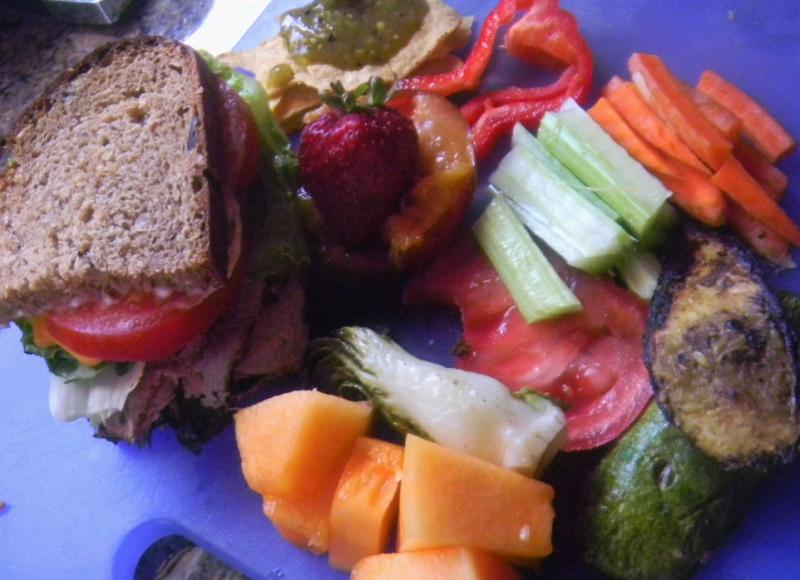
Well we didn't wait long. The crumb was open and so moist. Had the heel plain and a slice toasted with butter. Delicious! Then it was time for lunch. This bread called for a nice limoncello for lunch, being a special occasion and all- and some fine pate too. Life is good. Another great sunset last night.

The formula follows the pix’s as usual.


The Method
The method for this bread is a little complicated but not difficult if you don’t mind really sticky dough. The sourdough and yeast water starters were built together ‘en combo', instead of separately, over (2) 3 hour and (1) 2 hour builds.
The SD portion was seeded with 10g each of our rye sour, desem and multi-grain starters. The levain was then refrigerated overnight for 10 hours. The next morning it was allowed to come to room temperature before incorporating into the autolyse.
The soaker was made by pouring hot mocha coffee over the mix and allowing it to steep for 6 hours. The mocha coffee was made by putting 5 heaping teaspoons of Ghirardelli’s Double Chocolate mix in our standard brew. It was yummy on its own.
The dough, mocha, malts, potato and salt were autolysed for 2 hours. The levain was added and incorporated into the autolyse in the mixing bowl on KA 2 for 2 minutes and then 2 minutes on KA 3. The dough was allowed to rest, covered, for 30 minutes.
This is sticky dough so it was hand kneaded on a lightly floured surface for 4 minutes until it was smooth. The dough was allowed to rest for 20 minutes before the first of 3 S&F’s were done 20 minutes apart. The first one should have incorporated the soaker and the 2nd one the seeds. But I dumped them all in on the first one and then struggled to preserver against impending disaster.
There is a lot of mocha, soaker and seeds in the Mocha Disaster Chacon! Don’t give up, they will all get in there eventually. I had to add some bench flour and knead the dough to get it to work well for me. The dough was then allowed develop and ferment for 1 hour in the oiled, covered bowl.
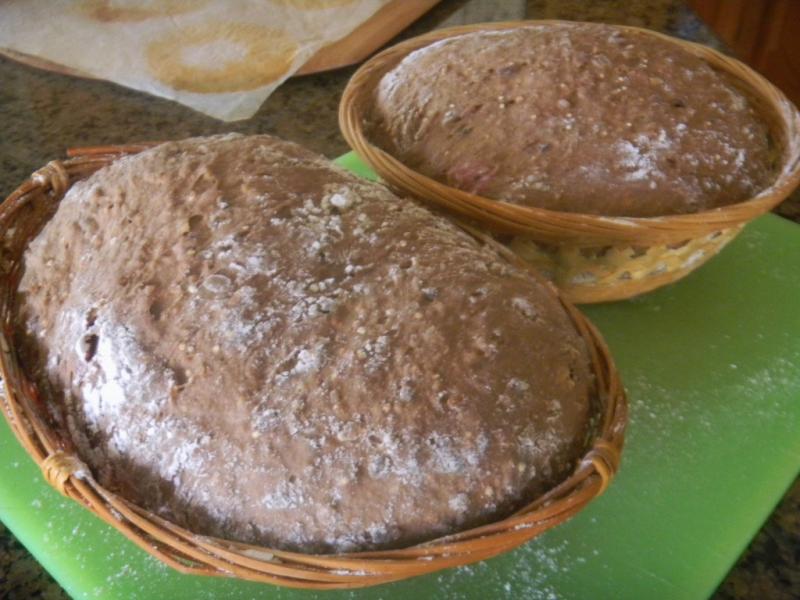
The dough was divided in half for two 800 plus gram boules. 102 g of this was pinched off for a knotted roll that was placed in the middle of the rice floured baskets (a Chacon directive) and the remainder of the dough was formed in the Chacone style and placed over the roll.
The 2nd oblong boule has a knot in the center but, instead of folding the edges up for the remainder of the dough, it was formed into a short fat batard (as opposed to a short, fat ba*tard) with a depression in the middle - just so it wouldn’t look the same as the round but it ended up looking the same anyway.
Once the baskets were loaded, the loaves were allowed to proof on the counter for 90 minutes in a tall kitchen trash can liner before being retarded overnight for 14 hours. They doubled in fridge – a good sign.
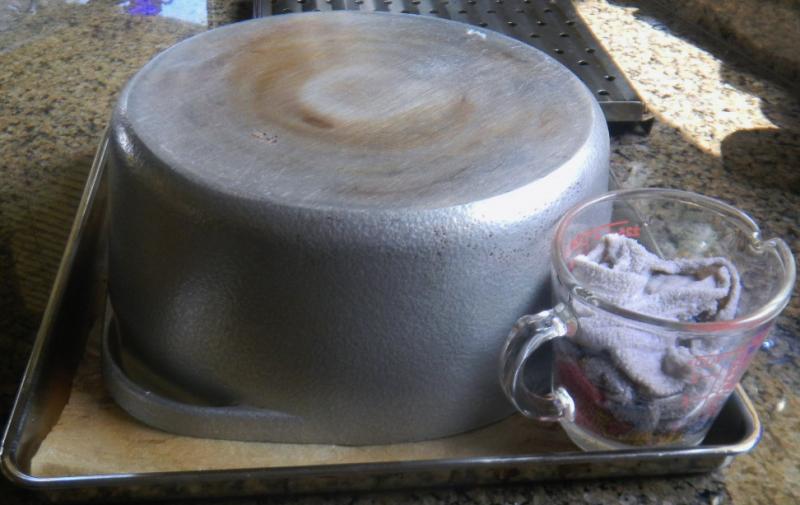
Since it rained last might, it was 75 degrees this morning so we decided to bake these boules off together in the big GE for a change with (2) of Sylvia’s steaming pans in place below the stone. The oven was preheated to 500 F.
The boules were removed from the fridge and overturned onto a peel covered with parchment – no sticking. The Chacon never requires scoring since it is allowed to naturally open up as it sees fit. Into the oven they immediately went, as cold as the fridge could make them.
They didn’t seem to notice the heat. These boules sprang very well, cracked nicely and baked up deeply brown. They were steamed for 15 minutes with the temperature being turned down to 450 F after 5 minutes.
The steam was removed at 15 minutes and the temperature turned down to 425 F convection this time. The Chacons were rotated every 10 minutes until they were done, 205 F inside, about 20 more minutes or 35 minutes total.
The boules were allowed to rest on the stone for another 10 minutes with the oven of and door ajar before being removed to cooling racks.
| Ian's Mocha Disaster Chacon | | | | | |
| | | | | | |
| Mixed Starter | Build 1 | Build 2 | Build 3 | Total | % |
| SD Starter, ( Desem, Multi-grain, Rye) | 30 | 0 | 0 | 30 | 5.16% |
| Yeast Water | 20 | 50 | 0 | 70 | 16.83% |
| Durum Atta | 10 | 20 | 0 | 30 | 7.21% |
| WW | 20 | 20 | 0 | 40 | 9.62% |
| AP | 0 | 0 | 50 | 50 | 12.02% |
| Dark Rye | 20 | 10 | 0 | 30 | 7.21% |
| Water | 30 | 0 | 50 | 80 | 19.23% |
| Total Starter | 130 | 100 | 100 | 330 | 79.33% |
| | | | | | |
| Starter | | | | | |
| Hydration | 100.00% | | | | |
| Levain % of Total | 19.84% | | | | |
| | | | | | |
| Dough Flour | | % | | | |
| Non - Diastatic Malt | 3 | 0.72% | | | |
| Dark Rye | 50 | 12.02% | | | |
| Ground Flax Seed | 10 | 2.40% | | | |
| Semolina | 50 | 12.02% | | | |
| Durum Atta | 50 | 12.02% | | | |
| AP | 200 | 48.08% | | | |
| WW | 50 | 12.02% | | | |
| Diastatic Malt | 3 | 0.72% | | | |
| Dough Flour | 416 | 100.00% | | | |
| | | | | | |
| Salt | 9 | 2.16% | | | |
| Mocha Coffee | 256 | 61.54% | | | |
| Dough Hydration | 61.54% | | | | |
| | | | | | |
| Total Flour | 581 | | | | |
| Mocha Coffee | 566 | | | | |
| T. Dough Hydration | 97.42% | | | | |
| Whole Grain % | 56.97% | | | | |
| | | | | | |
| Hydration w/ Adds | 96.62% | | | | |
| Total Weight | 1,663 | | | | |
| | | | | | |
| Soaker | | % | | | |
| Quinoa | 20 | 4.81% | | | |
| Hard Red WW Berries | 10 | 2.40% | | | |
| Rye Berries | 10 | 2.40% | | | |
| Buckwheat Groats | 20 | 4.81% | | | |
| Steel Cut Oats | 20 | 4.81% | | | |
| Cracked Bulgar | 20 | 4.81% | | | |
| Cracked Barley | 20 | 4.81% | | | |
| Spelt Berries | 10 | 2.40% | | | |
| Mocha Coffee | 145 | 34.86% | | | |
| Total Scald | 275 | 66.11% | | | |
| | | | | | |
| Add - Ins | | % | | | |
| Barley Malt Syrup | 10 | 2.40% | | | |
| Walnut Oil | 10 | 2.40% | | | |
| Millet & Hemp Seeds - 25 ea | 50 | 12.02% | | | |
| VW Gluten | 10 | 2.40% | | | |
| Mashed Grilled Potatoes | 72 | 17.31% | | | |
| Pumpkin & Sunflower - 45 ea | 90 | 21.63% | | | |
| Total | 232 | 58.17% | | | |
| | | | | | |
| (5) heaping tsps of Ghirardelli Double Chocolate Mix | | | |
| Soaker + Add in % | 124.28% | | | | |