The Fresh Loaf

A Community of Amateur Bakers and Artisan Bread Enthusiasts.

rye

dabrownman's picture
dabrownman

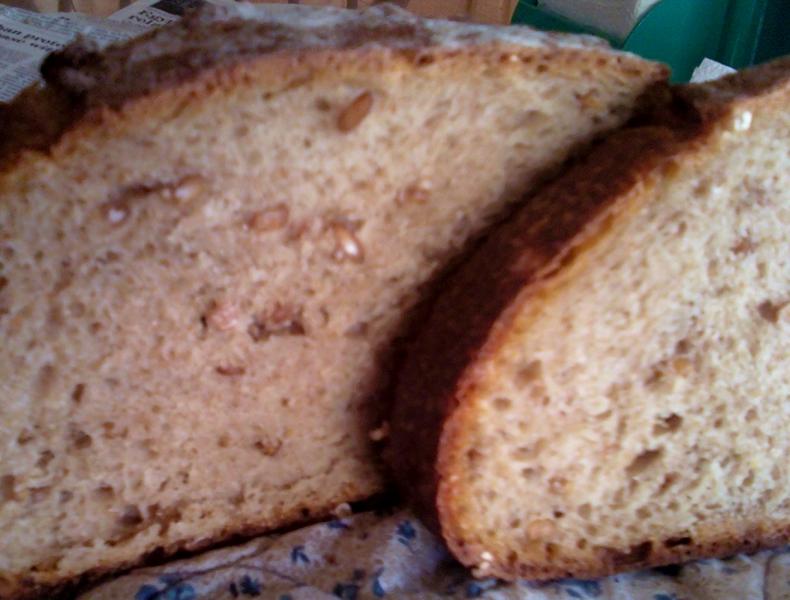
This fancy French named bread is really a Rustic Country San Francisco Sourdough.  It originally started out as a Glenn Snyder Country SD bread minus the rustic and the sweetbird, that she is,  took the recipe and tweaked it some and came up with the most amazing crust on a bread I have ever seen.   I just had to try my hand at it and converted it further to more my liking by; using a rye sour starter,  grinding my own WW and rye, increasing the rye to equal the WW, reducing the AP accordingly and then adding 50 g of whole WW and rye berries that were boiled in water for 30 minutes and then drained.  The berries were put back into the pot with 1 tsp of olive oil and then sauteed until caramelized.  I was hoping for a bread that would be more rustic, have a deeper more flavorful taste, a deep brown crust and crumb that was soft, moist and still somewhat open.  Well, I think all but the somewhat open crumb was achieved.  I guess you can't have everything.  It is the one of the best textured and tasty breads I have ever eaten.  It, like most breads, is much better toasted with butter and I'm guessing the flavor will be better tomorrow as well.  I can't wait to try this on a new sandwich creation tomorrow.  Here are some pix's.  The recipe follows the pix's

 Rustique Pain Comté de San Francisco

Yield: Two 750g Loaves

Ingredients

Levain Build

86 g AP flour

25 g Whole Wheat flour

25 g Whole rye flour

175 g water, cool (60 F or so)

30 g active culture (72% hydration)


   Final Dough (68% hydration, including levain)

600 g AP flour (77.5%)

87 g whole wheat flour (11.25%)

87 g whole rye flour (11.25%)

440 g warm water (80 F or so) (57%)

14 g pink Himalayan sea salt (1.5%)

313 Levain (40%)

Scald and Caramelize: 50 grams of WW and rye berries boiled in twice as much water as berries by volume for 40 minutes.  Drain berries and return to pan with 1 tsp of olive oil and sauté until the berries caramelize and start to leave color on the bottom of the pan.  When color starts sticking to the pan they are done.

Directions

 1.  Levain : Make the final build 10-12 hours before the final mix.

2. Mix: Add all the ingredients to the mixing bowl, including the levain, but not the salt or the scalded berries. Mix just until the ingredients are incorporated into a shaggy mass. Correct the hydration as necessary. Cover the bowl and let stand for an autolyse phase of 60 minutes. At the end of the autolyse, sprinkle the salt over the surface of the dough, and knead 4 minutes with dough hook on KA 3. The dough should have a medium consistency.  Add the scalded and caramelized  berries and mix on KA 3 for 1 minute   

3. Ferment with S&F: 3 hours. Stretch and fold the dough in the bowl once 10 strokes at the 30minute mark. Stretch and fold again, 5 strokes, at the one hour mark folding it into a ball in lightly oiled bowl.  Leave to ferment 1-2 more hours until the dough is at least 75% larger than when you started the ferment.

4. Retard: do 1 S&F in the lightly oiled bowl forming the dough into a ball again.  Refrigerate 8-20 hours, depending on how much time you have and sour your taste.

5. Divide and Shape:  take dough out of refrigerator and let it come to room temperature about 1 ½ hours.   Divide the dough into what 2 pieces and pre-shape, then shape into boules or batards 20 minutes later.

6. Proof: Approximately 1.5 to 2.5 hours at 72° F. Ready when poke test dictates.

7. Pre-heat: oven to 500 with steam apparatus in place - 45 minutes minimum.  I use a loaf pan half full of water and a dry12”cast iron skillet that go in the bottom rack of the oven at the beginning of pre heat and the stone on the rack above.  When the loaves go in, I throw 1 cup of boiling water into the cast iron skillet right after loading the bread on the stone.

8. Bake:  Slash loaves. Bake with steam, on stone. Turn oven to 450 F when it hits 500 F after loading loaves. Remove steaming apparatus after 15 minutes. Bake for another 15 minutes more or 30 to 35 minutes total. Rotate loaves for evenness as necessary. When done (205 Finternal temp), leave loaves on stone with oven door ajar, oven off for 10 minutes.  Move to cooling rack until loaf is room temperature.


Isand66's picture
Isand66

The last time I made Ciabatta I made a sourdough version that came out quite good.  In my never-ending quest to try to create something new and hopefully great tasting I came up with the concoction below.

I decided to go with a straight forward yeasted version of Ciabatta but I wanted to get more flavor in the final product.  I happen to love onions, so I figured why not add some carmelized onions and to get some stronger wheat and nuttiness flavor in the bread I decided to use some spelt and rye flour along with a low protein French style flour from KAF.  This combination resulted in by far the best Ciabatta bread I have ever made or tasted in my not so humble opinion :).

I followed the standard operating procedures from Peter Reinhart's Artisan Breads Everyday for the Pain a L'Ancienne Rustic Bread and modified the ingredients as mentioned above.  The only thing I would change maybe is to add some cheddar cheese next time which would really put this one over the top.

You can really taste the onions and the rye-spelt mixture and the open crumb was nice and moist.

If you give this one a try I would love to hear what you think.

Here are the ingredients and procedure I followed:

Ingredients

13 oz. KAF French Style  Flour (you can use All Purpose if you don't have French Style)

4 oz. Medium Rye Flour

3 oz. Spelt Flour

16 oz. Ice Cold Water (55 degrees F.)

0.4 oz. Salt  (1 3/4 Tsp.)

.14 oz. Instant Yeast (1 1/4 Tsp.)

1 Tbs. Olive Oil

17.5 oz. Carmelized Onions
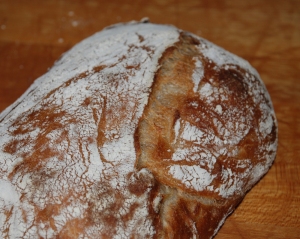
Directions

Cut up half of a medium size sweet onion and saute for 5-8 minutes on medium low in a frying pan or bake on a sheet pan in your oven.  Let the onions cool before adding them to the dough.

Add all the ingredients into the bowl of your mixer except the onions and stir for 1 minute on the lowest speed. The dough should be rather sticky and rough at this point. Let it rest for 5 minutes in the mixer bowl.

Add the cooled onions and mix on medium low using your paddle attachment for one minute. In my case I have a Bosch which only has one mixing/kneading attachment. The dough will still be very sticky but should very soft and much smoother. Transfer the dough to a lightly oiled bowl using a dough scraper or spatula. Cover the bowl and let it rest for 10 minutes.

After 10 minutes transfer the dough to a lightly oiled work surface. Make sure you oil your hands and do a stretch and fold on all sides of the dough and flip it over and form it into a ball. Put the dough back in the bowl and let it rest for another 10 minutes at room temperature. Do this stretch and fold process three more times over the next 30 to 40 minutes. You can do the stretch and fold in the bowl itself if you prefer. I personally like to do it on the counter.

After you do the last stretch and fold put it back in the bowl and cover it tightly and refrigerate overnight or up to 4 days. The dough should rise to almost 1 1/2 its size in the refrigerator.

Take the dough out of the refrigerator at least 3 hours before you plan to bake and let it sit at room temperature.  Around 1 hour after taking the dough out of the refrigerator, place a large piece of parchment paper either on your work area or the back of a baking pan and dust with flour to cover it completely. Using an oiled or wet dough scraper gently remove the dough to the work surface. You want to be very careful so you don't degas the dough and kill the big air holes you want to achieve.

Flour your hands and lightly dust the top of the dough. Use your hands and a metal dough scraper and form the dough into a 9" square and be very careful again not to manhandle the dough and degas it.

Next, cut the dough into either 3 small ciabatta or 2 larger size loaves. I opted to go with the 3 smaller size ones.

Gently fold the individual dough pieces into thirds like an envelope. Make sure to be very careful and not to apply any pressure. Roll the folded dough in the flour to coat it and lift it onto the parchment paper and roll it in the flour again. Rest the dough seam side down and repeat with the other piece(s) of dough.

Spray the tops of the dough with oil (I use a baking spray) and cover the pan with plastic wrap very loosely. You can also use a clean lint free kitchen towel.

After 1 hour of resting, roll the dough pieces very gently so the seam side is now facing up and lift them with your floured hands to coax them into either a 7" rectangle if making the larger size or 5" rectangle. Try to get them to be as close to a rectangle shape as you can when you put them back down on the parchment paper.

Let them rest covered loosely again for 1 hour.

About 45 minutes before baking, pre-heat oven with baking stone (I use one on bottom and one on top shelf of my oven), to 550 degrees F.

Place an empty pan in bottom shelf of your oven or a cast iron skillet.

Pour 1 cup of boiling water into pan and place loaves into oven. I also spray the side walls of the oven with water 2 to 3 times for added steam.

Lower oven to 450 Degrees and bake for 12 minutes and rotate the bread and bake for an additional 15 to 20 minutes until bread has a nice golden brown crust and the internal temperature reaches 200 degrees. The bread should have puffed up a little and should be hard when you tap it.
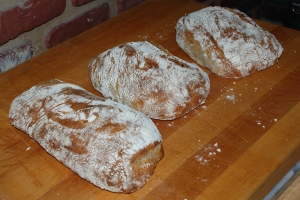
Let it cool on a wire rack for 45 minutes (good luck waiting that long!) and enjoy!
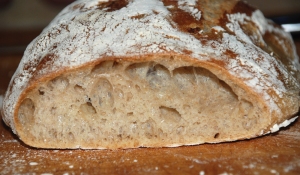
The bread should have nice large irregular holes and should be soft after cooling.

This post has been submitted to the Yeast Spotting Site here: http://www.wildyeastblog.com/category/yeastspotting

dabrownman's picture
dabrownman

After having such good luck with Phil's no stress recipe for 40% Rye and Caraway, I was additionally inspired by hanseata's seeded loaf's.  So, I thought I would try to marry up the two and take on my requirement for more whole grain and less white flour.  I was hoping that by adding some spelt and farro home ground berries to the rye replacing some of the white and adding some anise and fennel to the caraway, this new concoction would be a decent bread.  Plus, another important test, I could try out for the first time my new 'double Y chicken foot' slash!!!!

I also got a new way to final prove these ill shaped breads with a new bamboo containment thing-a-majig that has some doohickey handles for the containment challenged like myself.  Don't laugh.  This thing, what ever it is,  cost a buck.  We can't sleep at night worrying about these contraptions and they are real issues for us !!!  The used, so much better than new,  parchment paper is the crowning achievement of getting the loaves out of the trash bag and into the oven without disfiguring oneself unnecessarily - by hot oven.

The loaves sprang nicely.  The crust was crisp, crunchy yet chewy.  The taste of the bread was more earthy and more to my liking as expected.  The crumb wasn't quite as open as before probably due to the extra 20% whole grains in place of the white - but still OK.  The slash produced a wide flatish gash where the loaf pooled through lazily.  No ears - so fancy pants still needs some work before the double chicken foot slash is a keeper.

The disappointment was that I replaced some of the caraway seeds with the anise and fennel and the resulting seed taste was too slight and muddied.  I was too chicken to go for a bold taste with these seeds.  Don't you be !!! It would be much better just adding the same grams of anise and fennel as the caraway.  I think it would be perfect that way - if it didn't kill you of course ;-) 

Here are some more pics...

I really like it that you can make these breads in half a day if you have some decent rye sour built all the time.  Next time, and there will be one if only the for the double Y chicken foot slashs' sake, More seeds will be boldly incorporated.  I think I am still making progress.

Thanks again Phil and hanseata.


dabrownman's picture
dabrownman

What a nice bread to make - and it only took half a day since I already had the starter build ready - retarding in the fridge.  It is what Phil calls simple baking which is why I chose it.  It has to simple and stress less after all these 3 day ordeals of late :-).  Rye SD with caraway is my favorite bread - by far.  This one besides being easy, is also top notch.  Phil knows his bread baking ! Lovely texture and taste, crispy crunchy crust to cut but soft and chewy when eaten.  I had it plain, buttered, toasted, creamed with cheese and it was all good.  The lox was frozen but I bet it too would have been fabulous with this fine bread.  This is a fine every day family rye that almost all will enjoy.  Here are some more pics of how I did it  - which is far away from what the pro's like Phil do and my sorry attempt proves it.  Still haven't got a decent camera, so the cell phone shots will have to do.......

I'm getting better slowly but surely.  It is a nice feeling .  Bake Phil's 40% Rye with Caraway.  You will like it.

Graid's picture

What sort of rye is this and how would I achieve it?

January 30, 2012 - 6:27pm -- Graid
Forums: 

I was until recently under the mistaken impression that all rye bread was the sort you get in supermarkets in the UK and Belgium and Sweden. Small, dense, dark, and exceedingly rich in flavour.

This is the picture of the common UK brand. Like in Belgium and Sweden it is sold in the UK in pre-sliced form. The texture is crumbly and the bread has a habit of falling in half when you take the slices out. 

Juergen Krauss's picture

Mischbrot Madness

January 9, 2012 - 4:12am -- Juergen Krauss

For a while now I was thinking how to incorporate several doughs with different rye:wheat ratios into a single loaf, for various purposes( aestatics, spot the difference ...).

On the weekend I had some spare time and went the whole way (that's the madness component)

Using my single-step Detmolder formula I made 9 doughs with rye:wheat ratios of 20% to 100% and a simple white yeasted 100% wheat dough to wrap it all up.

loydb's picture
loydb

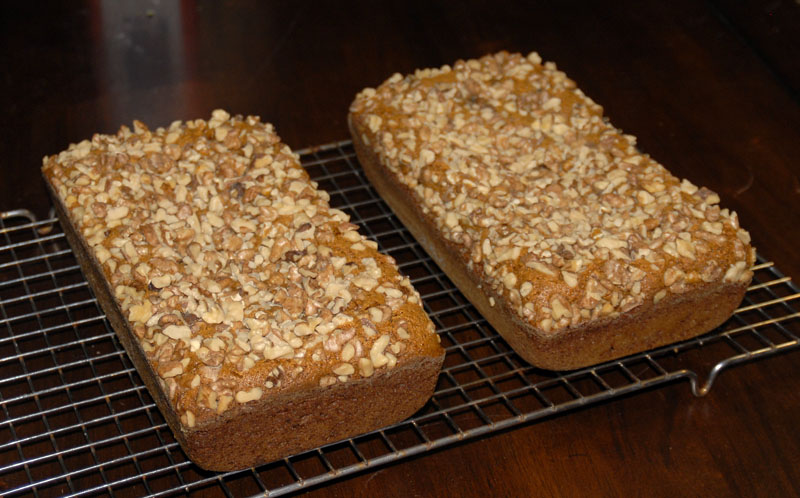
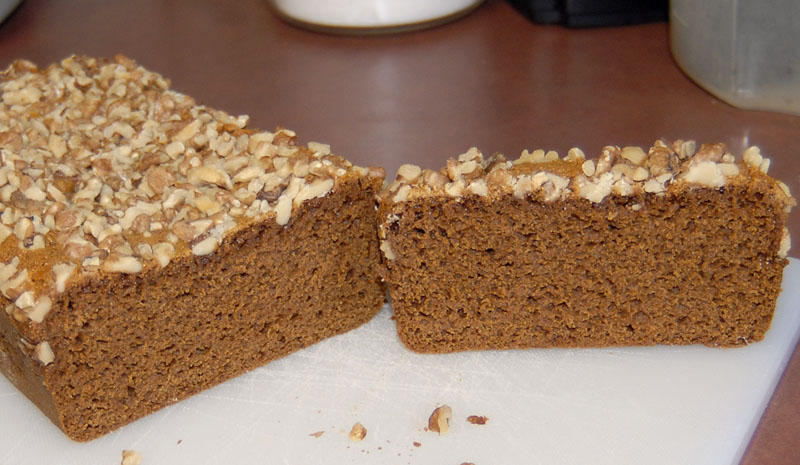
I'm almost caught up! It's week 5 in the Inside the Jewish Bakery Challenge - Semester 1. This week was Honey Cake.  

This called for white rye flour. To make it, I milled whole rye and then sifted to 80% extraction. I think the walnuts were a little heavy, the centers never really rose even after 3 hours of cooking. Almonds may have been a better choice.

In spite of it being a really runny, gummy, goopy batter, it baked up incredibly light, and not nearly as sweet as I would have anticipated from the pound of honey in it. There is no gumminess at all.

gmagmabaking2's picture

Rye Sour

January 6, 2012 - 1:51pm -- gmagmabaking2
Forums: 

Just fed my sour beasties this morning and decided to "play", made a bread with sourdough starter, 1 cup whole wheat and 1 cup of light rye flour... 1 tsp. salt. Looks great to me, smells even better.

Diane

breadforfun's picture
breadforfun

I like experimenting with different flours to see the nuances they bring to breads.  Here is a recent bake using a small amount buckwheat flour.  It is a large batch that I built for the amount of starter that I had made the night before using the Hamelman method for Vermont SD.  It made 4 loaves that averaged about 750 gm after cooling.  Besides the beautiful color it brings to a loaf, it adds a nutty flavor that, it turns out, works surprisingly well with brie and camembert cheese spread on it.  The crumb is moist and chewy and the crust has a great crunch.  If you like dark baked loaves, this one's for you.

Recipe:

Scored and ready to go:

Finished loaves:

Crumb:


ehanner's picture
ehanner

Let me start by apologizing to the generations of German bakers before me. I have been trying to learn about the dense style dark bread sometimes called Pumpernickel or Schrotbrot or Roggen Vollkornbrot.  I've baked the Hamelman Horst Bandle bread and liked it after I finally figured out how to bake it at home. Then I have been fooling with the Barm process and Barm breads, both white and rye flours. I read a comment from Dan Lepard about soaking whole berries in dark ale after simmering to soften. So finally all of this came together for me and I decided to try incorporating a couple of these things into the basic Vollkenbrot recipe and make some changes to the sweetener. 

It isn't really an honest Ale Barm that soured the rye chops. I started with my white starter and fed it a couple cycles with ale and AP. It provided the sour component with a very nice aroma and fluffiness after it had aged. This bread doesn't rise like a conventional loaf to any great degree. You can see the domed top with some cracks that indicate there was some spring.

The Vollkornbrot and Schrotbrot do not normally contain any flour. Not Hi Gluten or Rye flour. Perhaps  a meal or another finer grade of chops but no flour. I like to mix all of the pre ferments and scalds and soakers and then adjust the hydration to a thick paste with dark rye flour. There is a last minute addition of chops that have not been soaked that absorbs a lot of the extra water/ale but I usually need at least 100 grams of dark rye to get it where I like it. Several of the recipes I have studied call for kneading (stirring) for 30 minutes every few minutes until the dough becomes sticky. I believe this occurs when the last chops and flour additions have become hydrated. It is obvious when it happens.

The recipes call for using treacle or black strap molasses. I have been slowly increasing the amount and also adding honey at an equal amount in addition. The bitter of the black strap and sweetness of the honey seems complementary to me and I am liking the combination. I have another small batch in ferment now that will be sweetened with sorghum. I think that will also be a nice flavor.

Anyway, not to be disrespectful to my forefathers, this bread is delicious beyond my dreams. We sliced a few pieces from the smaller loaf and ate it with butter while still warm. It was soft and loaded with full deep flavor. The color is darker than it appears in the photos due to my wanting to show the detail. The 10 hour overnight bake at 240F in a sealed pan did the job. My thanks to Andy, Juergen, Franko, Shiao-Ping and Jeff Hamelman and Dan Lepard to name just a few who helped me get this far.

Eric


Crumb shot shows the course and dense nature of this bread.

There are several sub components of the formula. The amounts will make enough for one standard  steel bread pan and give you a 1Kilo loaf, pre bake weight. If you have a pullman pan, seal the top first with foil and then place the lid on.

Sour:
150g Rye Chops
150g dark ale
25g active starter

Scalded Chops and Berries:
100g Rye Chops
150g boiling water
8g Salt

50g whole Rye Berries
100g Hot Ale

Final Dough:
120g Rye chops
Dark Rye Flour as needed for consistency (100g)
30g Black Strap Molasses
30g Honey

Method:

Combine sour and soakers the morning of the day you want to bake so they have 12 hours to age.
When preparing the dough, combine all the ingredients and mix well with a large spoon. Add Dark Rye flour as needed to lower hydration to a sticky paste. You want it to be wet enough you could not roll it. Stir every few minutes for 30 minutes and the paste will become sticky.
Prepare a 8x4 (approx) steel bread pan with side edges all around with butter or crisco.
Spoon paste into corners and level the top with a spatula. Now create an edge with the tip of the spatula and a slightly domed surface. The idea is to have a domed top so any water condensate will run down to the edge and down the sides of the loaf.
Brush the top with water.

Seal the top of your bread pan with a double layer of foil being carefull to get a good seal around the edges.

Put the pan in a preheated 350F oven for 30-45 minutes. Lower the heat to 240F and bake for 8-10 hours. I lower the heat to 220F for the last 2 of the 10 hours.

Decant the loaf and allow to cool on a wire rack for at least as long as it takes to cool completely. At this point you can wrap in saran or a tea towel for a day or so. This bread may be kept in a plastic bag on the counter or refrigerated. It would last a long time if you could keep from eating it.

Enjoy

Pages

Subscribe to RSS - rye