The Fresh Loaf

A Community of Amateur Bakers and Artisan Bread Enthusiasts.

rye malt

varda's picture
varda

Lately I have been trying to make a passably authentic Russian Borodinsky Rye.    Fortunately Russian bakers are very generous.    Eliabel referred my last Borodinsky post to two Russian bread bloggers - Serghei and Masha.    They gave her some feedback which she very kindly translated for me.   I've tried to incorporate their advice into my latest bake.   A sticking point for those of us who would like to make authentic Borodinsky is the malt.   The original requires a fermented rye malt called red malt.    As far as I can tell this is not available in the United States.   Furthermore the process for making it is not well adapted to a home kitchen.   See for instance the discussion on dabrownman's post.   However, there are excellent rye malts available.    I was able to purchase three different malts at a brewing supply store in Cambridge, Massachusetts:   caramel, chocolate, and simple malted rye.    The chocolate and caramel are malted seeds which are then roasted to the desired color and flavor.    For the simple malted rye, the seeds are sprouted and then dried in a kiln.  

The advice I got through Eliabel was pretty straightforward.  

1.   Kvas is not a sufficiently concentrated source of rye malt for Borodinsky

2.   Molasses should go in the final dough rather than in the scald

3.  Eliabel also quoted a new book on Rye Zavarka breads which says that the red malt process retains some of the diastatic enzymes of the malt.  

For this bake I used the chocolate malted rye in the scald, and then added some of the simple rye malt to the final dough.   I also added the molasses to the final paste rather than the scald. 

Since in earlier Borodinsky attempts both Masha and Eliabel had mentioned there should be no cracking of the top, I modified a few things to see if I could avoid it.   First, I went way up on the hydration to 98%.   Second I took Howard's advice to dock the top, and Minioven's advice to take a spatula and separate the top of the loaf from the side of the pan prior to proofing.    This is the first of many attempts in which the top did not crack.    Otherwise I followed the three stage Auerman process as detailed by Andy.    I was again unable to cover the pan during the bake because I had added so much more water that the dough was too high.   It just ended up doming slightly.  

I cut in and tasted today after a 20 hour rest.

Since the chocolate malted rye had such a strong flavor, I should probably have used a bit more freshly ground coriander than I did.    I had cut back because my malt in previous attempts wasn't strong enough to balance the coriander flavor.   Other than that, I was pretty happy with the result.

Update:   Oh, one more thing I would change.   The scald was a little dry without the molasses and so hard to mix in with the rye sour.   Next time, instead of adding the extra 50g of water to the final dough, I would add more water to the scald.   

Borodinsky with Chocolate Rye Malt


Rye Sour


5:15 PM

9:00 PM


Seed

60


Whole Rye

32

75

140

247


Water

28

135

250

413

167%


660


Scald


Whole Rye

104


Chocolate Malted Rye

36


Boiling Water

249

adjusted for evaporation


Ground coriander

4


393


Sponge


Rye Sour

552


Scald

393


945


Total

Final

Sour

Scald

Total

Percent

Whole Rye

207

207

104

517

79%

KABF

138


138

21%

Water

50

345

249

644

98%

Molasses

41


41

6%

Chocolate Malted Rye


36

36

5%

Malted Rye

9


9

1.4%

Salt

10


10

1.5%

Ground coriander


4

4

0.6%

Sponge

945


552

393

1400


Sour factor

0.84


Feed starter as above


At second feeding, make the scald


Leave overnight (12 hours.)  Sour is frothy


Mix scald and starter


Ferment for 5.5 hours


Add final ingredients - mix by hand until blended


Ferment for 1 hour


Note that paste was very fluffy and aerated at this point


Spoon into greased bread pan.   Smooth down with wet spatula.


Spray top with water and do so at intervals


Cover


Proof for 1 hour 55 minutes


Very bubbly and starting to get holey on top


Oven preheated to 550 for 1 hour - steam pan for last 30 minutes of preheat

Put bread in oven and bring temperature back to 550


Then reduce to 350


Bake for 1 hour 15 min covered with foil after first 15 minutes


then remove steam pan, remove bread from pan and bake for 30 minutes


dabrownman's picture
dabrownman

I took 60 g of rye berries and soaked them for 5 hours in water.  Then, taking a metal sheet tray, I moistened a paper towel and placed it on the tray and spread the berries over the paper towel.  I then took two paper towels, moistened them, placed them over the berries, covered the sheet pan with plastic wrap and covered the whole shebang with a kitchen towel.. Every day I would move the berries around and spray the top of the paper towels a little water to keep them moist - not wet.  After 96 hours from start to finish the berries were ready to dry and looked like this.

The tray looked like this.

I then dried the berries in my table top Cuisinart convection oven.  The berries were stirred and the pan was rotated 18o degrees every 15 minutes.  I used a drying schedule of 30 minutes each at 175 F (convection), 225 F, 275 F and then 20 minutes at 325 F and they were done. Here are pictures at the end of each time and temperature.

175 F

225 F

275 F

325 F

After grinding the original 60 g of berries, it made 32 G of Red Rye Malt Powder.  The powder looked like this.


varda's picture
varda

Word of the day: unseasonable.  I've been hearing that a lot lately.   What it means in practice is that after carefully checking the expected weather for the next few days, I decided it really was safe to bake in my WFO in March!    Last year my first bake was in July, but that was because I had to rebuild the oven first.    This year, the oven came through the winter more or less intact.    I pulled off the tarps and burned a bit of brush in there yesterday to warm it up.    Then today, fired it up and baked.   It was that simple.    Except it may take me awhile to get back into the routine.   This bread was totally overproofed since it took me forever to get a fire going and the weather is so warm that proofing was fast.    If I had baked it in that state in my gas oven, it would have just sunk like a stone.   Also, I didn't quite manage to get a steam pan into the oven.   Too much to keep track of.   Next time.  


This bread is a multigrain sourdough.   The wrinkle is that I threw in my leftover rye malt.   My son said it was delicious.    I thought it tasted vaguely similar to eating a beer.   Not sure why, since most beer isn't made with rye.    So actually pretty good, but strange.  

Here is my hobo oven ready for baking:

Update:   Formula and Method

3/20/2012


Sourdough with Rye Malt


4:35 PM

9:30 PM


Starter

35


KAAP

20

47

62

129


Dark Rye

1

3

3

7

5%


Water

14

55

100

169

125%


305


Final

Starter

Total

Percent


KAAP

350

123

473

75%


Dark Rye


7

7

1%


Whole Rye

50


50

8%


Spelt

50


50

8%


Whole Wheat

50


50

8%


Water

285

162

447

71%


Salt

12


12

1.9%


Rye Malt

17


17

2.7%


Starter

292


1106


Mix all but salt and autolyse for 45 minutes


Add salt.   Mix in KA at low speed for 25 minutes


until dough is pretty strong and doesn't just flow down


when you lift the mixer arm


BF for 3 hours with no S&F


Cut and preshape


Rest for 30 minutes


Shape and proof (2 hrs)


Bake for 40 minutes in WFO


varda's picture
varda

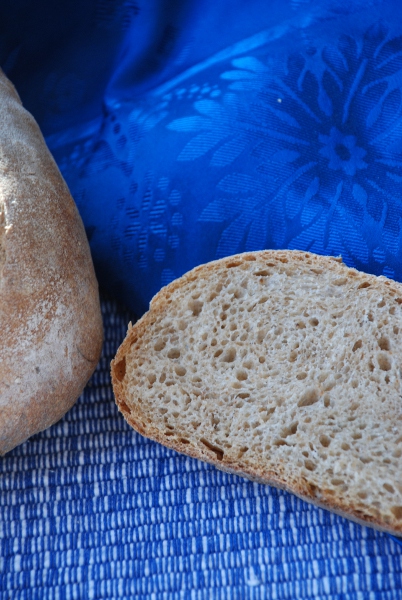
I have been making the same loaf of bread since Sunday and it's not even sourdough.   It is my first Pain de Mie, using the formula that Syd posted here.    Usually when people tell me what a lot of work it must be to make bread, I say it doesn't take much time or effort - mostly you let the dough do the work.   That does not hold for this bread.   Syd's instructions say to work this dough until it either has a gossamer windowpane, or your arms cramp up.   Since my arms never cramped up even though they were (and still are) extremely tired, I worked the dough with a few short breaks for an hour and 10 minutes.   No gym today.   In theory I could have used my Kitchen Aid stand mixer.   In practice it would probably have been the last time I used it.   

Since I have never made/bought/eaten this type of bread before I have no idea if it came out the way it should.  

I will say it's the most flavorful white bread I've ever tasted.  

A few baking notes:

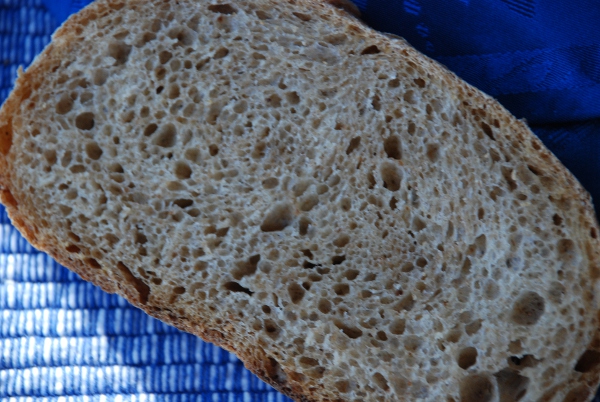
The third day of the formula, or baking day, calls for "whole egg 140g."   I thought maybe ostrich egg?    I clicked through to the site that Syd referenced hoping for some clarification.  Unfortunately I can't read Chinese characters so no help there.   I ended up putting in 3 medium eggs which came to 156g.   Comparing my crumb to Syd's his seems to be a lot whiter, so that may have been incorrect.  

Update:   Syd's instructions call for heating the milk for the first mix (the water roux) but not for the next two.   I scalded for each of these because that's just what I do, but didn't know if it was necessary or not.  

During mixing, the dough stayed fragile until around 40 minutes.    At around 50 minutes it seemed to be getting stronger and silkier.   I went back to the Chinese site to see if they had any pictures of what it should look like.   They did.   I wasn't there yet so I kept going until an hour and ten minutes, at which point it was strong enough to twirl around like a pizza.   

Syd didn't mention steam, and I wasn't sure if that is called for in this type of bread.   Google translate was no help.   I finally decided to do steam for the first 15 minutes.   I baked one slightly smaller loaf in a pyrex bread pan (5 x 9 x 2.5 inches) and the second in my short Pullman (4 x 9 x 4).   Since I was reasonably sure that I wouldn't repeat the disaster of a few days ago where my attempt at a second Borodinsky went very wrong, I decided to cover the Pullman.   It didn't overflow.   It did reach the top.   My first success in covered Pullman baking.   I baked the Pyrex loaf at 356F (180C) for 35 minutes and the Pullman loaf for 40.   Could probably have baked each longer, but I didn't want to push it.   These aren't supposed to be crusty loaves after all, given that Pain de Mie seems to mean Crumb Bread.   (Sounds better in French.)  

Update:  I divided dough as 956g of dough into the Pullman and 820g into the Pyrex. 

So I have now baked an Asian Pain de Mie or a facsimile thereof.   Wonder how a French Pain de Mie would differ.   Just about everything I'm doing here is new to me.  I have certainly never hand-worked dough for over an hour before - maximum maybe 25 minutes.   Any suggestions for improvements are decidedly welcome.  

Oh, and incidentally this is either the 4th or 5th of Syd's formulas that I have tried, or around half of the number posted.   More please!  They are most interesting and excellent.

Bonus Rye Malt

In my efforts to make a second Borodinsky more authentic than the first, I took Janet's suggestion to make Rye Malt.  While I did find a few detailed suggestions on the web for how to do this, I still found it confusing, so I hope these documented steps will be helpful.

Step 1:   Find rye berries.   --- I found them at a food co-op in Cambridge MA which seemed to have bulk berries of many different varieties.  

Step 2:   Soak for 5 hours  --- I only soaked 60g worth because I didn't know what I was doing

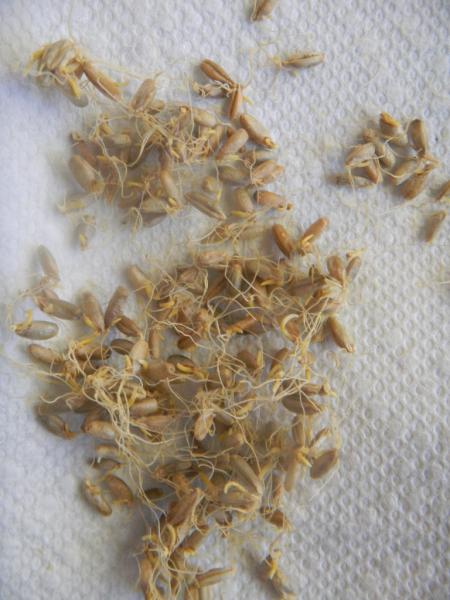
Step 3:  Drain, rinse, and then keep moist while the berries sprout.   In the picture below they are just starting to sprout around 16 hours after soaking is complete.   I placed a wet paper towel on top of the berries, and had to remoisten it a few times.  

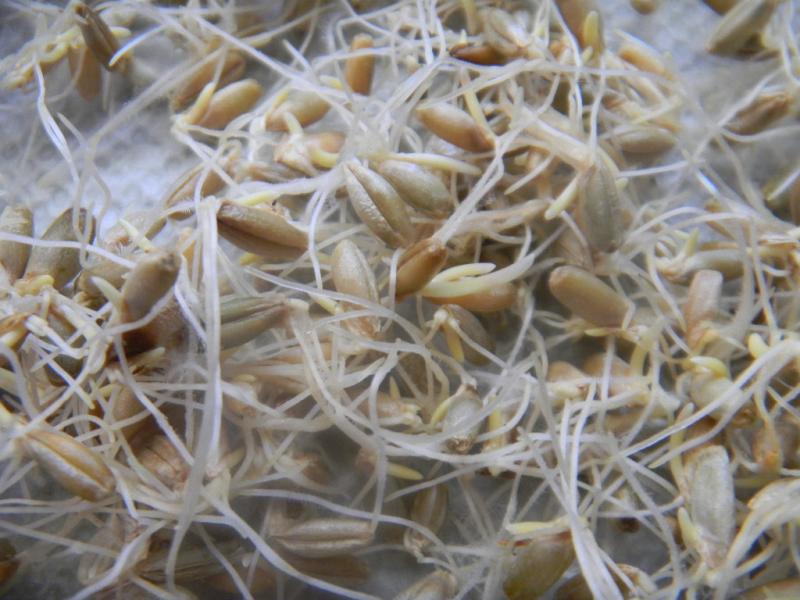
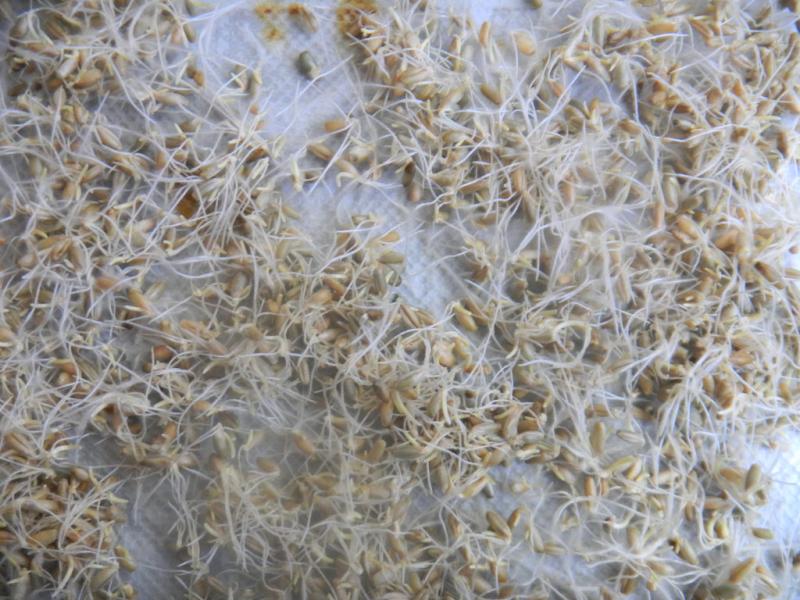
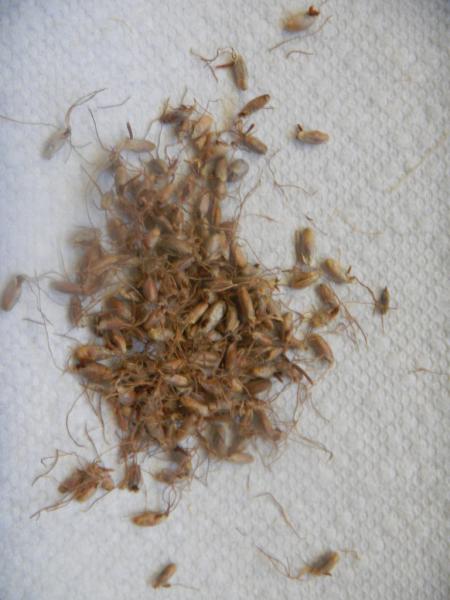
Step 4:  Put on a baking tray to dry out in the oven.    The picture at the top of the post where the berries are fully sprouted was taken 23 hours after the one above.

Step 5:   Dry out at very low heat for around 2 hours.   I kept the oven between 100F and 200F by acting as the oven thermostat. 

Step 6:   Grind them up.  I used a coffee grinder.

It's certainly not red.   I have no idea if it's Borodinsky appropriate.   But I will say that my Borodinsky didn't fail because of the malt.  

Subscribe to RSS - rye malt