The Fresh Loaf

A Community of Amateur Bakers and Artisan Bread Enthusiasts.

rustic bread

Postal Grunt's picture
Postal Grunt

I wrapped up my classroom sessions for the Master Food Volunteer program this past week. It's been a rewarding experience and I'm looking  forward to participating in the demonstrations over the next 12 months. There will be a chance to teach some lessons in bread baking as long as I can develop a lesson plan that can be presented in an hour or so format that won't get deep in the weeds and lose the interest of the class.

I took the opportunity to show my classmates and instructors what could be done with some active dry yeast when I brought in my copy of Floyd's Rustic Loaf. With a little bit of resizing into grams for the formula and reshaping into a boule, I managed to get the attention of the class at lunch time.

jgmathis23's picture
jgmathis23

Pain de Campagne, following DiMuzio's formula in his "Bread Baking, an Artisan's Perspective" book.  Thanks to richkaimd for recommending this great book.

90% KA unbleached bread flour

10% Hodgson Mills rye flour

68% hydration

25% of entire batch made up the night before as an 18 hour "old dough" preferment.  Kept it in the fridge for about 15 of those hours.

2% salt ( a little less than the 2.2% called for by DiMuzio)

0.5% Red Star instant yeast.

Baked two loaves sequentially in dutch oven at 450%, 20 minutes lid on, 20 minutes lid off (25 minutes for the second loaf).

I deliberately baked second loaf until crust dark brown, as recommended by Ken Forkish in his "Flour, Water, Salt, Yeast".

First slice, after an hour cooling, tasted hearty but light.  I think the rye flour adds most of the flavor, and also keeps the crumb a little tighter than it would be otherwise.  Should make good sandwich bread as well as "bread for its own sake".

Best to All

Jim M

bryoria's picture
bryoria

Today's bread was a rustic sourdough using my wild yeast starter:

I was out of aged whole wheat, so used all white flour instead (the recipe usually calls for 13% whole wheat).

  • 300 grams starter (100% hydration)
  • 725 grams white flour
  • 495 grams water
  • 1 tsp malt powder
  • 17 grams salt

Mixed all together with a 30 minute autolyse before adding the salt, then let it sit for 4 hours with one stretch and fold halfway.  Made fairly freeform loaves, being careful not to de-gas the dough, and let them proof at room temperature (on parchment on the back of a cookie sheet) for 45 minutes while the oven preheated.  I cover them with a smooth kitchen towel tucked around the well-floured loaves and put a paper towel roll between the loaves to keep them from spreading into each other.  Very high tech!

After proofing I slashed them and baked them at 425F for 45 minutes, putting a cup of hot water into a hot cookie sheet in the oven at the same time to make steam.  I think the slashes should have maybe been deeper.  When the loaves sprung (?) up the oven they just sort of flattened.   But other than that, I have no complaints. 

I've made the rustic sourdough a few times since I developed the starter last fall and I am always amazed and thrilled when the loaves rise so beautifully in the oven, with no added commercial yeast.  It's very magical.  Also extremely chewy, sour and delicious!

It was dark by the time we sliced it for supper, but I managed to get an okay photo of the crumb:

And as a bonus, while the bread dough was sitting for most of the day in between stretch and folds, I used the rest of my starter to make sourdough english muffins using the recipe from Wild Yeast blog.  This was my first time making english muffins, and I was really pleased. 

My only modification was to use all white flour due the aforementioned whole wheat flour shortage in the house.  The dough was very, very sticky and stayed that way, so I did add a little more flour as I mixed.  I cut them out with a 3" crumpet ring, and proofed them on the back of a baking sheet, covered with plastic wrap.  I baked them on my Oster griddle set to 275F, 8 minutes per side. The griddle is known to stay pretty cool, so I can't guarantee that the 275 setting is really 275, but whatever it was, it worked well.

They ended up looking pretty close to the storebought Costco ones my kids devour when they go to their grandparents, but taste so much better!  And I recognize all the ingredients!  I'll be doing this recipe again, with the whole wheat flour next time.


CaptainBatard's picture
CaptainBatard

Pierre Nury’s Rustic Light Rye or Who Stole My Bubbles


Now I think it’s time to roll up my sleeves and dive into this rustic Bougnat from Daniel Leader’s Local Breads. This is another bread from the prestigious Meilleur Ouvrier de France award winner Pierre Nury who hails from the Auvergne region of France. The only characteristics of this bread that actually resembles a French style, is the stiff levain that is used — and, of course, its award winner baker!   All the other nuances I have gotten accustomed to in making French bread, the tight shaping, timing of the rises, scoring of the loaves… have been thrown out the window.

I have to admit to being a little intimidated when reading the description of this French rustic rye, a loaf that looks quite a bit like Italian ciabatta…especially the author’s caveat that “the high proportion of water in this dough makes it difficult to knead by hand.”  But I was not going to let a little wet dough scare me off.  It actually felt good to get loose, and play with some slack dough! While things are being turned upside down with this recipe, I might as well throw something else into the mix (no pun intended) and continue my experimentation with the autolyse process.  Until now I have not been adding the levain to the initial mix of the flour and water. After reading Teresa’s second experiment in the autolyse process, I thought it could only give the dough a better structure, stronger development and maybe make it easier to incorporate the stiff levain into such wet dough. The hand mixing was a little sloppy to start…but after a short time the dough developed into a silky, smooth wet dough…and passed the window pane test with flying colors.  The rest of the process went along smoothly with no other real predicaments… so after a couple of folds and a rise, it went into the regenerator for its long, slow overnight ferment.

The next day I was eager to see what became of the dough… but I thought I’d give it the full twelve hours before I looked in.  So, the hour approached, the timer went off for the moment of truth and I opened the refrigerator; I could not believe my eyes! The once little boule…had more than quadrupled in size, had reached the top of the bowl and was filled with lots of big gas bubbles. I gently turned out the dough, divided it and slipped it into the hot steamy oven. I really thought I had hit this one on the head!  But this was not to be the case. The bread had a great creamy crumb, a subtle, slightly sour rye taste, a chewy crumb with a nice mouth feel and crackling crust … but where were those “long glossy tunnels” described by the author?  I am not really sure what happened to all the gas pocket so evident when I turned it out…was the gluten structure not developed enough?…was it over proofed?… was it the Type 130 rye flour that I used?…. or maybe the Type 65 with its gluten additive was not strong enough to hold the gas?  I have a sneaking suspicion that it was the coarse, heavy rye flour might have cut the glutens and causing the “long glossy tunnels” to collapse.  The jury is still out on this one.

If you made it through to the end of this post…congratulations and thanks for reading!  Now…seriously…Do you have any ideas on who stole my bubbles?  Please leave me a comment. I would be very interested to hear your thoughts.

To see more pictures and recipe come to Weekendloafer.com

Thanks.....Captain Batard

Ryan Sandler's picture
Ryan Sandler

One of my favorite breads from Hamelman's Bread is Pain Rustique (comes right before "Country Bread" and "Rustic Bread").  The bread is unshaped like a ciabatta, although it only has 69% hydration, and is scored before baking.  When I get it right (as opposed to, say, forgetting the salt and yeast following the autolyse, as I did the first time I tried the formula), it produces a toothsome crust and a flavorful, moderately open crumb.  As a bonus, the time from first mix to pulling the breads out of the oven is under 3 hours (not counting preferment time).

Anyway, the last week I was talking with my mom about the sourdough starter I brought her on our crazy baking day , and the subject of converting pre-fermented, commercially leavened formulas to sourdough came up, as did the Pain Rustique.  This got me thinking--why not try Pain Rustique as a sourdough?  And the more I thought, the more I had to try it.

Pain Rustique as written by Hamelman has 50% of the flour in a poolish, so I simply replaced this with a liquid levain.  I usually scale Hamelman's "Home" quantities by 2/3 since I can only fit 2 loaves on my stone at a time.   Here's what I did:

Levain*

  • 100g ripe starter at 100% hydration. 
  • 250g King Aurther All-Purpose Flour
  • 250g water

*Note: I needed 600g of ripe levain, didn't get around to mixing it until 10:30 the night before, and needed to start the bread be 7 the next day.  For a longer sitting time, I'd do less starter and more flour and water.

Final Dough

  • 300g flour
  • 120g water
  • 600g levain (all) 
  • 12g salt

Steps:

  1. The night before, mix the levain, cover and let sit overnight for 9 hours (but see note).
  2. Mix flour, water and levain by hand until all the flour is hydrated.  Autolyze for 25 minutes.
  3. Add salt, mix in the stand mixer at speed 2 for 2 minutes.
  4. Do 30 stretch and folds in the bowl with a rubber spatula, rotating the bowl with each fold.
  5. Ferment for 150 minutes, giving the dough a stretch and fold on the bench at 50 and 100 minutes.
  6. Dump the dough onto a lightly floured work surface.  Divide in half to make 2 510g (18oz) pieces, placing any scraps on the rough side of the dough. Then place each piece on a floured couche, smooth side down.
  7. Start pre-heating the oven with a baking stone and any steaming apparatus. Proof the loaves for 40-50 minutes.
  8. Flip the loaves onto a sheet of parchment on the back of a sheet pan.  This can be done by hand, but I've taken to pulling a bit of the couch over the edge of the pan, then flipping the loaf couche and all onto the parchment.  This avoids the problem of finger-shaped indents on top of the loaves, which fill in while baking, but make scoring difficult.
  9. Score longways, load into the oven, and bake for 35 minutes, with steam for the first 15 (I've been using the popular "towel method", placing rolled up towels soaked in hot water in two loaf pans below the baking stone.  After 15 minutes, the pans are removed).
  10. Turn off oven, open door and loaves in for 5 minutes before removing to a cooling rack.


The results looked very much like my previous attempts at Pain Rustique (and why not?  It's still an unshaped, 69% hydration dough).

Exterior

 Crumb:


The flavor, however, was surprisingly different.  A nice, mild sour flavor in the crumb, with a stronger sourness in the crust.  Crust was more sourdough-y than the poolish version, and the mouthfeel of the crumb was subtly different, but I don't know how to describe it.  The flavor evolved a little over time--on the first night the tiny amount of whole wheat from my starter (which is fed 25% whole wheat, 75% white) was detectable, but by the next day (and with the second loaf, pulled from the freezer a couple days later) that had mellowed and the sourness had increased.

A very, very tasty bread, all told.  I'd say better than the poolish version, although as I've noted the two are quite different in flavor.  I'll definitely make this again!

Ryan Sandler's picture
Ryan Sandler

My family is not so much in to football, but we are into bread.  This post will give you an idea how much.  You see, my mom taught me the basics of making bread when I was a kid.  However, she never went much beyond a basic white bread pan loaf (although these were always excellent).  Although I got her The Bread Baker's Apprentice for Christmas a couple years back, she never got into the artisan baking thing, with pre-ferments and all, and found the whole process a little intimidating.  But this year, for Christmas, she asked for a baking lesson from me.  Today was the day.

The plan: to bake three types of bread in one day, making two batches of each so that I could make one and demonstrate, and then she could make one.  Limitted to her standard (but quite good, as I discovered) home oven, this required staggering the batches over the course of the day.

On the roster: Italian Bread (from BBA), Potato Rosemary Bread (also from BBA), and French-style rustic bread (Pain Rustique from Hamelman's Bread). All solid players that I can do in my sleep at home, and felt like ought to go fairly smoothly, while showcasing different flavors, shaping and slashing styles.

Let the games begin!

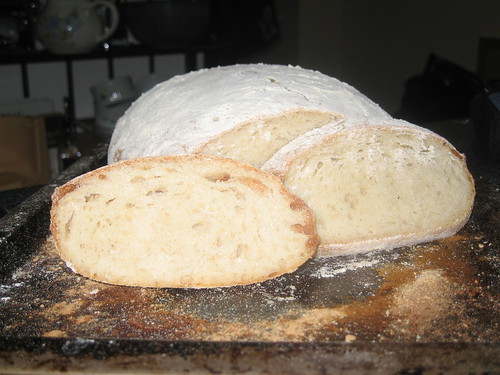
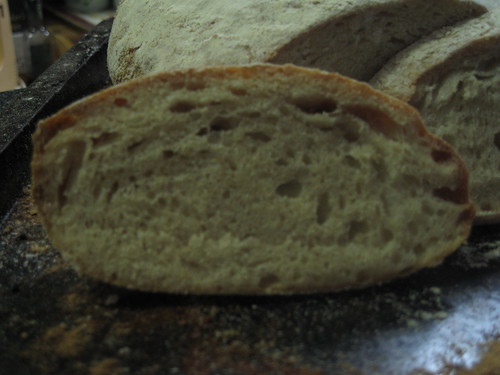
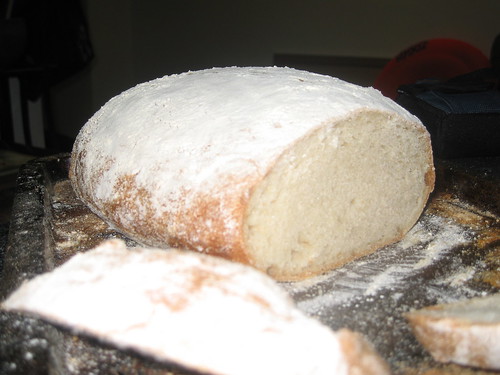
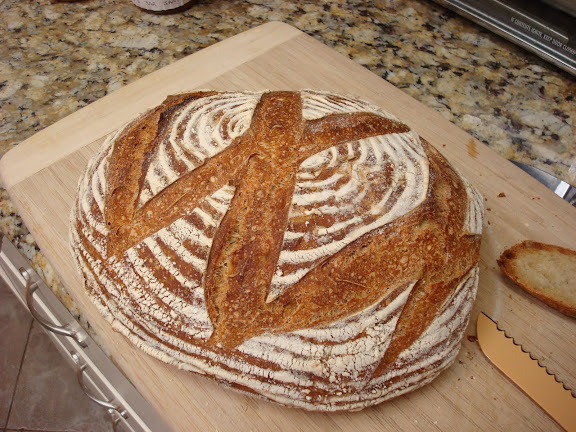
We showed up at my parents' place at 9am, bringing with us a pre-game miche:

Another Mighty Miche, ready for toasting

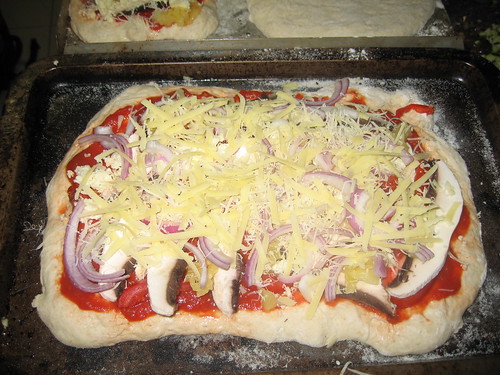
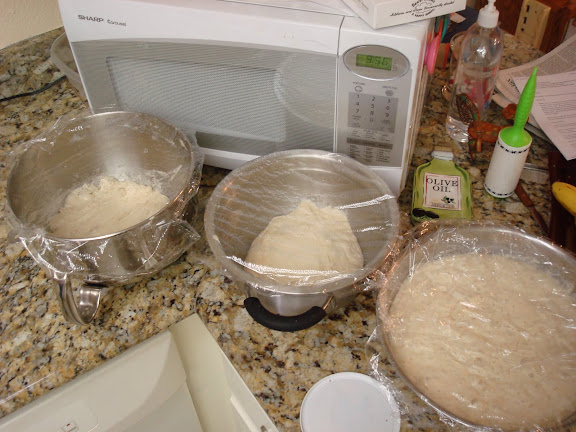
At 9:30 my dad took the baby, my wife went out shopping with her mom and sister, and my mom and I got to work.  First up was mixing Italian Bread--not much teaching there, although I demonstrated the power of the 5-minute rest for helping along gluten development

Italian Bread #1, in between the remaining biga and the poolish

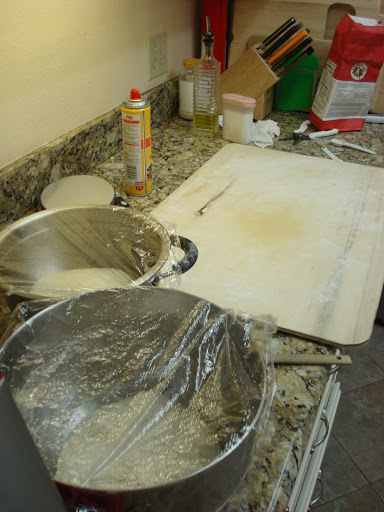
From there, the day proceeded in an almost-orderly fashion, alternating mixing, stretch-and-folding, dividing, and shaping with one bread and then another.  Mostly things proceeded smoothly, although there was a moment of panic when we realized that I'd dumped out, pre-shaped and final shaped Potato-Rosemary Bread #2 instead of #1, while #1 sat happily bulk fermenting for an extra half an hour.  Some improvisation was required (we pretended batch #2 had never been shaped, quickly shaped batch #1 without a pre-shape and pretended it had already been proofing for 10 minutes.  It worked.)

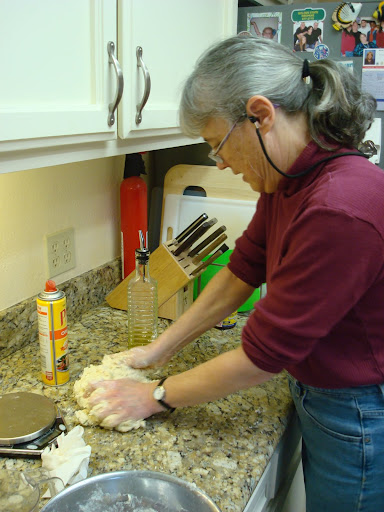
Mom kneading Potato Rosemary Dough

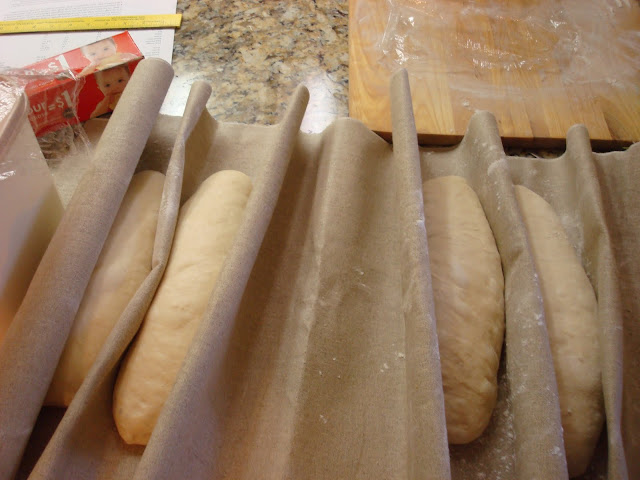
Italian Breads Proofing - "Mine" are on the left. (All on my new TMB/SFBI couche!)


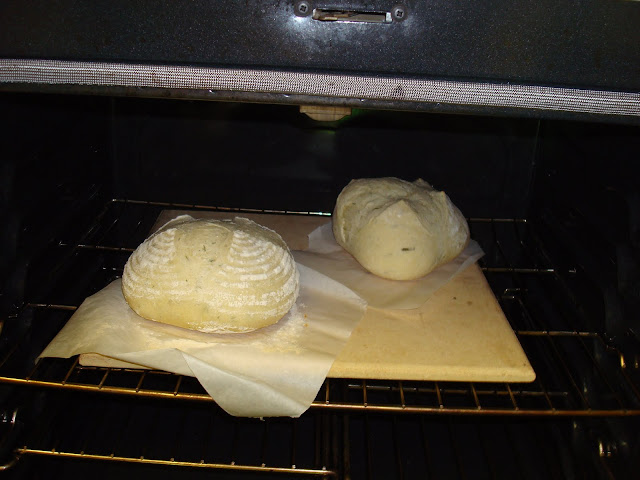
Potato Rosemary Breads in the Oven


Rustic Breads in Bulk Fermentation - "Mine" is on top (Also my lovely SFBI/TMB proofing board)

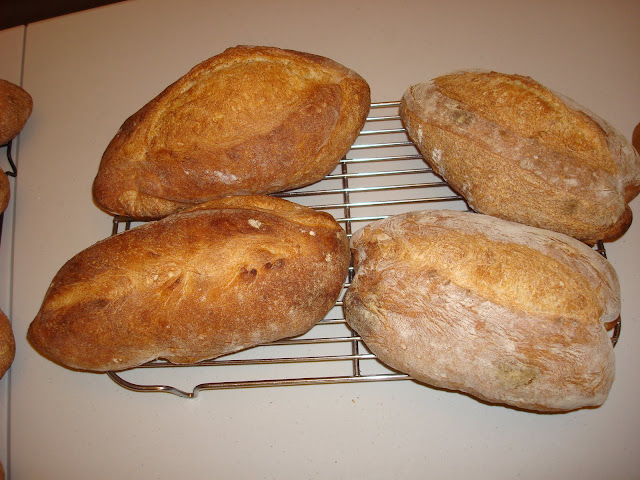
Italian Breads, Finished. Mine on the left (clearly under proofed!)


Rosemary Potato Breads (I don't even know whose are mine!)

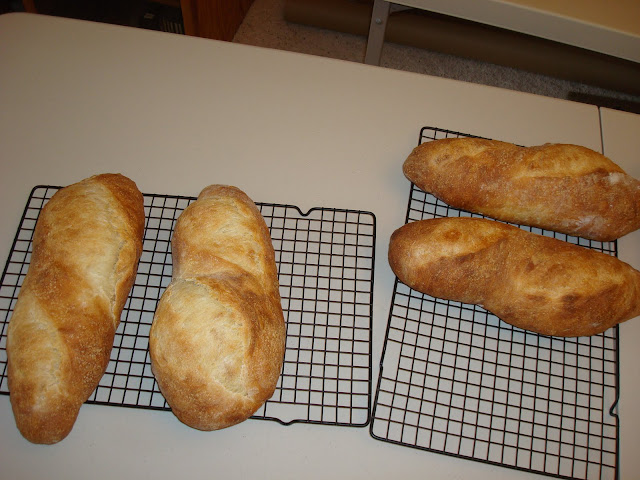
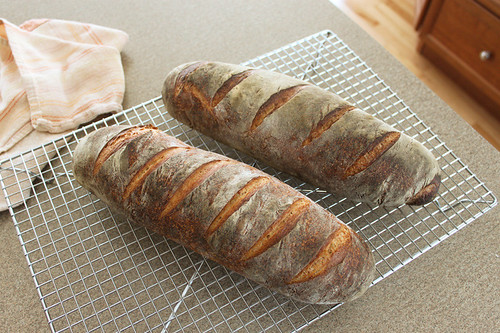
Rustic Breads  (Mine on the Right)

The hardest part of the whole business (besides being up on our feet all day baking), was teaching the shaping techniques.  I had the principles clear in my head (surface tension, surface tension, surface tension), but conveying the actual physical motions (which are just plain tricky anyhow) was quite difficult.  Practice was useful -- except on the Italian bread, I had my mom shape and slash one of "my" breads after I demonstrated the technique so she'd have an extra chance to get the hang of it.  What proved invaluable, however, was employing a dish towel a la Mark of Back Home Bakery to demonstrate.  I already thought that video was great when it was posted, but now I'm really grateful to Mark for making posting it! I only wish I'd thought to do that before we'd already shaped the Italian breads, rather than after.

The other main challenge was the oven--it was just too good!  My parent's gas oven held it's heat remarkably well, which meant that turning the temperature up before was actually unnecessary, and indeed counter-productive since amidst the chaos I forgot to turn it down after loading the breads.

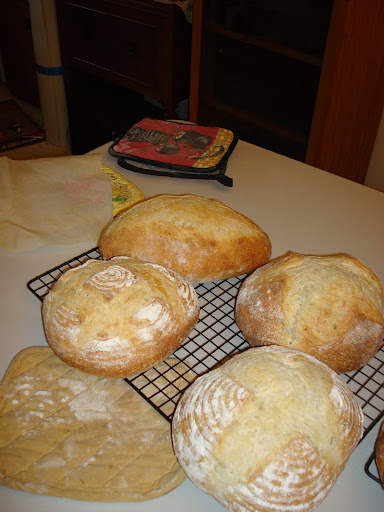
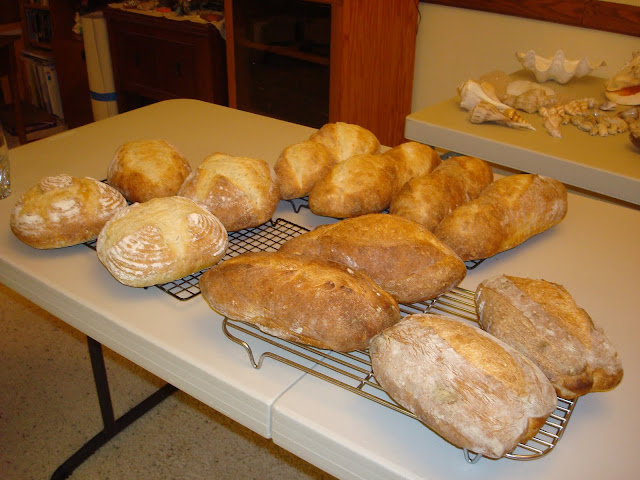
The fruits of our labors

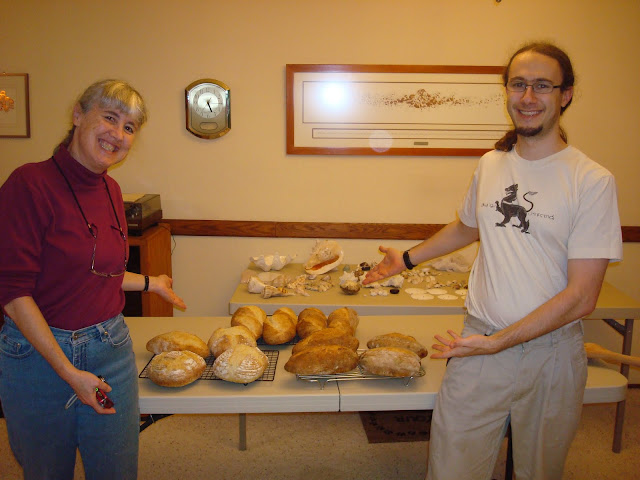
The bakers and their breads


After we were done baking, we brought three choice loaves over to my in-laws for dinner (it was my father-in-law's birthday, by coincidence), and had a lovely meal.

Clockwise from left, Rustic Bread, Italian Bread, and Potato Rosemary Bread


It was a fun, busy, bread-ful day.  I'd do some things differently if I were to do this again (like use a bigger oven and do three batches instead of six!), but my mom and I had a great time.

Happy baking, everyone,

-Ryan

nicolesue's picture

Rustic Bread from Peter Reinhart's ABED book

May 20, 2010 - 12:43am -- nicolesue

Hi all,

Just want to share a picture of a Rustic Loaf I made yesterday, based on Peter Reinhart's "Artisan Bread Every Day" (ABED) book. The book is fantastic and easy to follow - great for beginners like me. Hope you like the picture of the loaf. If anyone has any comments / goood advice, do drop a line!

Sue


holds99's picture
holds99

I'm slowly working my way through the bread section of Michel Suas' terrific book AB&P and found this interesting bread with an interesting history. 

Pain Meunier: (Miller's bread), the loaf has all of the components of wheat (white flour, whole wheat flour, wheat germ and cracked wheat) 

The following brief description of this bread, taken from Michel Suas book “Advanced Bread and Pastry”, appears at the beginning of his formula for pain meunier:

“To honor and thank their millers for delivering consistent flour, bakers of old created pain meunier, or Miller’s bread.  The formula was creatively designed to involve all the components of the kernel of wheat in the dough.  As a result, in addition to possessing great flavor, this bread also has exceptional nutritional value."

It's a great bread and fun to make.  I doubled Mr. Suas' "Test" formula and made 4 pounds of dough, divided the dough into three equal part and made three loaves.  I used 2 unlined willow German brotforms and 1 plastic (green) brotform.  The loaf proofed in the green plastic brotform, because of its shape, got a higher rise (photo no. 7, rear loaf) but doesn't have the character or markings that the other two loaves (front two) got from the unlined willow baskets.

I used a K.A. mixer to get the pate fermentee and grain roughly mixed with final dough .  Gave it a 20 minute rest, then did a final mix using the "slap and fold" method (Bertinet) then during bulk fermentation gave the dough 3 stretch and folds at 20 minute intervals.  Let it final proof for another 20 minutes (after the 3 stretch and folds), then divided, shaped and placed it into the brotforms.  It final proofed for 1 hour, then I scored it and into a preheated 450 deg. F. oven with a cup of boiling water into a cast iron skillet for a short blast of stream.  It baked for 30 minutes, turning the loaves midway in the baking cycle.  It's a great tasting bread with great texture (tender with a nutty flavor from the cracked grain) and nice crust. 

Michel Suas' Pain Meunier - Advanced Bread and Pastry

Michel Suas' Pain Meunier - Advanced Bread and Pastry 

Bushturkey's picture
Bushturkey

Sourdough CiabattaSourdough Ciabatta

I used the recipe from Peter Reinhart "The Bread Baker's Apprentice" - the Biga version.

My Biga was my white sourdough, mixed with an equal amount of organic bread flour and some water to make a firm starter.

I used half the oil given in Reinhart's recipe. I proved it on a couche (well, I got a length of thick cotton table-cloth material from a textile shop and hemmed the edge).

I flipped it onto a polenta-dusted "peel" (actually the off-cut from the ceramic tile I used in my oven) and slid it directly on the hot tile. The bread Ballooned (?does this mean it was under-prooved?) and the top-being closest to the element, almost burned.

Thegreenbaker's picture
Thegreenbaker

Just another lot of photos of my baking. :)


Below is a batch made from a poolish I made around 9pm last night and then fermented on the counter (at around 10-13 degrees celcius most of the night) until around 11am today.

Just a simple mix of approx 750g sifted wholewheat (wholemeal) flour, water, salt and 1/4 teaspoon of yeast. (with gluten flour added)


Then this morning, I added around 750g fine durum semolin. about 70-100g unbleached white flour, salt, 1 teaspoon of yeast, 1/3 cup rice bran oil and about 2 cups of butter milk.

It ended up being tooooooooooo wet so I added another 150g semolina-very fine.

mixed and left for an hour then kneeded and left for another hour. Folded a few times and left to ferment on the counter. I then folded it a few times again and then left it to rest for 15 mins, spllit it in two and plopped one piece on a oiled/semolina'd baking sheet

and smothered it in flour.

The rest I divided into 3 pizzas.


The photos show the result!


Raw Pizza


Cooked Pizza with various vegies (Courgette, red onion, loads of garlic, Paneer cheese, parmesan cheese, Pineapple, tomato (fresh and sundried) and olives) The top pizza is the same but with Salami for the meat eaters in my house. ;)


Rustic bread...sooo pretty....moist with a lovely crumb!


Crumb close up! Dang camera...takes terrible photos!


An angled profile shot :) Just to show my skill with a camera :) (kidding)

Sorry, no wine shots this time.......................

OH! that reminds me.....*goes off to crack open a bottle of nice 2004 pinot noir*


Till next time....which will be a while as I am moving to the UK. My house will be all packed up on monday and tuesday and then I will be a nomad for a few months till the visa come through!

SO, till then.

Happy baking everyone!

Subscribe to RSS - rustic bread