The Fresh Loaf

A Community of Amateur Bakers and Artisan Bread Enthusiasts.

rice

linder's picture
linder

I had to use up the rest of the ricotta I made so it was time to make an sweet Italian Easter pie to match the savory one, which we have almost completely devoured.  The recipe I used is from the website http://www.ciaoitalia.com  The only 'change' I made was to use wheatberries in place of the rice as indicated in the recipe.  Otherwise the pie was made per instructions.  I tasted some of the filling as I was making the pie and it is very flavorful with vanilla, orange zest, orange juice and cinnamon.  I have seen some pies that add chocolate bits as well, maybe next year.  Will be having some of this pie with a cup of tea later this evening.

Our Crumb's picture
Our Crumb

I'd been thinking that the sweet fragrance of basmati rice surely earns it some upward mobility out of its lowly caste, buried under the curry, and up into the brahmin bread basket.  A golden crumb seemed appropriate to its elevated status, so semolina was recruited.  I kept the durum to bog-standard Bob's Red Mill Fine Semolina, so as not to put the formula as out of reach as proper fine durum is (i.e., mailorder only).  Golden Temple Atta Durum would probably have been more appropriate (see below) and somewhat more accessible than the pukka mailorder product, but a soaker of BRM fine worked well.  I'm getting in the habit of adding 3% toasted wheat germ to mostly-whiteflour breads, following David Snyder's report on the SFBI miche.  So in that went.  Finally, developing the formula coincided with the recent spike in RYW chatter @TFL and the concomitant successional climax of my little mason jar crabapple/PinkLady/raisin/honey ecosystem, so RYW was fated to be the levain.  The results were surprisingly satisfying.

Formula

Process

1. Day before baking,

  • In morning, feed RYW with equal weight of Rubaud flour mix (100% hydration: 30 g RYW + 30 g flour).  Incubate at 77˚F until evening, then make up levain and incubate that overnight (9h) at 77˚F.
  • Bring 3 c unsalted water to boil.  Stir in 2 c white basmati rice (I used Lundberg Organic).  Return to boil and reduce flame to lowest setting.  Cover and cook for 20'.  White basmati rice weighs 142 g/c.  2 c dry came to 909 g cooked = 284 g rice + 625 g water; therefore each g of dry rice contributes ~2.2 g water when cooked.  This is more rice than needed.  Adjust accordingly if you don't want to have leftover rice.
  • In evening: Mix semolina soaker and leave at 77˚F (or whatever room temp is) overnight.                                         

2. Baking day, reduce cooked rice to a grainless mush via food processor and/or Foley food mill (I used the latter -- worked well).  Weigh out 420 g of mush.

3. Combine levain and all final dough ingredients (bread flour was KA Organic) except salt into shaggy mass. Adjust hydration if necessary.  Autolyse 30 min.

4. Add salt and french fold 5' / rest 5'/ french fold 5'.  Transfer to fermentation vessel (I use plastic boxes).

5. Bulk ferment 2.25 h with stretch and folds (in box) at 30', 60' and 100'.

6. Bench rest 25'.

7. Shape into a miche or 2 boules/batards.  Proof in rice+wheat floured banneton(s) for 2 h at 77˚F.

8. Bake on preheated stone in 500˚F oven turned down to 450˚F at start, for 20' with steam.  Remove steam apparatus, reduce oven temperature to 440˚F, and bake for an additional 20' with convection.    

9. Turn off oven, open door slightly, leave loaf on stone for 10'.

10. Remove and cool on rack.  Internal loaf temperature 210˚F.  Wait until fully cooled (preferably 24h) to slice.

Baking definitely diminishes the basmati flavor and fragrance.  Whereas the air was intoxicatingly perfumed with every slap of the french folding, in the finished loaf its presence is more evenly balanced with the wheat flavors.  Perhaps those more learned in the arts of gluten-free baking have tricks that would allow increasing the rice percentage in the formula.  The crust is sweet and chewy.  The crumb is angelfood-cakey soft and creamy yellow-white, slightly sticky on the bread knife but far less so 24h out of the oven than when just cooled.  RYW left no SD tang whatsoever, as advertised.  Toasts up exquisitely, best with butter.  The better the butter the better.  Fairly irresistible, truth be told.  I'll definitely be baking this again.  Maybe next week :-)

One feature of RYW that I'd failed to grok from posts by akiko, dabrownman et al. is the explosive leavening power of these potions.  From pilot builds beforehand, I knew my little homebrew could double a 100% hydration Rubaud flour mix in 6 hrs at 77˚F.  But that didn't prepare me for its Usain Boltian performance in a dough.  This juice could raise the dead.  What's up with that?  Just different bugs?  High titers?  Epigenetic adaptation to anaerobic conditions?  My baking routine this summer has been to start a SD batch and, while its fermentation proceeds at its normal stately pace, I can mix, ferment and bake a CY'd preparation (lately Reinhart's 100% WW sandwich loaf).  But bloody hell.  The CY loaf could hardly play through this time with the RYW dough hollering Fore! from the banneton.  It was nip and tuck, with the WW getting a bit overproofed (bogie?) while the RYW loaf holed out.

Finally, this bake and its score honors the victims of the tragedy in Oak Creek, WI.

Voila.  Blogo ergo sum.

Happy baking y'all,

Tom

MNBäcker's picture

Brown rice flour...?

April 19, 2012 - 11:58am -- MNBäcker

Hi again.

So, since it looks like I need some rice flour to rub into and dust over my "couche material", I'm wondering if I can just mill some brown rice I have in the cupboard? Or should I either buy some white rice and mill that, or buy milled rice flour outright? I have a Nutrimill that I'm sure would be up to handling the job.

Thanks in advance,

Stephan

http://www.firebrickbread.com

turosdolci's picture
turosdolci

Torta di Ricotta e Riso

Torta di Ricotta e riso is an Easter specialty. Some might call this a calzone or pizzagaina, but this torta has no meat. Ricotta is the favored cheese for Easter dishes in Italy and is made into pizzas, pasta's, cheesecakes and connoli.

http://turosdolci.wordpress.com/


SumisuYoshi's picture
SumisuYoshi

Purple Multigrain Loaf Crumb

This bread is heavily inspired by the Multi-grain Extraordinaire recipe from Bread Baker's Apprentice and really, it came out of my desire to stuff even more grains and grain flavor into that bread. I first made the Multi-grain Extraordinaire back in late September, and while I liked it quite a bit I was really looking for a bit more graininess, so to speak. I hadn't thought about that again until this weekend, as I knew I needed some lunch bread but I wasn't sure what to make. When I was digging in the cupboard for the pasta I needed for a pumpkin stew (more on that in a later post!) I saw the forbidden rice and purple barley I got a while back. Suddenly I had it, time to rework the recipe in search of more 'graininess'! In light of the supposed royal nature of the forbidden rice (although that is probably mostly marketing) and the similarity in color of the cooked rice to the ancient Royal Purple, I decided to name this Royal Grains Bread.

Purple Multigrain Baked Loaf

Royal Grain Bread Recipe

Makes: One 2 lb loaf or 6-12 rolls

Time: 2 days. First day: soaker and starter. Second day: mix final dough, ferment, degas, shape, final rise, bake.

Ingredients: (baker's percentages at the end of hte post)

Grain Soaker:

  • 4 oz. assorted grains (I used 1 oz. amaranth, 1 oz. millet, 1 oz. whole oat groats, .5 oz. corn meal, and .5 oz. flax meal)
  • 3-4 oz. water (enough to just barely cover the grains)

Stiff Sourdough Starter:

  • 1 oz. 66% hydration levain
  • 6 oz. bread flour
  • 4 oz. water

Final Dough:

  • 11 oz. of above starter
  • 4 oz. bread flour
  • 4 oz. other grain flours (I used 1 oz. forbidden rice flour and 3 oz. purple barley flour, both home ground)
  • 1.5 oz. brown sugar
  • 1½ teaspoons salt
  • 1 oz. cooked brown rice
  • 1 oz. honey
  • 4 oz. milk
  • 1-2 oz. water (this will depend on how much your grains absorbed)

Directions:

  1. Mix the grains and water for the soaker together, use just enough water to cover the grains and then cover the container and leave it to sit at room temperature overnight.
  2. Mix the 1 oz. of levain (if you aren't using a stiff levain you can adjust the quantities for whatever hydration levain you are using) with 4 oz. of water until well integrated and nearly homogeneous looking. Incorporate the water and levain mixture with the bread flour until a ball starts to form. Let the dough rest for 5 minutes covered. Knead the dough briefly, just enough to get it well mixed and smooth, no need to develop the gluten yet. Return the dough to a covered bowl or container and leave at room temperature to ferment. Depending on the strength of your starter and room temperature this could take from 3-12 hours. When I made it the room temperature was about 63 degrees and it took nearly 12 hours. If you know your starter will develop fairly rapidly, start this early enough to degas the dough and refrigerate after it has doubled, otherwise leave it at room temperature overnight.
  3. The next day remove the starter from the fridge ( if it was put in the fridge) about an hour before you plan to start making the bread.
  4. Stir the rest of the bread flour, the alternate grain flours, salt, and brown sugar together in a medium large bowl. I like to mix the starter in with the liquid so it incorporates into the final dough more easily, so stir together the milk, honey and 1 oz. of the water (reserve the rest in case needed later) and then mix with the 11 oz. of starter. Now pour the starter and liquids, the soaker, and the brown rice into to the bowl with the dry ingredients. Mix all of the ingredients together until they just begin to come together in a ball.
  5. Turn the dough ball out onto a lightly floured counter and knead for 6-10 minutes, or until you get adequate gluten development (check with a windowpane test). In my experience making this bread the dough will generally be stickier than you would expect from the hydration level and stiffness of the dough, I think this has to do with the grains from the soaker. Try to avoid adding too much flour during the kneading, as long as the dough is stiff enough that it seems to be able to hold a shape it will turn out fine, just use a bench scraper to recover any bits that stick. Lightly oil a bowl big enough to hold the dough when doubled, form your dough into a ball, roll it around in the oil, cover the bowl and set the dough aside to ferment at room temperature. Again, the time on this will vary depending on your starter, but 2-6 hours is a good estimate. No matter how long, when the dough has nearly doubled it is ready.
  6. If you want to make a freeform loaf: Now that your dough has doubled, or nearly doubled, turn it out and gently degas the dough, flattening it into a vaguely rectangular shape. Give the dough a letter fold (folding it into thirds along the long side) and seal the seam with the edge of your hand if needed. Now you have a preshape for a batard, fold once again to ensure good surface tension. Give the dough 3-5 minutes to rest before rolling it with your hands on the bench to make the ends thinner and extend them. If you have a couche use it to support the loaf as it rises, otherwise you can use parchment paper dusted with flour or sprayed with spray oil, just put objects to the side of the loaf to hold the parchment in place during the rise, and cover the loaf with oil sprayed plastic wrap. If you want to make a sandwich loaf: Starting just after the letter fold, flip the dough and gently roll it back and forth with your hands to even out the loaf shape. Once your loaf is more evenly shaped, tuck the ends underneath and briefly roll it again before placing the dough in an oiled 8½x4½ loaf pan. Cover the loaf pan and set it aside for the final rise. If you want to make rolls: Divide the dough into 6-12 of evenly sized pieces of dough, briefly preshape them into rounds and let them rest covered for 2 minutes so the gluten relaxes a bit. After the rest, shape the rolls into nice tight little boules. The method I use is to put my hand over the ball of dough, surround it with my fingers and thumb. Then while applying slight downward pressure and slight pressure with my thumb and pinky, rotate my hand a quarter turn counterclockwise, release the pressure slightly and rotate back to the home position. Repeat this until the dough forms a nice tight little ball. Place the shaped rolls on parchment paper on a baking sheet, cover, and set aside to rise.
  7. The final rise should be shorter than either of the previous two, and be careful using a poke test on this bread as the inclusion of flours with no or little gluten will make it a bit more delicate. For me, the final rise took about 90 minutes (but I had also moved to putting it in an oven with just the light off because I was going to need to go to bed!). If you are making the loaf in a loaf pan, it should rise to about 1/2 to 1 inch above the edge of the pan. The freestanding or loaf pan loaves would benefit from a very light scoring, no more than 1/8 to 1/4 of an inch deep. Preheat the oven to 350° with the rack on the middle shelf. If you wish to top your loaves or rolls with seeds or some other garnish, spray them lightly with water and top shortly before putting them in the oven.
  8. Bake for 20 minutes, at which point if you were making 12 rolls there is a good chance they will be finished. If you are making larger rolls or loaves rotate 180º (or earlier if you know your oven heats very unevenly) and continue baking for another 10-20 minutes on freestanding loaves and 25-40 minutes for pan loaves. As usual, the loaves should sound hollow when tapped on the bottom if they are finished and be around 185-190º. The color of the finished loaf will vary widely depending on the grains and grain flours you have used.
  9. Remove the baked loaves to a cooling rack (taking pan loaves out of the pan) and allow to cool for 1-2 hours before slicing.
  10. Enjoy the delicious graininess!

Note: If you wish to make this loaf without levain, skip the levain step and in the final dough use: 10.5 oz. bread flour, 5.5-6.5 oz. water and add in 2¼ tsp. instant or active dry yeast (add the instant to the dry ingredients and the active dry to the water and stir well). The rise times will of course be very different, probably around 1.5 to 2 hours for the first rise, and 1-1.5 hours for the second rise.


Some more photos:

Forbidden Rice and Purple Barley:

Forbidden Rice and Purple Barley

Shaped and Panned Loaf:

Purple Multigrain Shaped Loaf

Risen Loaf:

Purple Multigrain Risen Loaf

Baker's Percentage: Soaker:

  • Grains 100%
  • Water 75 to 100%
  • Total: 175-200%

Starter

  • Bread Flour 100%
  • Water 66.7%
  • 66% Levain 16.7%
  • Total 183.4%

Dough

  • Starter 137.5%
  • Bread Flour 50%
  • Alternate Flours 50%
  • Brown Sugar 18.8%
  • Salt 4.8%
  • Honey 12.5%
  • Cooked Brown Rice 12.5%
  • Milk 50%
  • Water (about) 12.5%
  • Soaker 100%
  • Total: 448.5%

Straight Dough Version:

  • Bread Flour 72.4%
  • Alternate Flours 27.6%
  • Brown Sugar 10.3%
  • Salt 2.6%
  • Honey 6.9%
  • Cooked Brown Rice 6.9%
  • Milk 27.6%
  • Water 41.4%
  • Soaker 55.2%
  • Total: 250.9%
SumisuYoshi's picture
SumisuYoshi

Multigrain Bread Extraordinaire

Sunday again, at my house this time. And once again I need a pan loaf for sandwiches! I started flipping through Bread Baker's Apprentice looking for my next target. The Multigrain Bread Extraordinaire caught my eyes, without so much as a picture! People who know me probably wouldn't be surprised by this, because as much as I love various artisan breads, whole wheat or multigrain anything will make me sit up and take notice. And no, I don't eat cardboard in my spare time.

The first step was to figure out what grains I was going to use in the bread. The recipe called for 3tbsp of either corn meal, amaranth, millet, or quinoa; 3tbsp of either rolled oats or wheat, triticale or buckwheat flakes; and 2tbsp of wheat bran. I decided to go with 2tbsp amaranth, 1tbsp millet, 2tbsp rolled oats, 1tbsp buckwheat cereal (not as small as flakes, but who's counting?), the 2tbsp of wheat bran, and 1tbsp of flax meal.

Grain Soaker

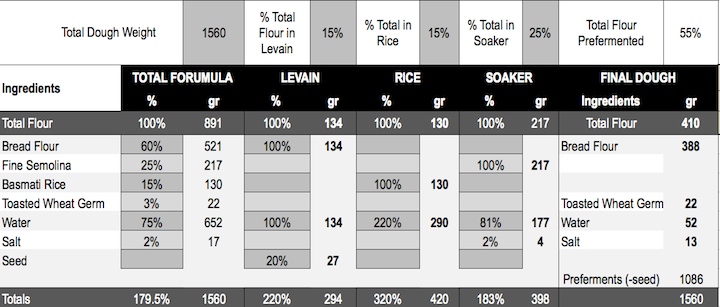
I'd also decided to deviate a bit from the recipe and make it sourdough. I already had my starter out to refresh (Friday night), and I had some leftover that I wouldn't be able to use for anything else, so why not right? I used the starter to make a small stiff levain (which I meant to build Saturday, and forgot). I wasn't particularly following a recipe for that part, so I wrote down the amount of flour and water I used so I could account for it in the recipe for the loaf.

Stiff Levain

I gathered together the rest of the ingredients:

MilkFlour, Salt, Brown Sugar

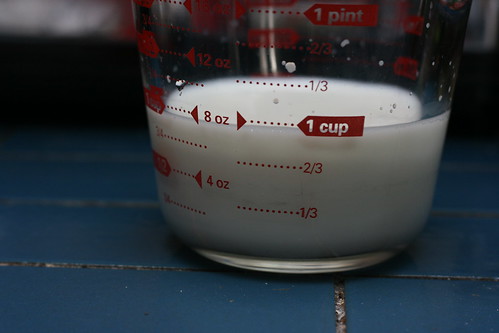
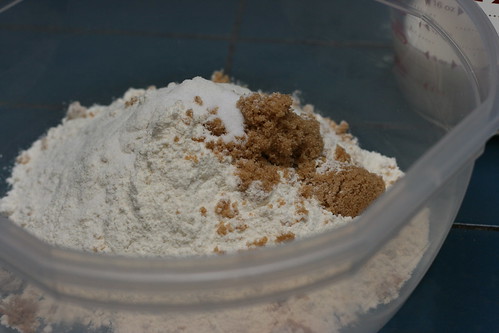
And not shown here: honey, cooked brown rice, and water. They went in after the levain descended on the milk.

Attack of the stiff Levain!

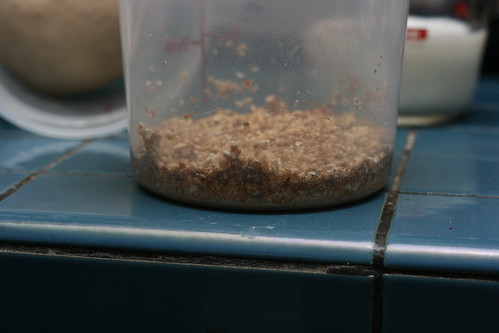
Mixing time! The dough was much gummier and stickier than I was expecting. I think a lot of that gummy/stickyness came from the starches in the soaker. As I emptied the grains into the dough I noticed the somewhat stringy goop of starch conglomeration on the bottom of the container.

Mixing the dough

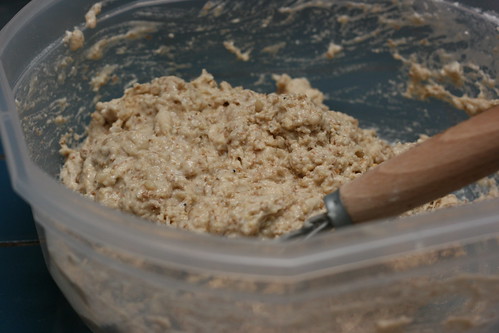
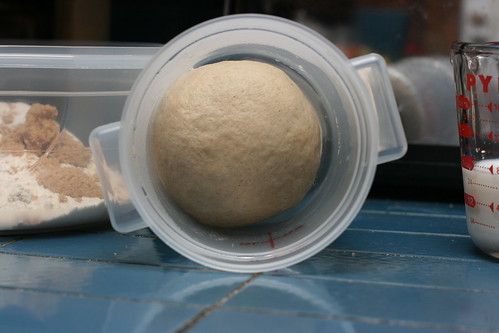
After a bit more mixing, adding a little bit of flour, doing some stretches and folds, the dough finally reached a point where I could actually handle it. It still was quite sticky and gummy though, definitely unlike other doughs I've dealt with so far.

Mixed dough

Folding the dough

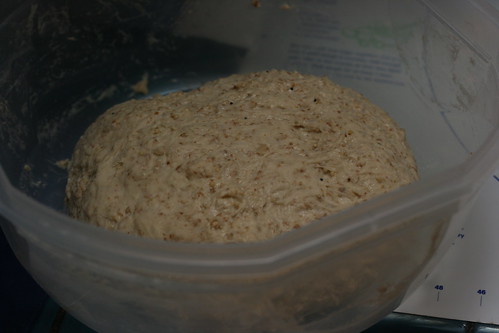
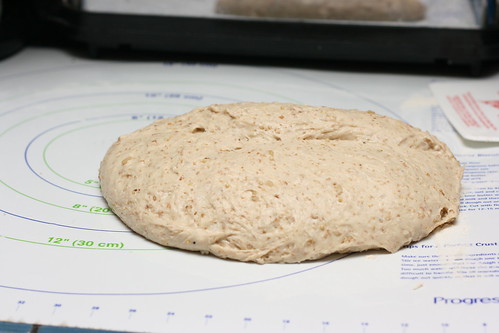
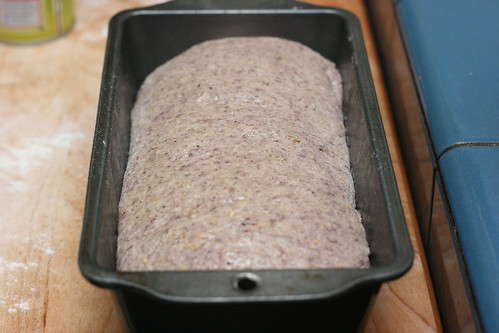
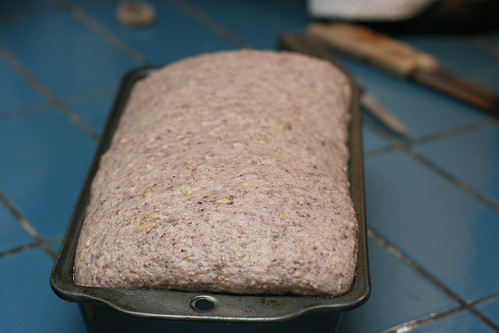
As I mentioned, I forgot to do a build of the stiff levain I made for this loaf. So it took a very long time to rise, in fact, at one point I wasn't even sure it was going to rise. What made it especially hard is that my sourdough starter really doesn't do most of the rising until the oven. So, I gave the dough plenty of time and a few more folds, it had finally grown some and didn't spring back on a poke test, so I shaped it into a loaf and plopped it into a pan.

Ready to proof

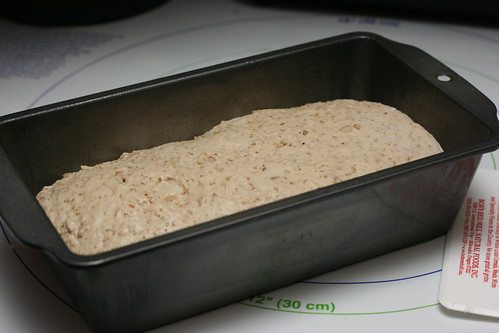
In the loaf pan it didn't take quite as long for the second rise, but it was getting late and I really needed to get to bed, so that was all the rising it was going to do!

Proofed

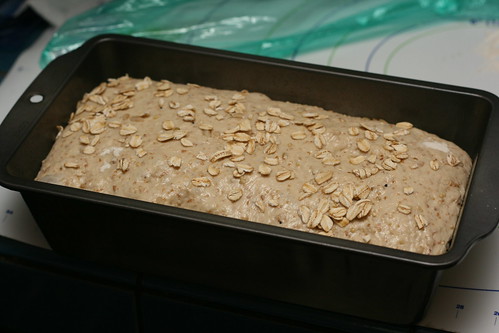
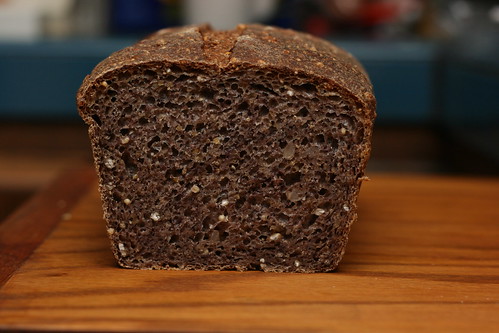
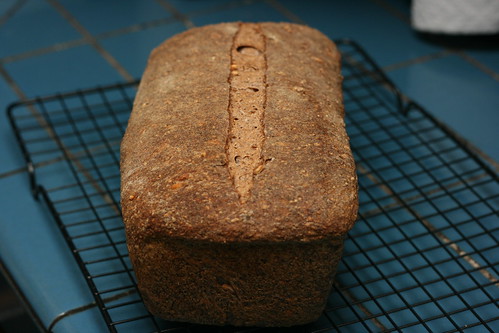
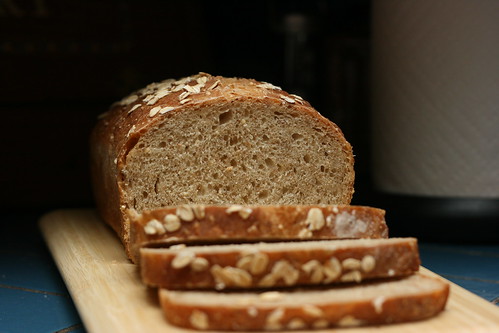
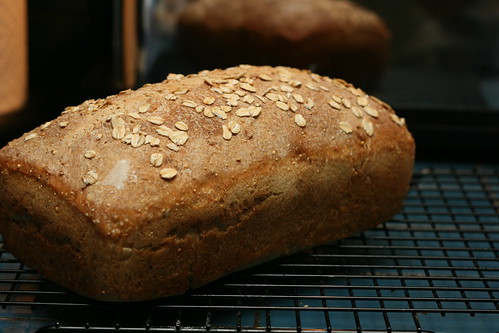
Into the oven it went, it did get a nice little bit of oven spring (but not as much as I was hoping for, and nowhere near as little as I was dreading). I think next time I'll make it with regular yeast, or make sure I remember to have a build of levain before I start the loaf! It smelled really wonderful when it was baking, in fact it smelled amazing when it was rising too! Never had a loaf that smells that good during bulk ferment and proofing. It was a great combination of yeasty, sour, sweet, and grassy/grainy. I assume the aroma must have come from all the grains in the loaf, but I don't really know for sure. This is definitely one bread I want to make again, and soon! I'll probably experiment with switching it over to whole wheat too, if that turns out well I think I may have found my dream sandwich bread...

Multigrain Bread Extraordinaire

Bread Baker's Apprentice Challenge

YeastSpotting

mrpeabody's picture
mrpeabody

OK, so I just posted a recipe for Mochi, which is a non-yeasted dough.  This is "The Fresh Loaf," so I should also give a recipe that is at least yeasted.  Here is my Mom's version of bok hong tay, a sweet steamed rice cake.  Its name is literally "white sweet pastry" in Chinese.  You sometimes see it in Chinese restaurants for dimsum.  My Mom always made it on the thin side, but the restaurants tend to make a thicker version. 

  • 4 c long grain rice
  • water
  • 1 pkg dry yeast (I've made this with regular and rapid-rise and they both work for this)
  • 4 c and 1 tablespoon sugar

Wash the rice well and then drain all water. Add to it 4 c of water and let the rice soak overnight in the water (room temperature).

The next day, put the rice-water mix in a blender and whip it smooth (hint: do this in small batches, with a rice-water slurry that is about 80-90% rice. This allows it to blend very smooth. Add the remaining water after it is all blended).

In a separate bowl, combine 1/2 c of lukewarm water, the dry yeast and 1 tbsp sugar. Wrap bowl with plastic wrap and let stand in a warm spot for approx 1 hr. Then add the proofed yeast mixture to the rest of the blended rice/water mixture and let stand at room temperature for 4-5 hrs.

In a separate bowl, mix 2 c water and 4 c sugar. If necessary, add heat to make all of the sugar dissolve. Be sure that the sugar syrup has cooled to room temperature before adding to the rice/water mixture. After adding the sugar syrup, let the mixture stand for another 1/2 hr before cooking the pastry.

To cook: Pour some of the mixture into a well-oiled cake pan (approx. 1/4 inch deep.  Again, my Mom prefered to make this on the thin side, but if you like, you can make it thicker, just adjust the cooking time). Steam the mixture for 15 min (be sure that the water is vigorously boiling). After the pastry is done, brush some oil on the top (note: if the oil had be previously heated to near smoking temp, and then cooled to room temperature, the resultant oil would taste better for brushing on the pastry.  I don't know why this is true, but according to my Mom that the way she always did it.).  When the bok hong tay has cooled down, cut out wedges of the pastry and serve. 

Enjoy, now I have to get back to work on my grant. 

Mr. Peabody

umbreadman's picture
umbreadman

So today i started a double batch variant of a multigrain hearth bread in the PR delayed fermentation/epoxy style. I decided to add 12ozs of cooked brown rice, quinoa, and amaranth grains for extra protein; i've also found that the quinoa sometimes gives a pleasant little *pop* if you happen to catch a grain between your teeth while eating the bread. It's "retarding" now; meaning I got lazy, and didn't want to bake it tonight so i left the bowl in the cold basement to do its thing.

I baked them in the early afternoon. By the time I actually got to them with a camera, they looked like this:


The crust was nice, but the crumb wasn't as open as i would have liked. I had a little trouble transfering it to the oven stone, and that negated a lot of the proofing : \ However, it wasn't dense in that heavy, difficult-to-chew-through way. Rather, every bite was substantial, chewy, and pleasant. I've become a great fan of naturally leavened breads, in part because of that unique texture.


I made this one the next day, somewhat on a whim, only checking Hammelman's sourdough seed bread recipe for a guide of what proportion of seeds to put in.

This one turned out amazingly, slightly burnt crust aside. The inside opened up nicely and the toasted seeds added a nutty sweetness that shut out any need for sweetener.

I also think I should get my camera out sooner, maybe I'll get a photo of a whole loaf one day... 

Sourdough Sunflower Seed Bread with Sprouted Grains

2lbs high extraction flour (e.g. Heartland Mill Golden Buffalo)

~20-22ozs water

~.6-.7 oz salt

5.5 oz sunflower seeds, toasted in pan and cooled

4oz sprouted grains (i used a combination of quinoa and amaranth. The grains should be soft from all the soaking, so no grinding was needed)

Sourdough culture (unknown amount, ~ 3 heaping tablespoons. ish.)

1) Mix Flour, water, grains, and salt into a tacky dough and let rest for 30-60 minutes for autolyse.

2) Cut dough and sourdough into small/medium chunks and mix. Knead until well blended and dough feels strong, ~7-10 minutes. (I knead by hand).

3) Let ferment for about 2.5-3hrs, folding at 1-1.5 hour intervals, depending on dough strength.

4) Unload dough, shape, and let proof for ~1hr, while heating oven + stone at 400-425.

5) Top with more sunflower seeds, slash, and bake with steam, turning down oven to 375 or so if crust darkens too quickly.

6) Eat when patience fails.

Subscribe to RSS - rice