Like many people, I found TFL in my quest to learn how to make sourdough. I had a starter going and was sure I had killed it. The advice I found here gave me the knowledge and confidence to make a starter that I've been using for months now, with ever-better results.
Although there is a wealth of information here, there was no one source that detailed the method I used, which was based on Reinhart's "barm" in BBA. Now that I have succeeded in making several starters, I've been thinking about making a video tutorial to walk through the process step-by-step, day-by-day. My own experience and that of others here has taught me one thing: sourdough starters don't read baking books, so they don't know how they are "supposed" to behave. I could have been spared the angst, the wasted time, and of course, pounds of precious flour, if only I had known what to expect and what to look for.
I don't have the technical part of video-making worked out yet, so I have decided to do a tutorial blog. This will be a real test, as I am trying out a modified starter that I haven't made before. It's still based on Peter's starter, but I have altered the amounts, and possibly the times, to suit my own fancy. If all goes well, I will end up with a more reasonable (i.e., much smaller) amount of starter, and I will get there with much less wasted flour.
So here goes:
Day 1:
Ingredients: 1/3 cup rye flour and 1/4 cup water
For the flour, I use stone-ground rye. Nothing special, just what I got from the grocery store. My water is tap water run through a filter. Before I had he filter on my sink, I used bottled drinking water.
Mix the flour and water in a bowl. It will be thick and pasty, kind of like the oatmeal that's left in the pot if you don't come down for breakfast on time.

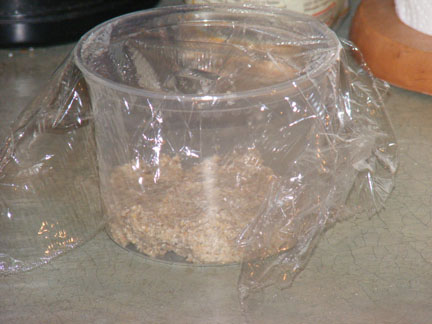
Once all the flour is mixed in, put it in a pint-sized or larger container and cover with plastic wrap. Leave it out on the counter.
And that's it for today.
Day 2:
Ingredients: 1/4 cup unbleached AP, bread, or high gluten flour; 1/8 cup water
There should be little, if any, change in the culture from yesterday. Again, I'm not really particular about the flour. I would just recommend staying away from bleached flour. I am using AP flour for this batch.
Mix the flour, water, and all of the starter from yesterday in a bowl. It will still be thick but a little wetter than yesterday.
Put it back in the container (no need to wash it), press it down as level as you can get it, and mark the top of the culture with a piece of tape on the outside of the container.
Put the plastic wrap back on top, and you're finished.
Day 3:
Ingredients: 1/4 cup unbleached AP, bread, or high gluten flour; 1/8 cup water
Around Day 3 or 4, something happens that puts terror in the heart of the amateur sourdough maker: they get a whiff of their starter. When you check your starter on Day 3, you may notice a strange, and not at all pleasant, odor. And unless you know better (which you will now), you'll swear something is drastically wrong. In fact, I would venture to guess that that smell has been the ruin of more amateur sourdough growers than anything else. It's an acrid, sour, almost rotten smell, and it's perfectly normal. And rest assured, your new baby sourdough starter will soon outgrow it. So, take heart, and press on.
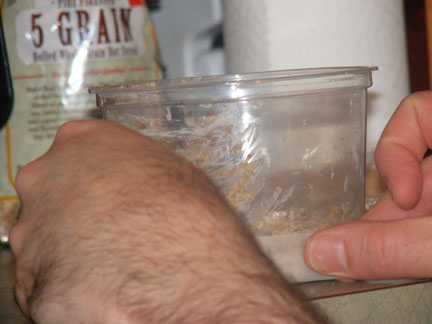
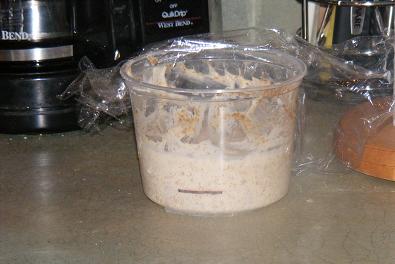
You may also notice that your starter has begun to come to life. It probably won't grow a lot, maybe 50%, but you will start to see bubbles, like these:
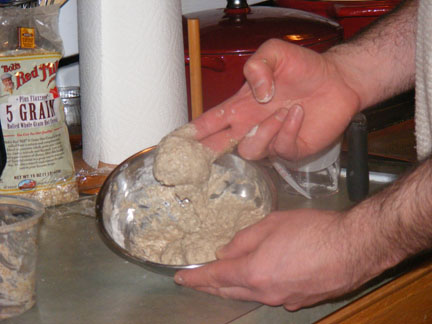
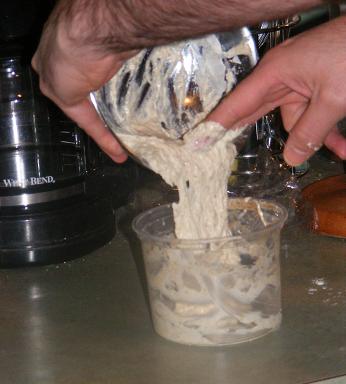
Regardless of the amount of growth, stir down your starter, throw out about half (no need to measure, just eyeball it), and mix the rest with today's flour and water. You will get a slightly more doughy-looking mass:

Once it's well mixed, put it back in the container (still no need to wash), pat it down, and move your tape to again mark the top of the starter.
Put the plastic wrap back on the container, and take the rest of the evening off. You worked hard today.
Day 4:
Ingredients: 1/4 cup unbleached AP, bread, or high gluten flour; 1/8 cup water
And now, a word about measurements. If you bake regularly, or even if you've just been nosing around baking sites for a while, you are no doubt aware that the ingredients in most artisan bread recipes are listed by weight rather than volume. I measure by weight for my baking and for maintaining my sourdough starter.
You might wonder why, then, am I using volume measurements here? Two reasons: first, I have tried to make this starter as simple to follow as possible -- no special tools, no monkeying around with the scales, just a couple of measuring cups and a bowl. And, when it comes to starting a starter, the measurements aren't as critical as when you actually go to bake with it. So for now, we're just using measuring cups.
Today is another one of those days where novice sourdough starter makers often lose heart. Your starter is now coming to life, and like most living things, it kind of has a mind of its own. Up until now, we followed the clock, making our additions every 24 hours. Now, we will be letting the starter dictate the timeframe.
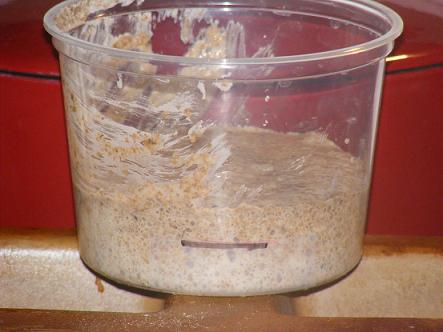
Before you do your Day 4 additions, you want to make sure your starter has at least doubled. If it doubles in less than 24 hours, you should still wait until the 24 hour mark. If it takes more than 24 hours, be patient. Let it double. It may take another 12 or 24 hours, or it may take longer. Again, be patient. It will double. Just give it time. Eventually, you'll end up with a nice, bubbly starter:
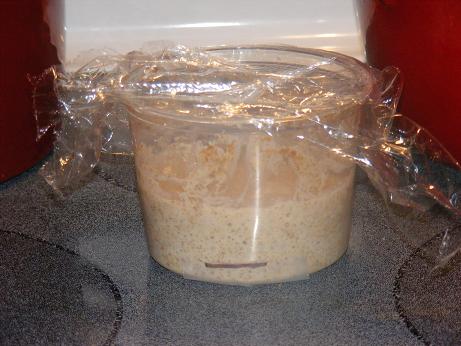
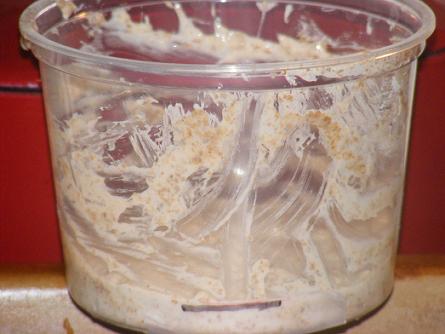
You can see that mine more than doubled. But I still waited for 24 hours. Once it doubles, throw out half of the starter, then mix the rest with the flour and water, and back into the bowl it goes:
Replace the tape and plastic wrap. Then wait for it to double. It could take as little as 4 hours, or it may take more than 24 hours. This time, you can move on to Day 5 at any point after doubling. It's OK if you let it more than double; it's also OK to move on right when it hits the double mark. So, hurry up and wait.
Day 5:
Ingredients: 3/4 cup unbleached AP, bread, or high gluten flour; 1/2 cup water
Once your starter has at least doubled, it's time for the final mix.
Combine flour, water, and 1/4 cup starter in a bowl and mix well. Transfer to a clean container with room for the starter to at least double.
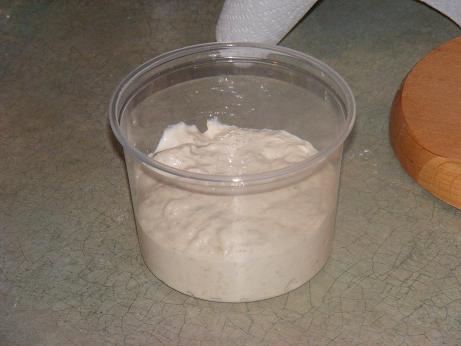
OK, one last time, cover with plastic wrap and let it sit on the counter until it gets nice and bubbly. Don't worry so much about how much it grows, just so that it's bubbly looking. This will probably take around 6 hours, but, again, don't stress about the time. Let the starter tell you when it's ready.

When your starter gets bubbly, pat yourself on the back: you are now the proud parent of a bouncing baby starter! Put a lid or other cover on your container and put it in the refrigerator. Let it chill overnight, and you can begin using it the next day.
Day 6 and beyond:
By today, your starter is ready to use. The flavor will continue to develop over the next several weeks to month, so don't be disappointed if your first few loaves aren't sour enough for you. I would still recommend beginning to bake with it right away, especially if you have never made sourdough bread before. That way, you can hone your skills while your starter develops its flavor.
Feeding your sourdough: If you keep your sourdough in the fridge, you only have to feed it about once a week. And you can minimize your discards by keeping only what you need and feeding it when you want to bake with it. I recommend a 1:1:1 (starter:flour:water) feeding, which means each feeding includes an equal amount, by weight, of starter, flour, and water.
Start by weighing your starter, subtracting the weight of your container. Then add an equal amount of flour and water directly to the container. So, for example, if you have 100 grams of starter, you would add 100 grams each of flour and water. If you feed your starter right out of the fridge, as I do, warm your water to lukewarm (90 - 100 degrees F). After you mix in the flour and water, leave it out on the counter for a few hours, then put it back in the refrigerator. It's best if you feed your starter a few days before you intend to bake with it.
To illustrate, here is an example of my feeding routine, starting with the Day 5 starter and assuming that I finished making the starter on Friday night:
- Saturday morning, I take out what I need to bake bread (2/3 cup using my normal sourdough bread recipe) and return the rest of the starter to the refrigetator.
- Wednesday of the next week, I get out the starter, weigh it, and add equal amounts of flour and water in a 1:1:1 ratio, as outlined above. My goal here is to build up as much starter as I need to make bread on the weekend, and enough left over for my next build. It's OK if I have more than I need to bake with. If I don't think I'll have enough after a 1:1:1 build, I will increase my ratio of flour and water, maybe to 1:2:2 or 1:1.5:1.5. In that case, I will let it sit out until it almost doubles before returning it to the fridge, which might take a bit longer, as I'm using less starter relative to flour and water.
- Friday night or Saturday morning, I again take out what I need to bake with and return the rest to the fridge, to be fed again mid-week.
This is just an example of how I keep my starter. You can feed yours more often if you bake more than I do. It's also OK to let it go more than a week between feedings. If you do that, though, you might want to feed it a few times before you bake with it.
So, that's it. Hopefully I've unravelled some of the mystery of sourdough starters and given you the confidence to try one yourself. Good luck, and let me know how it works out for you!