The Fresh Loaf

A Community of Amateur Bakers and Artisan Bread Enthusiasts.

quick

agentmorgan's picture
agentmorgan

http://www.wildyeastblog.com/2008/08/25/cranberry-oat-sourdough-scones/

Made these quick and delicious scones using pantry ingrediants so made some changes:

Used KAF WWW for all flours, including oat

Added 0.5C walnut chips

Used frozen and thawed sourdough starter 

Used 0.13tsp of KAF Fiori di Sicilia instead of the lemon zest

The instructions were clear and the dough went together smoothly and quickly.  I forgot to brush with milk and pulled the scones out a minute into baking to sprinkle with sanding sugar.  

I'm rather used to scones being thick and heavy, so was surprised at how light and fluffy these were while still having a nice crust on them.  They were not overly sweet, but I think I will forgo the extra sugar and even cut a bit out of the dough next time.  I have no idea if the sourdough would help preserve freshness as they were eaten too quickly!  Will certainly be making again.  

earth3rd's picture
earth3rd

This is my latest attempt at Ciabatta. I used this recipe:  

Jason's Quick Coccodrillo Ciabatta Bread

I have to be honest though... I liked the Ciabatta No Knead better. I liked the flavour of the No Knead bread better. I must admit that the Jason's Quick Coccodrillo Ciabatta might have had a more open crumb and is a pretty looking loaf it just lacked in taste. Here are a couple of photo's.

This is the measurments I used for 2 loaves.

233 gr. bread flour

100 gr. semolina

4.7 gr. yeast

10  gr. salt

320 gr. water


Bake Skywalker's picture

Quick Dinner Bread

November 1, 2010 - 9:59am -- Bake Skywalker
Forums: 

Hello my Baking Buddies, I am totally new to the site, really enjoying the community and forums, I feel at home here :) I have a good topic to start a thread on so I though I would throw it out and see what hits.

I found myself in a situation over the weekend.  My fiance and I were invited over to have Halloween dinner by the parents of my ten year old sons friend ("Girl" friend).  Saturday afternoon I found myself wishing that I had started a batch of Pain A L'anciene the night before to bake off that evening to bring to dinner on Sunday.

xabanga's picture
xabanga

Hello,

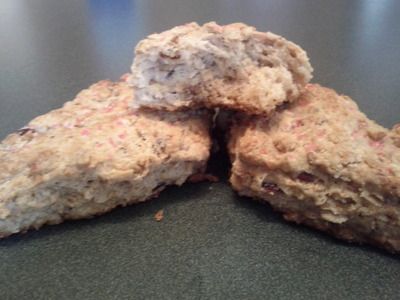
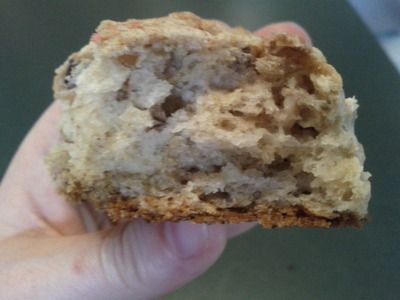
This is my first posting (although not my first bread). I've been researching an easy campfire bread recipe, and I ended up with a recipe for Australian Damper bread (actually there were several). I tried baking the bread at home, but because it used chemical leveners, I thought it tasted more like a biscuit rather than a bread (it was still good however). I did a little more research and found a recipe for a damper made with yeast (which is not the traditional way to make it). I had planned on baking it the traditional way in campfire ashes this weekend but I ended up baking it in my oven using baking tiles. So here's the recipe:

Australian Damper with Yeast

2 1/4 tsp yeast

2 Tbsp sugar

3 cups bread flour

1 Tbsp baking powder

3/4 tsp salt

1 1/4 cup warm water

1/4 cup melted butter

Mix the dry ingredient in a bowl. Add the melted butter and mix it in the flour mixture. Slowly add the water, knead lightly (about 1 minute), adding more flour as necessary. Let the dough rest in a bowl for 10 minutes. On a lightly floured surface, knead and shape the dough into a boule. Place it in a floured linen-lined proofing bowl and let it rise for 30 minutes.


Meanwhile preheat the oven to 375 degrees F with a baking stone on the middle rack and an old pan on the bottom rack. When the dough is risen, transfer it to parchement paper on an upside down cookie sheet (it helps slidding the dough onto the baking stone). Slash the dough.

Add ~1 cup boiling water to the old pan in the oven and let it steam for 1 minute before slidding the dough onto the baking stone. Bake for 35 minutes then cool on a baking rack. Enjoy!

Next time I'll try the bread on a campfire.

Subscribe to RSS - quick