The Fresh Loaf

A Community of Amateur Bakers and Artisan Bread Enthusiasts.

pita

gothicgirl's picture
gothicgirl

Posted on Evil Shenanigans on 3/23/2010 

I think pita bread may be magic.

Honey Wheat Pita Bread   

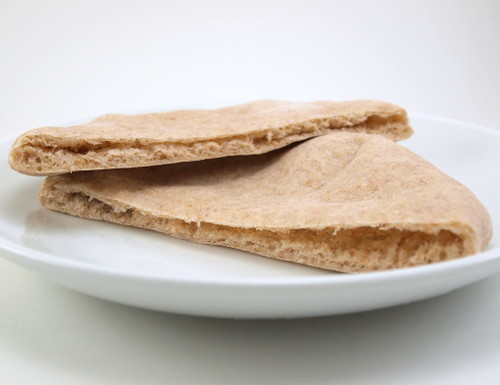
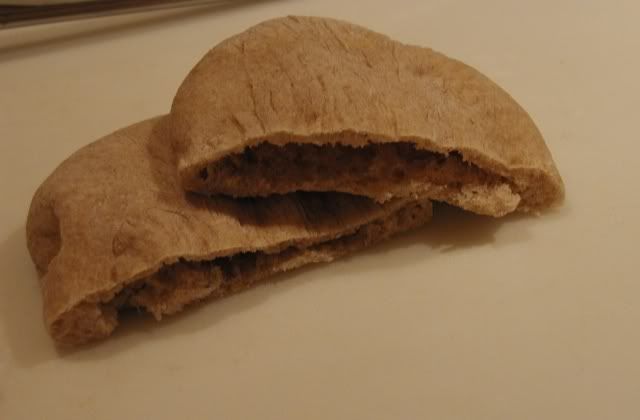
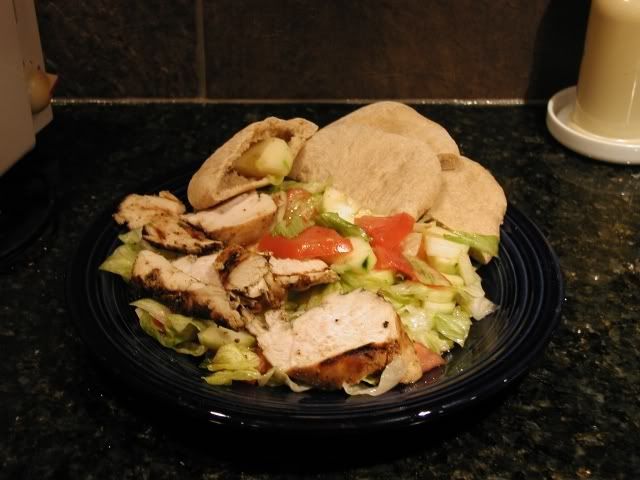
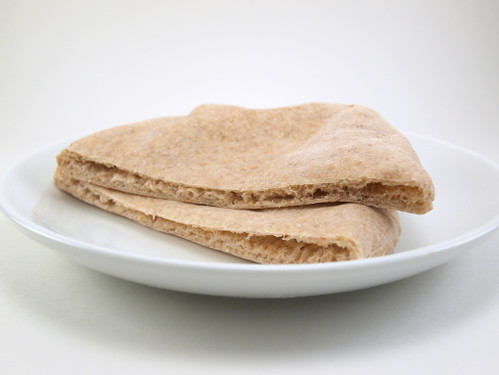
Not that it will grant wishes or anything, but I think the way it goes from thin, flat dough into a hearty pocket of bread fascinating.  Aside from the fascination factor, the versatility of pita bread is endless.  Stuff them with lunch meat for a sandwich, top them with sauce and cheese for a pizza, or bake them until crisp for chips.  Yes, the pita is very versatile.

Honey Wheat Pita Bread 

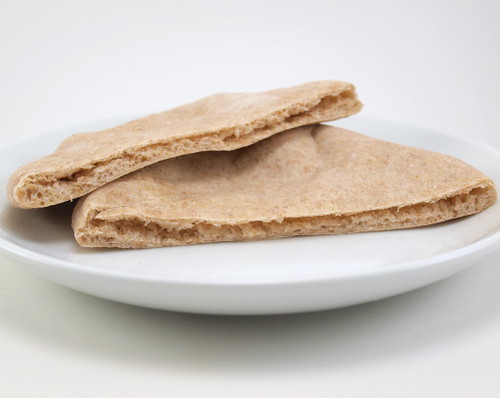
Notes on this recipe ...  First, they come out best if you can bake them on a raging hot pizza stone or cast iron skillet.  The stone, or skillet, should be heated for at least thirty minutes before baking for the best, and most puffy, results.  Second, these pita are made with whole wheat graham flour because it has the nutty flavor I wanted for this recipe, but if you do not have that standard whole wheat flour will work just as well.  Third, kept in a plastic bag the pita last for up to four days at room temperature.   

Honey Wheat Pita Bread   Yield 8 pita

1 cup whole wheat graham flour
2 cups all purpose flour
2 1/4 teaspoons dry active yeast
1 1/2 cups water, heated to 110 F
1 1/2 teaspoons salt
1 tablespoon honey
1 tablespoon canola oil

In a large measuring cup combine the water and yeast.  Let stand for ten minutes, until foamy.

Honey Wheat Pita Bread Honey Wheat Pita Bread

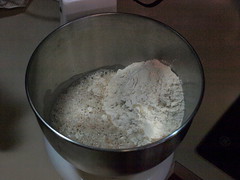
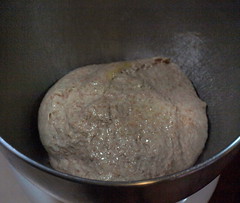
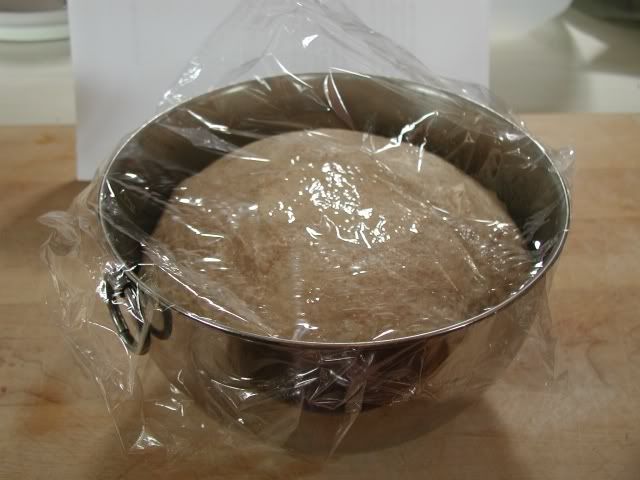
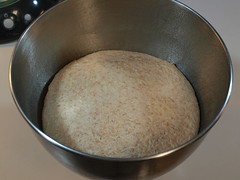
In the bowl of a stand mixer combine the yeast mixture, both flours, salt, honey, and oil.  Mix on low speed for three minutes then check to make sure the dough is not too liquid, but it should be sticky to the touch.  Mix on medium speed for five minutes.  Cover with plastic and let rise until double in bulk, about an hour.

Heat the oven to 475 F with a pizza stone, or 9″ or larger iron skillet, for thirty minutes.

Honey Wheat Pita BreadHoney Wheat Pita BreadHoney Wheat Pita BreadHoney Wheat Pita Bread

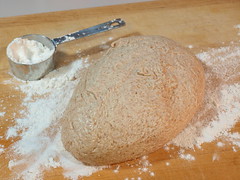
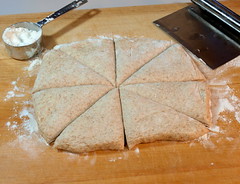
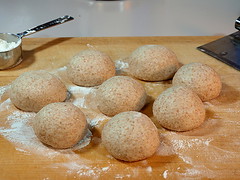
Once the dough has risen turn out onto a floured surface and press out the excess gas.  Divide the dough into eight equal pieces.  Roll the dough into balls then cover with a towel and allow to rest for twenty minutes.

Honey Wheat Pita Bread Honey Wheat Pita Bread Honey Wheat Pita Bread Honey Wheat Pita Bread 

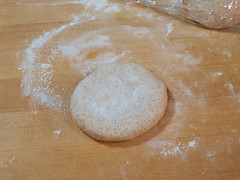
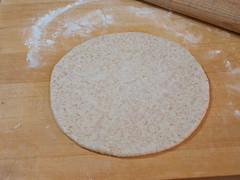
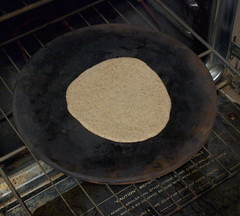
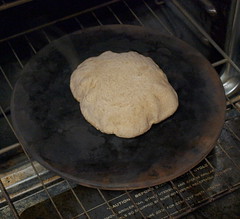
Once rested roll the dough into a thin circle, about 1/8″ thick.  Place the dough on the heated pizza stone and bake for 3-4 minutes, until golden brown and puffed.  Cover the baked pita with a clean towel and repeat with the remaining dough.

Honey Wheat Pita Bread 

Enjoy!

Honey Wheat Pita Bread

Erzsebet Gilbert's picture

A belated hello, a blog link with a few recipes, and fictional fanciful tales about bread!

April 2, 2009 - 9:01pm -- Erzsebet Gilbert

Hi, everybody!

Maybe this is a bit silly, since I've already exchanged messages with a few of your wonderful selves and posted my own question about how best to bake bread on a Coleman camp stove - and I received so many fantastic ideas and suggestions - but I hadn't really given an Official Introduction; essentially, I'm a writer and stumbling but devoted baker living in Hungary, and I've been so enthralled by the whole Fresh Loaf community.  

Erzsebet Gilbert's picture

"I pita the fool," or, a report on camp baking and a gyro filling recipe

March 22, 2009 - 10:03am -- Erzsebet Gilbert
Forums: 

Hello, everybody!  

I'll begin with another thank-you to all those who responded to my previous/first post, my questions about baking while camping.  Using all the help, I'm planning upon trying bread-steamed-in-a-can, or crumpets, or English muffins quite soon.  Last night, however, I had success.(!)...

Rosalie's picture
Rosalie

I've been asked (via Messages!!) to post the recipe I used for Pitas.  I made two recipes, but I'll post the one that was designed as a Pita recipe.  Apparently just about any bread recipe will work, although I don't know about high-hydration doughs.

In my experimenting, I've become curious about the role of the yeast.  My conjecture is that the yeast just helps with the development of the gluten and of the formation of a gluten skin (as I think someone called it).  I don't think it has much of any role in the puffing up.

This recipe was taken from Beatrice Ojakangas' Great Whole Grain Breads.  It's on page 277 and is called "Whole Wheat Pita Bread".

  • 1 package active dry yeast (I'm sure I used considerably less)
  • 2 1/2 cups warm water (warm if you go the proofing-of-the-yeast route - I don't - instead, I go for long refrigerator rises, usually overnight)
  • 1 tablespoon sugar
  • 2 teaspoons salt
  • 2 tablespoons salad oil
  • 5 1/2 to 6 cups whole wheat flour

I won't go into the details of making the dough.  Do it however you usually do it.  Develop it into a smooth ball, but it doesn't need to rise.  Ojakangas has you let it rest about 15 minutes after the mixing and before kneading 10 minutes on a board.  Then you cover it and let it rest 20 minutes.  Then you "punch dough down" and divide into four parts, and each part into four more, for a total of sixteen.  So the dough for a single standard loaf of bread will make about eight standard pitas.

Shape each piece of dough into a small ball and roll out to make a 6-inch circle.  I don't know how thick this is, but I suspect it's 3/16 of an inch.  In my subsequent pita trial, I used the special rubber bands for rolling pins and rolled them out to 1/8 inch, and they were quite a bit thinner.  Cover and let rise 30 minutes.

Here's where the Ojakangas narration gets confusing.  I'll adapt.  While the pitas are rising, preheat the oven to 500 degrees with a stone in place (for 30 minutes).  Arrange six pitas at a time on parchment paper.  With the assistance of a cookie sheet - a rimless one or a rimmed one turned upside down - transfer the pitas and the parchment to the stone.  Bake 4-5 minutes "or until rounds are puffed and tops begin to brown."  But don't wander off.  Turn on the oven light and sit on the floor to watch.  Mine started to puff up at about the two minute mark, and they were fully puffed up about a minute later.  Quite a show.

Rosalie

Rosalie's picture
Rosalie

I was inspired by a question by someone in another bread forum and my own recent discovery and love affair with baking pita.  In the other forum, the person had frozen shaped bread dough and then was having problems reviving it.  I wondered if she could make pitas with it.  While that question remains unanswered, I tried a related experiment.

I picked a nice basic bread recipe - in this case, an adaptation of Bernard Clayton's Rosemary-Garlic Bread on page 464 of my edition.  The recipe calls for about half whole wheat flour and half white flour, and I, of course, used all whole wheat.  I also, as usual, used considerably less than the 2 packets of yeast - possibly a teaspoon, but I don't remember. And I'm sure I stuck it in the refrigerator for a good part of its early life.  It's been a couple weeks.  But that's my modus operandi.

I divided the dough into twenty-four equal balls, which would make them smaller than might have been called for (for about six cups of flour for two standard loaves).  I then rolled the balls to 1/8 inch thickness, using those rubber bands I found online (Fanta, I think) for my rolling pin.  And I managed to freeze them by placing them in the freezer on non-stick cookie sheets for a couple hours and then stacking them and putting them in freezer bags.  (A smaller quantity would have made the logistics of this step a bit simpler.)

I now take them out two at a time and bake them in my Oster countertop convection oven.  Today I had my greatest success so far.  I placed the frozen pitas between two sheets of parchment paper on top of the oven with an inch or so of space between the oven and the pitas.  I then pre-heated the oven to 450 (its top temperature) with my little toaster-oven baking stone in the middle for about half an hour.  Then I placed one piece of parchment and the pitas on the stone.  In less than two minutes the pitas were big round balls.

Sorry, no pictures.  All gone.  Maybe next time.  I still have plenty more from this batch to experiment with.

Rosalie

Rosalie's picture

I Made Pita!

January 2, 2009 - 5:45pm -- Rosalie

I made Pita!  My first time.  I had thought, maybe, there was some voodoo involved, but there isn't.

I used Beatrice Ojakangas' "Whole Wheat Pita Bread" recipe on page 277 of "Great Whole Grain Breads".  I stuck the dough in the fridge overnight, planning to pick up her instructions after the kneading.  But the recipe got confusing.  If I took her literally, I would "preheat" the oven to 500 after I stuck the rounds in the oven; didn't make sense since I was baking only for 4-5 minutes and in three batches.

404's picture

BBQ/Grilled bread

October 24, 2008 - 4:21am -- 404
Forums: 

Are there any types of bread you can cook directly on a grill/bbq without using the BBQ as an oven. I figure there must be types of bread in some cultures that have some nomadic roots that do this as who is going to lug about an oven.

I don't care about authenticity more that it's always good to have freshly cooked bread with a BBQ and cooking it on the same grill would be handy.

I imagine that you need to use a flat bread so it cooks fast so something along the lines of pita breads might be an option.

KipperCat's picture
KipperCat

Since I wanted a small batch of these, I started with Floyd's recipe.  I also took note of MysticBunny's comment that she got the best flavor with an overnight sponge, knowing that this was very true of most breads.  To simplify things, I simply made Floyd's recipe using only 1/4 tsp. of yeast.  (I knew that reducing the yeast like this would stretch the rise time out to at least 15 hours.) Rather than a thorough mix or knead, I quickly mixed everything; let it rest a bit and then did a few stretch-and-folds.  I left the dough on the counter to ferment overnight.  The next day, the dough was at least tripled.  I wasn't ready to bake at this point so deflated, did another stretch-and-fold and refrigerated the dough.  Due to other circumstances, the dough sat in the fridge for a day and a half, not the few hours I had envisioned! 

I would have liked these a bit larger.  I'm not sure what thickness I rolled them to, but it was less than 1/4". The dough could have been a bit cool, or more likely I needed to let it relax for a few minutes.  At any rate, I couldn't roll them any thinner. I baked these for about 5 minutes, which allowed them all to puff and gave me a bit of color on the bread. The bread was delicious The dough didn't suffer too much from its long refrigeration.  Here it is, just before I shaped it.


Dinner was delicious

Everyone was hungry.

sourLou's picture

Recipe conversion

April 15, 2007 - 11:12am -- sourLou

Hello..

I want to make pitas using Floyd's pita recipe. Any suggestions how I should convert it to using a starter? I try to maintain my starter with equal weights flour/water. (i think that is considered 100% hydration)

Here is the recipe:

3 cups flour
1 1/2 teaspoons salt
1 Tablespoon sugar or honey
1 packet yeast (or, if from bulk, 2 teaspoons yeast)
1 1/4 to 1 1/2 cups water, roughly at room temperature
2 tablespoons olive oil, vegetable oil, butter, or shortening

Thanks!

Louis

Pages

Subscribe to RSS - pita