The Fresh Loaf

A Community of Amateur Bakers and Artisan Bread Enthusiasts.

pita

Pretzel's picture

Pita bread dough in a bread machine

March 17, 2013 - 10:13am -- Pretzel

Has anyone successfully made pita bread in a bread machine. Surely it should be easy, use a pita bread recipe, make the dough via the machine, then roll out and bake as per normal pita bread. The PB recipes I've seen say to knead for ten minutes. Is that somewhere in the ballpark of what my machine will do? I've got the widely used Panasonic machine.

Any problems I haven't spotted, advice, success stories, or why did the bread machine cross the road jokes?

hanseata's picture
hanseata

The owner of A&B Naturals, the store that sells my bread, asked me one day: "Can you bake pitas, too?" I had never made them, so I said with conviction: "Yes!"

At least I knew where I could find a pita recipe!

In "Whole Grain Breads", one of my favorite baking books, Peter Reinhart has a recipe for whole wheat pitas - just the right thing for my grain loving customers.

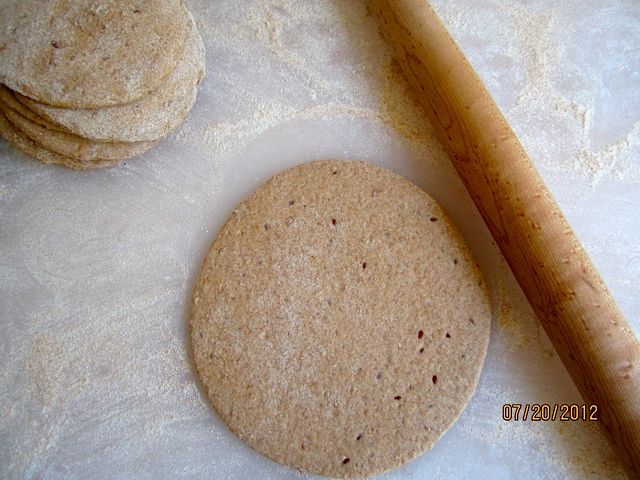
I started my first pita dough. No big deal, until I got to the shaping part. The pitas had to be rolled out no thinner than 1/4 inch (6 mm), and to an 8-inch (20 cm) diameter. But my pitas already reached this thickness at 6 1/2 to 7 inches (16 to 18 cm.)

Pitas are shaped in three steps, first into rolls, then rolled out to 4"/10 cm. Don't skimp on the flouring!

Below: rolling out pitas to a larger round (6 1/2 - 7" or 16 - 18 cm.) Re-flour them, if necessary.
A high oven temperature is key to a pita's proper horizontal separation into two layers. This high temperature has to be maintained during the whole bake, from below as well as from above.

Many cheaper ovens don't heat up to the necessary 550ºF (280ºC.) Without that boost pitas can't produce the large gas bubble that creates a pocket. And without a pocket - no delicious filling!

A baking stone, or a rack lined with unglazed terracotta tiles (like I have), works best for keeping the  temperature stable, even when the oven door has to be opened several time during the baking process. And very hot stones make the best baking surface for pitas, too.

To reheat fast enough after each opening of the door I remembered Peter Reinhart's advice for baking pizza ("American Pie"), where the problem is the same: intermittently switching the oven to broil for a short time.

How many pitas can you bake at the same time? One batch of dough makes 8 (or 6, if you want larger ones.) Peter Reinhart says one at a time, but, of course, being a semi-professional I wanted to do it a little less time consuming.

After some trials, I found that I can put two at the same time in the oven. That's the maximum, with more it becomes very difficult to load and unload them without damage, and to keep control over their baking process.

2 pitas can be baked at the same time. Once out of the oven, they deflate quickly.

Of course, it takes a little bit of experience to slide the pitas into the oven without them folding over in one place, and to extricate them without nicking them with the peel.

But it's not rocket science, a smart child can do it:

  Josh, our carpenter's son, thought it was much more fun to help with my baking than reading his book!

Though Peter Reinhart's original 100% whole wheat pita is very good, I made a few changes to it. I substitute a 7-grain mix for some of the whole wheat flour, and add an overnight bulk rise in the fridge, this is more practical for my baking schedule, and, in my opinion, improves the taste even more. It also has the advantage that I can reduce the yeast amount by 2 grams.

Though I usually cut down on the sweetener in Peter Reinhart's recipes, this whole grain bread needs the full dose.

We like our pita filled with grilled Halloumi cheese, tomato and lettuce - the way we had it in Girne/Kyrenia on Cyprus. And how do my customers at A&B Naturals like them? They fly off the shelf so that I have to bake them every week!

Here is a link to the recipe in my blog "Brot & Bread".

jschoell's picture
jschoell

Make a soaker with whole wheat flour and spelt berries. Let it sit at room temp, covered. A day later, mix yeast with warm water and honey. After 5 minutes, add the foaming yeast to the soaker, along with some salt and enough whole wheat flour to make a sticky dough. Knead for 5 minutes, form a ball and transfer to a bowl coated with good EVOO. Let rise until doubled.

Pour out dough and slice off chunks that will form 3 inch diameter balls. Wrap balls in plastic wrap and refrigerate or freeze. 

After a day of chilling, preheat oven to 500 F, with a heavy cast iron pan on the middle rack. Pour 1/4 cup of poppy seeds on a work surface. Take the dough ball from the fridge, unwrap it, and flatten it on top of the poppy seed mound. Flip the dough over and smash it into the seeds again, sweeping the seeds into a pile as needed. Continue until the dough disc is black on both sides with poppy seeds. Slide it onto the preheated pan and bake until puffy, about 5-6 minutes. 

rodrip's picture

Pita Question

February 11, 2011 - 3:02pm -- rodrip
Forums: 

Hi,

I have a question about pita breads. When I make pita breads I have no problem with getting them to puff up and expand like I want them to. What I was wondering about was do all pitas made in home style ovens end up with all or mostly all of the " crumb " on bottom side of the pita, the side facing a baking stone? I usually end up with the opposite side being almost like a thin crust with no crumb on that side. Bakery made pitas don't seem to have that problem.

Rodrip

johannesenbergur's picture
johannesenbergur

So... time to try something new and the pictures of the pita breads on the right side of TFL has always appealed to me.

Being European, I had to use some other measurements and didn't bother getting the exactly like the recipe, so here's what I did, inspired by http://www.thefreshloaf.com/recipes/pitabread.

Ingredients: (Made 8 pita breads á 50g)


  • 1 dl tepid water
  • 15g fresh yeast
  • ½ dl plain natural yogurt (I can't seem to stop using this in my creations)
  • 5g sea salt
  • 5g honey
  • 10g olive oil
  • 50g durum/semolina flour
  • 150g regular wheat baking flour + some for dusting and adding as nessecary.
  • Optional: Spices (I used a tiny bit of ground chilli, smoked paprika and ground cilantro)


Mix the yeast with the water, add the yogurt, oil, salt and honey, mix well with a fork, till it's a greyish, oilish mixture.
Add the flour, a little at a time (100g) and stir with the fork as long as it makes sense.

Knead for around 10 mins or so. Let it rise under a luke warm tea towel in a warm place for 30 mins.

Carefully fold and strech the dough, and make a sausage. Cut the dough-sausage into appropriate size lumps, I weighed them and made them 50g. Let the pieces rest and rise for 5 mins.

Use a rolling pin to flatten the dough and hopefully you'll succeed in making them circular as well. Just make it really thin, not paper thin, but 3-5mm thick.

By this time your oven should be really hot (max. heat) and if you have a baking stone (which helps), it should be hot as well. Place the pancake lookalike dough onto the stone and bake them for 3 mins in 200°C or to taste. The breads should blow up like balloons.

Cut them up sidewise and enjoy your pitas.

Filling suggestion:
Garlic and herb roasted shoulder of lamb, sweet corn, tomato, cucumber, salad leaves and hot salsa.

...I'm going to quit blogging now and eat some more...

cranbo's picture
cranbo

So last night I set off on my first Pita adventure using the TFL recipe. 

I like weight/percentages, so I weighed out the measured ingredients to develop a formula by weight. This is my conversion technique pretty much for all baking now.

The original recipe was much too sticky for me as well (worked out to ~68% total  hydration for me); had to add 50g more flour to get a manageable dough, and even then it was a tad bit wet. Overall hydration of 59-61% seems to be in the right ballpark for pita. 

The below recipe is ~60% overall hydration:

Makes 8 balls @ 105g each

  • 346g AP flour
  • 148g whole wheat flour
  • 297g water
  • 28g olive oil
  • 22g honey
  • 11g salt
  • 7.1g instant yeast 

What I learned: 

  • Hot oven is a must, 500F worked best for me, baking stone on center rack
  • 2 to 2.5 minutes was perfect for me; I would go ~2 minutes, and flip for 30 seconds. 
  • The rolled-out pitas that I left to rise covered for 30 minutes gave the most even puff. It also could've been the 450F oven, though...at 20 minutes and 450F, only a few of them puffed up completely.
  • Next time, I will try the skillet/stove-top technique for better browning. Also much easier to place & turn than a 500F oven + baking stone! 
I'd post some photos of the tasty outcomes...but they're in my stomach right now. 
Neo-Homesteading's picture
Neo-Homesteading


Recently I experimented with a basic lean pizza dough and made these rolls. They were great for sandwiches and my sons favorite, cheesy bread. They're similar to focaccia rolls however its hollow in the middle and more like a pita. 

http://neo-homesteading.blogspot.com/2010/11/pita-rolls-basic-pizza-dough.html

cyalexa's picture

pita question

June 3, 2010 - 6:42am -- cyalexa
Forums: 

I am going to try my hand at pita bread using the recipe posted under favorites on this site. I will be serving them with dips so do not want a pocket. How do I avoid the puff in the oven that results in the pocket/ From reading the comments following the recipe I am inclined to make the breads thicker. Is this right? Other suggestions? Thanks in advance.

Pages

Subscribe to RSS - pita