The Fresh Loaf

A Community of Amateur Bakers and Artisan Bread Enthusiasts.

peter reinhart

Floydm's picture
Floydm

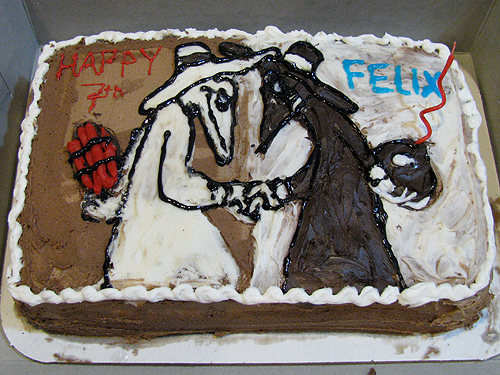
A busy morning today.  First up was a birthday party for my son at a local rollerskating rink.  The high point was the Spy vs. Spy theme cake that dstroy decorated:

Based on this image.  Note that the wick of the bomb was a candle.

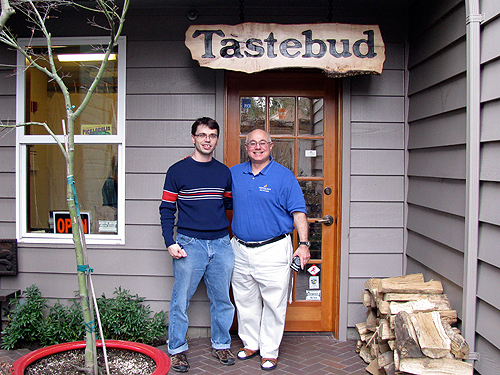
After that it was over to Tastebud, where Peter Reinhart was meeting with a bunch of Portlanders who are testing the recipes for his upcoming book.

I met a number of his testers and tried a few of their creations, which were all good.  As I said in my previous post, I'm looking forward to trying the new set of recipes they are coming up with.

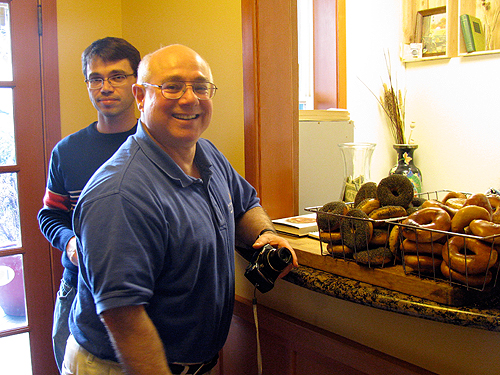
We also tried some of the wood oven bagels that they make at Tastebud.

Delicious, dense, shiny, and chewy, definitely the best bagels I've had in Portland. 

Tastebud is walking distance from the apartment I lived in in college and where we lived when we got married.  Sigh... if only it had been there when I lived in the neighborhood, back when "weekend mornings" meant "brunch," not "cartoons."  Oh well...

Floydm's picture
Floydm

Peter Reinhart is in Portland this weekend.  I was able to get together with him for coffee this morning at little t american baker in SE Portland.

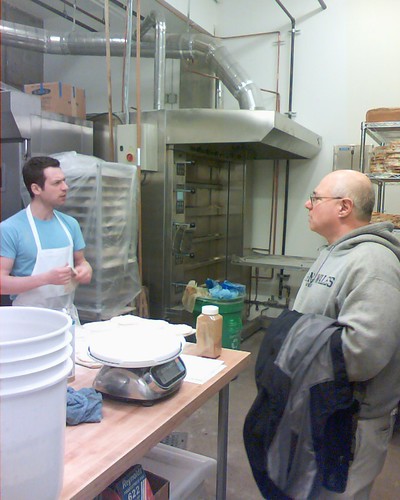
Tim Healea, the head baker, was kind enough to show us around the bake room. 

It is a small space, but they have an awesome 5 rack oven and bake many types of bread every day.  While we were there they were making naan and pulling... plank bread out of the oven (I think that is what they called it... It was something like a focaccia, sprinkled with thyme, rosemary, and sea salt and full of olive oil).  We tried a rustic ciabatta-like roll with carrot and polenta in it while we were there that was wonderful and one of their pastries, which was delicious too.

I, however, was a space cadet and left my good camera at home (well, I had the camera but I forgot the battery), so these phone pictures were the best I could get.  I will, however, try to come by Tastebud tomorrow around 11:30-12 to see Peter and any TFLers who show up there, and this time I'll bring a real camera.


pcasebere's picture

Peter Reinhart: The art of baking bread

January 14, 2009 - 6:37pm -- pcasebere
Forums: 

Okay, so I was sitting in a 2000 level class titled, "Society and Technology," and the instructor referenced a video of Peter Reinhart talking about bread, and then asked the question, "Is bread baking a technology?"  Well, the rest was a discussion, and a bit of other topics, but I thought y'all (..or you guys if your up North) would be interested in it, so without further delay, check out the following URL:

dmsnyder's picture
dmsnyder

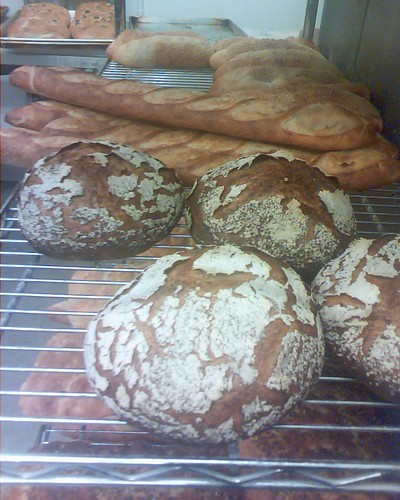
Above are pictured three loaves of San Francisco Sourdough made from the recipe in Peter Reinhart's "Crust and Crumb." They each turned out with subtle differences that are instructive regarding the variables that affect the appearance of our loaves. I thought it might be useful to describe these differences and what produced them.

I'm not going to describe the formula or method, because these were according to the recipe and were identical for all 3 boules. They were proofed in identical coiled reed brotformen. The two loaves on the right were baked together. The one on the left was baked 45 minutes later, and was left in the refrigerator, where all had been cold retarded overnight, 45 minutes longer than the other two. As you can see, they were scored with the same checkerboard pattern. Both bakes started in a 500F oven. The temperature was lowered to 450F when the loaves had been loaded. They baked for 30 minutes then were left in the oven for another 10 minutes with the oven turned off and the door ajar.

What were the differences in my procedures, then?

For the first bake (the two loaves on the right): 5 minutes before loading the first loaf (the one in the middle). a handful of ice cubes were put in a pre-heated metal loaf pan on the lowest shelf. Then, I dumped the boule on a peel, scored it and loaded it. The oven door was closed. I scored the second loaf (the one on the far right) and loaded it. I then poured a cup of boiling water into a pre-heated cast iron skillet on the bottom shelf and closed the door. The loaf pan and the skillet were removed after 10 minutes.

For the second bake, the loaf on the far left was scored and spritzed with water, loaded and then covered with a stainless steel bowl. The bowl was removed after 10 minutes.

What were the differences in outcome?

Comparing the two loaves baked together, the first one loaded had better oven spring and better bloom. I think it got the benefit of a slightly higher initial oven temperature. The second loaf was loaded within 2-3 minutes of the first. I have seen this difference between 2 loaves loaded sequentially in this manner repeatedly. I think the differences are "real."

The third loaf and the first (the one on the far left and the middle one) had about the same oven spring and bloom. If anything, the loaf in the middle had more. They were both, of course, the "first" loaf loaded. However, the one baked under a bowl for 10 minutes had a much shinier crust due, I think, to dissolved and gelatinized starch on the surface.  The difference "in person" was more dramatic than what I see in the photo. This shininess is an effect I've seen only with breads baked covered. The longer the loaf is covered, the stronger the effect.

These differences may be of little significance. All three boules are quite satisfactory. But the differences do elucidate the effects of minor changes in temperature and humidification and might answer questions other have about how to achieve desired improvements in their breads.

FYI, we had part of the loaf on the left with dinner (Onion soup and Dungeness crab cakes with an Anderson Valley Sauvignon Blanc). The bread had a crunchy crust, typical chewy crumb and lovely complex soudough flavor. This is still a fabulous version of SF Sourdough.

Any comments about the observed differences would be welcome.

David

Eli's picture
Eli

Scones have become a popular item in our house these days. Henry, another member of TFL was kind enough to share his recipe with me and his scones are wonderful too. These scones are incredible and contain no butter but rely on the heavy cream for the fat content. They will melt in your mouth! Rich and silky and they freeze well. This batch was inspired by the last of my wonderful fresh blueberries. How I'm going to miss them till next year. But I have these scones for now and will be content. Life is good!

JMonkey's picture

Let me just say ...

July 14, 2008 - 5:39pm -- JMonkey

... that Peter Reinhart's "Sweet and Sour Onion Marmelade" is really really good. I made a sourdough, whole-wheat grilled pizza last night (no recipe, really -- I kinda just threw it together) and made the onion marmelade from American Pie.

Amazingly tasty. I plan to use it on sandwiches and, given how incredibly tasty it is, I may just make a foccacia for dinner sometime this week!

Woot!

dmsnyder's picture
dmsnyder

SF Sourdough Baguettes 6-29-08

SF Sourdough Baguettes 6-29-08

SF Sourdough Baguettes Crumb 6-29-08

SF Sourdough Baguettes Crumb 6-29-08

These baguettes were made with the formula for San Francisco Sourdough from Peter Reinhart's "Crust&Crumb." The firm starter was made with a mixture of Guisto's Organic (whole) Rye and King Arthur Bread Flour. The final dough was made with King Arthur European Artisan Flour.

The recipe makes 4-1/2 pounds of dough. I made two 1.5 lb. boules and these two baguettes. The dough was on the dry side, although I added about 1/4 cup of water during mixing. I cold retarded the formed loaves for about 18 hours. The baguettes were baked with steam for the first 10 minutes, then dry for another 15 minutes. The crust is crunchy, thicker than a traditional baguette. The crumb is less open than I wanted. The taste is typical of breads made with this dough - moderately sour and complex.

A word about the scoring, since that has been a source of frustration for me: These results are as good as I have ever obtained. I think the factors that contributed to it were 1) The dryer dough is easier to slash, 2) I was careful not to over-proof. They were baked 2 hours after being taken out of the refrigerator, 3) I consciously attempted to implement what Proth5 calls "Mental mis en place." I take this to mean clearing your mind of any other thoughts, then reviewing the procedure elements and visualizing the procedure before starting to slash, then executing the slashes quickly and smoothly according to the chosen procedure. I did not achieve perfection, but I feel I have progressed. What's needed is practice, practice, practice.

Here is one of the boules made with the same batch of dough:

SF Sourdough Boule 6-29-08

SF Sourdough Boule 6-29-08

David


dmsnyder's picture
dmsnyder

SF SD Pain de Compagne

SF SD Pain de Compagne

SF SD Pain de Compagne crumb

SF SD Pain de Compagne crumb

This came out of the oven this evening in time to cool ... almost cool ... for our obligatory bedtime snack.

It is basically the same bread as that described in my last blog entry except that I built the dough directly from the starter rather than elaborating an "intermediate starter," and I made it with slightly higher hydration. As a result, it did not have the first clear flour, and it had proportionately more whole wheat and rye in the starter. This was a sticky dough that I avoided over-kneading. It fermented for 3.5 hours with one folding at 90 minutes. I shaped a single boule of about 830 grams. It was retarded in the refrigerator for 18 hours.

The boule was proofed in a linen-lined banneton and baked on a stone, covered with a stainless steel bowl for the first 15 minutes of a 40 minute bake. It was left in the turned off oven with the door ajar for another 10 minutes.

The crust was really crisp after 90 minutes of cooling. The crumb is tender but chewy, how I like it. The taste is medium sour with clear notes of whole wheat and rye which I expect to be more subtle by the morning.

My next project is to use the same dough at a lower hydration to make sourdough baguettes.

David

dmsnyder's picture
dmsnyder

San Francisco Sourdough variation Boule

San Francisco Sourdough variation Boule

SF-SD-Variations-Boule Crumb

SF-SD-Variations-Boule Crumb

San Francisco Sourdough variation Batard

San Francisco Sourdough variation Batard

San Francisco Sourdough variation Batard Crumb

San Francisco Sourdough variation Batard Crumb

San Francisco Sourdough: Variations on a theme

The formula for San Francisco Sourdough Bread in Peter Reinhart's "Crust & Crumb" has been my favorite recipe for my favorite bread for some time. I have varied the formula, using different starters and various mixes of white wheat, whole wheat and rye.

All of the breads have been good. I can say that my favorite loaves have been made with bread flour with a small amount (10-12%) of rye flour.

I have not varied the techniques for mixing or proofing in Reinhart's instructions to date, and, with a single exception, I have always baked this bread as boules. Reinhart's instructions indicate that this bread can be formed as boules, batards or even baguettes.

This time, I decided to try some new variations in ingredients, procedures and loaf shape. The dough was mixed in a Bosch Universal Plus.

Starter Feeding

1 part mother starter

3 parts water

4 parts flour (70% AP flour, 20% whole wheat and 10% rye)

Intermediate firm starter

3 oz starter (formula above)

9 oz water

13 oz First Clear Flour

Dough

All of the intermediate firm starter

2 cups of water

23.50 oz King Arthur European Artisan Flour

3.5 oz Guisto's Organic Whole Rye

0.25 oz Diastatic Malt powder

0.75 oz salt

Procedure

Day 1 - Make the intermediate starter

Mix the Intermediate firm starter. Ferment tightly covered for 9 hours (overnight) at room temperature, then refrigerate for 10 hours.

Day 2 - Mix, Bulk Ferment, Divide and Scale, Shape and Retard

Take the starter out of the refrigerator 1 hour before use.

Mix the water, the diastatic malt and the flours until it forms a shaggy mass. Cover and autolyse (let the flours absorb the water and the gluten start to develop) for 20 minutes.

Add the firm starter cut into 10 pieces to the dough and mix at Speed 1, adding the salt while mixing. Continue to mix at Speed 2 until the gluten is well developed and a window pane can be formed. (7 minutes).

Empty the dough onto the bench and fold the dough into a ball. Place the dough in a lightly oiled bowl, at least twice its size. Roll the dough ball around to coat with oil, cover the bowl tightly, and allow the dough to ferment for at least 4 hours. (If rising too quickly, do a fold to de-gas the dough, but plan on leaving the dough alone for the last two hours, at least.)

Gently transfer the dough to the bench. Scale and divide the dough as wished, according to the type and size of the loaves you want to bake. (The total weight of the dough is around 4-1/2 pounds.)

Let the dough rest, covered with plastic wrap, for 10 minutes, then form loaves. These can be place in bannetons or on parchment or canvas "couches." In either case, cover the loaves air tight and refrigerate overnight.

Day 3 - Proof and Bake (two methods)

Take the loaves out of the refrigerator and allow to warm up and rise for 3-4 hours until expanded to 1-1/2 times their original volume.

Baking method 1

One hour before baking, pre-heat the oven with a baking stone and cast iron skillet in it to 475F.

Slash the loaves as desired, spritz with water and transfer the loaves to the baking stone.

Immediately pour 1 cup of boiling water into the skillet and close the oven door. If desired, spritz the oven walls with water 2-3 times spaced over the first 5 minutes of the bake. After 5 minutes, carefully remove the skillet from the oven, empty any remaining water and dry it. Put it somewhere to cool. After the last spritzing, turn the oven temperature down to 450F.

Baking method 2

Alternatively, set the oven to 450F.

Slash the loaves as desired, transfer them to the stone and bake the loaves covered with a bowl or a roaster for 15-20 minutes. Then remove the cover.

Continue baking until the loaves are nicely colored and their internal temperature is at least 205F. The loaves will be done in 30-40 minutes total time, depending on their size and shape. Then, turn off the oven but leave the loaves on the stone for another 5-10 minutes to dry the crust. Allow the loaves to fully cool (1-2 hours) before slicing.

Comments:

With this particular combination of flours and the procedure as described, the dough was quite sticky at the end of mixing. After a couple of foldings, it was extremely elastic, and I wondered if I had mixed it more than I should have. However, after bulk fermentation and dividing, the dough was quite relaxed and remarkably extensible. It was not at all sticky at this point. This has been characteristic of doughs made with KA European Artisan Flour, in my experience.

The batard pictured above was baked uncovered with steam from water poured into a hot skillet. The boule was baked under a stainless steel bowl without additional steam. Although the boule was baked about 45 minutes after the batard, the latter rose more quickly on parchment and acted as if over-proofed. The boule rose more slowly in a banneton. It did not seem over-proofed, and it had much better oven spring and bloom. The batard had a more open crumb. My hunch is that how I shaped the boule (too tight) was the major determinant of the differences in proofing time and crumb openness. (Other analyses would be welcome.)

Eating (Batard)

The crust is crunchy but not at all tough. The crumb is tender with a delicious complex pain de compagne-type flavor, except with more assertive sourness.

David

Pages

Subscribe to RSS - peter reinhart