The Fresh Loaf

A Community of Amateur Bakers and Artisan Bread Enthusiasts.

parmesan

Isand66's picture
Isand66

I just refreshed my Yeast Water starter earlier in the week after returning home from a long business trip.  I have had great success mixing the Yeast Water starter with a traditional sourdough starter so I decided to follow a similar path.  To make things interesting and because I happen to love durum breads I decided to make a 65% hydration YW starter using only durum flour and for the sourdough starter I converted some of my AP starter first to a 100% hydration starter using durum flour and sprouted whole wheat.  I built both starters up in 3 stages over 2 days to make sure I had nice and lively starters.  I didn't quite think through the amounts correctly so I ended up with a lot of extra starters.  Not too worry as I'm making some YW Durum English Muffins tonight withe the extra starter.  Feel free to adjust the amounts below if you don't want any left-over starter.

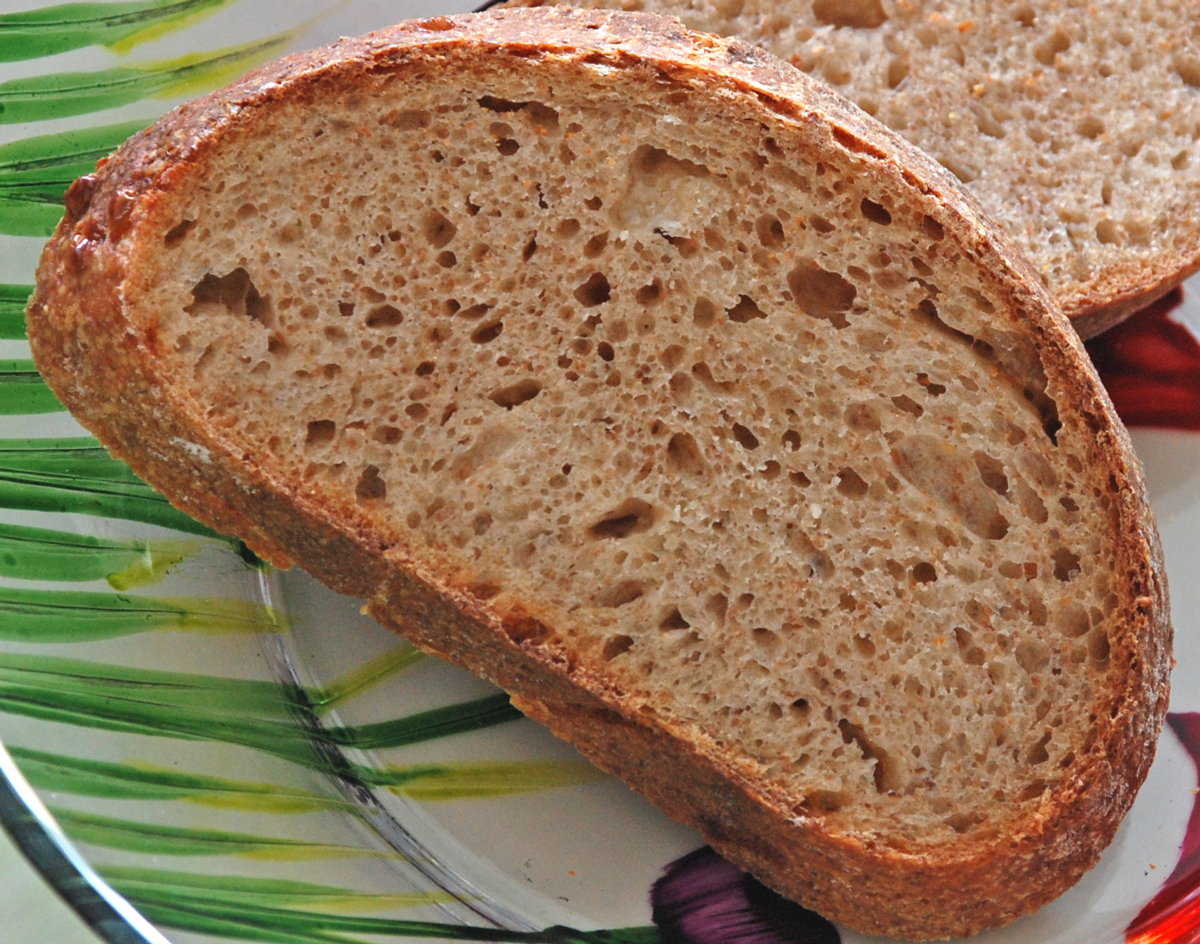
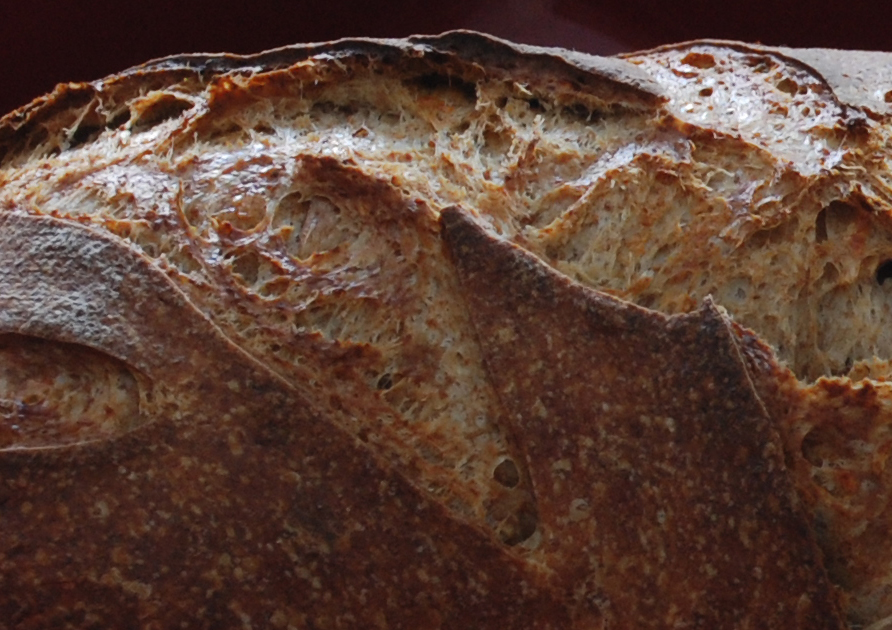
The end result was a nice open flavorful crumb with a crisp and chewy crust.  You can taste the Parmesan cheese but it's a subtle flavor and does not overpower.  This is a nice hearty bread to have with a nice Italian meal or a tasty sandwich.

Enjoy!

Procedure

Yeast Water Starter Build 1

60 grams Durum  Flour (KAF) (note: this is not the same as Semolina Flour which is for pasta)

60 grams Yeast Water Starter

Mix the flour and Yeast Water in a bowl until thoroughly combined.  Cover the bowl and let it sit at room temperature for around 6-10 hours.  The starter should almost double when ready to proceed to build 2.

Build 2

Add ingredients below to starter from above and mix until incorporated.  Cover with plastic wrap and let sit at room temperature for 6-10 hours.

100 grams Durum Flour

100 grams Yeast Water

Build 3

Add flour to starter from above and mix until incorporated.  Cover with plastic wrap and let sit at room temperature for 4 hours or until bubbly and either use immediately or put in the refrigerator for the next day.

100 grams Durum Flour

10 grams Yeast Water

(Note: I made extra starter since I wanted to use this for another bake.)

Sourdough Starter Build 1

63 grams AP Starter

30 grams Durum Flour

33 grams Sprouted Whole Wheat Flour (You can use regular Whole Wheat)

75 grams Water

Mix the flour, starter and water in a bowl until thoroughly combined.  Cover the bowl and let it sit at room temperature for around 6-8 hours.  The starter should almost double when ready to proceed to build 2.

Sourdough Starter Build 2

60 grams Durum Flour

40 grams Sprouted Whole Wheat

100 grams Water

123 grams Sautéed Onions (sautéed in olive oil)

Mix the flour and water with the  starter from build 1.  Cover and let sit at room temperature for 6-8 hours until doubled and nice and bubbly.

Sourdough Starter Build 3

62 grams Durum Flour

40 grams Sprouted Whole Wheat

Add the flour to the starter from build 2 and let it rest covered for 6 hours until bubbly and nearly doubled.

Main Dough Ingredients

200 grams Yeast Water Durum Starter from Above

225 Sourdough Starter from Above

250 grams French Style Flour (KAF) (You can use AP Flour or Bread Flour to substitute)

150 grams Durum Flour (KAF)

100 grams Sprouted Whole Wheat Flour

70 grams Roasted Wheat Germ (this really adds a nice nutty flavor to the bread)

16 grams Seas Salt or Table Salt

51 grams Shaved or grated Parmesan Cheese

22 grams Olive Oil

425 grams Water (80-90 degrees F.)

Procedure

Build your Yeast Water levain and Sourdough starter the day before you are ready to bake.

The evening before you want to bake, mix the flours and the water.  Mix on low-speed in your stand mixer or by hand for about 1 minute until the ingredients are combined.  Let the dough autolyse for about 20 minutes to an hour.

Next add both levains and the oil along with the salt and mix for 3 minutes on low.  After 3 minutes add the cheese and mix for about 1 minute until incorporated.  The dough will come together and be slightly sticky.  Place the dough in a slightly oiled bowl and do a couple of stretch and folds.  Cover the bowl and let it rest for 10-15 minutes.  Do another stretch and fold in the bowl and let it rest another 10-15 minutes.  Do another stretch and fold and let the dough sit out in the covered bowl for another 1.5 hours.  Place the dough in the refrigerator until ready to bake the next day.

When ready to bake take the dough out and leave it covered in your bowl for 1.5 to 2 hours.  Next divide the dough into 2 loaves and either place in a banneton or from into batards and let them rest in floured couches for 1.5 - 2 hours.
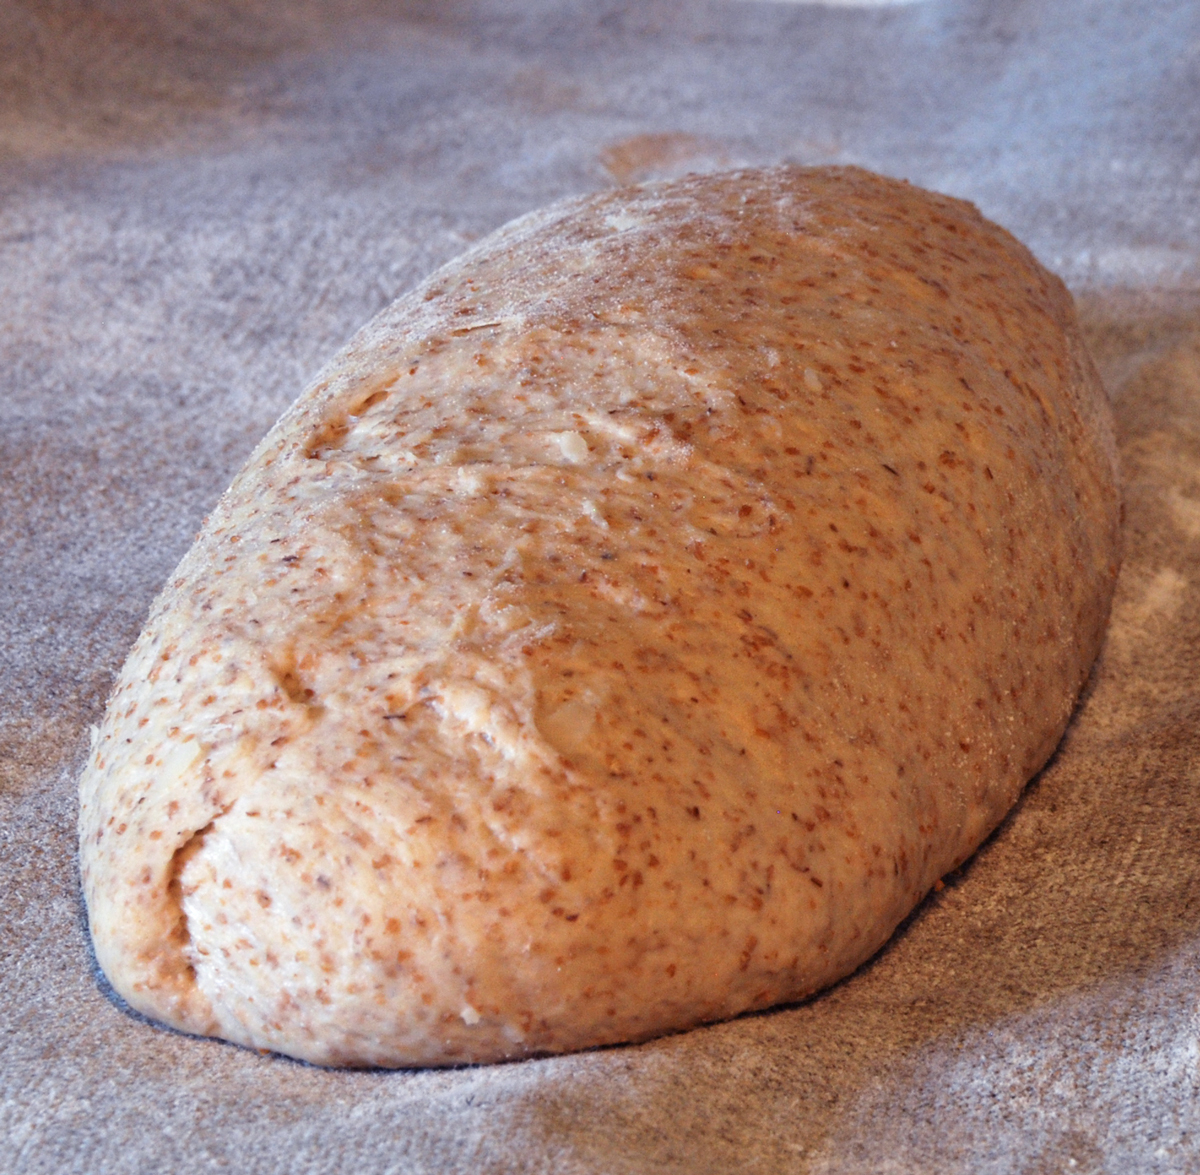
About one hour before ready to bake, set your oven for 500 degrees F.and make sure you prepare it for steam.  I have a baking stone on the top shelf and the bottom and use a heavy-duty rimmed baking pan that I pour 1 cup of boiling water into right as I put the loaves into the oven.

Score the loaves as desired.

When ready to bake place the loaves into your oven on  your oven stone with steam and lower the temperature immediately to 450 degrees.  It should take around 30 minutes to bake  until the breads  are golden brown and reached an internal temperature of 200 - 205 degrees F.

Let the loaves cool down for at least 2 hours or so before eating as desired.

dabrownman's picture
dabrownman

We had one more batch of saved white Italian starter left over from the panettone bake which produced so much excess starter it is nearly obscene.  It was built up over 3 stages and had been previously refrigerated for several days. We decided to do an Italian bread and was torn between an Altamura Pope’s Hat or the Chacon it eventually inspired.


For breakfast a couple of days ago, we were finishing off the last 3 slices of the Eric’s Chacon; a marbling of challah with Eric’s Favorite Rye, toasted with a schmear of grilled salmon and cream cheese and decided to do a chacon in a way we had not done before.   It is funny how bread decisions get made sometimes.


We used the same whole grain variety of Kamut, rye, WW, quinoa, barley and oats with a little potato and Toady Tom’s Tasty Toasted Tidbits this time but reduced to 22% of the flours used so that the rest of the add in goodies could possibly come through a little better.  We kept to the 72% hydration of the last bake and hoped that it wouldn’t end up feeling as wet overall since the scald was deleted from this bake too.


We also decided to reduce the 36 hour retard and final proof in the fridge back to 24 hours after the last batch over-proofed at the 36 hour mark.  Reducing the whole grains in the mix should slow things down a little bit my apprentice noted as well.  She would be pretty smart sometimes if she wasn’t so dumb, if cute, otherwise.


We used a high percent of levain (20%) of the total dough weight again, which is more than we normally would use if we were going for sour, but that is what we had left over and after refreshing it to bread speed.


Some fine bakers like to use large levain amounts in their bakes like Peter Reinhart and our own Ian.  This might have contributed to the over proofing of the last bake though and another reason to go with a 24 hour retarded proof this time. But, after 15 hours it sure hasn’t proofed itself up much in the fridge.


The method was the same this time as the last bake except for the 24 hour final proof and retard in the fridge and we divided the dough into two, not to make two different loaves but to make two different kinds of bread in one chacon.


One half of the dough had kalamata olives, home made sun dried tomatoes and grated asiago cheese added to it and the other half had fresh rosemary, garlic and grated parmesan cheese.  Now that sounded pretty Italian to me but I cut the salt down some to account for the salt in the add ins.


The chacon started with an olive knotted roll in the middle surrounded by a rosemary twisted rope.  The rope was surrounded by balls of alternating doughs.  The remaining dough was separated into 2 ropes each and made into an alternating 4 strand round challah shape.


The ends were braided but instead of being tucked under they were rotated to the side to make the challah larger in diameter.  This was placed on top of the rest of the shapes in the basket.  It didn’t quite cover but we didn’t want to smoosh it up too much to see what the shape would be like on the bottom of the loaf after baking.  Why should top get all the pretty decoration?


This dough was still pretty wet, much wetter than our normal chacon dough, so it will be interesting to see how the shapes come though the cracking stage when baked.  Hopefully it will still crack as expected.  If it tastes half as good as it smells before baking, we will have some fine Italian bread to eat.


Just checked on it and this bread needs much more time in the fridge to proof right so, 36 hours is back on the table but it will have to be 40 hours because I’m not putting this bread in the oven a 5 AM!  Or 10 AM either.

Just put it on the heating pad to warm up and proof before we heat up Big Old Betsy.  It should bake it in A DO to be consistent with the last bake but consistency is far from my baking prowess.

Wow! After 42 plus hours in the fridge and on the counter this bread baked up the deepest, richest, mahogany color with blisters I have seen on any bread coming out of our Big GE.  It was baked on a stone at 500 F for 2 minutes and then an additional 12 minutes at 450 F all under steam with 2 of Sylvia’s steaming pans and a 12” skillet with lava rocks, ala David Snyder, that I threw a half cup of water into as I closed the door.

 This chacon is awfully handsome on the outside and it sure smells just as tasty too.  Can’t wait to slice this bread and have a taste but I will – at least till it cools.  Sadly, all the intricate balls didn't crack due to too much hydration.  The challah on the bottom didn't even show a sign of being there much less crack.

I turned the oven off and cracked the door when the chacon got to 203 F since it was so dark and let it sit on the stone till it hit 205 F on the inside.

The crumb came out not quite as open as the last bake but it was moist and soft.  The crust went softer as it cooled but was mighty tasty and chewy.  This bread is delicious and I can't wait to have it with some lemon flavored olive oil, fresh Italian herbs, black pepper and Italian grated cheese.  This is some kind of delicious that should be patented or illegal.

Formula

Starter

Build 1

Build 2

 Build 3

Total

%

SD Starter

20

0


20

2.92%

AP

35

45

45

125

22.69%

Water

35

45

45

125

22.69%

Total Starter

90

90

90

270

49.00%


Starter


Hydration

100.00%


Levain % of Total

20.50%


Dough Flour


%


Red Malt

3

0.54%


White Malt

3

0.54%


Toady Tom's Tasty Toasted Tidbits

5

0.91%


Quinoa

10

1.81%


Whole Wheat

10

1.81%


Dark Rye

10

1.81%


Spelt

10

1.81%


Barley

10

1.81%


Dark Rye

10

1.81%


Potato Flakes

10

1.81%


Oat Flour

10

1.81%


AP

400

72.60%


Dough Flour

551

100.00%


Salt

11

1.60%


Water

355

64.43%


Dough Hydration

64.43%


Total Flour

686


Total Water

490


Total Dough Hydration

71.43%


Hydration w/ Adds

71.43%


Total Weight

1,317


Whole Grains

22.01%


Add - Ins


%


Asiago & Parmesan Cheese

50

9.07%


Olives & Sun Dried Tomato

80

14.52%


Total

130

23.59%


1/2 T of Fresh Rosemary


1 Clove of Minced Garlic


dabrownman's picture
dabrownman

These rolls are SD / YW, caramelized onion, sun dried tomato, bacon, parmesan cheese Emperor Rolls with Seeds so they are pretty much not Kaiser rolls or semmels any more.  We forgot to put in the basil but left it in the formula.


We were reading a post on another unmentioned site on how to make your own sun dried tomatoes.  Tomatoe are 25 cents a pound for Roma ones this week so no time like the present  to dry them.  Sun dried tomatoes have become increasingly more expensive in the store and are very easy to make at home.  I prefer mine roasted slowly with a little salt and Herbs de Provence packed in olive oil so that you get flavored oil too.


After finishing the tomato drying project we were looking around for a new way to use them besides in our standard pizza dough.  We also needed some hamburger buns for our monthly hamburger dinner.


We usually make these no fancy do shaped buns, with parmesan cheese, basil and apple wood smoked bacon but thought that a few minced sun dried tomatoes wouldn’t hurt them any – unlike what FedEx might do to your next package.


This time the apprentice thought we might give Emperor Roll shaping a try for these rolls and stick some; white and black poppy, white and black sesame, basil and nigella seeds on them with egg.  The (2) multi-seeded ones also had kosher salt and chia seeds in the mix.  We recently found some oregano seeds but forgot to use them on purpose - just to be consistent in forgetting stuff we would have liked to put in our recipes .


We also wanted to enrich our last dough for rolls with an egg to go along with the butter, NF milk and olive oil.  They ended up being 75% hydration our recent norm for white breads.


Kaiser rolls are always plain instead of having seeds on them and oddly they have nothing to do with the Kaiser either.  Odd how things get named isn’t it?  Kaiser rolls originate from Vienna, Austria and were supposedly named after the Emperor Franz Joseph but they are never called Emperor rolls.  So we ended up naming these Franz Joeseph's Emperor Rolls with Seeds.  We can understand how Empress Ying would have every right to be miffed bout this.


We shaped the rolls like they do here:

http://www.kingarthurflour.com/blog/2008/02/28/all-tied-up-shaping-kaiser-rolls/


And not the way Norm does here:

http://www.bing.com/videos/search?q=kaiser+roll+shaping&mid=B286163E82FA4DA942DEB286163E82FA4DA942DE&view=detail&FORM=VIRE5


Had we known it was Norm at the time, we would have shaped them the authentic way.  Next time for sure.


These Emperor Rolls with Seeds came out nicely brown and went soft as summer rolls tend to do in AZ.   Kaiser Rolls should be crusty and hard for NY authentic ones.


Method

We built the YW and SD levains separately over a 6 hour build with equal amounts of flour for each and 69% hydration.   The dough flours were autolysed with the milk for 4 hours.   When the levains and the dough flours came together we added the egg, oil softened butter, salt and malts and squeezed the dough through our fingers until incorporated.

After the dough had rested for 15 minutes, we did the first of (4) sets of S&F’s on 30 minute intervals.  The first one was (16) ¼ turns reducing by 4 turns each successive set.  The dough rested in a plastic covered oiled bowl in between sets.  After the last set the dough was retarded for 12 hours in the 38 F fridge in the oiled plastic covered bowl.

After the retard was complete we let the dough sit out for 1 hour on the counter to warm up.  We then weighed out (10) 112 g pieces and shaped them into balls.  After a 10 minute rest under plastic on the counter, we rolled out the balls into 14”ropes.

After another 10 minute rest they were shaped into Kaiser rolls and placed on parchment paper on cookie sheets to final proof covered in a plastic trash can liner for 2 hours.  The tops wee brushed with egg wash and sprinkled with the seeds.

Big Betsy was fired up to 450 F with (2) of Sylvia’s steaming bread pans with wet towels in them.  After 45minutes the rolls were ready to bake with additional steam provided by the ½ C of water we tossed into the bottom of the oven.

After 2 minutes the temperature was turned down to 425 F and then down to 375 F when the steam came out at the 10 minute mark. The rolls were rotated 180 degrees every 5 minutes after the steam was removed to ensure even browning.  They were removed from the oven when they reached 205 F internal temperature about 25 minutes including the steam.  We didn’t brush the tops with milk to keep them soft when they came out of the oven like we normally do since we thought they would go oft enough on their own

Formula

YW / SD Combo Starter

Build 1

%

SD Rye and Desem Starter

20

3.56%

Yeast Water

50

12.44%

AP

150

17.41%

Water

50

12.44%

Total Starter

270

34.83%


Starter


Hydration

68.75%


Levain % of Total

25.94%


Dough Flour


%

AP

350

87.06%

WWW

52

12.94%

Dough Flour

402

100.00%


Salt

8

1.99%

Non Fat Milk

262

65.17%

Dough Hydration

65.17%


Total Flour

562


Milk and Water

372


T. Dough Hydration

66.19%


Whole Grain %

11.39%


Hydration w/ Adds

74.53%


Total Weight

1,041


Add - Ins


%

Butter

28

6.97%

Egg

57

14.18%

Red Rye Malt

1

0.25%

White Rye Malt

1

0.25%

Olive Oil

12

2.99%

Total

99

24.63%


3 Thick Apple Wood Smoked Bacon Strips

2 T Chopped basil


4 T Caramelized onion.


1/4 C Grated Parmesan


2 T Sun Dried Tomato


Epsilon's picture

Newbie's first loaves!

August 25, 2012 - 12:24pm -- Epsilon
Forums: 

This is part me showing off, part asking for input. :)

A bit about me - I've always enjoyed cooking, but just recently (as of a week ago) dove into bread-making for the first time ever when I bought a few packets of active dry yeast on a whim. I've made two batches, and I've got my third one retarding in the fridge. I've already bought a proper jar of yeast (rather than packets,) and I've got an attempt at cherry yeast water brewing in the kitchen at the moment.

... yeah, I'm kind of addicted already. ;)

dabrownman's picture
dabrownman

We have been baking with YW, Combo YW / SD and straight SD lately but have not had the chance to compare identical YW and SD recipes to see how they might compare.  We recently made a Joe Ortiz Desem Starter that we really liked so decided to use WW to build each of the starters to the same 90 grams of levain with the same 80% hydration.


We usually want somewhere around 40 % whole grains minimum in our breads with sprouts and seeds, but since these rolls were going to be used for our monthly hamburger dinner we skipped the sprouts and seeds but added fresh chopped basil, caramelized onions, bacon and parmesan cheese instead. 

Yeast Water version is first for pictures.


These additions reflected isand66’s (Ian’s) bacon, caramelized onion and cheese bread we rank in our top 5 and his roll bake this week along with breadsong’s roll bake this week that had basil and parmesan cheese in it.  We thought combining the 2 would make for a very nice bun for our grilled poblano chili, caramelized onion and mushroom, cheese burger we were planning for dinner.


Since it is summer, we planned on bailing the rolls in the mini oven using (2) of Sylvia’s steaming cups designed for it.   We are amazed the varieties of well baked bread that come out of that little oven.


This was no exception.  Both rolls were soft and moist inside with the YW being more so but the SD was more open.  The crusts came out nice and crusty but were immediately toned down to nice and soft by brushing milk on them immediately – no one wants a hard hamburger bun. The crust on the SD was darker and more blistered and the spring was greater.  The SD rolls were baked last when the oven temperature and steam were working better.

Now for the Desem SD pictures


The YW rolls were slightly under baked and the SD ones were slightly over baked even though both were baked the same way and for the same time and temperature exactly.  Since only the levain was retarded, the SD tang was muted for the SD rolls and there was no SD tang in the YW as expected.

We liked both of these rolls equally well and have now found our new go to hamburger bun and possible bruschetta  bread.  We will add 10g each of potato flakes and ground oats with a little garlic and 12g of water to the recipe next time to make it even better.  We just forgot them this time by mistake.


Method

The levains were built over (2) 3 hr and (1) 2 hr build before being refrigerated overnight.  Home ground whole wheat was used for the levains in keeping with the normal Desem starter feed.  We also ground the soft white whole wheat berries.


Each  dough was made by hand mixing the levain and non fat milk together first to break up and liquefy the levain, then the flours, butter and oil were added.  We added the fat to give the rolls an even more tender and moist crumb.  The dough was then hand kneaded for 4 minutes and allowed to rest for 15 minutes in an oiled, plastic covered bowl.

YW is on the right in side shot and on the left in the crumb shot.  The spirng better for the SD - quite unexpected.


(4) sets of S & F’s were done on 15 minute intervals with the herb, onion, bacon and parmesan added in on the third set.  The dough was then allowed to ferment and develop for 90 minutes.

Each batch made (6) 111 g rolls.  After dividing, the rolls were S&F’ed to shape and then rolled under the palms of the hand until the skin was tight and the fold seamed shut.  The rolls were then proofed for 2 hours on parchment in a plastic bag.

YW on the left, SD on the right.


The oven was preheated to 500 F and Sylvia’s (2) Pyrex cups, half full of water with a wash cloth in them were heated until boiling in the microwave.   The rolls with parchment were placed on the top part only of the mini’s broiler pan with the steaming cups and loaded in the lower rack for 10 minutes of steaming.  After 2 minutes the temperature was turned down to 425 F.

Who wants a plain cheeseburger?


When the steam came out at the 10 minute mark, the baking rack was moved to the upper level and the temperature turned down to 375 F convection this time.  In 5 minutes the rack was rotated 180 degrees and moved to the lower level for 5 more minutes of baking. 

When you can have one of these.  Both have grilled poblano peppers, Alpine Lace, Emmenthaler Swiss and brie cheese, caramelized onion and mushrooms.  One has lettuce and tomato and one does not.  Either makes any architect a proud builder :-) Even Lindy's on 4th in Tucson would have a hard time beating these burgers and no way they can beat the buns!


At 20 minutes the rolls were deemed done and removed to wire cooling racks where they were immediately brushed with milk to soften the crust for hamburger buns.

Brownman's Banana Bread made as a sheet cake For desert.

Formula follows the pictures.

YW StarterBuild 1Build 2 Build 3Total%
Yeast Water25200452.86%
WW152194515.00%
Total Starter404199030.00%

Or the Desem starter below

Desem SD, Caramelized Onion, Basil, Bacon,  Parmesan Rolls     
      
Desem StarterBuild 1Build 2 Build 3Total%
SD Desem Starter1000102.86%
Rye00000.00%
AP00000.00%
WW152194515.00%
Water152003511.67%
Total Starter404199030.00%
      
Starter     
Hydration80.00%    
Levain % of Total14.49%    
      
Dough Flour %   
Semolina5016.67%   
Bread Flour7525.00%   
Soft White Whole Wheat5016.67%   
AP7525.00%   
Durum Atta5016.67%   
Dough Flour300100.00%   
      
Salt62.00%   
Non Fat Milk19565.00%   
Dough Hydration65.00%    
      
Total Flour350    
Milk and Water235    
T. Dough Hydration67.14%    
Whole Grain %42.86%    
      
Hydration w/ Adds68.29%    
Total Weight621    
      
Add - Ins %   
Butter206.67%   
Olive Oil 103.33%   
Total30

10.00

   
 Add ins are split between  12 rolls     
3 Bacon strips     
4 T Chopped basil     
6 T Caramelized onion.     
1/4 C Grated Parmesan    


milwaukeecooking's picture
milwaukeecooking

Sun-dried parmesan bread

This was my kitchen sink recipe.  I accidentally made too much baguette dough so I decided to throw some of it in my banneton with a few added extras.  I had sun-dried tomatoes around and I had recently ground up some parmesan.  So, I thought, why not mix it into my extra dough.  Before putting it into the oven I spritzed it with water and gave it a sprinkling of cracked pepper.  Out of all the breads I have made this one actually made my mouth water when it was baking.  The smell was incredible.  Here is how I made it. 

Follow my poolish recipe for the dough.  I made 900 grams of dough for this recipe.

After the second rise lightly flatten out the dough into a square that is roughly 12"x12".  On one half of it sprinkle 1/4 cup ground parmesan cheese and then, on top of that, gently press in 1 cup of chopped sun-dried tomtatoes.  Leave 1/2 inch of dough around the edges so that you can seal it back up again.  Fold the empty side over the top of the tomatoes and press down on the edges to seal.  Flatten the dough slightly and business fold it into thirds (like you are mailing a business letter).  Let your dough rest for 5 min and business fold again.  I folded mine three times. 

At this point you should have a few layers of tomato and you will want to shape your dough into a boule.  You don't need a banneton for this because all of the folding and shaping has made your dough fairly tough and it will stand on its own.  However, let your boule rise for an hour, until doubled, before baking. 

Pre-heat the oven to 500F while your dough is rising.

Right before baking spritz your boule with water and top with pepper.  You need the pepper...trust me. 

 Spray the walls of your oven with water and bake for 2 minutes.  Repeat.  Repeat.  Turn the heat down to 425

Bake again for 20 min at 425.

Rotate your bread 180 degress and turn the heat down to 400 and bake for 20 min.  

Check the temp of your bread.  If the internal temperature isn't over 195 it isn't done.  The optimal temp is between 195 and 205. 

I wanted to take pictures of the crumb so you could see the tomato goodness inside but it got eaten before I could remember.  Next time I will post a picture of the crumb.  This is a recipe that I would like to re-create again. 

sun-dried parmesan bread

http://veggieinmilwaukee.wordpress.com

Subscribe to RSS - parmesan