The Fresh Loaf

A Community of Amateur Bakers and Artisan Bread Enthusiasts.

Pandoro

d_a_kelly's picture
d_a_kelly

This one isn't very seasonal at the moment, but I love eating it for breakfast. It's so buttery and soft that I really don't think it needs an accompaniment. The recipe is taken from "non solo zucchero vol.II" where it is called pandoro evolution, but it is very similar to the pandoro a sfoglia from Cresci. 

Main impasto - in grams

sweet starter (50% humidity) 45

dry active yeast 3

very strong flour 179

sugar 36

unsalted butter (soft but not melted) 27

egg 107

salt 3.5

half a vanilla pod 

melted butter flavour 0.3 (I've made this before without the flavouring and it tasted exactly the same - but it's in the recipe so I've included it here).


mix all the ingredients together and work it until it forms a smooth, elastic dough. It should be strong and windowpane, but still very slightly sticky. Wrap it in plastic and put it in the freezer. I left it in there for an about an hour, but the book actually recommends overnight at -10C. While this is firming up, I worked on the butter for lamination:

softened unsalted butter 147

icing sugar 39 


mix the two ingredients together thoroughly, then pat into a square, wrap, and put in the fridge to firm up. When both parts are at the right consistency, take 362 of the dough and laminate it as if you were making croissants - 3 simple turns in total, with at least half an hour between each turn. It ought to look something like this when you've finished:


the total weight is 550g.

The difficult bit is then forming this into a ball without breaking the laminations. The book gives absolutely no guidance here whatsoever! I usually fold the ends underneath and then roll it around until it looks more or less spherical. I doubt very much that this is the best method! The dough by this point is really quite resistant to being shaped. 

It looks so tiny in the tin - it's hard to believe that it can possibly fill it!

Leave it to prove at about 27C and at least 60% humidity for about 10 - 12 hours. I left mine for 10 hours. 

I think it could easily have grown even more than this, so next time I might put less dough in the pandoro tin. As it was, it was just about to start spilling over the edge. If my shaping of the ball had been better then I also think this might have helped.

Leave it in the open air for about 30 minutes in order to form a skin on the dough and then it goes in the oven for 30 minutes at 170C. Leave it in the tin for a few hours after cooking before turning out. Mine stuck a little bit - I should have used more flour and butter to grease the form. 

When it's ready to eat (after a few days), dust it in icing sugar and enjoy! 

I was very happy with the crumb on this one - really light and shreddy, with a wonderfully complex buttery taste. It just fell to pieces as I was cutting and eating it. 


David

FlourChild's picture
FlourChild

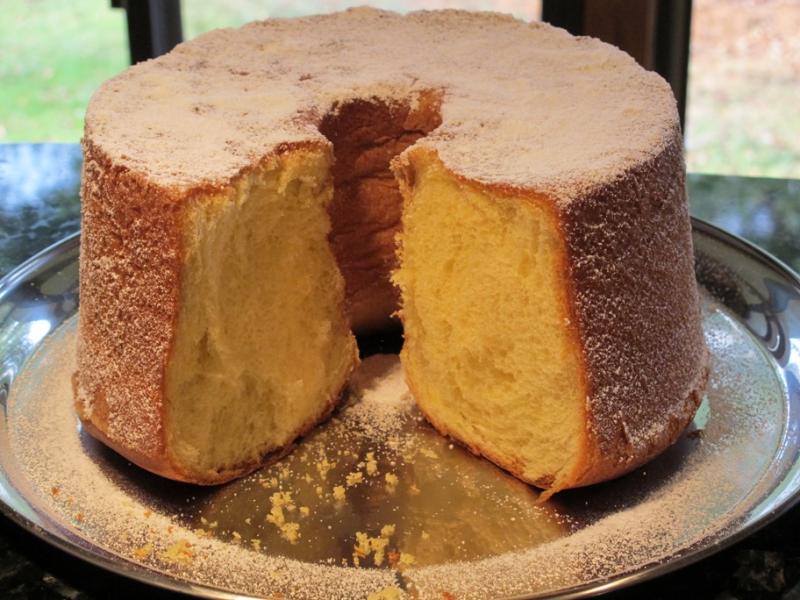
This is my first go with Maggie Glezer's Pandoro (from Artisan Baking), and all things considered I'm quite pleased with it.  There are two amazing things about this bread.  The first is how something with that much sugar and butter can be so light and ethereal-  I'm stunned by the texture.  The second is the balance of flavors.  It doesn't come across as too eggy, it doesn't taste only of butter or vanilla, and it isn't obviously a sourdough.  But put them all together in just the right balance, and they add up to a beautiful, rounded, perfumed and complex flavor.  I was so very happy when this bread was baking, I don't think I've ever smelled something quite that good from my oven.

The dough largely followed the schedule in the book, with the exception that the first build took about 50% longer (6hrs vs 4) than it was supposed to, but I attribute that to my tendency to feed starters a little too early, so it needed a bit of time to catch up.  Once it did, the rest of the stages proceeded right on time.  I used my folding proofer set at 78F.

The only other issue I had was that my paddle attachment was just not capable of mixing this super-sticky yet strong dough.  I have a KA 600, and this dough only worked when I switched to the dough hook.  With the paddle, it just wrapped around and would not come off for anything, not with a spatula, not with high speeds.  I finally had to slice it off with a sharp knife.  

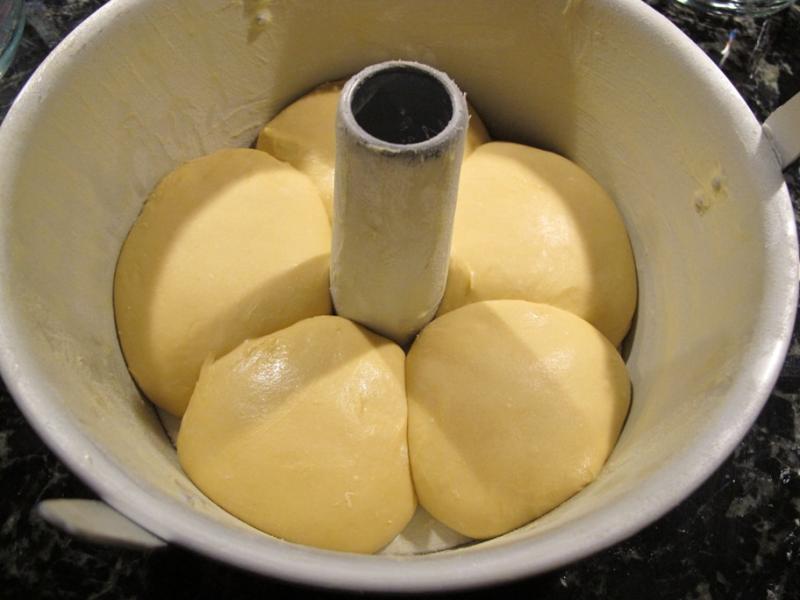
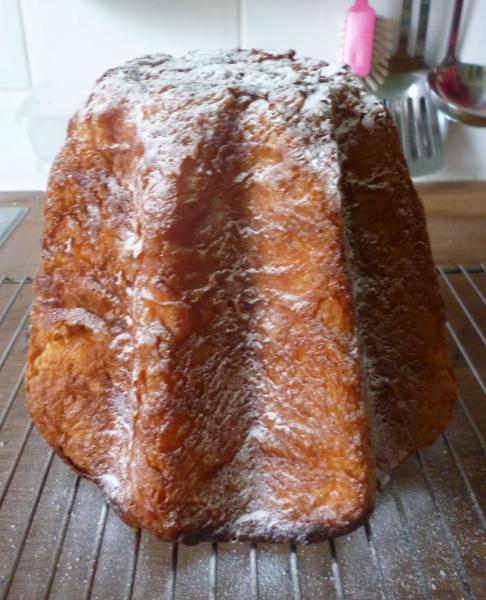
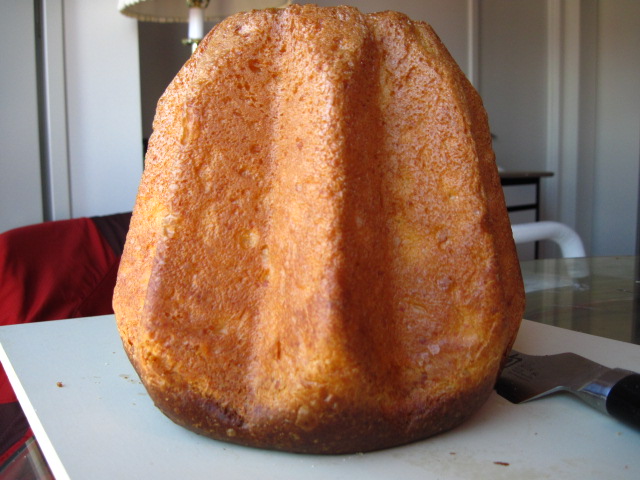
I used a large tube pan (16 cups capacity) instead of two eight cup pandoro molds, as I wanted to see how the bread was before buying more pans.  Looks like I'll be in the market for some star-shaped molds this season:)  

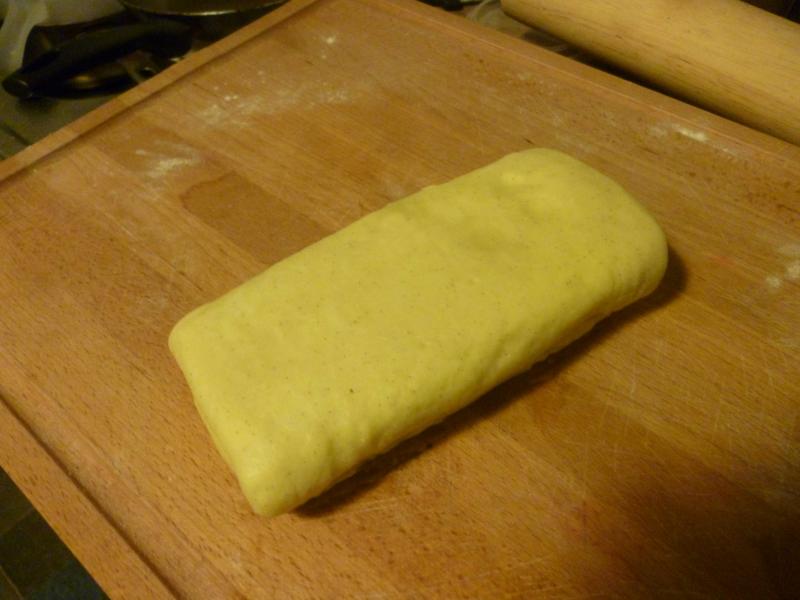
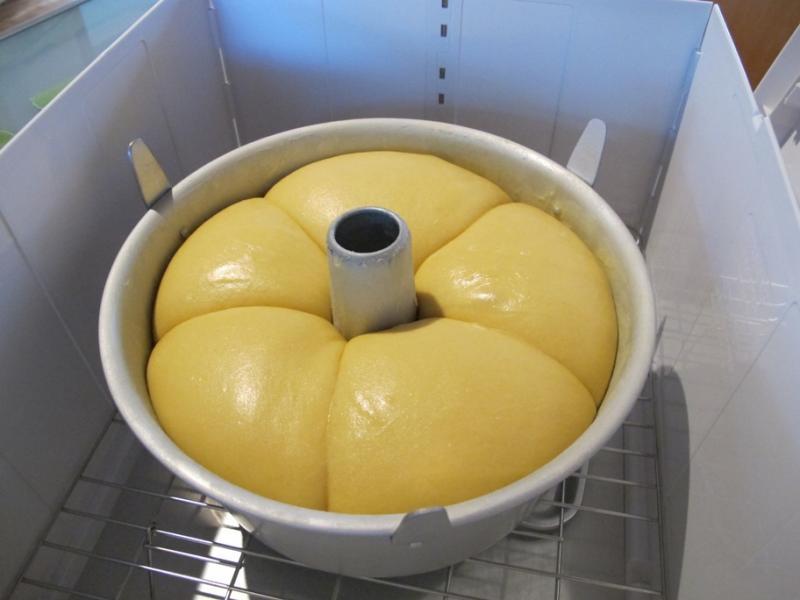
The final proof takes the dough up by more than quadruple, from the picture above to the one below.  Not bad for a naturally-leavened bread with just 0.2% yeast.

I don't want to post Maggie Glezer's recipe, but Artisan Baking is a lovely book to read or check out of the Library.  This bread was the reason I made a starter last year, and though it's taken me a while to collect all the ingredients (like cocoa butter, high-gluten flour and osmotolerant yeast), I'm glad I finally got around to making it.  

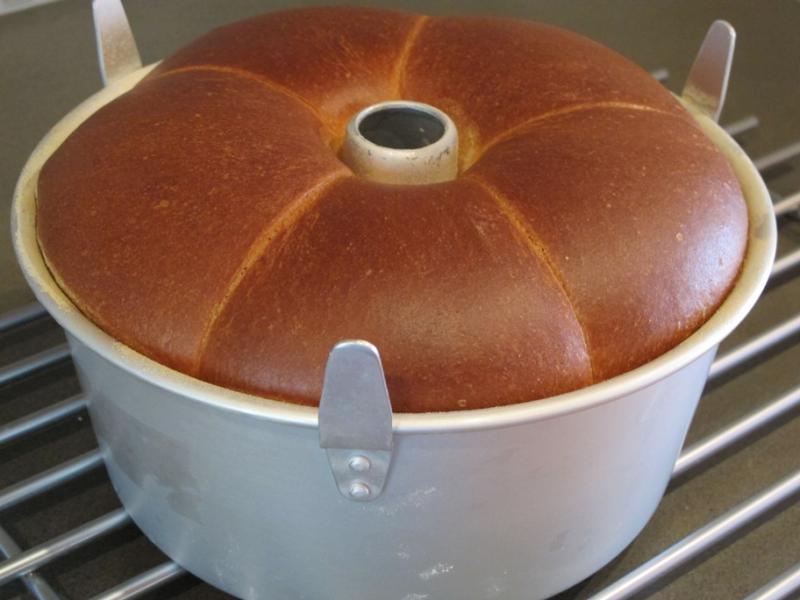
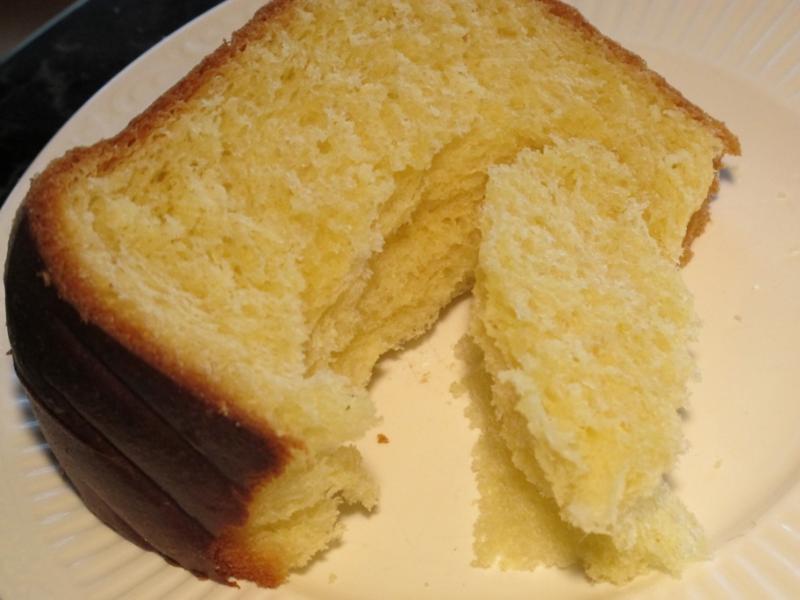
The top is prettier than the bottom, if I make it in the tube pan again I think I'll keep it right side up.

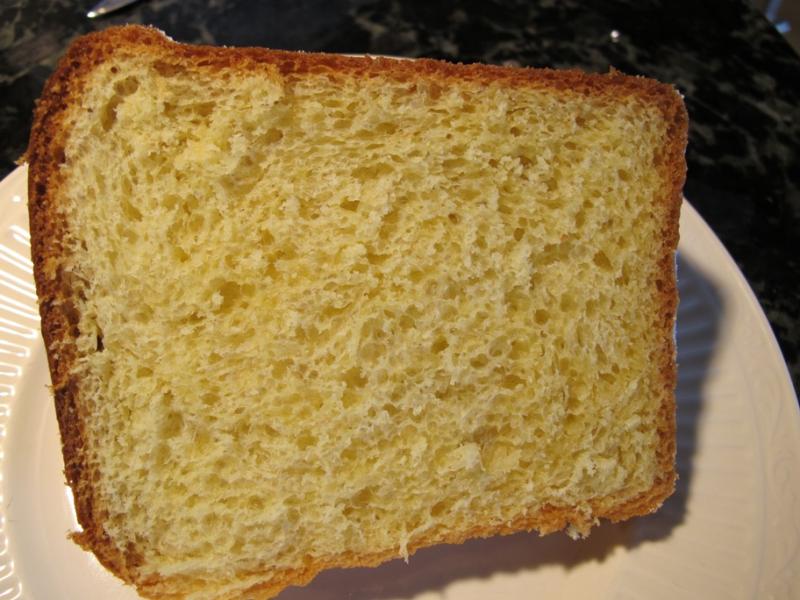
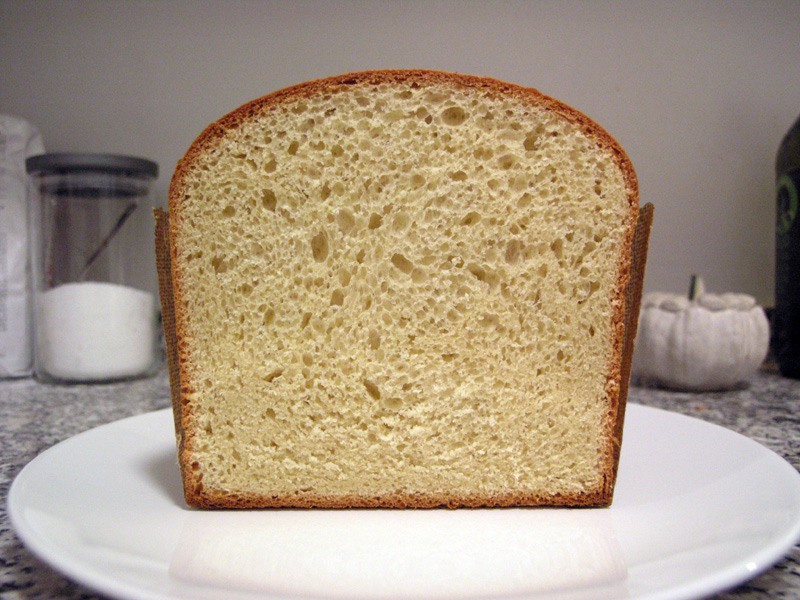
The ethereal crumb, so soft and light.  It even had a bit of shreddability.  Next time, I'll try a bit longer/slower mixing to see if I can get more shredding.

This would be the perfect seasonal viennoiserie for anyone who isn't crazy about the fruit in a panettone, or who appreciates light textures.  The bread has 17% of its flour pre-fermented, more  than 42% butter/cocoa butter, 0.2% osmotolerant yeast, 68% eggs/yolks, more than 41% sugar/honey, and hydration of 73% (taking into account the water content of eggs, honey, butter, etc.).  

yy's picture
yy

Over the weekend, I finally worked up the courage to try making Bruno's Pandoro from Maggie Glezer's Artisan Baking. I followed the the formula almost exactly. The one thing I changed was to replace all of the whole eggs in the formula with an equal amount of egg yolks by weight. I had the idea in my mind that this would give the final product better color and flavor (more on this later).

Though time consuming, the process was much easier than I anticipated. The dough wasn't entirely successful. As you can see in the photo below, there were little coagulated chunks that never broke up. I'm guessing they came from the step where I added flour and egg yolk to the first dough. The egg yolk bound with the dry flour to form little chunks that couldn't be dispersed by mixing. 

It took a full 27 hours at around 72 degrees F for the dough to go from this:

to this:

Here's the result (from the larger mold)

In retrospect, I should have filled the molds just a tad more to get that big pillowy base that pandoro should have. Given the limited amount of oven spring, it was the correct decision to bake when I did, or the loaves would have collapsed. I had to decrease the oven temperature from recommended 350 F to 325 F about twenty minutes into the bake because the tops were getting too dark. 

The crumb:

I wasn't too happy about the crumb, which had a spongy cake-like texture. I'm looking for a pillowy soft bread-like texture with shreddable strands. I'm not sure how much of this shortcoming is attributed to the amount of egg yolk I used, and how much is attributed to adding the butter/cocoa butter to the mix too rapidly or too soon. The uneven chunks indeed proved to be unpleasant in texture. 

The egg yolk flavor turned out to be too strong and gave the bread a "gamey" flavor, if that makes any sense. Next time, I'd like to make the loaf a little sweeter, use whole eggs just as the formula prescribes, increase the vanilla, and perhaps increase the proportion of cocoa butter, which I would like to stand out more in the flavor profile. 

Despite the pandoro not being perfect this time around, it still makes for a great breakfast (smeared with nutella), and it was a lot of fun to work with the silky, runny dough. 


yy's picture

Looking for an Italian pandoro mold

November 9, 2011 - 7:57am -- yy

Hi everyone

I've been looking all over the internet for an Italian pandoro mold that's available in the U.S. or that ships to the U.S. for a reasonable price. Most of what's available seems to be of the Portuguese variety, which has deeper pleats and a wider flare. The photo below shows what I'm looking for (taken from mwilson's blog at staffoflife.wordpress.com)

breadbakingbassplayer's picture
breadbakingbass...

Hey All,

Just wanted to share with you probably my most successful attempt at baking a pandoro like bread to date.  I have tried baking this type of bread along with panettone with little success since college (15 years or so).  I sort of improvised this recipe so I can't vouch for the "authenticity" of it but I can assure you that this is the best tasting, best textured bread using lots of eggs, milk, butter and sugar that I have ever baked.  I have also opted to use only my stiff sourdough starter to leaven this thing, and have mixed everything by hand.  I probably should have done a better job documenting, but it's too late now.  I also used the paper panettone molds as I don't have the traditional star pandoro molds.  As a final note, this bread takes forever to make, and forever to rise.  Don't rush it.  It is ready when it's ready...

Enjoy!

Tim

Recipe
Sweet Starter
110g AP
46g egg (1 extra large egg)
16g sugar
50g stiff SD starter @ 50% hydration
222g approx starter yield

6/29/11
**Stiff SD starter should be fed 1 to 2 days before and kept in refrigerator.
10:45pm - In a bowl, mix all sweet starter ingredients, knead until well combined, cover and let rest 15 minutes.
11:00pm - Knead sweet starter for a minute or so until the dough is smooth, wrap in plastic wrap tightly and tie with a twist tie.  Please in a covered plastic container and place in refrigerator on top shelf (not in coldest part).  Go to bed.

Final Dough
500g AP
164g eggs (3 extra large eggs)
136g whole milk (scalded and cooled)
100g sugar
225g unsalted sweet cream butter (2 sticks) at room temp.
12g Kosher salt
12g honey
2 tsp vanilla extract
222g sweet starter
1372g approx dough yield

2 paper panettone molds 5" diameter, 3 3/4" tall

6/30/11
10:00pm - Weigh out all ingredients using a digital scale.  Scald milk and let cool.  Take out sweet starter out of fridge.  The starter should be well expanded, like a balloon.
11:00pm - Place all the flour into a large mixing bowl along with the salt, create a well in the center, add the eggs, milk, vanilla extract, honey, mix with a rubber spatula into a shaggy dough, then knead by hand in bowl for a few minutes until a relatively smooth dough has formed.  Cut sweet starter into a few pieces and knead into dough. This operation should take about 15 minutes.
11:15pm - 11:30pm - Cover and let rest.  Place entire bowl into a large plastic bag.
11:30pm - Knead in sugar by hand.  About 1/3rd of total amount at a time until all this sugar is added.  This should take about 10 minutes to do.  
11:40pm - 12:00am  - Cover and let rest.  Whip the butter with a wire whisk until fluffy.  Butter panettone molds and refrigerate.
7/1/11
12:00am - Knead in butter by hand.  About 1/3 of total amount at a time until all the butter is incorporated.  This part is particularly gross.  Add the butter, and squeeze the butter into the dough with your hands.  The dough will look like it's falling apart, but it will eventually come back together.  Do not worry about kneading the dough until it passes the windowpane test.  It just won't happen by hand, or with AP flour.  This should take about 15 to 20 minutes.
12:20am - Divide dough into 2 equal portions, shape into a boule, place in separate bowls, cover and let rest.
12:45am - Final shape, and place into butter molds, cover with plastic wrap, place on sheet pan and into large plastic bag and refrigerate overnight.  Dough should fill the mold about 1/4 to 1/3 of the way.  Go to bed.
7:30am - Take out of refrigerator and place on kitchen counter.  Let rise.  Go back to bed, or make some coffee...
9:30am - Have breakfast.
12:30pm - Go out and take a walk, do some shopping.
3:00pm - Come home to check on the pandoro.
4:00pm - Place oven rack on 2nd from the bottom.  Preheat to 400F.
5:00pm - When the pandoro domes slightly above the top of the mold, egg wash if you like, place them into the oven on a sheet pan, turn down oven to 350F and bake for 40-45 minutes or until the internal temp reaches 190F.  


5:45pm - take out of oven, check internal temp.  Cool on wire rack and let rest for at least 12 hours.  Try not to cut into them before they have cooled completely...

Here's the crumbshot:

jgrill's picture
jgrill


Last week I mixed, and baked my first pandoro, the Italian cake, rich with sugar, butter, and eggs, as well as cocoa butter, and a bit of vanilla extract (from Maggie Gleezer's Artisan Baking).


This was much more a batter than a dough, and was not easy to shape into a log, and from that, into a ball…in fact, I was happy to get it into the pans.

I did let it rise from about 6:30 P.M. until  almost 7 A.M., and by then it had still not domed above the tops of the tins. I put both tins in my upper oven, and turned on the oven to "proof," and they did rise a bit more. Then I baked them in my lower oven at 350° F for 30 minutes, rotating the pans at 15 minutes.


Can't yet comment on flavor as these will be served on Christmas day, but the aroma is wonderful. Hope I don't forget the powdered sugar.


Update: I didn't forget the powdered sugar (My wife, Linda, made sure some was placed in a baggie for each cake when we took them to two separate family food events christmas day).

Flavor was excellent—sweet, but not too sweet. Cakes were light, and altogether well received by all who had a slice. I am pleased, and will make these again (as I now have a lot of cocoa butter).


Subscribe to RSS - Pandoro