The Fresh Loaf

A Community of Amateur Bakers and Artisan Bread Enthusiasts.

oat flour

Isand66's picture
Isand66

The storm has come and it has delivered as promised.  Here on the South Shore of Long Island where I live we spent most of the morning digging out of 20+ inches of icy heavy snow.  In between the snow plowing and digging I managed to shape and get my latest bread in the oven.

Using the 36 hour technique I adapted from TxFarmer's blog posts on The Fresh Loaf, I made a hearty style loaf with my favorite cherry flavored tea, fresh chopped cherries and some oat flour.  I used the oat flour in the levain as well as the final dough.  Some potato flour and malted wheat flakes were added to round out this dough.

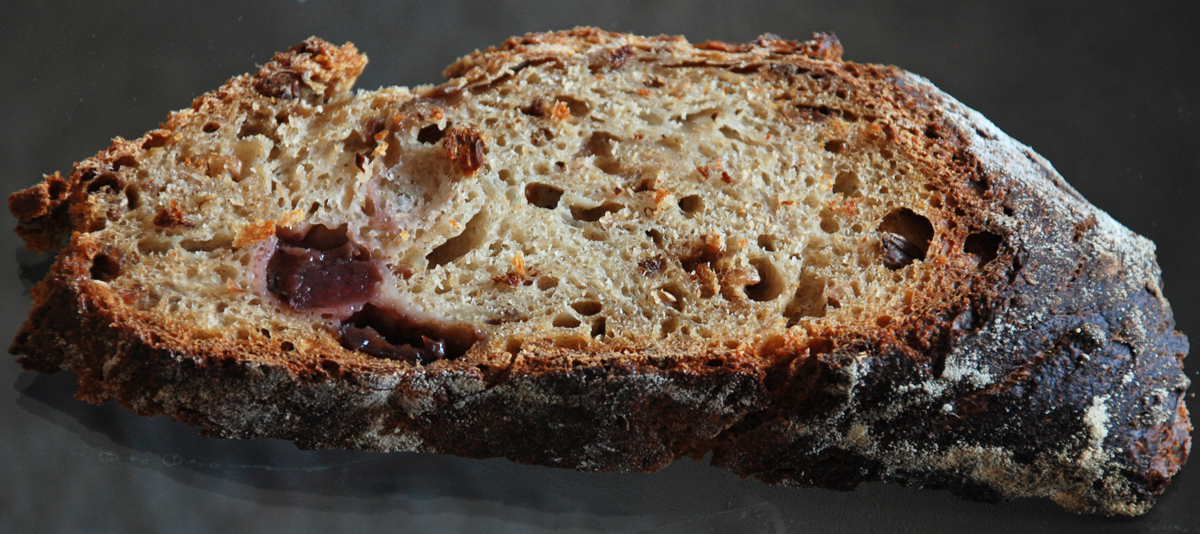
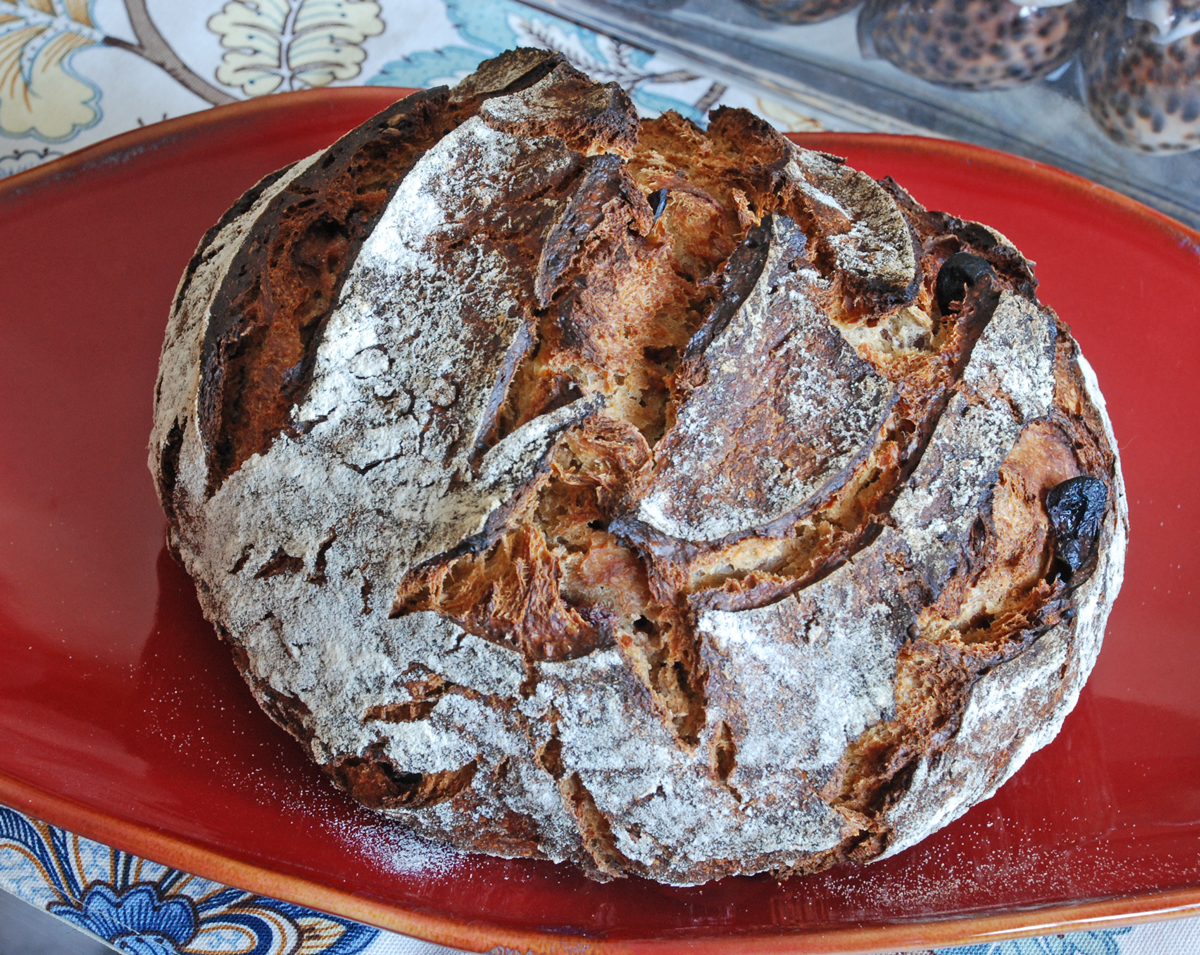
The end result was a nice moist crumb with a great chewy crust with cherry chunks.  This was a large loaf and took almost 2 hours to bake.  I lowered the temperature to 425 F. to prevent the crust from getting too dark which is one of the reasons why it took so long.

This exciting technique takes a while but it is worth it. I actually let the dough retard longer than 24 hours called for in the recipe due to my schedule and I don't think it effected the final bread either way.

Directions

Starter Build 1

104 grams Seed Starter (Mine is a 65% White AP starter)

100 grams Oat Flour (KAF)

200 grams European Style Flour (KAF)

203 grams Water at Room Temperature (80-90 degrees F.)

Mix ingredients in a bowl until thoroughly combined.  Cover the bowl and let it sit at room temperature for around 8 hours.  The starter should almost double when ready to proceed.

Starter Build 2

All Starter from Build #1:

35 grams Water at Room Temperature (80-90 degrees F.)

Mix ingredients in a bowl until thoroughly combined.  Cover the bowl and let it sit at room temperature for around  4 - 6 hours.  The starter should almost double when ready to proceed.

Main Dough Ingredients

300 grams  Starter  from above (note: you should have a small amount left over)

450 grams European Style Flour

200 grams Oat Flour (KAF)

100 grams Potato Flour

100 grams Malted Wheat Flakes

20 grams Seas Salt or Table Salt

88 grams Fresh Cherries (Pitted and chopped)

600 grams Cherry Tea Iced  (Make sure the tea is ice-cold before using.  I added the hot tea to ice cubes)

Procedure

Mix the flours, malted wheat flakes and the ice tea together in your mixer or by hand until it just starts to come together, maybe about 1 minute.  Put the dough in a slightly covered oiled bowl and put in the refrigerator for 12 hours.

The next day add your starter and salt to the dough and mix by hand until it is thoroughly mixed and evenly distributed.  Due to the high water content in the 100% hydration starter this dough is very easy to mix by hand and is very silky and smooth.

Bulk rise at room temperature for 2-3 hours until it grows around 1/3 in volume doing stretch and folds every half hour until it has developed the correct amount of strength.  During the last stretch and fold flatten out the dough slightly into a rectangle and add the chopped cherries.

Put the dough back into the refrigerator for around 20-30 hours.  I ended up letting it go around 30 hours.

When you take the dough out of the refrigerator you want it to have almost doubled in volume.  Mine only rose about 1/3 in volume.  Let it rise at room temperature for around 2 hours or until the dough has doubled from the night before.

Next, shape as desired.  I made a large Miche and placed it in my cloth lined basket.  Make sure you use enough rice flour with flour in your bowl/basket to prevent this moist dough from sticking.
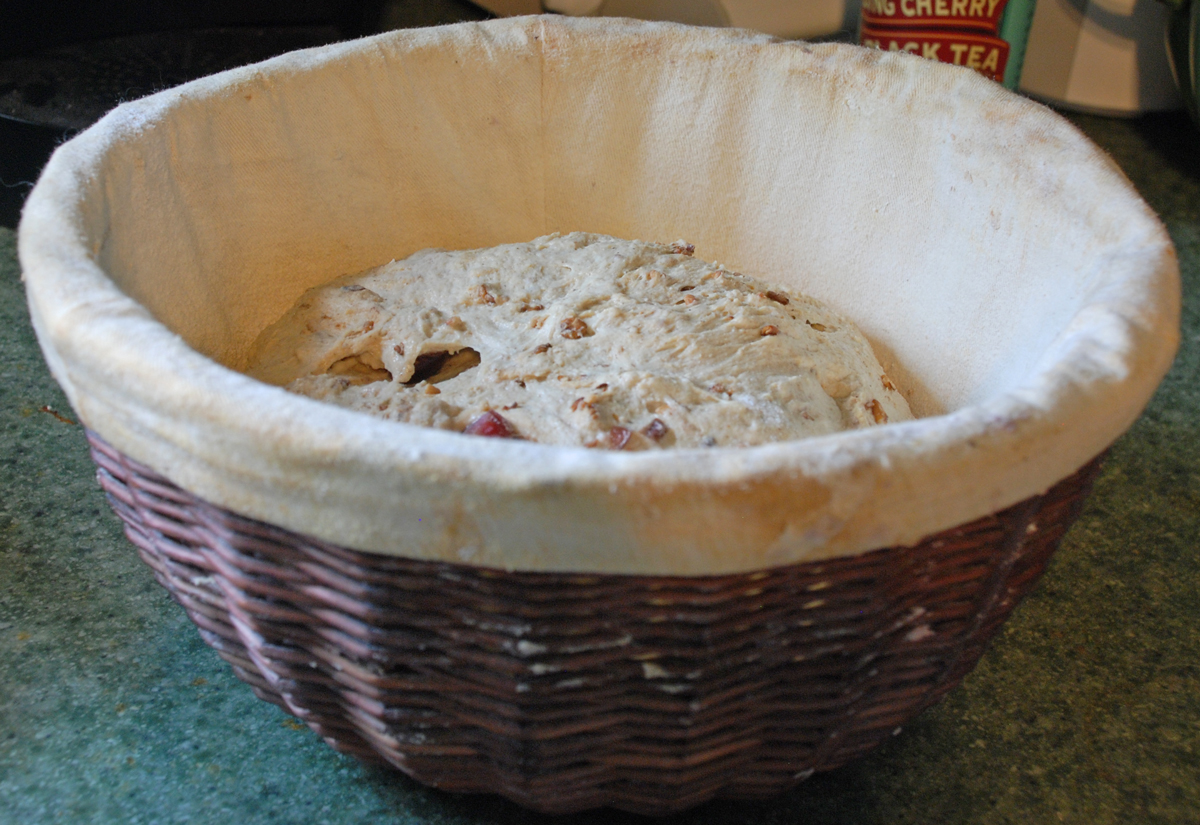
Cover the dough with a moist towel and let sit at room temperature for 1.5 to 2 hours.
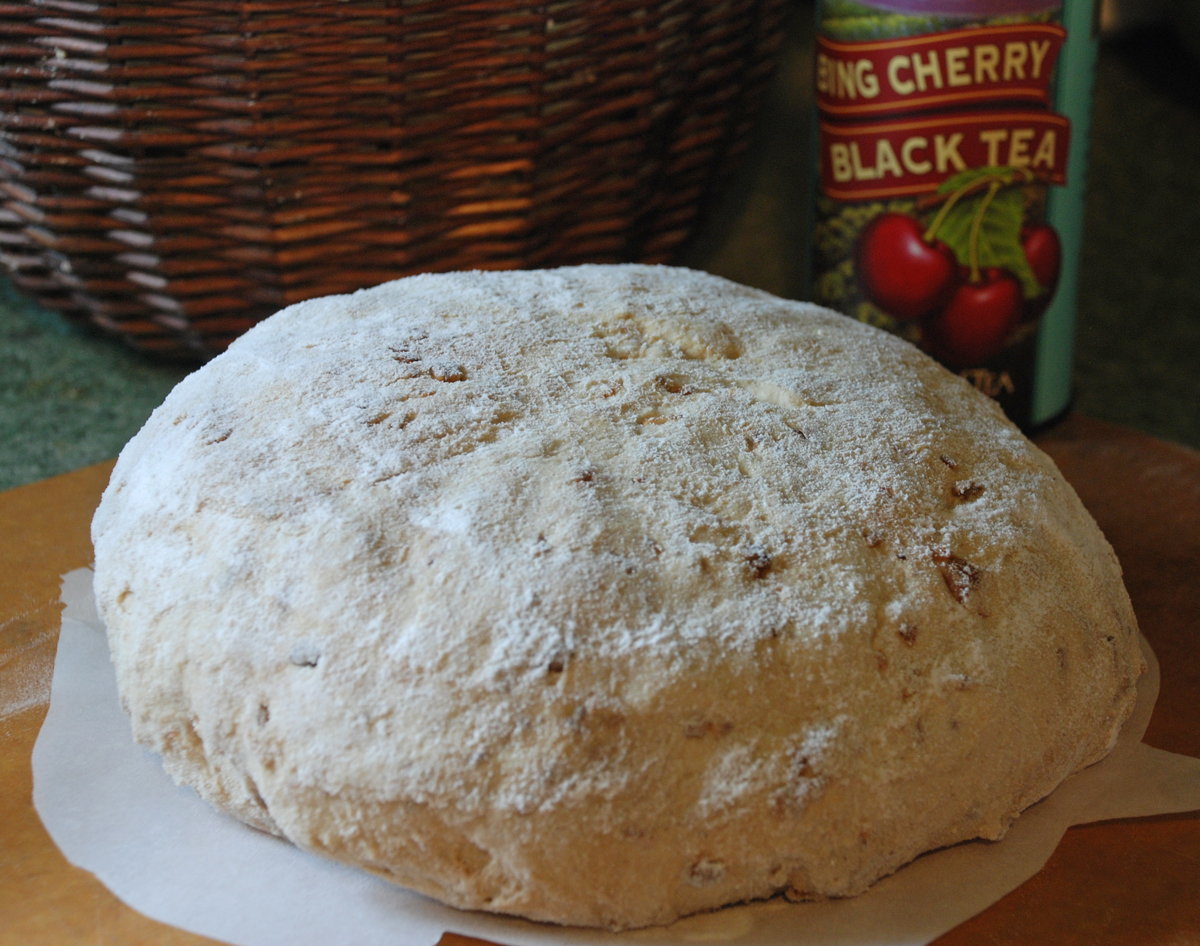
Score as desired and prepare your oven for baking with steam.
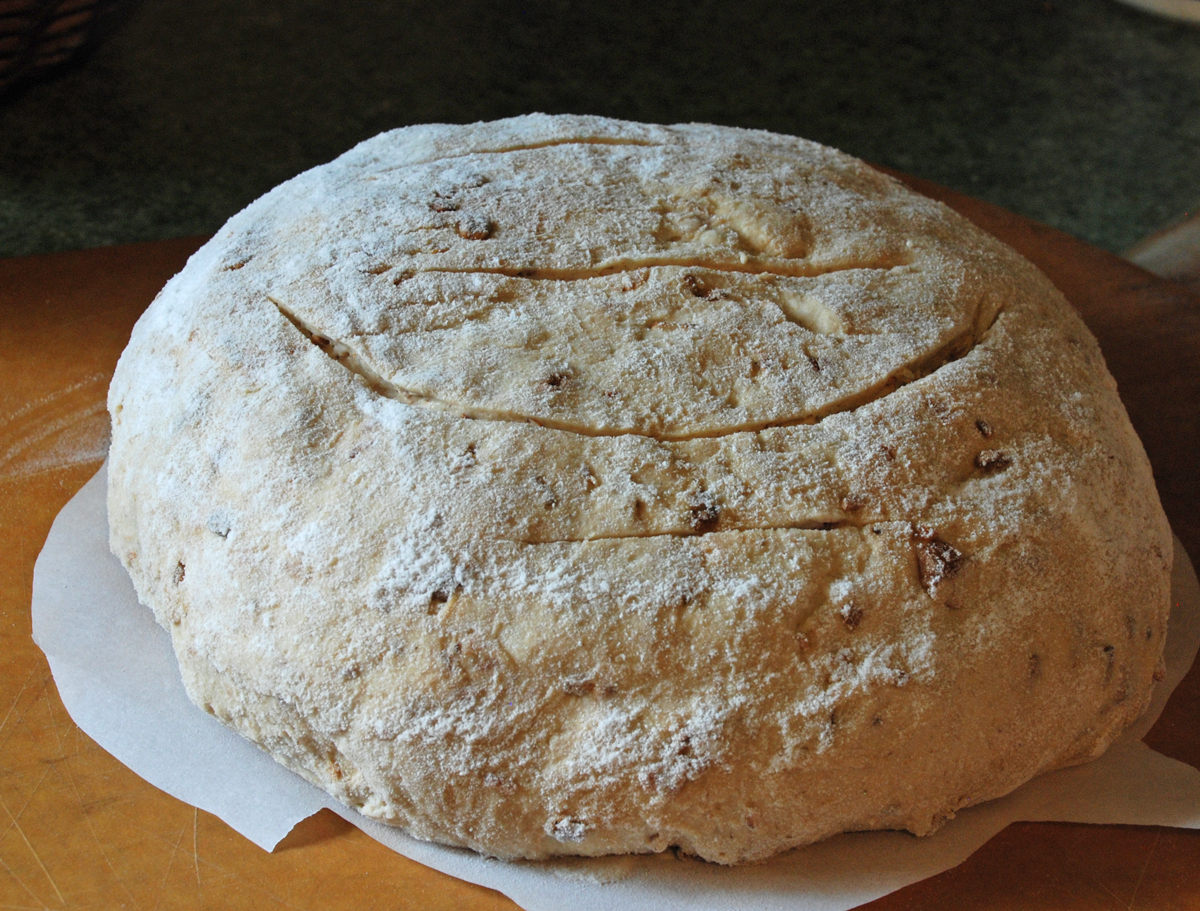
Set your oven for 500 degrees F. at least 45 minutes before ready to bake.  When ready to bake place the loaves into your on  your oven stone with steam and lower the temperature immediately to 450 degrees.   Since this loaf was so big I ended up lowering the oven after 35 minutes to around 425 degrees.  When the loaf is nice and brown and reached an internal temperature of 200 degrees F. you can remove it from the oven.

Let the loaves cool down for at least an 3 hours or so before eating as desired.
Cat-Angel Bell Weathering the Storm
The Dolphin is Trying to stay above the snow
Misty waiting for some Cherry Sourdough.....okay so she's waiting for some Kibble!
Isand66's picture
Isand66

I recently returned from my 3rd trip to China for work this year and the first bread I attempted to make was this one.  I think I must have been suffering from a bad case of jet lag since I ended up with a puddle of cherry cheese which resembled a flat bread.  I like to work with wet dough but I went overboard on this attempt and didn't take the extra cherry juice from the cut up cherries into consideration.

I am happy to say that my second attempt of this bread was much more successful as I ended up with something that actually resembles a bread rather than a pancake.  I still can't find my wife's cherry pitter so I had to de-pit the cherries by hand which is a messy job to say the least.

I used a nice Havarti style cheese in this bake which melts nicely and compliments the cherries very well.  I used fresh cherries since they are still in season and reasonably priced.  I pureed 218 grams of cherries and cut the balance of 134 grams into pieces.  I used my mini Cuisinart to puree the cherries but you can use a blender or stick blender as well.

I used my standard white flour AP SD starter which I keep at 65% hydration and I added some Oat Flour to give it a little bit of nutty flavor.  I think the next time I make this bread I would add some walnuts or pecans to make it even better.

The final dough came out terrific with a nice moist open crumb with cheese and cherries oozing from its pores.  It smelled amazing with the flavors of cherries and cheese while it was baking and it took all my self-control not to tear into it until the next morning.

Procedure

Starter

71 grams Seed (Mine is 65% AP Flour Starter)

227 grams AP Flour

151 grams Water (85 - 90 degrees F.)

Mix seed with water to break up for a few seconds and then mix in flour until the starter form a smooth dough consistency.  Put it in a lightly oiled bowl and loosely cover and leave at room temperature for at least 10 hours.  The starter should double in volume.  Put the starter in the refrigerator for up to 1-2 days or use it immediately.

Main Dough

Ingredients

425 grams Starter from above

340 grams Bread Flour (King Arthur Flour)

161 grams Oat Flour (King Arthur Flour)

63 grams European Style Flour (KAF--you can substitute bread flour or a little whole wheat)

218 grams Cherry Puree

134 grams Pitted Cherries Cut Up into Small Pieces

200 grams Havarti Cheese or Similar Style Soft Cheese

220 grams Water (85 - 90 degrees F.)  (Note: the Cherry Puree Counts as the Balance of the Liquid)

16 grams Sea Salt (or table salt)

Procedure

Weigh the cherries and remove the pits either with your hands, knife or if you are lucky a cherry pitter.  Puree the 218 grams per above in your food processor or blender and set aside. Cut the remainder of the cherries into small pieces and set aside in a strainer to drain.

Cut the cheese into small cubes and set  aside.

Mix the starter with all the water except for 20 grams just to break it up along with the pureed cherries.  Next mix in the flours for 1 minute on low in your mixer or by hand and let them autolyes for 30 minutes up to an hour.    Next add the salt and then add the remainder of your water unless you feel the dough is already too hydrated.  Mix on low-speed or by hand for 4 minutes.  Remove the dough from your mixing bowl to your work surface.

The dough will be very sticky so you may want to use a bench scraper to help you do 4-5 stretch and folds.  Leave the dough uncovered for 10 minutes on your work surface or put it in a slightly oiled bowl.  After 10 minutes either on your work surface or in your bowl do another stretch and fold, cover the dough and let it rest for 10 minutes.  Repeat this S & F procedure one more time and let it rest another 10 minutes.  Do one last S & F  and flatten the dough out into a rectangle.  Add the cherry pieces and the cheese pieces and fold up the dough onto itself.  (Note: I goofed up and did this step after the first stretch and fold which made it very difficult to do additional ones.)

Let the dough sit in your bowl for another 1.5 to 2 hours depending on the temperature of your room ( my house is usually at about 70-72 degrees F.).  Next put the dough into your refrigerator overnight up to 24 hours or longer if necessary.  I usually only wait about 24 hours but you can do 36 hours if necessary.

The next day when ready to bake, remove the dough from the refrigerator and  let the dough sit out at room temperature for 1.5 hours - 2 hours until it starts to come to room temperature and is growing slightly. You can now remove the dough from your bowl or dough bucket and form into your desired shapes.  Be careful not to handle the dough to  roughly or you will end up degassing the nice gas trapped in the dough.  Place formed loaves in floured baskets (I use rice flour to make sure they don't stick which works every time).

 Let the dough rise at room temperature for around 2 hours until they pass the poke test.  (When the dough is poked your finger should leave a small indent that springs back very slowly.)

Score the loaves as desired and prepare your oven for baking with steam.

I then baked on my oven stone with steam at 450 degrees until both loaves are golden brown and reached an internal temperature of 205 - 210 degrees F.

Let the finished bread rest on a wire rack until cool and try to resist the temptation to cut into them until thoroughly cooled.

Please feel free to visit my other blog at www.mookielovesbread.wordpress.com for all my bread recipes.

Isand66's picture
Isand66

My wife fried up some fresh plantains as a nice accompaniment to dinner the other night.  Since she made too many I figured I would try adding some to my next bread.  In retrospect I think it would have been better to boil some plantains instead of using fried ones but overall the bread turned out pretty good.  I can say that the plantains are certainly not overpowering and add a nice flavor and texture to the final bread.

I used my standard stock AP starter and added some Durum, Oat, First Clear, Spelt and White Whole Wheat flours to the mix along with some olive oil.  The overall hydration of this dough is 68%.

Starter

71 grams Seed (Mine is 65% AP Flour Starter)

227 grams AP Flour

151 grams Water (85 - 90 degrees F.)

Mix seed with water to break up for a few seconds and then mix in flour until the starter forms a smooth dough consistency.  Put it in a lightly oiled bowl and loosely cover and leave at room temperature for at least 10 hours.  The starter should double in volume.  Put the starter in the refrigerator for up to 1-2 days or use it immediately.

Main Dough

Ingredients

425 grams Starter from above

180 grams Bread Flour (KAF)

100 grams Durum Flour (make sure not to use Fancy Semolina as it is too gritty)

100 grams Oat Flour (KAF)

150 grams First Clear (This is used in Rye breads but I like the crumb this helps make in other breads as well)

75 grams Spelt Flour (Bob's Red Mill)

50 grams White Whole Wheat (KAF)

195 grams Plantains (Fried, or boiled and mashed)

395 grams Water (85 - 90 degrees F.)

16 grams Sea Salt (or table salt)

10 grams Olive Oil

Procedure

Mix the flours  with all the water except for 50 grams for 1 minute.  Let the dough rest covered for 15 minutes to 1 hour which will allow the flour to absorb the water.    Next add the salt, starter, oil and mashed plantains.  Mix on low for 1 minute and then add the remainder of your water unless you feel the dough is already too hydrated.  Mix on low-speed or by hand for 4 minutes.  Remove the dough from your mixing bowl to your work surface.  The dough will be very sticky so you may want to use a bench scraper to help you do 4-5 stretch and folds.  Leave the dough uncovered for 10 minutes on your work surface or put it in a slightly oiled bows.  After 10 minutes either on your work surface or in your bowl do another stretch and fold, cover the dough and let it rest for 10 minutes.  Repeat this S & F procedure one more time and let it rest another 10 minutes.  Do one last S & F  and put the dough in a lightly oiled bowl for 2 hours.  If you don't feel the dough has developed enough feel free to do some additional stretch and folds while the dough is in the bowl and then put it in the fridge overnight.

The next day when I returned from work I removed the dough from the refrigerator and  I let the dough sit out at room temperature for 1.5 hours.  I then formed it into loaves and put them in floured bannetons and let them rise covered for 2 hours.

Score the loaves as desired and prepare your oven for baking with steam.

I then baked on my oven stone with steam at 450 degrees until both loaves were golden brown and reached an internal temperature of 205 - 210 degrees F.  I left them in the oven for 15 minutes with the heat turned off and the door open a crack to get the crust a little harder.

This bread has been submitted to Yeast Spotting here at http://www.wildyeastblog.com/

Isand66's picture
Isand66

I have some left over brisket and pulled pork in the freezer I defrosted to for this weekend so I wanted to make some rolls that would be good for sandwiches.  I have been experimenting with my Wild Yeast Water Starter over the last month or so with some mixed results.  My last experiment to convert a recipe for New England style hot dog buns to WYW ended up with bread sticks so this time I was determined not to make the same mistakes as previously.

I have decided to believe what I have been told and made sure to build the starter up over at least 2 stages versus the one stage for the hot dog fiasco.  If you want to know more about starting your own WYW starter let me know and I will be glad to help you.  It is really easy to start and maintain and WYW does not have nearly as much of a sour tang as sourdough starters.

For this recipe as I mentioned I built my starter up over 2 phases four hours apart using AP flour and WYW.  I ended up with extra starter since I would rather over-estimate the amount needed than under-estimate.  Feel free to cut back on the WYW and flour about 10%.

Procedure

Wild Yeast Water Starter Build 1

210 grams AP Flour

210 grams WYW

Mix the flour and the WYW in a bowl and leave covered at room temperature for 4-5 hours.

Wild Yeast Water Starter Build2

200 grams AP Flour

56 grams WYW

Mix additional ingredients into Build 1 and use your hands to make sure all the ingredients are incorporated.  You should have a fairly firm 65% starter.  Leave covered for 4-5 hours at room temperature and then either proceed to main dough or refrigerate over night.

Main Dough

425 grams WYW Starter from Above

200 grams Bread Flour (KAF)

200 grams First Clear Flour (KAF) (This is typically used in Rye breads and I enjoy the nice chewy texture it adds to rolls)

100 grams Oat Flour (KAF)

78 grams White Whole Wheat Flour (KAF)

18 grams Salt (Seas Salt or Table Salt)

121 grams Egg Yolks (around 6-7 large eggs)

298 grams Water (85 - 90 degrees)

26 grams Olive Oil

Add all the water except 50 grams to the starter to break it up in your mixing bowl.  Next add all of the flours and mix on low for 2 minutes.  Let the dough autolyse for around 15 - 20 minutes. This will help the dough absorb the flour.  Next add the salt, remaining water and the olive oil and mix for 2 minutes on speed number 1 and 2 minutes on speed number 2.  You should have a nice smooth dough which is still tacky.  Move the dough onto your work surface and dust lightly with flour if necessary or spray some cooking spray instead.  Most of the time if the dough is not a high hydration I will not use anything on my wood board.

Do 4  stretch and folds and form the dough into a ball and leave uncovered for 10 minutes.  After the first rest do another stretch and fold and cover the dough.  Let it rest for another 10 minutes and then do another stretch and fold.  You can now put the dough into a lightly oiled container or bowl and cover it.  Let it sit at room temperature for 2 additional hours or less if it is warm in your kitchen.  After 2 hours place the covered bowl in the refrigerator for 1 - 3 days until ready to bake.

When you are ready to make your rolls take the dough out of the refrigerator and keep it in its bowl at room temperature for 1.5 -  2 hours.  After its rest it is time to shape the rolls.  Depending on how big you want the rolls, first cut the dough in half and then roll half the dough into a log.  Next cut off the desired size piece you want and roll it into a tight ball.  Place rolls on cookie sheet and cover the rolls with a clean lint free towel sprayed with water or a piece of plastic wrap lightly sprayed with cooking spray.  Let the rolls rest at room temperature for 2 hours or until they are at least 1.5 the size.

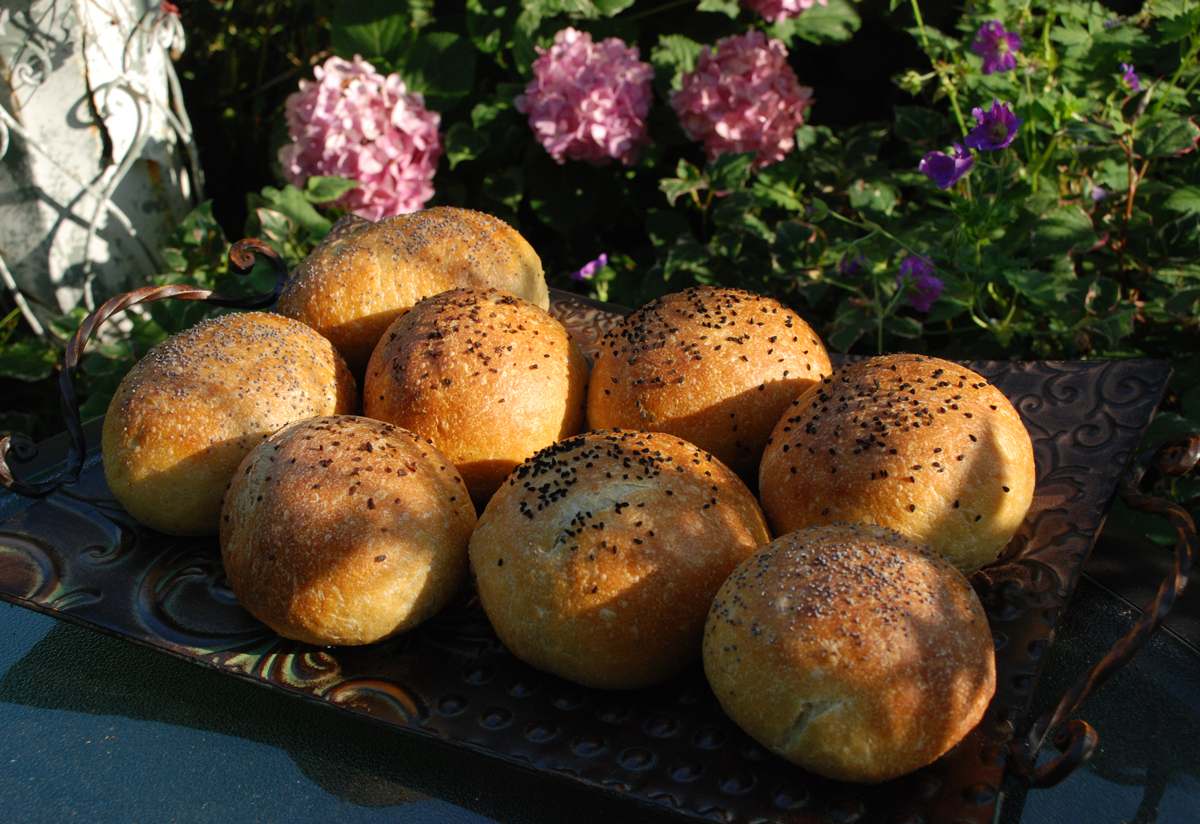
Make an egg wash with a little egg wash and apply to each roll and put on desired toppings.  I used toasted onions, poppy seeds and also Charnushka seeds or also known as Nigelia Sativa which are tiny black seeds used on Jewish rye breads as well as Slavic sausages and in Armenian and Israeli cooking.

Around 30 minutes before baking the rolls, prepare your oven and pre-heat at 500 degrees.  I used my usual set-up for steam and added 1 cup of boiling water to a pan on the bottom shelf but for rolls you could omit this step and you will get softer rolls if that is what you desire.  After adding the steam lower the oven to 425 degrees and continue baking.

It should take around 20-25 minutes to bake the rolls and they should be nice and brown on the bottom and top.  When done, let them cool on a wire rack and enjoy.

The rolls ended up nice and chewy and light with a nice open crumb.

This post has been submitted to the Yeast Spotting Site here: http://www.wildyeastblog.com/category/yeastspotting/.

Lily
Pineapple Lily
Dahlia
Isand66's picture
Isand66

Now that I have taken the dive bait and started baking with my Yeast Water Starter, it was time to try something a little more complicated.  Following the lead of my friend DA Brownman, I decided to try a combo yeast water levain and AP sourdough levain.  To make it interesting I made the yeast water levain using 100% durum flour in a 2 build process and combined this with my existing refreshed AP sourdough starter.

For the final dough I mixed in some Oat flour and some Wheat Germ for nuttiness along with a majority of Durum flour, some mashed potatoes with the skins and some walnut oil.

I have to say that this ended up being a great tasting bread with a wonderful crust and crumb.  I'm going to grill some for dinner tonight with some olive oil and grated cheese mixture which I anticipate will be mouth-watering.

The final bake had some excellent oven spring and like I said, the crust is nice and crispy with a perfect buttery and open crumb.

Yeast Water Starter Build 1

50 grams Durum Flour (KAF)

50 grams Yeast Water Starter

Mix the flour and Yeast Water in a bowl until thoroughly combined.  Cover the bowl and let it sit at room temperature for around 4 hours.  The starter should almost double when ready to proceed to build 2.

Build 2

Add ingredients below to starter from above and mix until incorporated.  Cover with plastic wrap and let sit at room temperature for 4 hours.

100 grams Durum Flour

50 grams Yeast Water

Main Dough Ingredients

125 grams Refreshed AP Starter (65% hydration)

250 grams Durum Yeast Water Starter (all of starter from above)

40 grams Roasted Wheat Germ

50 grams Oat Flour

455 grams Durum Flour

161 grams Mashed Potatoes (I like to mash them with the skins on and used red potatoes)

8 grams Walnut Oil

18 grams Salt (Sea Salt or Table Salt)

400 grams Water (80 to 90 degrees F.)

Procedure

Mix the starters with the water and stir to break it up.  Next mix in the flours into the starter mixture and mix for 2 minutes with your mixer or by hand.    Let the dough autolyse for 30 minutes to an hour in your bowl covered with a cloth or plastic wrap.  Next add in the salt, mashed potatoes and oil and mix on speed #2 for 4 minutes or by hand.  The dough should have come together in a ball and be tacky but not too sticky.

Next take the dough out of the bowl and place it on your work surface.  Do a stretch and fold and rest the dough uncovered for 10 minutes.  After the rest do another stretch and fold and cover the dough and let it rest for 10 minutes.  Do one more stretch and fold and put the dough into a lightly oiled bowl and let it sit at room temperature covered for 2 hours.  After 2 hours you can put the dough into the refrigerator for 24 hours or up to 2 days before baking.  Feel free to do some additional S & F's if you feel it is necessary.

The next day (or when ready to bake) let the dough sit out at room temperature for 2 hours.  After 2 hours form the dough into your desired shape and put them in floured bannetons, bowls or on a baking sheet and let them rise covered for 2 hours.  Score the loaves as desired and prepare your oven for baking with steam.

Set your oven for 500 degrees F. at least 30 minutes before ready to bake.  When ready to bake place the loaves into your on  your oven stone with steam and lower the temperature immediately to 450 degrees.  It should take around 20 - 30 minutes to bake  until both loaves are golden brown and reached an internal temperature of 200 - 210 degrees F.

Let the loaves cool down for at least an hour or so before eating as desired.

.

Isand66's picture
Isand66

I just received my new order from KAF the other day and was dying to try some of my new flours I ordered.  I wasn't too happy though when I received an email the day after it arrived telling me how excited I should be about the KAF 20% off sale!

Anyway I digress....I decided to try my new Sprouted Wheat Flour which was not milled by KAF but apparently they distribute this brand.  I also used another new interesting flour which was made from 100% oats.  Along with these 2 flours I added a large amount of French Style Flour which added to the silkiness of this dough.  I have used this flour many times before and it is great for baguettes or ciabatta but I also find it very nice for developing the nice open crumb I like.

I refreshed my standard AP white starter the night before and used most of it in this bake.  I have also included the ingredients to make the exact amount of starter needed from your seed starter.  Mine is kept at 65% hydration so adjust yours accordingly.

The final dough was a nice mild sourdough with a hint of nuttiness from the oat flour and sprouted wheat flour.  The crumb was not too moist and had a nice open crumb and overall this was a nice bread worth making again for sure.  I used it for a nice pastrami sandwich last night which I ate while tailgating at the Brad Paisley concert at Jones beach.  I am not a big fan of country music by I do have to say he puts on a great show.  Could have done without the rain storm and cold winds in June but we all had fun anyway.

Starter

71 grams Seed (Mine is 65% AP Flour Starter)

227 grams AP Flour

151 grams Water (85 - 90 degrees F.)

Mix seed with water to break up for a few seconds and then mix in flour until the starter form a smooth dough consistency.  Put it in a lightly oiled bowl and loosely cover and leave at room temperature for at least 10 hours.  The starter should double in volume.  Put the starter in the refrigerator for up to 1-2 days or use it immediately.

Main Dough

Ingredients

425 grams Starter from above (all of the starter)

200 grams French Style Flour

200 grams Sprouted Wheat Flour

167 grams Oat Flour

425 grams Water (90 degrees F.)

18 grams Sea Salt (or table salt)

Procedure

I mixed  the flours together with all the water except for 50 grams and let them autolyes for 1 hour.    After an hour  I added the levain and the water with the salt and mixed on speed #1 for 1 minute and #2 for 4 minutes.  I then did a stretch and fold, rested the dough uncovered for 10 minutes.  I then did another stretch and fold, covered the dough and let it rest for 10 minutes.  I did one more stretch and fold and put it in a lightly oiled bowl for 1.5 hours.  I then put it in the fridge overnight.

The next day I let the dough sit out at room temperature for 1.5 hours.  After 1.5 hours I formed it into loaves and put them in floured bannetons and let them rise covered for 2 hours.  Score the loaves as desired and prepare your oven for baking with steam.

I then baked on my oven stone with steam at 450 degrees until both loaves were golden brown and reached an internal temperature of 200 - 210 degrees F.

I got a nice bloom with my scoring, actually more than I expected.  One loaf I tried a curved scoring pattern which came out pretty nice.

It was so nice outside yesterday I decided to shoot the finished loaves outside in my garden.  The summer flours flowers are just starting to bloom in earnest making this one of my favorite times of the year.


mawil1013's picture

Create a healthier bread for me.

December 4, 2011 - 8:04am -- mawil1013
Forums: 

I'm trying to create a heathier loaf of bread for my personal consumption.  I have a recipe for 100 % whole wheat with gluten, and a recipe for Cornell bread which uses soy. 

Recently I've been modifying the 100% whole wheat recipe by grinding my own oat meal to suppliment the whole wheat, why? Because I want to fluff up the heavy whole wheat plus get the added benefits of oat flour. The recipe is still too heavy. I don't want to but have been thinking of adding regular bread flour and/or soy.  

MarieH's picture
MarieH

I have been tinkering with an oat and whole wheat english muffin loaf for quite a while. I used to make this recipe with AP flour but now we try to eat only whole grain baked goods. This is my latest tinker and I am quite happy with the results. I increased the water for a higher hydration loaf hoping to get bigger nooks and crannies to better simulate an english muffin. The recipe follows the pictures. Happy baking!

  •  6 oz (1 1/2 cup) whole wheat flour
  •  6 1/2 oz (2 cups) oat flour
  •  1 TBS sugar
  •  2 tsp salt
  •  3/8 tsp baking soda
  •  4 1/2 tsp instant yeast
  •  2 oz (1/2 cup) bakers milk powder

Stir together in a large bowl.

Note: If you don't have oat flour, you can grind old-fahioned oatmeal in a food processor until flour-like.

  • 19 1/2 oz water
  • 2 oz orange juice

Heat until 120-130 degrees and add to the dry ingredients. Beat well with a wooden spoon to make a smooth batter. Batter will be quite thin.

  • 10 oz (2 1/2 cups) whole wheat flour

Add and stir in until well blended to make a loose batter. Adjust with water or flour to the consistency of muffin batter.

Grease and sprinkle with cornmeal two 5”x 8” bread pans. Divide batter evenly between the pans and lightly smooth tops with a spatula dipped in water. Lightly sprinkle top of batter with cornmeal.

Cover and let rise in a warm place for 30 - 45 minutes until about 1/2 inch above the top rim of the pan. Batter will be very puffy.

Bake at 400 degrees for 25 minutes. Remove from pans immediately and cool on a rack.

Because this bread has no fat, it should be used in a day or two. It freezes very  well and can be put in the toaster without thawing.

Subscribe to RSS - oat flour