The Fresh Loaf

A Community of Amateur Bakers and Artisan Bread Enthusiasts.

multigrain

dabrownman's picture
dabrownman

A blend of Seigle d’Auvergne and Borodinski where diastatic malt is used in the dough on the French side and non diastatic malt with scalded rye berries is used on the Russian side.  Thank goodness no retardation is required, no matter how nice it would be, to produce a nearly classic clash of multicultural bread with different colored malts and multi grain flours that ends up being slightly unique in the end - in a peaceful and united way.   The loaf rose well during final proof but the spring was more of a sprawl.  The crust is chewy the crumb is moist, soft and quite airy.   It tastes like your eating really good Russian Rye bread while walking down the Champ de Elysee in the springtime.  Recipe follows the pix's. 

Pink Himilayan Salt, the scald, dough and levain

Red Non D and White D Malts

Rye berries being scalded with the Red ND Malt

White D Malt on white flour

Before final rise

 French / Russian 57% Rye, 11% WW Rustic Bread

Starter - 10 g


rye

1.68


WW

1.66


AP

1.66


water

5


Starter

10


Levain- 220g


Total

BP

1st build

2nd build

3rd build

Starter

10

1.51%

10


Rye

40

6.02%

10

20

10

WW

40

6.02%

10

20

10

B. Flour

40

6.02%

10

20

10

Water

90

13.55%

30

60


Total

220

33.13%

70

120

30


Scald – 53 g after scald and

soak


RyeBerry

25

3.77%


Water

23

3.46%


ND Malt

5

0.75%


Scald

53

7.98%


Bread –391 g


DarkRye

67

10.09%


Rye

66

9.94%


B. Flour

73

10.99%


D. Malt

5

0.75%


Salt

5

0.75%


Water

175

26.36%


Bread

391

58.89%


T. Weight

664

100.00%


Grains& Flour

366

Including scald and starter


Water

293

Including scald and starter


Hydration

80.05%


Levain is

33.13%

of the total weight.


 Directions

 Take 10 g of 100% hydration starter and add10 Geach; Rye, WW and AP flour along with 30 g of water.  Mix well, cover with plastic and let sit for 6 hours on the counter.  Then add 20 g each of the same flours and 60 g water.  Let sit on counter for 6 hours.  Refrigerate overnight.  In the morning add10 geach of the flours but no water and let sit on the counter covered in plastic wrap.

 Scald the rye berries and red non-diastatic malt in50 gof water.  Boil until the water barely disappears.  Turn off heat and reserve covered with plastic wrap on counter with the levain. Let sit 2 hours then start autolyse.

 Mix the bread flours, white distatic malt and water well, cover and autolyse for 1 hour after the scald and the levain have rested 2 hours on the counter.

 Mix in the levain and let autolyse for 1 hour.  Then add the scald and the salt and mix well.  Do 5 S&F’s on an oiled surface and place in an oiled bowl.  Then do 5 S&F’s every 20 minutes 2 more times.  Pre-form into ball using the final S & F’s at the 1 hour mark and let sit in an oiled bowl for 20 minutes.

 Shape as desired, I did an oval, dust with rye bran or other bran, flour or rice flour and place in prepared basket.  Place basket in plastic bag and let proof until dough has risen 70% - 80%.  You can also proof in a DO.

 Pre heat oven to 500 F for 45 minutes, with your stone and steaming apparatus in place.  No steam needed if using a DO.  Take dough out of benetton by overturning onto a piece of parchment on a peel.  Slide bread and parchment paper into oven onto the baking stone.  Turn oven down to 450 F and bake for 15 minutes.  Remove steaming apparatus and turn down oven to 425 F with convection on now.  Bake about 20 minutes more until bread reaches 205 F in the middle.   Let sit on stone, in off oven, with the door ajar for 10 minutes.  Cool on rack.

 If using DO, bake at 500 F for 20 minutes with lid on, then remove lid and turn down temperature to 450 F.  Bake about 20 minutes more until middle of bread is 205 F. 

bryoria's picture
bryoria

My first post!  I keep my bread notes in a cheap notebook stuck to my fridge, but thought a bread blog might work better, and enable me to share my notes.  I am fairly new to bread baking and find some of the posts here rather intimidating.  I took an artisan bread baking course at our local technical college last fall, developed a wild yeast starter during the class, and was off and running with the longer-fermentation methods.  Before the class I had been making all our bread, but  just plain whole wheat sandwich loaves from my own flour, mixed and kneaded and baked all in one morning. 

Although my freeform sourdough loaves always turn out well, I have not had much luck with 100% whole wheat sandwich loaves using the long fermentation methods, even after experimenting with aging my flour.  I would like to learn how to make a 100% whole wheat sandwich loaf that doesn't crumble in the centre.  Until then, I use my old, all-in-one-day method for sandwich loaves and alternate with the partial white flour sourdoughs I learned in my class.

Today I tried to make buns from one of the recipes we learned in the class, a multigrain sourdough.  It was my first time making buns from one of the class recipes.  They turned out great.

Notes on today's buns:

  • recipe from NAIT course
  • first time trying the dough as buns
  • divided dough into 16 pieces and formed as flat hamburger buns
  • placed on cookie sheets to rise for 30-40 minutes
  • baked on cookie sheets at 400 for 18 minutes, no steam, turning pans halfway through
  • buns softened as they cooled
  • good size for hamburgers
  • flavour fantastic, good texture

(updated to add photo showing crumb)

Mebake's picture
Mebake

This is the usual Hamelman's Wholewheat Multigrain, only i baked twice the recipe yield, and kept the hydration untouched.

Khalid

varda's picture
varda

I'm so excited - I just can't hide it - I'm about to lose control and I think I like it.

Until today, I had no idea the Pointer Sisters were bakers.  

Finally, on my sixth attempt at making the Gérard Rubaud Miche which Shiao Ping so memorably demonstrated, I have something that looks like bread.   I don't know why this bread is so difficult.   I adapted it, and adapted it some more to get to this point.   I was motivated by the fact that it is really just completely delicious even when it looks like something the cat dragged in.   My husband (who claims he only likes white bread) says everytime I make this, "This is really good.   Have you ever made it before?"   This bread even contains its own ether of forgetfulness.    I won't cut it until tomorrow, so who knows, but... Proth5's comment on DavidG618's  recent post on whole wheat sourdoughs, was what led to the latest adaptations.   Shiao Ping mentions fermenting this for around 3 hours in quite warm conditions before cold retarding overnight.   This is what I tried to do for several of my tries.   This time I cut the bulk ferment to less than two hours, with total fermentation including proofing at 4 hours and 15 minutes.   Earlier I had given up on the mixed grain starter with three stages and tiny amounts of rye and spelt added at each stage, and just started using my own regular starter.   That also helped a lot.   Maybe with the shorter ferment times, I could go back to the  Rubaud starter.   I am curious as to whether or not it would make a difference (in a positive way that is.)

Here is the formula:   I also scaled down from the original quantity of around 3.5 pounds to 2.5 pounds.   But I'm not going to call it a mini-miche - just a miche that is slightly smaller than regulation.


Final

Starter


WW

127


127

18%

Spelt

64


64

9%

Rye

17

5


22

3%

White

405

95


500

70%

Water

508

62


570

80%

Salt

13


1.9%

Starter

162


14%


1296


2.6


(Even though I used my own starter, I adjusted all the numbers so they came out with the same percentages as Shiao Ping's version.) 

 And the crumb with spelt-induced sheen:

LT72884's picture
LT72884

This is a light and hearty multi- grain free form loaf bread. It is actually pretty simple. I was inspired by Zoe from her book "Artisan bred in five minuets a day" the baking technique is from her but the recipe is a modified version of hers. I have another one that i use honey instead of water. If you cut 3/4ths cup of water out, replace it with 3/4ths cup of honey.

  • 3 cups lukewarm water
  • 1.5 tbls kosher salt
  • 1.5 tbls yeast(two packets)
  • 1 cup Bobs red mill 10 grain cereal
  • 5.5 cups gold medal all purpose flour

Take the yeast,salt, water, and mix it together in a 5 qrt lidded bowl. Just not air tight. Add the dry ingredients and mix with either a wooden spoon, your hands, or a stand mixer. But DO NOT KNEAD the dough. Once all the flour is incorporated. Check to see if it is a nice sticky,wet dough. You might need to add a tablespoon extra of water to insure that it is nice and wet. let rise for 2-3 hours at room temp. You can either use the dough after the rise or put it in the fridge. The dough will store up to 10 days in the fridge.

On baking day, take a 1.5 pound piece of dough and shape into a elongated loaf. Sprinkle some cornmeal onto a pizza peel, and place the loaf onto the cornmeal. If dough is cold, let rest for 2 hours. If dough is at room temp, rest for 1 hour. Place pizza stone or silicone mat on center shelf of oven with a broiler try under neath the stone or mat. pre-heat oven to 450. Slash the loaf with 1/4 inch slashes across the top, side to side. Place loaf on stone or mat and pour 1 cup of hot water into the broiler try. DO NOT USE A GLASS TRY.. Bake for  35 minutes or until nice and golden brown. Let completely cool on wire rack.


free form loaf

Franko's picture
Franko

For the bread I wanted to bake this week I didn't have to look too far to find the recipe I was after. Right next to the Whole Wheat Levain in Hamelman's Bread that I baked last week is his Whole Wheat Multigrain which also uses a levain. Over the last six months I've accumulated a lot of various grains and thought I'd try to use some of them up since I'm running out of room in my storage bin. As well, I wanted a recipe that I could use the Red Fife whole wheat flour in, so this seemed like the perfect fit. The only changes I made to the formula were to increase the amount of grains by 18% and the overall hydration by about 4% , putting it into the high 70's. The grains used were millet, oatmeal, cracked wheat, rye chops, and the last of some seven grain mix I've had since last February. The millet made up 40% of the hot soaker, and the remaining grains were divided in roughly equal proportions. Since the formula includes 1% of bakers yeast in addition to the levain, this is by far the quickest rising levain style bread I've made so far, taking just a little over 5hrs and an easy one day 'mix to oven' levain bread. The loaves were baked using the dutch oven method, the boule baked totally in the lid/pot combo and the batard on the stone covered with the pot. So far I've had better results using the pot/stone combo for even bottom colour, as the lid/pot method tends to darken it more than I'd like. Earlier this week in a reply to Mini on another post I described it as scorching, but it's not even that, it's just uneven colouring since there's no 'burnt' taste to the loaf. The DO we have is heavy aluminum rather than iron so that may be where the problem lies, I'm not sure. I'm considering having a piece of baking stone cut to size to fit inside the lid and see if that doesn't correct the problem, or I may just go for a genuine Lodge CC. At any rate, both loaves turned out well I thought, with a crunchy crust and a nice chewy, even textured crumb. This is a good everyday bread for sandwiches or toast, and although it uses a levain it's very mild in acidity but with lots of deep wheaty flavour that bread lovers will enjoy. If there was any downside to this bake it's that I've just enough Red Fife flour left for one more mix, meaning my trip down Island to Cowichan Bay for more will have to be sooner than I'd thought. The RF flour is so nice to work with and makes such tasty bread I really don't mind having to literally go the extra mile/s to get some more.

All the Best,

Franko


Home Baker's picture
Home Baker


DRY INGREDIENTS

  • 700g all purpose flour
  • 700g bread flour
  • 200g rye flour
  • 150g whole wheat flour
  • 100g wheat germ
  • 100g ground whole grain cereal
  • 100g milk powder
  • 50g cracked/kibbled wheat and/or rye berries
  • 40-50g course kosher salt
  • *1/2 teaspoon citric acid powder
  • *1/2 teaspoon ginger

First, grind, weigh and measure all the dry ingredients, combining them in the mixer bowl.

Let the mixer stir the dry ingredients to an even blend. I use the paddle attachment turning on its lowest speed in the completely filled bowl of a Kitchenaid K5A mixer. Once mixed, you will divide the dry ingredients into two equal parts.

I should mention here that the portions and processes in this recipe were designed to match my own kitchen and my own equipment. The dry measures completely fill my largest mixer bowl, the four loaves are the maximum that my oven can handle in one bake. 

WET INGREDIENTS

I start building production starter a couple of days ahead, with the aim of having about 600 grams of vigorous starter ready when I plan to start mixing and fermenting the loaves. 

Measure separately for each batch:

  • 250g production sourdough (from whole grain rye, whole grain wheat and unbleached KA all purpose -- all organic)
  • 660g water
  • *2 tablespoons honey (from a local coop)
  • *1/2 teaspoon natural soy lecithin
  • *1 tablespoon organic barley malt syrup
  • *1 tablespoon unsalted butter

Make two batches of wet ingredients. The dough will be mixed in two batches to prevent ruining the mixer by overtaxing its motor and gears. One batch of wet ingredients goes into each half of the dry ingredients mixture. 

MIX

Into each of two large mixing bowls, add one measure of the combined wet, then one measure of the combined dry ingredients. Fit dough hook onto mixer and carefully work one measure of wet ingredients into one measure of dry ingredients for only a few minutes, ending with two batches of wet dough. Cover each  bowl with plastic and let it rest for 1/2 hour.

FERMENT

Dump each bowl of wet dough into the same large plastic lidded tub. Stretch-and-fold dough a few times in the tub, then cover tub with lid and place into refrigerator for total of 16-24 hours.

Remove tub from refrigerator for about ten minutes of stretch-and-folds at two intervals, first after 4-6 hours and once more after 8-12 hours. Rest in refrigerator for final, uninterupted 8-12 hours.

Place at least a pint of water into a clear glass or plastic container and place the container the same spot the final rise will occur. A ball of dough will be dropped into water at the same time as the loaves are set in the rise location. By watching for the moment when the sunken ball of dough floats the the surface it will be possible to determine exactly when the dough has reached its maximum rise. The vessel of water is placed in the area where the final rise happens well ahead of time to ensure that the water achieves the same temperature as the air --and the rest of the dough-- in that space. 

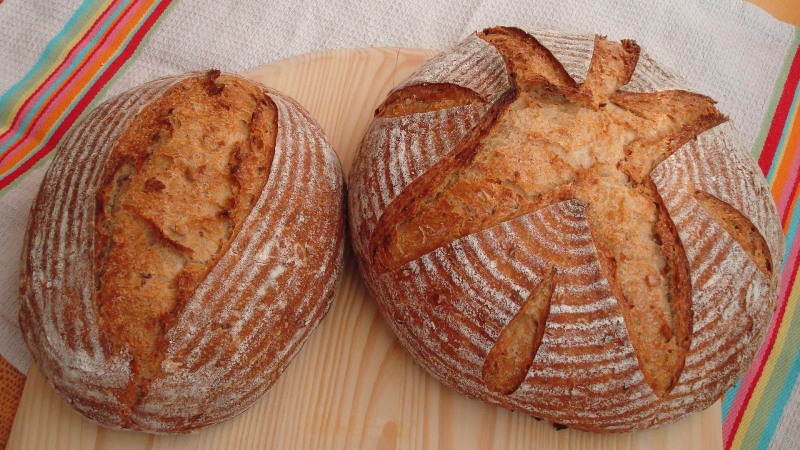
FORM LOAVES & FINAL PROOF

Cut a small (50-75g) piece of dough off and shape into tight ball. Cover and set aside.

Divide remaining dough into:

  • 2 pieces @ 950g for smaller (8") loaf pans, and
  • two pieces @ approximately 1125g for large (9") loaf pans.

The process I use is to portion two pieces of dough at 950g, then weigh remaining dough and divide it into two equal portions. The larger amounts can vary somewhat but I find this recipe gives the best result from the standard 8" loaf pan when the loaf is formed from a 950g measure of dough. Shape and pan dough into the greased loaf pans. Place loaves into plastic bags or lidded tubs for final rise, then move to the final rise location. 

Now, retrieve the reserved ball of dough and drop it into the glass of water which had been placed hours before in the same final rise area where the shaped, covered loaves have now been placed. The ball of dough will sink to the bottom of the container of water. The ball of dough will remain submerged in the glasss of water for a long time, but start checking it periodically after about two hours. The amount of time required for the dough ball to float (which marks the end of the final proof) can vary widely, from at least two to more than four hours, depending on temperatures and the vitality of the starter. I have found that capturing the precise moment when the dough achieves its maximum rise (but not a minute more) is the key to producing a really remarkable flavor and appearance from this recipe. Excellent and repeatable results are obtainable by using this method to monitor the final rise: when dough ball floats to the surface the loaves must go immediately into the hot oven.

BAKE

About an hour before you think baking will begin, place a shallow metal pan in the bottom of the oven and turn on the oven to preheat to 500°F. As soon as the dough ball floats to the surface of the water it has been submerged in, place a mug 2/3 full of hot water to boil in the microwave. Remove panned loaves from their plasic enclosures and slash each loaf once down the middle, along its longest dimension. Take mug of boiling water from microwave and pour it carefully into the metal pan in the bottom of the oven. Place the four panned loaves on one shelf, set at a height just below the center of the oven, close oven door and reset oven temperature to 460°F. After ten minutes lower temperature to 425°F. After 20 minutes rotate loaves for even browning and turn heat down to 375°F. After 40 minutes begin checking loaves for doneness. I bake the loaves to an internal temperature of 205°F - 210°F, which takes 45-55 minutes. Each of the loaves always seems to need slightly more or less time in my oven. 

Cool loaves on rack for at least two hours before slicing. Flavors don't fully develop until about 24 hours after removal from oven. 

*NOTE ON MEASUREMENTS: Measuring cups and measuring spoons handle thick liquids and small quantities of dry product more accurately and with less waste than my scale does.

Recipe submitted to YeastSpotting page at Wild Yeast.


Mebake's picture
Mebake

I wanted to bake under a pyrex, and an ss bowl this time. The boule on the Right was under a pyrex bowl, and the Batard was under the stainless bowl.

My adapted recipe of Hamelman's Formula:

Total Formula:

Bread Flour: 1lb  (50%)

Whole Wheat Flour: 1lb (50%)

Mixed Grains: 5.8 oz (18%)

Water: 1lb , 10oz (78%)

Salt: 0.7 oz (1 T + 0.5Tsp) (2.2%)

Yeast: (1tsp) instant yeast (1%)

Honey: 1oz (1 T, 0.5tsp) (3%)

Levain:

Bread Flour: 3.8 oz (100%)

Water: 4.8 oz (125%)

Starter: 1.5 T (20%)

Soaker:

Grains (Cracked oates, or wheat or Rye, Sunflower seeds, Flax seeds, Buckwheat): 5.8oz (100%)

Water : 6.9 oz (120%)

Salt: 0.5 tsp

Final Dough:

Bread Flour: 12.2 oz

Wholewheat Flour: 1lb

Water: 12.5 oz

Salt: 1 T

Yeast: 0.1oz  (1tsp)

Honey: (1T + 1tsp)

Soaker: All

Levain: All


Neat Results, but the chronic charred bottom remains a challenge i have to put up with in My gas oven.

The loaves could have used more proofing time, but i bet the premature levain i mixed in had something to do with it.


Pages

Subscribe to RSS - multigrain