The Fresh Loaf

A Community of Amateur Bakers and Artisan Bread Enthusiasts.

multi grain

Isand66's picture
Isand66

I think the name of this bread is probably the longest one I've ever used or seen for that matter!  There are just too many things thrown in this latest bake to make it any shorter and do the bread justice.

Recently I made a durum yeast water/sour dough combo bread using separate starters for the yeast water part and for the sour dough part.  I was urged by a few of my baking friends, DA and Janet to try making 1 starter using my AP sourdough seed along with the Yeast Water instead of water, plus the  flour.

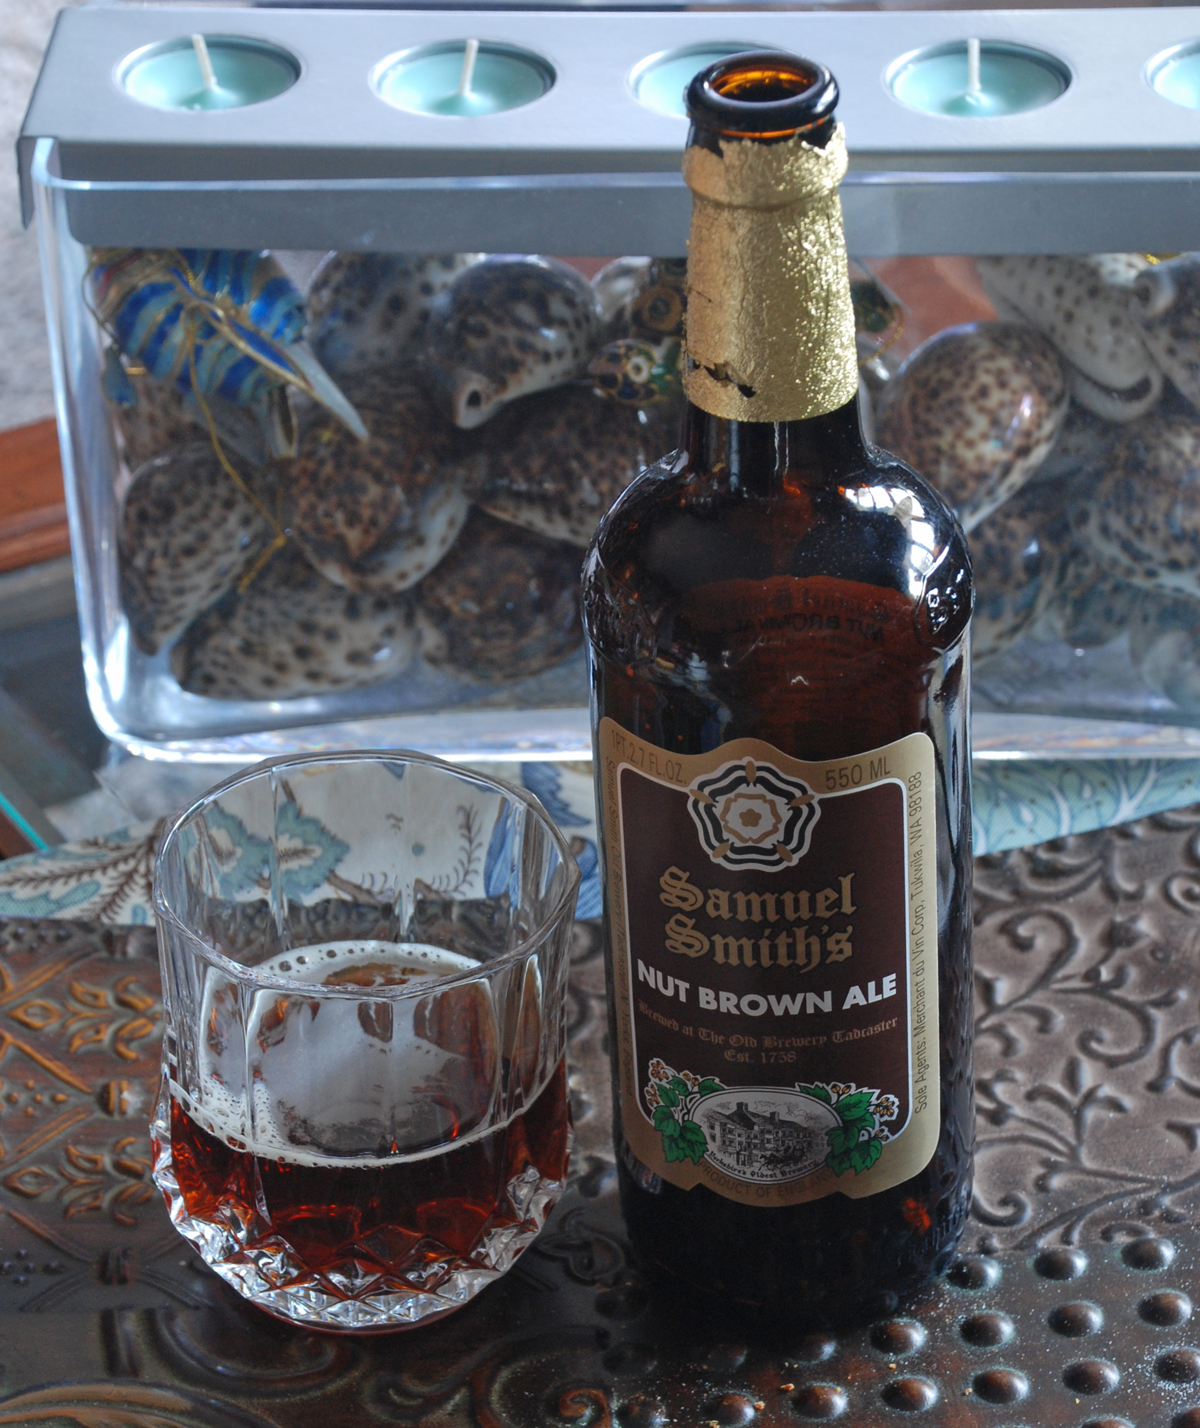
I also wanted to use some of the fresh roasted pumpkin seeds I picked up at the market the other day along with trying some millet flour I also purchased at the same time.  Oh, and I forgot I also picked up a bottle of Nut Brown Ale and I had roasted some sweet potatoes so in they went into the cauldron.

I built the starter over 2 builds using French Style flour and Dark Rye flour which I thought would make this a nice hearty and deep flavored bread once the ale and other ingredients were added.

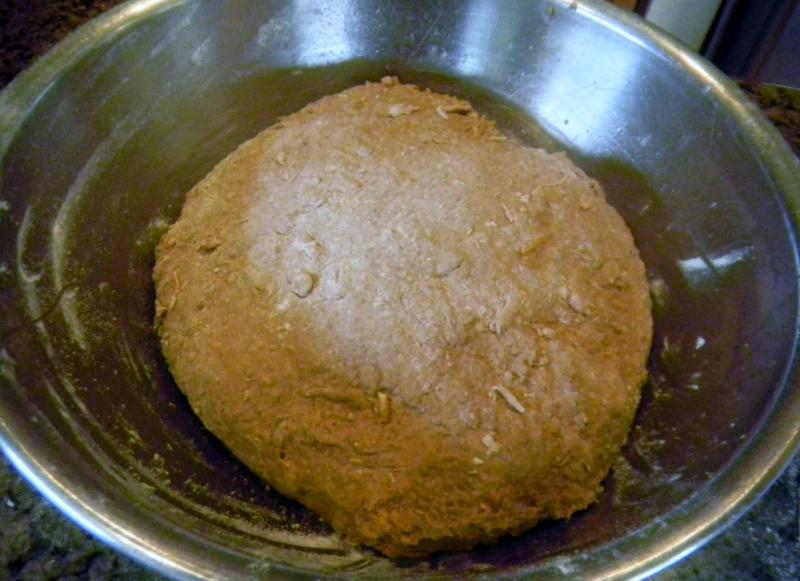
The dough ended up very wet which contributed to the nice moist crumb along with the addition of the sweet potatoes.  You can really taste the dark brown ale in this one and overall I was very happy with the outcome.

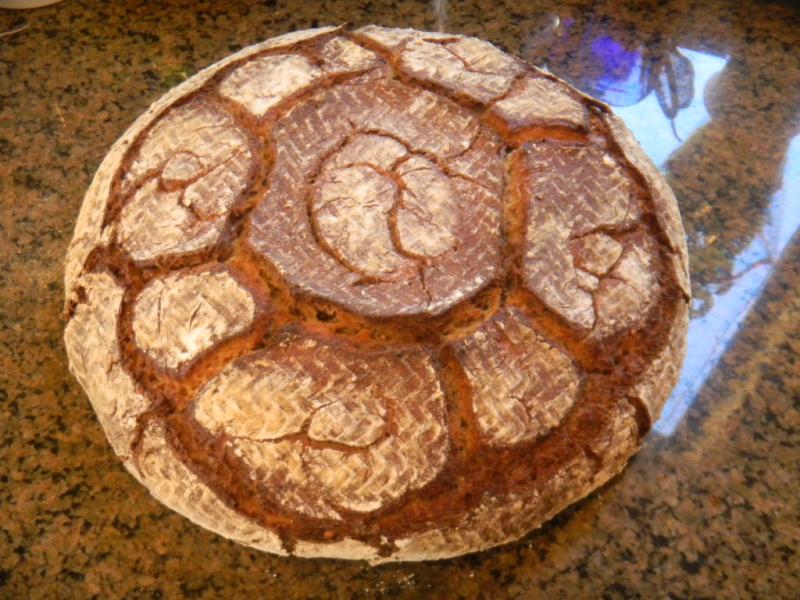
I used a basket I picked up recently which gave the dough a very fancy pattern.  It was almost too nice to score the bread but I forced myself to wield the knife never the less.

If you decide you want to make this and don't have any Yeast Water brewing, just use water instead when building your sour dough levain.

Procedure

Yeast Water-Sour Dough Starter Build 1

50 grams AP Starter at 65% Hydration

100 grams French Style  Flour (KAF) (note: you can substitute Bread Flour or AP Flour if necessary)

50 grams Yeast Water Starter

50 grams Water

Mix the flour, water and Yeast Water in a bowl until thoroughly combined.  Cover the bowl and let it sit at room temperature for around 6-10 hours.  The starter should almost double when ready to proceed to build 2.

Build 2

Add ingredients below to starter from above and mix until incorporated.  Cover with plastic wrap and let sit at room temperature for 6-10 hours.  You can then use it immediately or refrigerate for a day until ready to mix the final dough.

50 grams French Style Flour

80 grams Dark Rye Flour

160 grams Yeast Water

Main Dough Ingredients

395 grams Starter from Above

180 grams French Style Flour (KAF) (You can use AP Flour or Bread Flour to substitute)

150 grams Millet Flour (Bob's Red Mill)

150 grams Dark Rye (also known as Pumpernickel)

60 grams Rye Chops

60 grams Malted Wheat Flakes

270 grams Sweet Potatoes (Roasted and mashed with a fork)

60 grams Roasted Pumpkin Seeds

16 grams Seas Salt or Table Salt

20 grams Olive Oil

375 grams Water (80-90 degrees F.)

Procedure

Build your Yeast Water levain-Sourdough combo starter the day before you are ready to bake.

On baking day, mix the flours, rye chops, malted wheat flakes and the Ale (make sure the Ale is at room temperature).  Mix on low-speed in your stand mixer or by hand for about 1 minute until the ingredients are combined.  Let the dough autolyse for about 20 minutes to an hour.

Next add the levain, sweet potatoes, oil and the salt and mix for 3 minutes on low.  After 3 minutes add the pumpkin seeds  and mix for about 1 minute until incorporated.  The dough will barely come together and be almost soupy.  Place the dough in a slightly oiled bowl and do a couple of stretch and folds.  Cover the bowl and let it rest for 10-15 minutes.  Do another stretch and fold in the bowl and let it rest another 10-15 minutes.  Do another stretch and fold and let the dough sit out in the covered bowl for another 1.5 hours  (You may need to do a few more S & Fs to build enough gluten development).  Place the dough in the refrigerator until ready to bake the next day.

When ready to bake take the dough out and leave it covered in your bowl for 1.5 to 2 hours.  Next either make one large boule or  divide the dough into 2 loaves and either place in a banneton or from into batards and let them rest in floured couches for 1.5 - 2 hours.

About one hour before ready to bake, set your oven for 500 degrees F.and make sure you prepare it for steam.  I have a baking stone on the top shelf and the bottom and use a heavy-duty rimmed baking pan that I pour 1 cup of boiling water into right as I put the loaves into the oven.

Score the loaves as desired.

When ready to bake place the loaves into your oven on  your oven stone with steam and lower the temperature immediately to 450 degrees.  It should take around 30 minutes to bake  until the breads  are golden brown and reached an internal temperature of 200 - 205 degrees F.

Let the loaves cool down for at least 2 hours or so before eating as desired.

So how many cats are in this house?

dabrownman's picture
dabrownman

After the difficult and tedious Not So Stollen bake earlier in the week, we decide to continue our Thanksgiving bake list with something much simpler, less stressful even if not as enjoyable.
  

After seeing Toady Tom’s fantastic large miche bake and the excellent crust he managed to put on it, we decided to do a large loaf too only using the chacon shape we love to make since it too can produce a beautiful crust if it naturally splits where we would like as it springs and blooms in the oven heat.


We also wanted to try out a toasted wheat germ, soft white wheat extract and oat bran component similar to Toad’s to see what it tasted and looked like in the chacon.  All but 10g went into the dark side.


Instead of using our recent 1  starter and 24 hour counter levain development we went back to our roughly 20% seed levain for the SD starter required for this bake.   One levain was Rye Desem combo SD for the heartier darker portion of the loaf that has 2all of the whole grains listed for the starter. 


The other levain was a YW one that was fed with cake meal, another new ingredient for bread making for us.  Many folks use this ground matzo altus for their lemon, poppy seed walnut cakes or possibly a chiffon cake of any number of possible flavors.  We decided to try it out in the whiter portion of this bread only to see what it tasted like and how it performed in two different kinds of bread.
  

The instant coffee and the cocoa were only used in the dark portion to, you guessed it, make it darker than the light colored portion.  We also used some yogurt whey water for some of the liquid in both portions with 2/3rds of it going into the dark side.  The sprouts were also split between the two sides in the same proportion as the whey water - 2/3rds to the dark. 


In order to finish the breakout, the white portion ended up being 500 g with 100 g of the AP and bread flour and 80 g of the whole grains in the bread flour and 10g of the toasted bits.  Total flour and toasted stuff was 290 g and the liquid was 210 g (42 g whey) for a little over 72.4% hydration not counting any of the 1/3 of the sprout total that went into it.


With the malts, oats, and potato flakes on in the dark side the hydration of it was 82%.

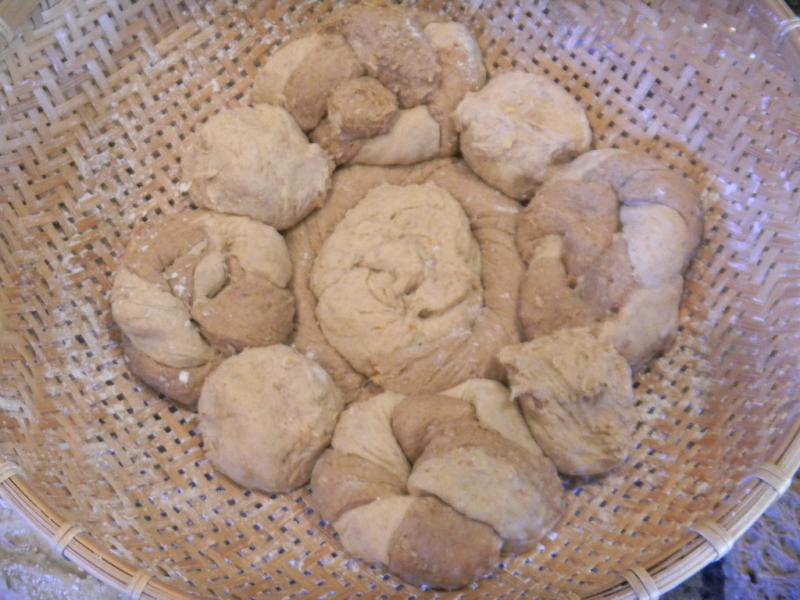
The fun part was putting together the largest chacon we have ever made.  The center knotted roll is made from the light side and the side going down into the basket is sprinkled with rice flour.  It was surrounded by a twisted rope from the dark side.   The 4 other knotted rolls, on the cardinal direction points, were made from equal portions of dark and light that were ropes twisted together to make one rope.  The 4 little balls between the 4 twisted knotted rolls were from the light side.  Remember to rice flour anything that will touch the basket so it doesn't stick - and don't rice flour anything else so it sticks together.
 

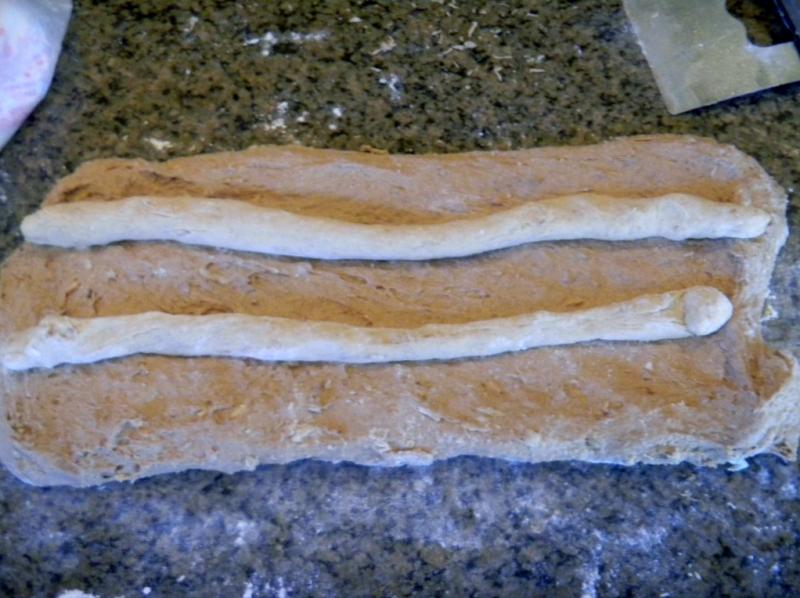
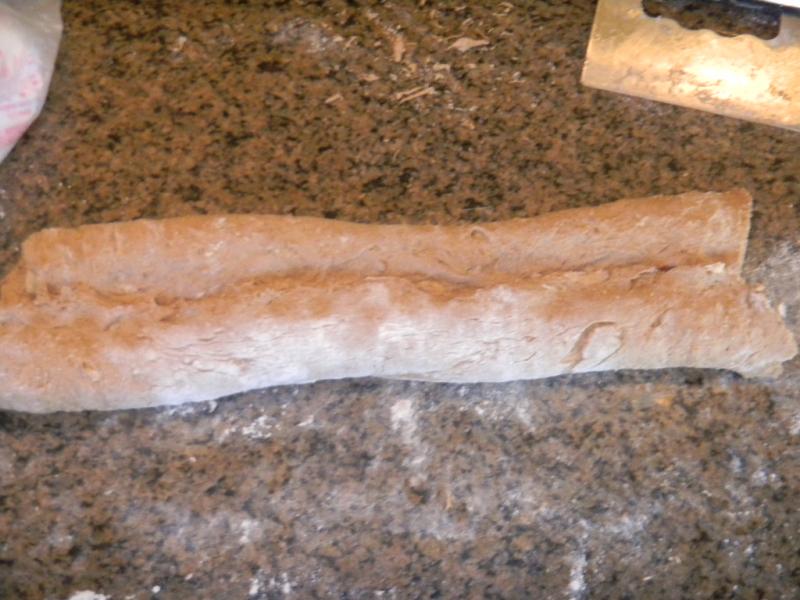
What was left over was two light ropes that were placed on the spread out remaining dark side.  The long sides of the dark were folded over the light ropes to encapsulate them making a long rectangle.  The shot sides of the rectangle were folded over to the middle making a near square where the corners were folded into the center making a circle that was quickly shaped as a boule.


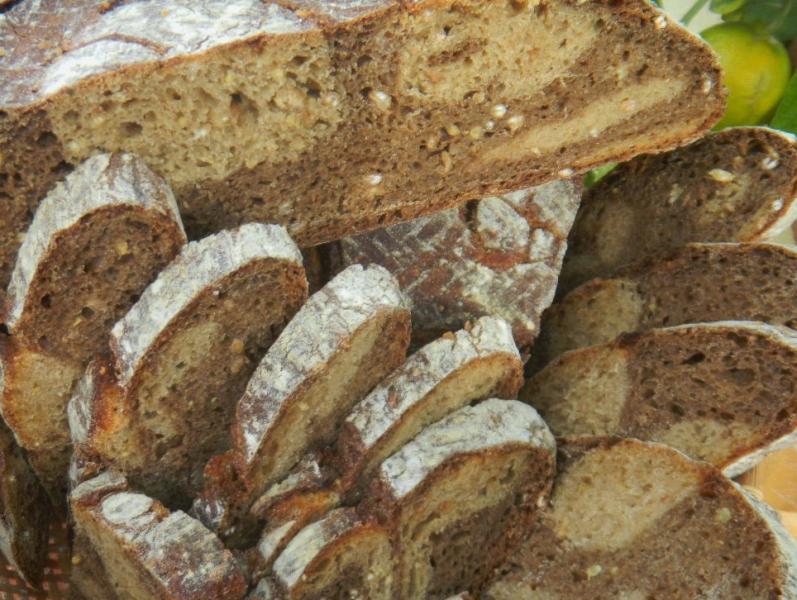
This boule was pressed out gently into a large bialy with the center indentation equal in size to the circle of knotted rolls, ropes and balls already in the basket.  The large bialy was floured around the edge that would contact the basket with rice flour and flipped over so the indentation covered the knotted rolls and the assembly was basically flat on top when finished. 

We hope this assembly will make a very pleasing marbled look when the chacon is cut.  Otherwise it was a waste of time and effort…something every baker is well used to if they have been baking more than a couple of minutes with an apprentice that is nearly all paws, bark and ankle bite.

The levains were formed by mixing, letting them double over about 4 hours or so and then chucking them in the fridge for 24 hours to build the labs while suppressing the yeast.   The flours and toasted bits were autolysed with the liquids and the salt for 2 hours as the levains came back to room temperature a day later.

Once the autolye and the levain were combined for each, the gluten was developed with 15 minutes of French slap and folds.  Then 4 sets of S&F’s wee done fpor each where the sprouts were incorporated on the 3rd set.  The dough’s were allowed to develop for 1 ½ hours on the counter before being retarded in a36 F fridge for 15 hours.


They were allowed to warm up for 1 ½ hours before being formed into the chacon and the allowed to proof at room temperature for 2 hours before firing up old Betsy and her16”round stone,  to preheat at 500 F for 20 minutes before 2 of Sylvia’s steaming pans were added.

After 45 minute of total pre-heat the chacon was un-molded easily from the basket using parchment and peel.  It slid into the oven off the peel when a 1/2 C of water was thrown into the bottom of the oven for extra initial steam and the door closed.  The temperature was turned down to 450 F the steaming was done at the 20 minute mark when the pans were removed and the temperature turned down to 425 F, convection this time.

In another 20 minutes the bread was exactly 205 F in the middle and beautifully and evenly brown from rotating it 90 degrees on the stone every 5 minutes after the steam came out.  At the 40 minute total mark, we turned off the heat and left the oven door ajar as the chacon continued to crisp on the stone for another 10 minuets before removal to the cooling rack.

The chacon didn't spring all that much and might have been a little over proofed but it did bloom and crack as expected.  It is a very pretty large chacon and we can’t wait for it to cool down and rest for awhile before we cut it ....   and see if anything interesting happened inside.

Now that it is cut..... the light and dark did learn to play well together.  We are pleased that it is so pretty on the inside and fitting for such a gorgeous outside.   The crumb is fairly open for so many add ins and whole grains.  The dark is tangy sour while the white is a little sweet, maybe sue to the Cake meal, has no tang and is a little moister as YW tends to impart in crumbs everywhere.  A very nice combination of two tastes.  The toasted bits tend to come through more on the dark side and the millet crunch is prevalent throughout.  This bread will have to to to the top of the chacon list and into the top 15 of our all time top 5 favorites.  I'm glad we made a big one.

Formula

Combo Starter

Build 1

%

SD Desem & Rye Sour

30

3.01%

Bulgar

20

2.56%

Dark Rye

20

2.56%

Kamut

20

2.56%

Buckwheat

20

2.56%

Spelt

20

2.56%

Whole Wheat

20

2.56%

Yeast Water

60

7.69%

Ground Flax

20

2.56%

Cake Meal

80

10.26%

Water

140

17.95%

Total Starter

450

39.74%


Starter Totals


Hydration

97.25%


Levain % of Total

17.88%


Dough Flour


%

Whole Spelt

25

3.21%

Dark Rye

25

3.21%

Whole Wheat

25

3.21%

Whole Kamut

25

3.21%

Bulgar

25

3.21%

Buckwheat

25

3.21%

Cake Meal

50

3.21%

Oats

20

2.56%

Instant Potato Flakes

20

2.56%

Bread Flour

245

31.41%

AP

245

31.41%

Dough Flour

730

93.59%


Whey 125 and Water

610

78.21%

Dough Hydration

83.56%


Total Flour

998


Total Water & Whey Water

822


T. Dough Hydration

82.36%


Whole Grain %

43.19%


Hydration w/ Adds

78.94%


Total Weight

2,517


Add - Ins


%

Red Multi-grain Malt

3

0.38%

Barley Malt

20

2.56%

White Multi-grain Malt

3

0.38%

Total

26

3.33%


Multigrain Sprouts


%

WW

25

3.21%

Rye

25

3.21%

Quinoa

25

3.21%

Buckwheat

25

3.21%

Millet

25

3.21%

Bulgar

25

3.21%

Spelt

25

3.21%

Total Sprouts

175

22.44%


Toasted Bits


%

Toasted Germ, Oat Bran & Extraction

50

6.41%

  10 g each of instant coffee and cocoa went into the dark side only.

Isand66's picture
Isand66

Chocolate flavored coffee.....what could be wrong with using some in a bread you ask?  Nothing of course, so why not use it in a soaker as well ?  That is exactly what I ended up doing.  I normally leave the grains soaking for about 30 minutes to an hour, but in this case I left it over night for around 24 hours and the soaker grains sucked up all the coffee.  When I mixed the final dough I decided to make this a very moist, high hydration dough so I didn't cut back on the additional coffee used and the end result as you will see was the most moist bread I've made to date that almost melts in your mouth.

I used some rolled oats, cracked wheat and malted rye berries for the soaker and for the final dough I used durum, dark rye, white rye, European style flours and some roasted wheat germ.  I added some barbecued potatoes and pistachio oil as well.

In order to make the soaker I used 285 grams of hot water and mixed it with the ingredients and let sit at room temperature for 24 hours.

For the starter, I refreshed my standard AP 65% hydration white starter the night before and used most of it in this bake.

Soaker

100 grams Rolled Oats

100 grams Cracked Wheat

50 grams Malted Rye Berries

285 grams Hot Mocha Coffee

Mix coffee in a bowl with other ingredients and let sit covered at room temperature for 24 hours.

Starter

71 grams Seed (Mine is 65% AP Flour Starter)

227 grams AP Flour

151 grams Water (85 - 90 degrees F.)

Mix seed with water to break up for a few seconds and then mix in flour until the starter form a smooth dough consistency.  Put it in a lightly oiled bowl and loosely cover and leave at room temperature for at least 10 hours.  The starter should double in volume.  Put the starter in the refrigerator for up to 1-2 days or use it immediately.

Main Dough

Ingredients

425 grams Starter from above (all of the starter)

100 grams Durum Semolina Flour (KAF)

100 grams White Rye Flour

100 grams Pumpernickel Flour or Dark Rye Flour

150 grams European Style Flour (KAF)  (Sub Bread Flour if you don't have this)

50 grams Roasted Wheat Germ

370 grams Mocha Coffee (90 degrees F.)

14 grams Sea Salt (or table salt)

209 grams Mashed Roasted Potatoes

10 grams Pistachio Oil (substitute any oil desired)

Procedure

I mixed  the flours together with all the coffee except for 50 grams and let them autolyes for 30 minutes.    I then added the levain, potatoes, oil and the soaker and the rest of the coffee with the salt and mixed on speed #1 for 1 minute and #2 for 4 minutes.  I then did a stretch and fold, rested the dough uncovered for 10 minutes.  I then did another stretch and fold, covered the dough and let it rest for 10 minutes.  I did one more stretch and fold and put it in a lightly oiled bowl for 2 hours.  I then put it in the fridge overnight.

The next day I let the dough sit out at room temperature for 1.5 hours.  After 1.5 hours I formed it into loaves and put them in floured bannetons and let them rise covered for 2 hours.

Score the loaves as desired and prepare your oven for baking with steam.

I then baked on my oven stone with steam at 450 degrees until both loaves were golden brown and reached an internal temperature of 200 - 210 degrees F.

I had to bake this bread for almost 50 minutes since it was so moist and the final dough came out with an excellent crust and moist crumb.

Please visit my other blog for my older posts at www.mookielovesbread.wordpress.com.

Crumb Close-up
dabrownman's picture
dabrownman

After having such a nice loaf turn out from the last Chacon bake, we thought we would do everything we could to mess it up – and we did mess up more than half of it without much difficulty at all.  These things happen when you try new things.  Not to worry when we can learn from near disasters.

 We took a more difficult but very nice 90% whole grain formula and decided to try it out in the Cuisinart mini convection oven  we want to use for summer baking.   The problem is that space is limited, steaming is harder and keeping the steam in difficult.

 So we decided to try baking this loaf 2 different ways with steam and see which one performed better.

One was using the broiling pan that came with the oven, putting water below and baking the bread on the perforated cover.  The other way was to bake the bread on the broiler pan bottom and put a stainless steel mixing bowl over the top.

The spare tire.

 We also wanted to try out some different patterns for the Chacon as well as try out a new shaping method that would help in spring.   We did two folds and crimps (like shaping baguette) for the outside ring instead of one.

The loaf steamed with the full broiler pan and the water below, we decorated with flax seeds and bran stuck to the loaf with egg white.  One the other round loaf we used 3 smaller knotted rolls instead of one in the middle and left it undecorated under its steel steaming lid that acted like a cloche.


The winner was unmistakable.  The cloche, steel lidded loaf, performed much better as far as spring goes.   But, after removing the steaming lid my apprentice forgot to move the loaf up a rack level and burned the bottom of it.  OOPPPSSS!   The other loaf didn’t have any spring at all - but was not burnt.  Between the two, we got zero decent bread but would if you could cut the good bottom one of them and switch it to the other better sprung and looking top.

 Now we know that the mini oven will work fine in the summer to make bread when plugged in outside by using the cloche and the apprentice has learned her lesson.

The method for this bread was the 3 day process and similar to this bake:   http://www.thefreshloaf.com/node/28806/hanseata%E2%80%99s-wild-rice-sd-w-yeast-water-multi-seeds-prunes-beer-and-sprouts#comments

3 stage levain YW and SD combo starter, overnight retard of the starter, 24 hour autolyse for the flour and the liquid using whey water from yogurt making this time, 1 1/2 hour ferment/development followed by overnight retard for the dough with final proof the next day in rice floured baskets in a trash bag.

We also used walnut oil and crushed walnuts for a separate paste like Phil did for his Walnut and Sage bread and put walnuts and pumpkin seeds in the bread too with the sprouts.  – Thanks Phil!  We preheated to 500 F regular bake and then did a regressive temperature baking profile.  After 2 minutes 450 F.  After 15 minutes, remove steam or cloche and turn oven down to 400 F convection.  Turn loaf 180 degrees every 5 minutes until done about more 20 minutes or 35 minutes total until temp hits 205   the center of the loaf.   Leave in oven to crisp for 10 minutes with oven off and door ajar.

See how the purple color comes out under inside artificial lighting - The walnut oil paste finally shows itself. 


As you can see the crumb is nice and airy even with 90% whole grains in this loaf.  The power of YW shows.  The crumb was moist.  The crust stayed crisp and crunchy even hours later.  Tuns out the dark crust came from reusing the parchment paper from the Croissant bake - butter transferring to the crust and turning dark. It didn't taste bad nor was it tough or hard to cut - just dark - and extra tasty.  The Chacon curse was partially lifted.  This is one great tasting bread too.  We love all the whole grains, add ins, nuts and sprouts.   The whey water makes this breadhave a deep SD flavor that builds over time.  The Chacon has it's new formula now too. 

As a final note we did pinch of 100 g of fermented dough right before it went into the fridge to use as a starter for a pizza and pide for tonight’s dinner - turned out very well.  We will make that a separate post though.

The formula follows the pix and we won’t have crumb shots for 24 hours.

90% Whole Grain SD, YW Combo w/ Sprouts, Walnuts, Seeds and Whey      
      
Mixed StarterBuild 1Build 2 Build 3Total   %
SD Starter25100354.65%
Yeast Water050257512.82%
Rye2500254.27%
      
      
Dark Rye0250254.27%
Soft White W0050508.55%
WW25250508.55%
Water5000508.55%
Total Starter1251107531052.99%
      
Starter     
Hydration85.07%    
Levain % of Total18.89%    
      
Dough Flour    %   
Whole Rye508.55%   
Whole Soft White Wheat20034.19%   
Whole Spelt254.27%   
Semolina7512.82%   
Oats254.27%   
Whole Millet254.27%   
Whole Quinoa254.27%   
White WW508.55%   
Whole Farro203.42%   
Whole Barley203.42%   
Whole Bulgar254.27%   
Potato Flakes101.71%   
Ground Flax Seed101.71%   
Whole 6 Grain Cereal254.27%   
Dough Flour585100.00%   
Salt111.88%   
Whey 450, Water 7552589.74%   
Dough Hydration89.74%    
      
Total Flour752.5    
Whey 450, Water 75667.5    
T. Dough Hydrat.88.70%    
Whole Grain %89.24%    
      
Hydration w/ Adds89.04%    
Total Weight1,641    
      
Multigrain Sprouts     %   
WW254.27%   
Spelt254.27%   
Rye254.27%   
Total Sprouts7512.82%   
      
Add - Ins      %   
Red Rye Malt20.34%   
White Rye Malt20.34%   
Walnut Oil 50.85%   
Dried Sage10.17%   
Barley Malt203.42%   
Molasses101.71%   
Wheat Germ101.71%   
VW Gluten101.71%   
Sunflower Seeds 25, Walnuts 507512.82%   
Total13523.08%   
dabrownman's picture
dabrownman

Well, I am happy as punch with the latest version of my multi grain challah bread that is baked at 450F and steamed in the oven for 20 minutes -verses the cloche.  But, I am disappointed I was not able to control my experiment to find out if the cloche or oven steaming method was better.  The higher temperature worked best for both but, this attempt, the bread rose much higher and faster than the Wagner Ware loaf even though  both were identical in every way.  The only thing I can think of is that the starter, which was the same for each, was more mature and stronger than it was the week before.

I noticed this time, during the levain build, it doubled in 4 hours instead of the 8 hours it took the last time.  This is a new SD starter that is less than 3 weeks old (started the sourdolady way).  When the loaf went into the baking pan it appeared to be exactly like the cloched loaf.  But, the version 4, did rise higher during fermentation and it also rose higher in the fridge during retard and rose higher after it was taken out of the fridge this morning - even thought the retard was 6 hours less and the final rise before the oven was 2 hours less.

All things considered, I think that either cloched or baked in a steamed oven, this bread works equally well both ways and it shows that that a fully mature and strong starter with a proper build is essential to bread making.  I had half a loaf of the clotched verion 3 to compare in the photos that follow.  The version 4 crum is far superior, lighter and open.  The crust is the same as the clotched.  I like the taste of the clotched better propably because it was hours longer in the making and developed more SD flavor.

I think I can reproduce version 4 and will figure out a way to slow it down and make the flavor a litttle better.


What can Ido to improve this bread now.  Autolayse the flour before adding the levain.  Cut down the amount of levain to extend the time.  lower the temp of the ferment and post retard?  Any thing else?

Here are the pics before retard.


After retard

After poor slash - My worse bread making skill by far

In the oven

20 minutes later steam comes out

Oven off and door craked open - temp 205 F

Version 4 twice as high as version 3

crumb shot and others


dabrownman's picture
dabrownman

Before TFL came into my world, I had a multi grain, seeded, SD challah that I baked every week for my daily sandwich loaf. I called it my made up name Brachflachen Mehrere Vollkombrot. It was the standard; mix about 20 ingredients, kneed for 10 minutes let rise, punch down, let rise in the loaf pan, egg wash, slash and bake a 350 until 205 F. It took about 8 hours from start to finish - and I thought that was slow bread!! After finding out the slow bread was really 3 days - not 8 hours, I converted my old recipe to make it take nearly forever to make - instead of just a really long time :-) Now it is a 12 hour levain build, long S&F ferment, long retard and long after fridge rise bread. I really like the way it came out. Nice dark crispy, crunchy crust with Nijella and sesame seeds, soft, moist, small holed crumb with subtle SD taste that made great tasting toast too. It is still my favorite sandwich challah loaf .

The second shot of the crub says a lot about me and my foodie nature.  Home made; challah, dijon mustard, pickles, cheese, meat and home grown; lettuce and tomatoes.

The 3rd shot means it is home made Aranchello, Minneochello and Limochello time too !!!!!

MarieH's picture
MarieH

I baked two sandwich breads yesterday - sandwich buns and a multigrain sandwich loaf. Kind of had a theme...

The sandwich buns are adapted from a King Arthur recipe. I added white whole wheat flour and milled golden flax (both from King Arthur). I have used the golden flax a few times and really like the nutritional goodness and the texture it produces. Pictures first, then the recipe.

For best results (a smooth, slightly soft dough), use the smaller amount of water in a humid
environment, the greater amount in a dry climate and something in between the rest of the time.

Using the paddle attachment in a stand mixer bowl, on the lowest speed mix all of the dough ingredients until they come together.

Switch to the dough hook attachment and knead on speed number 2 for 10 - 15 minutes to make a soft, smooth dough. Cover the dough, and let it rise until it's nearly doubled in bulk - 1 to 2 hours.

6 to 8 ounces lukewarm water

1 ounce soft butter

1 large egg

7 ounces whole wheat flour

7 1/2 ounces AP flour

3 tablespoons ground golden flax

1 3/4 ounces sugar

1 1/4 teaspoons salt

1 tablespoon instant yeast

Gently deflate the dough, and divide it into 10 equal pieces. Shape each piece into a round ball; flatten to about
3" across. Place the buns on a lightly greased or parchment-lined baking sheet, cover, and let rise for about an hour, until noticeably puffy.

Lightly beat 1 large egg and 2 TBS water together and brush the top of the buns. Bake the buns in a preheated 375°F oven for 15 to 18 minutes, until golden brown.

Multigrain Sandwich Loaf

freerk's picture

what makes my multi grain tangzhong crack?

June 26, 2011 - 12:15pm -- freerk

I am currently in the process of  putting together a multi grain unenriched loaf, relying on the tangzhong method to keep it nice and fluffy. Here is the latest result from its prettiest side:


But this is what I would like to talk about: on the dark side of the moon this is what is going on

liseling's picture

Pinto Bean Bread

May 25, 2009 - 6:37am -- liseling
Forums: 

I think I've found one of the greatest sandwich breads ever in this recipe! It's soft and delicious with a crispy crust, it takes hardly any time to make once you've soaked your beans, and it's a high protein bread with all the nutrients found in pinto beans.

Pages

Subscribe to RSS - multi grain