Submitted by freerk on September 3, 2011 - 7:34am

Baking with one hand; german rolls baking video


Hey fellow TFL-ers,

Working hard on my baking with one hand skills. Thank you Panasonic, for a sturdy tiny camera, that will even survive a plunge in the dough (not that it has happened...yet)!

Welcome to the Bread Lab :-)


The YouTube video is hereby completely dedicated (I hope you appreciate this) to Hanseata (Karin)! Thank you for all your wonderful formulas on here, and making my favorite list read like a copy of your profile; this one's for you!

Enjoy!

Freerk

P.S. You would do me a big favor endorsing my BreadLab iniative. Every "like" will get me closer to realizing a 6 episode documentary/road movie; chasing the best bread Europe has to offer. Thanks in advance!

Submitted by freerk on July 17, 2011 - 1:30pm

Pain aux Céréales, based on Erik Kayser's formula


Hey fellow TFL-ers

Erik Kayser's formula's and breads are quickly gaining popularity in my baking ball-book. After giving his Buckwheat Paline a spin earlier, I went for the Pain aux Céréales this weekend, pointed to Don's formula here by Andy (Ananda). It was a great success from start to finish. A great dough to work with, a wonderful balance of flavours and, not unimportant, a great looker!

The seeds

The loaves

 A detail of the crust

and the crumb of course


Happy baking, thank you Don for the formula, and Andy for the pointer!

Freerk

P.S. You would do me a big favor endorsing my BreadLab iniative. Every "like" will get me closer to realizing a 6 episode documentary/road movie; chasing the best bread Europe has to offer. Thanks in advance!

Submitted by hanseata on May 12, 2011 - 12:51pm

Korntaler - Crunchy Bread from a "Floury German Kitchen"


STARTER
10 g rye starter, 100% hydration
60 g water
100 g bread flour

SOAKER
115 g whole rye flour, or medium rye
120 g whole wheat flour
30 g flaxseeds
30 g millet
4 g salt
210 g water

FINAL DOUGH
all soaker and starter
105 g bread flour
6 g salt
60 g dried soybeans
40 g water, or more as needed

DAY 1

Mix together all ingredients for starter. Cover, and let sit at room temperature for 14-18 hours.

MIx together all ingredients for soaker. Cover and let sit at room temperature.

DAY 2

Pour boiling water over soybeans and let soak for 15 minutes. Drain, let cool, and chop coarsely. Dry on kitchen paper towel, and toast slightly at 170 C/325 F for ca. 20 min. Let cool.

Combine all dough ingredients, mix on low speed for 1-2 minutes, until ingredients come together, then 4 minutes on medium-low speed. Let rest for 5 minutes, then continue kneading for another 1 minute.

Ferment sough for 3-4 hours, or until it has grown 1 1/2 times its original size.

Shape dough into boule, place into banneton, seamside down, and proof for ca. 2 hours, or until it has grown 1 1/2 times. (Preheat oven after 1 hour.)

Preheat oven to 250 C/500 F, including steam pan.

Bake bread at 240 C/475 F for 10 minutes, steaming with 1 cup of boiling water. Reduce heat to 220 C/425 F, and bake for another 10 minutes. Remove steam pan and rotate loaf 180 degrees. Continue baking for ca 20 minutes more (internal temperature at least 93 C/200 F). Bread should sound hollow when thumped on bottom.

Let cool on wire rack.

The recipe was adapted from Nils Schöner: "Brot - Bread Notes From A Floury German Kitchen".

Submitted by halimahanne on March 23, 2011 - 11:08pm

Multigrain Artisan Loaf with Millet, Barley and Teff

Hello all!  I've been reading this site and playing with artisan breads for.. oh 6 weeks now.  Anyway, great site and great information, thanks!  

Recently I bought a cookbook called Good to the Grain which has recipes with a bunch of different flours, including brown butter scones with teff, buckwheat cookies and more.  So, being rather poor at following recipes, I decided to make something up with my stock of weird flours for extra flavors. O M G! I ate half of the first loaf the first day.  I'm not sure that I can describe the flavor...sweet and rich... thats not quite right.  But I would like to share, cuz it was so yummy.

Biga/Poolish thing:

50 g millet

70 g barley

40 g teff

170 g whole wheat

320 g water

1/8-1/4 tsp yeast

I made at night and put immediately in the fridge at 9:30 pm.

Final Dough

Biga/Poolish

180 g AP

tsp yeast 

85 g water (on the warmish side to warm up the cold dough)

17 g salt (TB)


Autolyse 30 minutes without salt.  Added salt and did the French slap fold thing for maybe 5 minutes (where you pick it up bang the end on the table, stretch and fold it over).  Then I did 3-4  envelope thingys over the next 3 hours.  Shaped (not so good at that yet), rose and baked at 500 5 minutes with steam and then turned down to 450.  Not sure how long, used a thermometer  for doneness.

I want to try other breads (I have a starter in the fridge) yet I'm making this again for tomorrow! I'm addicted. Let me know what you think!  Thanks, Halimah

Submitted by breadbakingbass... on May 6, 2010 - 6:59am

5/5/10 - Millet, Brown Rice, Corn Bread


Hey All,

Just wanted to share with you my bake from last night.  I made this bread using white corn flour, freshly milled jasmine brown rice, and millet.  I may have overhydrated, but I think it turned out nicely.  Enjoy!

Tim

Ingredients:

700g AP

100g Jasmine Brown Rice (freshly milled)

100g Millet (freshly milled)

100g White Corn Flour

188g SD starter @ 60% hydr

700g Water

20g Kosher Salt

1/2 tsp ADY

1900g Total Dough Yield


Directions:

6:35pm - Mix all ingredients in large mixing bowl well, cover and let rest for 25 mins.

7:00pm - Knead for 30 seconds using wet hands and french fold kneading method in mixing bowl ala Richard Bertinet.  Cover let rest.

7:30pm - Turn dough.

8:00pm - Turn dough.

9:25p - Divide and shape into 2 boules.  Just do 2 letter folds, place in floured linen lined banneton and let proof for 1 hr.  Arrange baking stones on 2 levels along with steam pan.  Preheat to 500F.

10:00 - Turn dough out onto floured peel, place in oven directly on stone.  When all loaves are in, place 1 1/2 cups water in steam pan, close door.  Bake 15 mins at 450F with steam.  Rotate between stones, bake for 30 minutes at 425F.  Loaves are done when internal temp reaches 210F.  Cool completely before cutting.


Submitted to Yeastspotting on 5/6/10

Submitted by breadbakingbass... on March 19, 2010 - 12:39pm

3/16/10 - Everything (I had laying around in my pantry) Levain


Hey All,

Just wanted to tease you a bit.  I don't have pictures yet, but here is the recipe for something I will call the "Everything Levain".  I pretty much had all this stuff laying around in my kitchen, so I wanted to make a bread using all of it...  Here is the recipe below.  I will post pictures later this weekend.

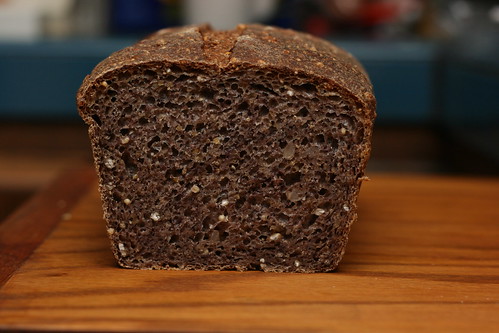
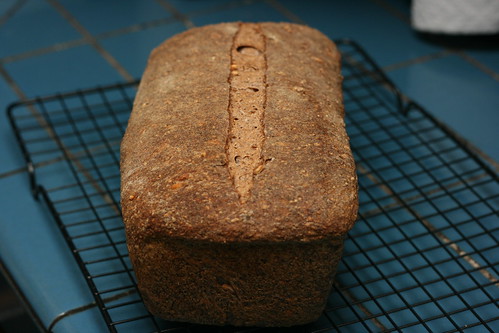
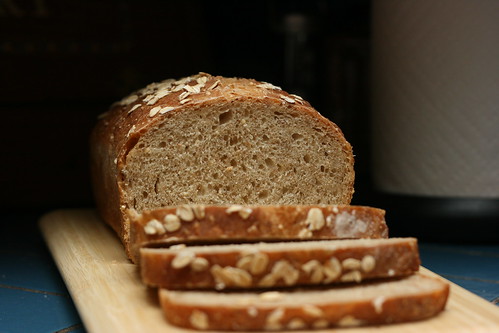
Edit: So I finally cut into it.  A friend whom I gave a loaf said the crust was too crusty, and the inside was a bit "dense"...  My loaf, while it was very "crusty", I found the crumb to be pretty OK.  As for the taste, it's pretty OK.  There were so many things it it, that I can't really place any of the flavors individually...  I prefermented 50% of the total flour, with most of it being the mixture of bits.  Maybe next time I will preferment less, up the hydration, and bake it for a shorter amount of time...  Overall, I am pleased with this "bold" bake...  Enjoy!

Tim

3/16/10 - Everything Levain

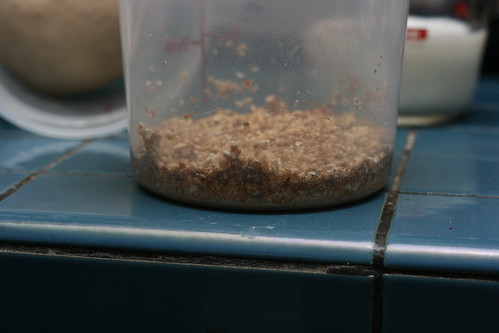
Stiff Levain (60% Hydration)

440g - Bread Flour

70g  - Rye Berries (freshly ground)

70g  - Spelt Berries (freshly ground)

70g  - Hard Wheat Berries (freshly ground)

70g  - Millet (freshly ground)

70g  - Jasmine Brown Rice (freshly ground)

70g  - Cornmeal

70g  - Graham Flour (Bob's Red Mill)

70g  - 10 Grain Cereal (Bob's Red Mill)

600g - Water

100g - Firm Sourdough Starter (60% Hydration)

1700g - Total


Final Dough

750g - AP Flour

250g - Bread Flour

760g - Water

36g -  Kosher Salt

¾ Tablespoon - Instant Yeast

1700g - Stiff Levain

Yield - 3500g dough


3/16/10

Stiff Levain

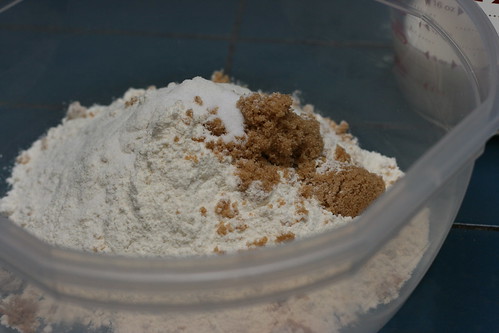
7:30pm - Grind all grains

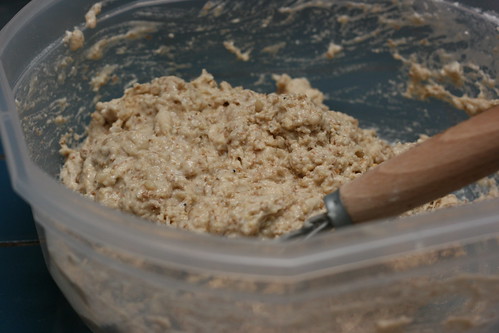
7:50pm - Mix all with wooden spoon until combined, knead with wet hands until rough dough is formed, cover and let rest.

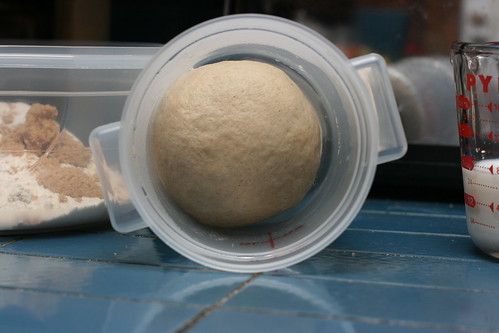
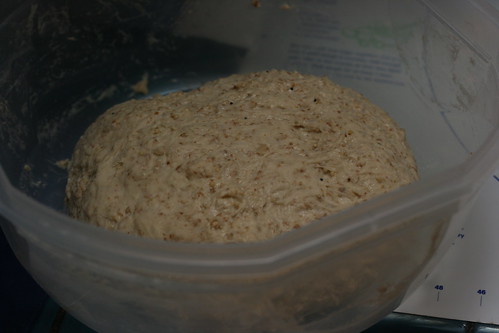
11:30pm - Knead into ball, transfer to oiled container, cover and let rest on counter.


3/17/10

1:00am - Transfer to refrigerator overnight.

8:30am - Turn dough, shape into ball, return to refridgerator.


3/18/10

12:52pm - Take levain out of fridge, place on counter and let rest.

1:00pm - Mix flour/water from final dough, place in oiled container and let rest/autolyse in refrigerator.

6:04pm - Take dough out of fridge.  Measure out salt and yeast.  Cut up stiff levain into pieces and place onto dough, sprinkle with salt and yeast, knead 5 minutes and rest for 30 minutes, covered.

6:50pm - Knead dough 1 minute, cover let rest for 30 minutes.

7:20pm - Turn dough, cover let rest.

9:00pm - Divide dough into 3 equal pieces, shape, place in linen lined basket, covered with towel.  Proof for 90 minutes.

9:30pm - Arrange 2 baking stones on different  levels, arrange steam pan, turn on to 550F with convection, preheat for 1 hour.

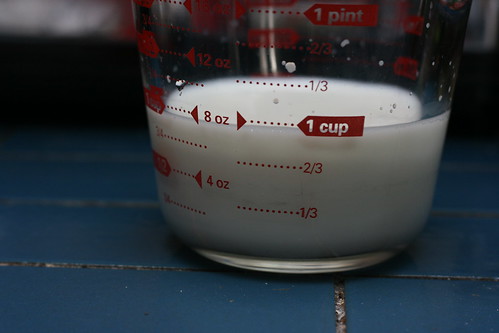
10:30pm - Turn off convection, place 1 cup of water in steam pan, close door.  Turn boules out onto floured peel, slash as desired and load directly onto stone.  After last loaf is in, add 1 more cup of water to steam pan, close door.  Lower temp to 460F and bake 1 hr with no convection, rotating and shifting loaves between stones halfway through bake, lower to 430F for remaining half of bake.  Loaves are done when crust is deep brown, and internal temp is 210F.  Cool completely before cutting.


Submitted by copyu on January 3, 2010 - 3:07am

Millet varieties...?


Hi all,

I've just come back from a long shopping trip. I was panicking about finding all the requisites for tomorrow's bake, as I live in Japan, where tastes are somewhat different from those of westerners. Still, I was successful—I even found amaranth and European Anise, eventually!

However, I am now confused about 'millet'. I found at least 6 or 7 different varieties in one store and was wondering which ones are used in Europe and the USA, if anyone can help.

Millet is rather popular in Japan, I would guess, but I only know of it being used west of Tokyo, especially for sweets (eg, 'kibi-dango', which is famous in Okayama.) Apparently, there are at least four different names for this grain in Japanese: Awa, Kibi, Kimi and Hie.

I bought the 'awa' and 'hie' types which look vaguely similar. The 'awa' is golden and a little larger than poppy-seeds; the 'hie' is a tad larger and kind of "drab" in color—whitish-brown. [One available variety of "Kibi" was almost the size of black peppercorns. I didn't think I'd want that in my dough...]

If my information is correct, the "hie" type is also known as "barnyard millet" in some circles. Can anyone enlighten me as to what type is used in bread outside of Japan?

Cheers,

copyu

PS: I want to make the 'seeded sour' NKB featured in a video on 'breadtopia' with quinoa, amaranth, poppy, millet, whole wheat, rye, bread flour...Thanks, copyu


Submitted by SumisuYoshi on November 19, 2009 - 3:10am

Royal Grains Bread

This bread is heavily inspired by the Multi-grain Extraordinaire recipe from Bread Baker's Apprentice and really, it came out of my desire to stuff even more grains and grain flavor into that bread. I first made the Multi-grain Extraordinaire back in late September, and while I liked it quite a bit I was really looking for a bit more graininess, so to speak. I hadn't thought about that again until this weekend, as I knew I needed some lunch bread but I wasn't sure what to make. When I was digging in the cupboard for the pasta I needed for a pumpkin stew (more on that in a later post!) I saw the forbidden rice and purple barley I got a while back. Suddenly I had it, time to rework the recipe in search of more 'graininess'! In light of the supposed royal nature of the forbidden rice (although that is probably mostly marketing) and the similarity in color of the cooked rice to the ancient Royal Purple, I decided to name this Royal Grains Bread.

Royal Grain Bread Recipe

Makes: One 2 lb loaf or 6-12 rolls

Time: 2 days. First day: soaker and starter. Second day: mix final dough, ferment, degas, shape, final rise, bake.

Ingredients: (baker's percentages at the end of hte post)

Grain Soaker:

  • 4 oz. assorted grains (I used 1 oz. amaranth, 1 oz. millet, 1 oz. whole oat groats, .5 oz. corn meal, and .5 oz. flax meal)
  • 3-4 oz. water (enough to just barely cover the grains)

Stiff Sourdough Starter:

  • 1 oz. 66% hydration levain
  • 6 oz. bread flour
  • 4 oz. water

Final Dough:

  • 11 oz. of above starter
  • 4 oz. bread flour
  • 4 oz. other grain flours (I used 1 oz. forbidden rice flour and 3 oz. purple barley flour, both home ground)
  • 1.5 oz. brown sugar
  • 1½ teaspoons salt
  • 1 oz. cooked brown rice
  • 1 oz. honey
  • 4 oz. milk
  • 1-2 oz. water (this will depend on how much your grains absorbed)

Directions:

  1. Mix the grains and water for the soaker together, use just enough water to cover the grains and then cover the container and leave it to sit at room temperature overnight.
  2. Mix the 1 oz. of levain (if you aren't using a stiff levain you can adjust the quantities for whatever hydration levain you are using) with 4 oz. of water until well integrated and nearly homogeneous looking. Incorporate the water and levain mixture with the bread flour until a ball starts to form. Let the dough rest for 5 minutes covered. Knead the dough briefly, just enough to get it well mixed and smooth, no need to develop the gluten yet. Return the dough to a covered bowl or container and leave at room temperature to ferment. Depending on the strength of your starter and room temperature this could take from 3-12 hours. When I made it the room temperature was about 63 degrees and it took nearly 12 hours. If you know your starter will develop fairly rapidly, start this early enough to degas the dough and refrigerate after it has doubled, otherwise leave it at room temperature overnight.
  3. The next day remove the starter from the fridge ( if it was put in the fridge) about an hour before you plan to start making the bread.
  4. Stir the rest of the bread flour, the alternate grain flours, salt, and brown sugar together in a medium large bowl. I like to mix the starter in with the liquid so it incorporates into the final dough more easily, so stir together the milk, honey and 1 oz. of the water (reserve the rest in case needed later) and then mix with the 11 oz. of starter. Now pour the starter and liquids, the soaker, and the brown rice into to the bowl with the dry ingredients. Mix all of the ingredients together until they just begin to come together in a ball.
  5. Turn the dough ball out onto a lightly floured counter and knead for 6-10 minutes, or until you get adequate gluten development (check with a windowpane test). In my experience making this bread the dough will generally be stickier than you would expect from the hydration level and stiffness of the dough, I think this has to do with the grains from the soaker. Try to avoid adding too much flour during the kneading, as long as the dough is stiff enough that it seems to be able to hold a shape it will turn out fine, just use a bench scraper to recover any bits that stick. Lightly oil a bowl big enough to hold the dough when doubled, form your dough into a ball, roll it around in the oil, cover the bowl and set the dough aside to ferment at room temperature. Again, the time on this will vary depending on your starter, but 2-6 hours is a good estimate. No matter how long, when the dough has nearly doubled it is ready.
  6. If you want to make a freeform loaf: Now that your dough has doubled, or nearly doubled, turn it out and gently degas the dough, flattening it into a vaguely rectangular shape. Give the dough a letter fold (folding it into thirds along the long side) and seal the seam with the edge of your hand if needed. Now you have a preshape for a batard, fold once again to ensure good surface tension. Give the dough 3-5 minutes to rest before rolling it with your hands on the bench to make the ends thinner and extend them. If you have a couche use it to support the loaf as it rises, otherwise you can use parchment paper dusted with flour or sprayed with spray oil, just put objects to the side of the loaf to hold the parchment in place during the rise, and cover the loaf with oil sprayed plastic wrap. If you want to make a sandwich loaf: Starting just after the letter fold, flip the dough and gently roll it back and forth with your hands to even out the loaf shape. Once your loaf is more evenly shaped, tuck the ends underneath and briefly roll it again before placing the dough in an oiled 8½x4½ loaf pan. Cover the loaf pan and set it aside for the final rise. If you want to make rolls: Divide the dough into 6-12 of evenly sized pieces of dough, briefly preshape them into rounds and let them rest covered for 2 minutes so the gluten relaxes a bit. After the rest, shape the rolls into nice tight little boules. The method I use is to put my hand over the ball of dough, surround it with my fingers and thumb. Then while applying slight downward pressure and slight pressure with my thumb and pinky, rotate my hand a quarter turn counterclockwise, release the pressure slightly and rotate back to the home position. Repeat this until the dough forms a nice tight little ball. Place the shaped rolls on parchment paper on a baking sheet, cover, and set aside to rise.
  7. The final rise should be shorter than either of the previous two, and be careful using a poke test on this bread as the inclusion of flours with no or little gluten will make it a bit more delicate. For me, the final rise took about 90 minutes (but I had also moved to putting it in an oven with just the light off because I was going to need to go to bed!). If you are making the loaf in a loaf pan, it should rise to about 1/2 to 1 inch above the edge of the pan. The freestanding or loaf pan loaves would benefit from a very light scoring, no more than 1/8 to 1/4 of an inch deep. Preheat the oven to 350° with the rack on the middle shelf. If you wish to top your loaves or rolls with seeds or some other garnish, spray them lightly with water and top shortly before putting them in the oven.
  8. Bake for 20 minutes, at which point if you were making 12 rolls there is a good chance they will be finished. If you are making larger rolls or loaves rotate 180º (or earlier if you know your oven heats very unevenly) and continue baking for another 10-20 minutes on freestanding loaves and 25-40 minutes for pan loaves. As usual, the loaves should sound hollow when tapped on the bottom if they are finished and be around 185-190º. The color of the finished loaf will vary widely depending on the grains and grain flours you have used.
  9. Remove the baked loaves to a cooling rack (taking pan loaves out of the pan) and allow to cool for 1-2 hours before slicing.
  10. Enjoy the delicious graininess!

Note: If you wish to make this loaf without levain, skip the levain step and in the final dough use: 10.5 oz. bread flour, 5.5-6.5 oz. water and add in 2¼ tsp. instant or active dry yeast (add the instant to the dry ingredients and the active dry to the water and stir well). The rise times will of course be very different, probably around 1.5 to 2 hours for the first rise, and 1-1.5 hours for the second rise.


Some more photos:

Forbidden Rice and Purple Barley:

Shaped and Panned Loaf:

Risen Loaf:

Baker's Percentage: Soaker:

  • Grains 100%
  • Water 75 to 100%
  • Total: 175-200%

Starter

  • Bread Flour 100%
  • Water 66.7%
  • 66% Levain 16.7%
  • Total 183.4%

Dough

  • Starter 137.5%
  • Bread Flour 50%
  • Alternate Flours 50%
  • Brown Sugar 18.8%
  • Salt 4.8%
  • Honey 12.5%
  • Cooked Brown Rice 12.5%
  • Milk 50%
  • Water (about) 12.5%
  • Soaker 100%
  • Total: 448.5%

Straight Dough Version:

  • Bread Flour 72.4%
  • Alternate Flours 27.6%
  • Brown Sugar 10.3%
  • Salt 2.6%
  • Honey 6.9%
  • Cooked Brown Rice 6.9%
  • Milk 27.6%
  • Water 41.4%
  • Soaker 55.2%
  • Total: 250.9%
Submitted by SumisuYoshi on September 28, 2009 - 10:20pm

Another Sunday Bake

Sunday again, at my house this time. And once again I need a pan loaf for sandwiches! I started flipping through Bread Baker's Apprentice looking for my next target. The Multigrain Bread Extraordinaire caught my eyes, without so much as a picture! People who know me probably wouldn't be surprised by this, because as much as I love various artisan breads, whole wheat or multigrain anything will make me sit up and take notice. And no, I don't eat cardboard in my spare time.

The first step was to figure out what grains I was going to use in the bread. The recipe called for 3tbsp of either corn meal, amaranth, millet, or quinoa; 3tbsp of either rolled oats or wheat, triticale or buckwheat flakes; and 2tbsp of wheat bran. I decided to go with 2tbsp amaranth, 1tbsp millet, 2tbsp rolled oats, 1tbsp buckwheat cereal (not as small as flakes, but who's counting?), the 2tbsp of wheat bran, and 1tbsp of flax meal.

I'd also decided to deviate a bit from the recipe and make it sourdough. I already had my starter out to refresh (Friday night), and I had some leftover that I wouldn't be able to use for anything else, so why not right? I used the starter to make a small stiff levain (which I meant to build Saturday, and forgot). I wasn't particularly following a recipe for that part, so I wrote down the amount of flour and water I used so I could account for it in the recipe for the loaf.

I gathered together the rest of the ingredients:

And not shown here: honey, cooked brown rice, and water. They went in after the levain descended on the milk.

Mixing time! The dough was much gummier and stickier than I was expecting. I think a lot of that gummy/stickyness came from the starches in the soaker. As I emptied the grains into the dough I noticed the somewhat stringy goop of starch conglomeration on the bottom of the container.

After a bit more mixing, adding a little bit of flour, doing some stretches and folds, the dough finally reached a point where I could actually handle it. It still was quite sticky and gummy though, definitely unlike other doughs I've dealt with so far.

As I mentioned, I forgot to do a build of the stiff levain I made for this loaf. So it took a very long time to rise, in fact, at one point I wasn't even sure it was going to rise. What made it especially hard is that my sourdough starter really doesn't do most of the rising until the oven. So, I gave the dough plenty of time and a few more folds, it had finally grown some and didn't spring back on a poke test, so I shaped it into a loaf and plopped it into a pan.

In the loaf pan it didn't take quite as long for the second rise, but it was getting late and I really needed to get to bed, so that was all the rising it was going to do!

Into the oven it went, it did get a nice little bit of oven spring (but not as much as I was hoping for, and nowhere near as little as I was dreading). I think next time I'll make it with regular yeast, or make sure I remember to have a build of levain before I start the loaf! It smelled really wonderful when it was baking, in fact it smelled amazing when it was rising too! Never had a loaf that smells that good during bulk ferment and proofing. It was a great combination of yeasty, sour, sweet, and grassy/grainy. I assume the aroma must have come from all the grains in the loaf, but I don't really know for sure. This is definitely one bread I want to make again, and soon! I'll probably experiment with switching it over to whole wheat too, if that turns out well I think I may have found my dream sandwich bread...

Bread Baker's Apprentice Challenge

YeastSpotting

Millet crust