Back in May, 2010, bnom posted a reminiscence of the San Francisco Sourdough bread baked by Larraburu Brothers Bakery, which went out of business about 30 years ago after a fire in their plant. (See Divine inspiration--for me it way Larraburu Brother's SF SD. What was it for you?) For many who grew up eating it, the Larraburu bread was the quintessential San Francisco Sourdough. Although the bakery is long-gone (and much lamented), Doc.Dough found a journal article from 1978 describing their formula and process, so we might attempt to reproduce this famous bread.
Doc.Dough's citation is quoted below, as follows:
Title: Lactic and volatile (C2-C5) organic acids of San Francisco sourdough French bread
Cereal Chemistry 55(4): 461-468; Copyright 1978 The American Association of Cereal Chemists
Authors: A. M. Galal, J. A. Johnson, and E. Varriano-Marston
The Larraburu Company produces San Francisco sourdough French bread by the sponge and dough process. Each day a piece of straight dough or starter sponge known as the "Mother" is saved and refrigerated to be used as a starter sponge the following day. This starter sponge is used to make more starter sponge as well as sponges for bread production. The starter sponge consists of 100 parts of clear flour (14% protein), approximately 50 parts of water, and 50 parts of the starter sponge. The ingredients are mixed and fermented for 9-10 hr at 80°F. The bread dough is made by mixing 100 parts flour 12% protein, 60 parts of water, 15 parts of sponge, and 1.5-2% salt. The dough rests 1 hr and then is divided, molded, and deposited on canvas dusted with corn meal or rice flour. The dough is proofed for 4 hr at 105°F (41°C) and 96% relative humidity and baked at 420°F (216°C) for 40-50 min in a Perkins oven with direct injection of low pressure steam (5 psi). Oven shelves were covered with Carborundum.
Specific instructions for mixing are not provided, but I would surmise that, because of the very short bulk fermentation and long proofing times, Larraburu Brothers used an intensive mix. This would result in a bread with high volume but a relatively dense, even crumb. I altered the procedure to use an autolyse, a less intensive mix, a longer bulk fermentation with a stretch and fold and a shorter proof. My intention was to bake a bread with a more open crumb structure and better flavor.
The autolyse allows the flour to absorb the water and for gluten to start developing. This head start on gluten development allows for a shorter mixing time to get to the desired stage of gluten development. Less mixing has two principal effects: 1) The gluten strands are less organized, resulting in a more open crumb with a random distribution of holes of varying size. 2) Less oxidation of the carotenoid pigments in the flour, resulting in a more yellow crumb color and better bread flavor.
Note that the fermentation and proofing temperature control was made possible by using a Brod & Taylor Proofing Box.
To make one 1 kg loaf:
Sponge (Stiff Levain) | Baker's % | Wt (g) |
High-gluten flour | 100 | 45 |
Water | 50 | 22 |
Stiff starter | 50 | 22 |
Total | 200 | 89 |
Mix thoroughly and ferment for 9-10 hours at 80º F in a lightly oiled bowl, covered tightly.
Final dough | Baker's % | Wt (g) |
AP flour | 100 | 565 |
Water | 60 | 339 |
Salt | 2 | 11 |
Sponge (stiff levain) | 15 | 85 |
Total | 177 | 1000 |
Procedure
Mix the flour and water in a stand mixer with the paddle for 1-2 minutes at Speed 1.
Cover the mixer bowl tightly and autolyse for 20-60 minutes. (I autolysed for 60 minutes.)
Sprinkle the salt on the dough and add the sponge in chunks.
Mix for 1-2 minutes with the paddle at Speed 1, then switch to the dough hook and mix for 5 minutes at Speed 2. Adjust the dough consistency by adding small amounts of water or flour, if needed. (I did not add either.) The dough should be tacky but not sticky. It should clean both the sides and bottom of the mixing bowl.
Transfer the dough to a clean, lightly oiled bowl. Cover tightly.
Ferment at 105º F for 2 1/2 to 3 hours in a humid environment. Stretch and fold once at 1 1/4 hours.
Pre-shape the dough round and cover with a towel or plasti-crap.
Let the dough relax for 15-20 minutes.
Shape as a boule or bâtard.
Proof at 105º F in a floured banneton or en couche, covered, until the dough slowly fills a hole poked in it with a finger. (This was in 30 minutes, for me!)
About 45 minutes before baking, pre-heat the oven to 480º F with a baking stone and steaming apparatus in place.
Transfer the loaf to a peel and score it as desired.
Transfer the loaf to the baking stone. Turn down the oven to 450º F.
Bake with steam for 15 minutes. Remove your steaming apparatus, and bake for another 25 to 35 minutes until the crust is nicely colored and the internal temperature is at least 205º F.
Turn off the oven, but leave the loaf on the baking stone with the oven door ajar for another 10-15 minutes.
Transfer the loaf to a cooling rack, and cool completely (at least 2 hours) before slicing.

Proofed, slashed and ready to bake
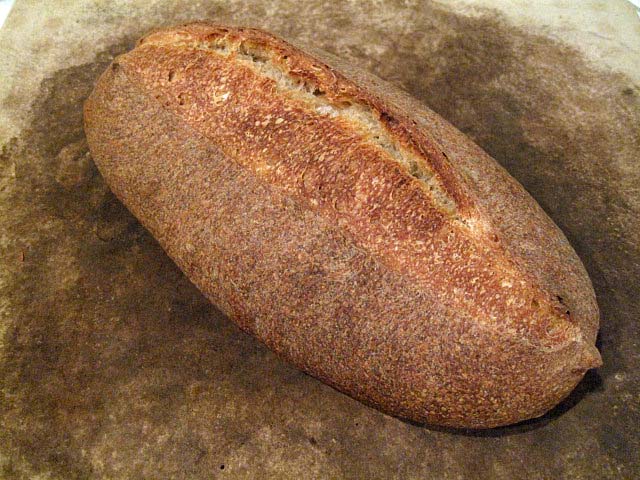
The bread had exuberant oven spring and bloom. In hindsight, it could have proofed for another 15 minutes or so without harm. I baked it for a total of 40 minutes. The crust was very firm, and the loaf sang nicely while cooling. The aroma was that of fresh-baked bread without any yeasty overtones.


Crackley Crust

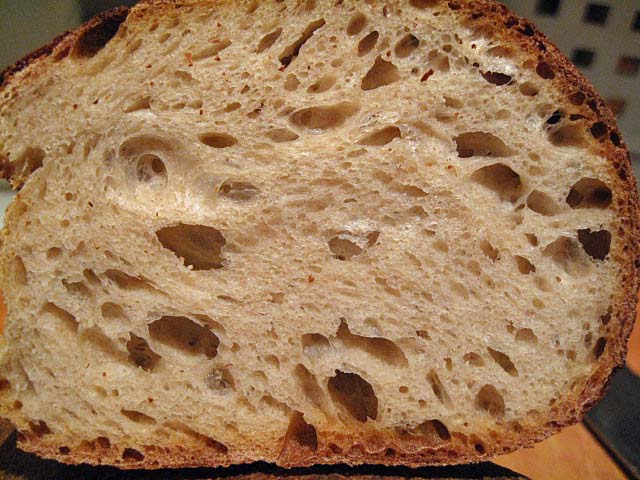
Classic SF SD crumb
I sliced and tasted the bread about 3 hours after it came out of the oven. The aroma of the bread was sweet and wheaty. The crust was very crunchy with a wonderful flavor I have had from the crusts of excellent bakery loaves but not before from my oven. The crumb was quite tender and cool-feeling. The flavor was sweet with only a hint of lactic acid, creamy-type sourness. I could discern no acetic acid presence at all, much to my surprise.
Now, that's not "bad!" I'd say this may be the best flavored French-style pain au levain I've ever made. But it does certainly not have the assertive, vinegary tang usually associated with San Francisco Sourdough. In fact, my wife, who is not at all fond of super-sour sourdoughs, said, "This is better than San Francisco Sourdough!" I try not to argue with her, but it's clearly a matter of taste.
I'm going to give this recipe some thought and may tweak it to get more sourness, but, you know, I may make it just like this again too. It's really outstanding!
David
Submitted to YeastSpotting