Posted on www.evilshenanigans.com on 11/25/2009 here
Ready for something a tad more advanced? It takes time to make, but it is SO worth it.

I fell in love with croissant making a few semesters ago in my Laminated Dough class. Bread making is among my favorite things to do in the kitchen, but making laminated doughs (doughs with butter sandwiched between the layers) tops that. It takes time to make laminated dough and the process has taught me a lot about being patient in the kitchen. Some things can't be rushed.
Making croissants at home is not a hard thing to do. Yes, it will seem intimidating the first time when you see all the steps all at once, but it is really just three stages, which makes the whole process less intimidating for me.
Stage 1 - Mixing the dough and making the butter block
Stage 2 - Marrying the butter with the dough and doing your three turns (folding the dough into thirds, like a letter, and turning 90 degrees)
Stage 3 - Make-up and baking

A few things to note:
I proof these croissants in the refrigerator overnight then allow them to set, at room temperature, for an hour before baking. The long, cold proof gives the dough more flavor and allows the butter to chill completely before the final proof at room temperature.
The oven gets a spritz of water from a spray bottle before the croissants go in, and another when I put them in the oven. The steam helps the croissants get nice and big. You want that.
Give yourself two or three days to make these. If I do not have a full day to make the dough and do the turns, about 6 hours for stage one and two, I make the dough and make the butter block the first day, do the turns and make up the croissants the second and bake the third.
Cook the croissants until they are well past golden brown. The edges should be quite dark and the tops a robust brown color. This does two things, it gives the croissants more flavor and it ensures they are done all the way through.
Once made up into croissants you can freeze the dough and store it for as long as two months. Just put the frozen croissants in the refrigerator overnight to defrost and let stand for an hour and a half before baking.
This dough can also be used for some pretty awesome danish!

Roll your sleeves up, get out your butter and remember, no fear! You CAN do this!!
Butter Croissants Yield 5 pounds of dough (about 48 croissants)
Adapted from Professional Baking, 4th Edition by Wayne Glisslen
For the pre-ferment:
7 ounces water, warmed to 110F
1/2 ounce dry active yeast
5 ounces bread flour
For the dough:
2.5 ounces sugar
1 teaspoon salt
12 ounces whole milk
1 1/2 ounces water
2 pounds bread flour
For the butter block:
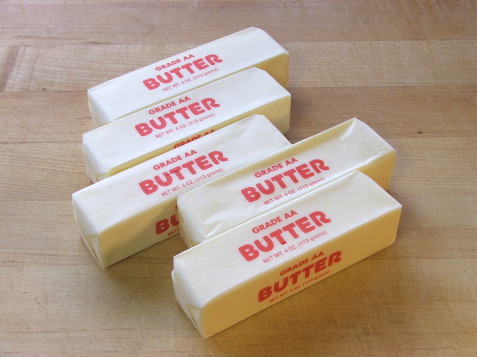
1 pound 4 ounces butter (I use salted for croissants, but unsalted is also good)
Egg wash:
1 egg
1 tablespoon cream
2 teaspoons water
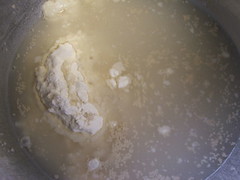
Begin by preparing the pre-ferment. In the bowl of a mixer, or in a large bowl, mix the water, yeast, and bread flour. Mix until it forms a very wet dough. Cover and let stand for 15 minutes.
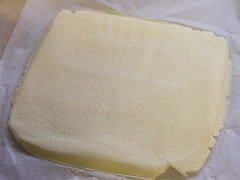
While the pre-ferment sits prepare the butter block.
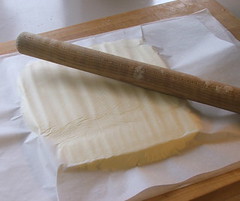
Between two sheets of parchment paper arrange 5 sticks of cold butter into a rough square. Using a rolling pin press and pound the butter until it forms a rectangle about 1/4″ thick. Place this in the refrigerator until ready to use.

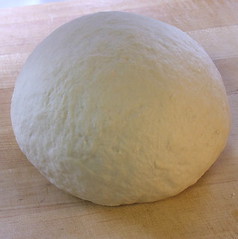
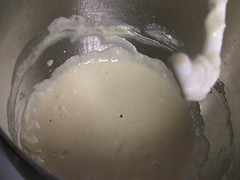
Once the pre-ferment is rested add the ingredients for the dough and mix on low speed for three minutes. Increase the speed to medium for two minutes. You do not want to form gluten, you are just trying to form a rough ball of dough. Turn the dough out on a lightly floured surface and knead lightly until it forms a relatively smooth ball.
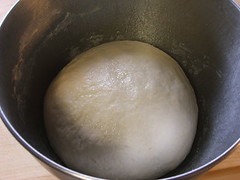
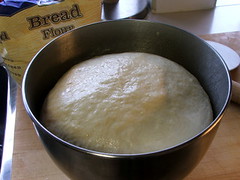
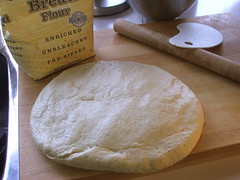
Place the dough in an oiled bowl and cover until it is double in bulk, about 50 minutes. Turn the dough out of the bowl onto a lightly floured surface and, using the palm of your hand, press out the air bubbles. Form another ball and return to the bowl. Refrigerate for an hour.
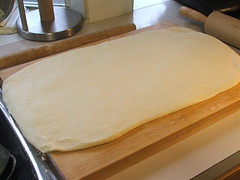
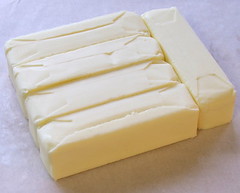
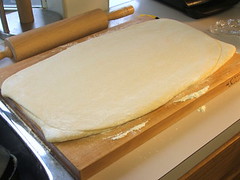
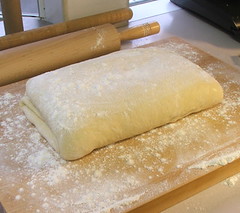
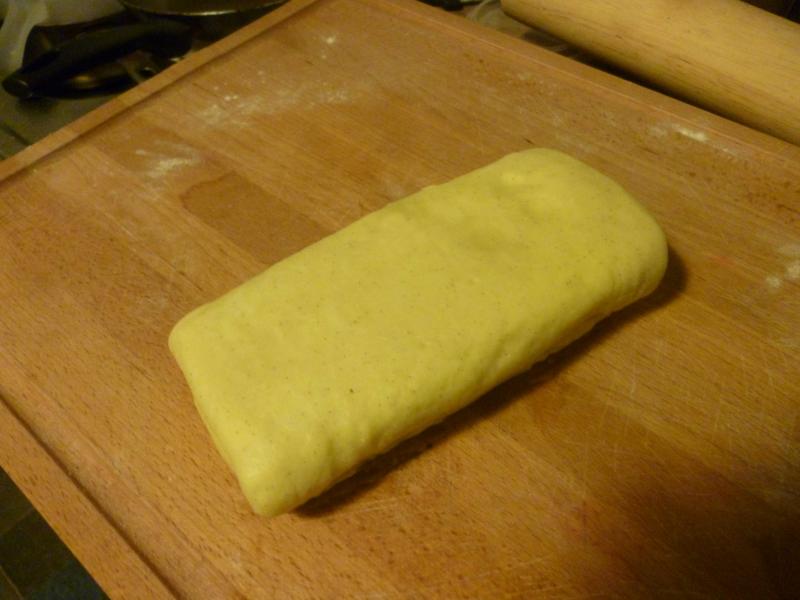
Once the dough has rested for an hour remove it and the butter block from the refrigerator. Turn the dough out on a a lightly floured surface and press out the air. Using a rolling pin form a large rectangle roughly 12″ x 24″.
Take the butter block still wrapped in parchment and see if it covers 2/3 of the rolled out dough. If it is too small roll it out until it fits, leaving a 1/2″ border around the edges. You can use your fingers to spread the butter if needed, just make sure that the butter does not develop any holes.
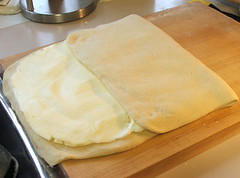
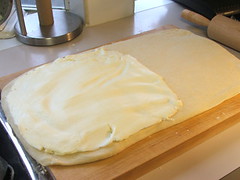
Fold the dough with out butter over the center of the dough. Fold the buttered side in. At this point check to see of the butter is getting soft. You want the butter cool and firm, but if it is starting to melt let the dough chill, covered, for twenty minutes before you make the first turn. ( If you work quickly you can incorporate the butter and do your first turn before you have to chill. Your first time you may not be able to. That is completely ok.)
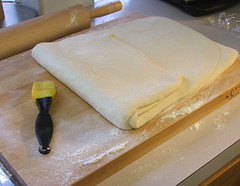
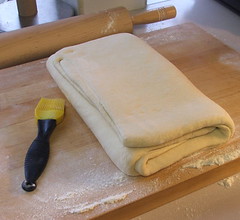
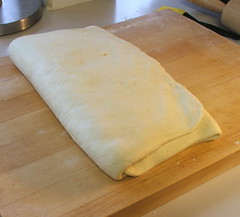
Turn the dough 90 degrees, or with the long seam facing horizontal to you. Dust the board and the dough well with flour and roll out the dough into a rectangle that is about 12″ by 20″. Dust all the flour from the dough and fold one third of the dough in. Dust the top of the dough again to remove any flour and then fold the other third over the top. Wrap the dough in plastic and chill in the refrigerator for an hour.
Repeat this process two more times.
Once you have completed three turns, and the dough has rested for an hour, you are ready to roll out and make up your croissants.
Divide the dough in half. Wrap the half you are not using and return to the refrigerator.
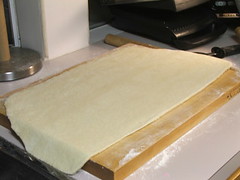
On a well floured surface roll out the dough until it is about 1/8″ thick. You may need to let the dough rest during this process if it starts to spring back. If so, cover with plastic and return to the refrigerator for ten minutes. Once rolled out cut the dough in half lengthwise with a pizza cutter. Now, holding your cutter at an angle cut triangles from the strips of dough that are about 4″ wide at the base. Cut one strip at a time.

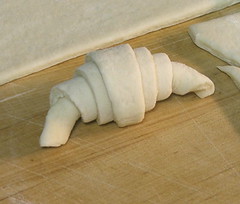

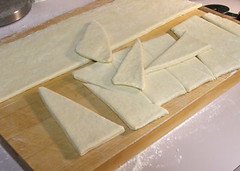
Working with a few triangles at a time, chilling the rest, stretch the dough gently at the base until it is about 5″ to 6″ wide, then stretch the dough lengthwise so it forms a long triangle. Working from the base, roll the dough onto itself, stopping to stretch the unrolled dough half way through. Place the dough with the point on the bottom and tuck the edges in to form a crescent shape. Place on a parchment lined sheet pan.
Cover with plastic and chill for at least 4 hours, but overnight is best.
Heat the oven to 400 F, prepare the egg wash, and fill a spray bottle with water. Set the dough out to proof for an hour at room temperature while the oven heats.
When you are ready to bake spritz the inside of the oven with water. Close the door and wait thirty seconds. Brush the croissants with egg wash, then put the pan in the oven and spritz again and quickly close the door.

Bake for 18 to 22 minutes for medium sized croissants, or until the tops are very brown and they sound hollow when tapped on the side. Rest on the pan for five minutes before removing to a wire rack to cool slightly.

Serve warm.


 They turned out fairly well I thought, not having made them for a few years and I was very happy with the flavour. Unfortunately I'd run out of time that day to do anything more with the feuillete and decided to leave it for the next day. When I got home from work the next afternoon I set about rolling out the dough to a 14x9 inch rectangle and dividing that into 3” wide strips of dough that I piped a 3/4” strip of filling (recipe to follow) along the length of each, then alongside the length of that strip I placed blueberries side by side. These were then rolled string fashion, or like you would a cinnamon bun roll, to 15 1/2” and then made into a 3 strand braid and placed in a loaf tin to rise.

 It took about an 1 ¼ hrs to rise and 25-30 minutes in a 380F oven to bake. When it came out I immediately applied a thin apricot glaze to seal it and help prevent staling, then sprinkled it with toasted almond slices for garnish. When it had cooled sufficiently I drizzled the loaf with some white vanilla fondant I'd made a few days before.
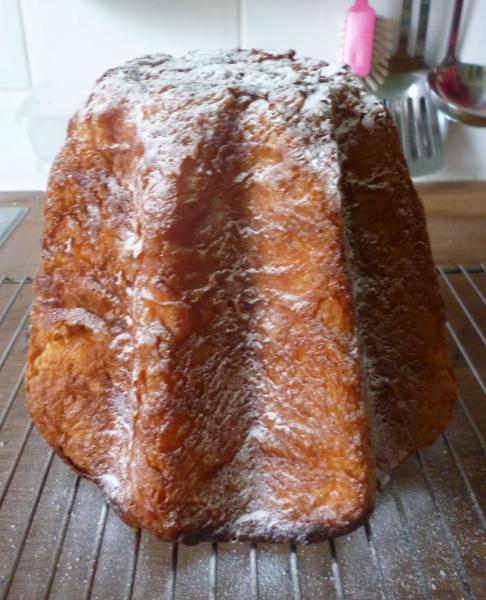
 The braid didn't rise quite as high as I would have liked since by this time the dough had lost some power from the additional day it'd had before I could use it, but it turned out well enough that I knew I had to try it again . As far as the flavour went?... pretty incredible. I'll get into that more a little later in this post but for now....Wow! Some photos of the the finished loaf.


