The Fresh Loaf

A Community of Amateur Bakers and Artisan Bread Enthusiasts.

Italian Bread

dmsnyder's picture
dmsnyder


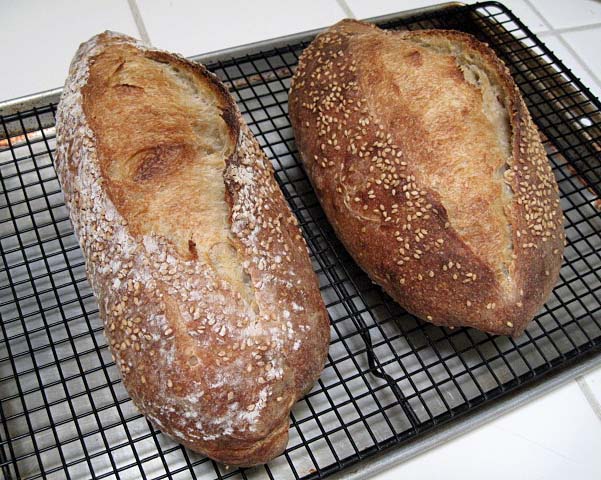
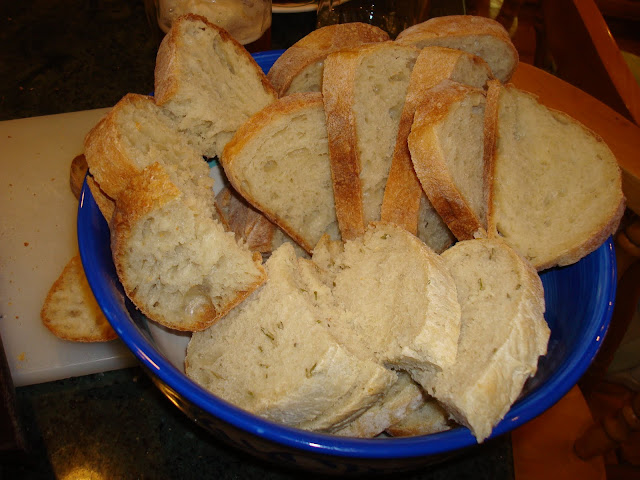
Yesterday, I made Chicken Cacciatore for tonight, when my sisters would be at our house for dinner. It seemed to me I should be serving some sort of Italian bread with this dinner. I didn't really feel like tackling a brand new recipe, although there are a number of Italian breads on my “to bake” list. I thought about the sourdough version of Reinhart's Italian bread from BBA which I have made many times and enjoyed. However, once the idea of formulating an “Italian version” of my San Joaquin Sourdough occurred to me, I knew that's what I was going to make.

I was delighted with the result, although I don't know that anyone more knowledgable than I regarding Italian breads would recognize it as in any way “Italian.” 

Ingredients

Wt. (g)

Baker's %

AP flour

400

80

Fine durum flour

100

20

Water

350

70

Salt

10

2

Sugar

14

3

Diastatic malt powder

5

1

Active Liquid levain

100

20

Olive oil

14

3

Total

993

199


Method

  1. In a large bowl, disperse the levain in the water.

  2. Add the flours, sugar and malt to the liquid and mix to a shaggy mass.

  3. Cover the bowl and let it rest for 20-60 minutes.

  4. Add the salt and olive oil and mix thoroughly. (Note: I squish the dough with my hands until it comes back together, then do stretch and folds in the bowl until it forms a smooth ball and the oil appears completely incorporated.)

  5. Transfer the dough to a 2 quart lightly oiled bowl, and cover the bowl tightly.

  6. After 30 minutes, do 20 stretch and folds in the bowl. Repeat 3 more times at 30 minute intervals.

  7. Refrigerate for 12-36 hours.

  8. Take the dough out of the refrigerator and allow to warm up for 1-2 hour.

  9. Divide the dough into two equal pieces and pre-shape as rounds. Cover with a clean towel or plasti-crap and let rest for one hour.

  10. Shape as boules or bâtards and proof en couche or in bannetons for about 45 minutes. (Note: Optionally, if proofing en couche, roll the loaves on damp paper towels then in a tray of sesame seeds. Alternatively, you can brush the loaves with water and sprinkle with sesame seeds. If proofing in bannetons, you would use the second method but after transferring the loaves to a peel, just before baking.)

  11. One hour before baking, pre-heat the oven to 480ºF with a baking stone and steaming apparatus in place.

  12. Transfer the loves to the baking stone. Steam the oven, and turn the temperature down to 460ºF.

  13. After 12 minutes, remove the steaming apparatus. (Note: What I actually do at this point is switch to convection bake and turn the oven down to 435ºF for the remainder of the bake.) Continue baking for another 12-15 minutes or until the loaves are nicely browned and the internal temperature is at least 205ºF.

  14. Turn off the oven, but leave the loaves on the baking stone and the oven door ajar for another 5-10 minutes to dry the crust.

  15. Transfer the loaves to a cooling rack. Cool completely before slicing.


The crust was chewy except for the ear and bottom crust which were nicely crunchy. The crumb was nice and chewy-tender. The crust flavor was sweet and nutty with the sesame flavor we always enjoy. The crumb was sweet and nutty. Absent the rye flour and with the addition of the oil, sugar, malt and durum flour, the flavor was delightful but very different from that of the San Joaquin Sourdough.

The four of us consumed 2/3 of a loaf with dinner. When I was going to slice some more, sister Ruth told me she would prefer to save it for breakfast toast. Her proposal prevailed.

I'm sure this will make delicious toast, even competing with the Hamelman 5-grain Levain I also baked this afternoon.


David

Submitted to YeastSpotting

dmsnyder's picture
dmsnyder

Franko's recent blog about his project to bake Pane tipo di Altamura (Pane di Altamura...my ongoing project) reminded me that this bread had gotten lost on my “to bake list.” I have baked a number of breads with semolina and a couple with durum (finely milled durum flour) my favorite of which has been Tom Cat's Semolina Filone from Maggie Glezer's "Artisan Breads".  However, I've never before baked an 100% durum bread. My reading about the Pane di Altamura and Franko's blog inspired me to attempt this bread, finally.

I have three books with formula's for Pane tipo di Altamura: Carol Field's “The Italian Baker,” Franko Galli's “The Il Fornaio Baking Book” and Daniel Leader's “Local Breads.” The first two use a yeasted biga and additional commercial yeast. They also use a mix of bread flour and semolina. Leader's formula uses a biga started with yoghurt and semolina flour. Leader's formula also differs from the other two in specifying a higher dough hydration. Based on my bias in favor of wild yeast and my past positive experiences with breads from Leader's book, I based my formula on his.

I deviated from Leader's formula and method in a number of ways which I will describe. I converted my stock starter to a durum biga and did not use yoghurt. The major compromise was that I only fed my starter once with durum flour. I had planned on three refreshments before the final mix, but the weather forecast is for temperatures over 105ºF for the rest of the weekend. Since it is only expected to get to a chilly 98ºF today, it seemed prudent to bump up the baking schedule and try to avoid using the oven when it's 105 or 107ºF. So, what's described is what I actually did, with notes indicating significant deviations from Leader.

Semolina biga

Wt.

Baker's %

Active sourdough starter

50 g

71

Fancy durum flour

70 g

100

Water

57 g

81

Total

177 g

252

  1. Disperse the starter in the water. Add the flour and mix thoroughly.

  2. Ferment at room temperature for 12-14 hours.

Notes

1. Ideally, one would add one or two additional builds to convert the biga to 100% durum.

2. Leader's formula for the final dough calls for 200 g of semolina biga, but his formula for the biga produces only 177 g. If you follow Leader's formula, you need to build more biga than this.

Final dough

Wt.

Baker's %

Semolina biga

170 g

34

Fancy durum flour

500 g

100

Water

350 g

70

Salt

15 g

3

Total

1035 g

207

Notes

  1. Leader's formula calls for 200 g of biga. I was only able to use 170 g. Given the very warm kitchen temperature today, using less starter is probably reasonable.

  2. Accounting for the flour and water in the biga, the final dough hydration is actually 71%.

  3. Leader specifies 3% salt in his formula without indicating why this bread has more salt than the usual 2%. Note that, if you calculate the baker's percentage of salt accounting for the flour in the biga, 15 g is actually 2.6% of the total flour

Method

  1. Mix the final refreshment of the biga 8-12 hours before the final dough mix and ferment it at room temperature.

  2. In the bowl of a stand mixer, disperse the biga in the water. Add the flour and mix with the paddle for 1 minute.

  3. Cover the bowl and autolyse for 20 minutes. (Note: Leader does not call for an autolyse, and, as far as I can tell, this is not used in Altamura.)

  4. Add the salt, and mix with the dough hook at Speed 3 for 5 minutes. The dough should be smooth and pass the window pane test. (Note: Leader says to mix at Speed 4 for 10-12 minutes. However, my dough was very smooth and passed the window pane test after 5 minutes at Speed 3. Perhaps this was a benefit of the autolyse.)

  5. Transfer the dough to a lightly oiled 2 qt container.

  6. Ferment with the bowl tightly covered for 3-4 hours or until the dough has doubled in volume. Stretch and fold in the bowl at 30 and 60 minutes. (Note: Leader does not call for the S&F's.)

  7. Transfer the dough to a lightly floured board. Shape into a boule.

  8. Dust the boule with semolina flour and place it in the center of a clean, dry kitchen towel dusted with semolina. Bring the corners of the towel to the center and tie them, “to make a snug bundle.” (Note: Leader describes this procedure being used in the Altamura bakery he visited and by the village women who brought their own dough to the bakery for baking. However, the videos I've seen of Altamura bakeries in action show the loaves being proofed en couche.)

  9. Proof the loaf at room temperature until it “balloons inside the kitchen towel” - 1-1/2 to 2 hours. The loaf is ready to bake when an indentation made by poking a finger into it springs back slowly. (Note: My loaf was proofed for 90 minutes in a 78ºF kitchen. The surface of the loaf was quite dry at the end of proofing. I imagine this contributes to the famously chaotic blooming of the folded loaf during baking.)

  10. About an hour before baking, preheat the oven to 500ºF with a baking stone and steaming apparatus in place.

  11. Transfer the loaf to a lightly floured board.

  12. Stretch the loaf into a rectangle about 6 x 16 inches, with a narrow side nearest you. Fold the near edge all the way up to meet the top edge, and seal the seam. Now, bring the folded near edge 3/4 of the way up towards the far edge, and seal the seam all the way around so the lip of the far part of the loaf is flattened. The loaf should now be shaped as a half-circle. (Note: An alternative, shape, which is also traditional, called a “priest's hat” is made by cutting a very deep cross into the boule with a bench knife and pulling the corners well apart. The opening is then dusted with semolina flour to keep it from sealing during oven spring.)

  13. Transfer the loaf to a peel dusted with semolina flour and dust the surface of the loaf with flour.

  14. Turn the oven temperature down to 400ºF. Transfer the loaf to the baking stone . Steam the oven lightly.

  15. Bake for 40 to 50 minutes until the loaf is “mahogany-colored all over and golden where it splits open.” (I removed my steaming pan after 15 minutes and switched to convection bake at 375ºF for the remainder of the bake.)

  16. Transfer the loaf to a cooling rack and cool for at least 1 hour before slicing.

    Initial mix before autolyse

    Dough mixed, ready for bulk fermentation

Pre-shaped boule, ready for proofing


Proofing 

Proofed and ready for the final shaping

Dough stretched out. First step in final shaping.

Shaped loaf, ready to bake

Pane tipo di Altamura

Pane tipo di Altamura crumb

Pane tipo di Altamura crumb close-up

The aroma and flavor of the bread are most remarkable for a prominent sourdough tang. The flavor otherwise is very nice, but I cannot identify distinctive flavors I would associate with durum, as opposed to other wheat flours. The crust is chewy over the fat part of the loaf but quite crisp over the flatter part.

David

Submitted to YeastSpotting

Juergen Krauss's picture
Juergen Krauss

My wife's christmas present was a baking course at the Lighthouse Bakery, a small bakery focussing on teaching and some wholesale.

We were 4 participants and made some wonderful breads out of 5 different doughs using biga, rye sourdough, sponge, poolish and pate fermentee.

The most surprising and spectacular of the breads we made was the pugliese, which is also the "signature" loaf of the Lighthouse Bakery.

Liz and Rachel, who run the bakery, are happy for the formula to be shared, so here it is:

finished loaf

This bread is made with strong flour, water, salt and yeast, and yet has a sweetish, creamy crumb. It keeps well and is still excellent as toast 4 days after baking (given it survives that long).

Here is the formula:

Biga

The biga can be stored in the fridge and keeps for a week.

Ingredient Weight(g) Percent
Strong White Flour 500 100
Water 350 70
Fresh yeast 4 0.8

Mix and ferment at room temperature for at least 1 hour (until the yeast gets going), then put it into the fridge overnight. It will expand further, so choose an appropriate bowl.

Here a picture of the biga after 1 night in the fridge (the surface scraped off):

biga


Dough

The given amounts make 1 loaf.

Ingredient Weight(g) Percent
Strong White Flour 500 100
Water 340 68
Biga 100 20
Salt 10 2
Fresh yeast 4.5 0.9

Mix and work the dough.

Our teachers recommend to use a mixer: 5min on medium speed and 5min on high speed.

I have no mixer; but I got great results with Bertinet's slap and fold technique.

Bulk ferment for about 3 hours (until trebled in size).

Preheat oven to 220C.

Shape into boule, be careful not to handle the dough too hard, it's quite sloppy at this stage.

Avoid using flour on the worktop.

Put the dough onto a baking parchament for the final proof (about 1 hour, check with the finger test).

Here a picture of the boule after final proof, it spreads a bit, which is not a bad thing:

proofed

Then dust it with flour and dimple it with your fingertips - a bit like captain Nemo playing the organ in his submarine.

Here is the result, ready to go into the oven:

dimpled

Rather flat.

But the oven spring is quite amazing, and on the course when the oven door opened there was an astonished Ooooh in unison.

Bake for 35 to 40 minutes at 220C without steam.

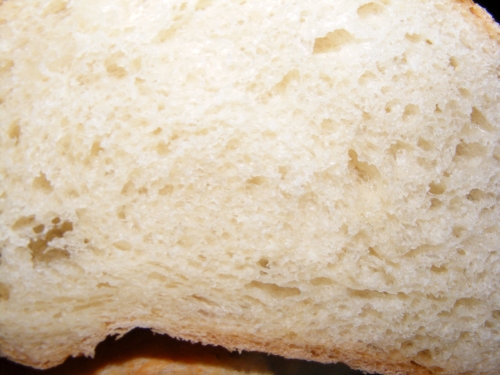
The result is the first picture in this post, here a shot of the crumb:

crumb

It needs to rest a couple of hours after baking, the taste improves a lot and you are rewarded for your patience.

I hope you enjoy making this bread as much as I do,

Juergen


dmsnyder's picture
dmsnyder

Tre Franceses


“Pan Francese” simply means “French Bread” in Italian. It is a long, thin loaf that is the Italian version of a baguette. Daniel Leader has a formula in Local Breads which he titles “Italian Baguettes” and says are called “Stirato,” which means “stretched” in Italian. Michel Suas' Advanced Bread and Pastry includes a formula for “Pan Francese,” and we made this bread during the Artisan II workshop at SFBI.

The differences between Leader's and Suas' formulas are relatively minor. Leader uses a biga at 60% hydration, and the biga is 61% baker's percentage of the total dough. Leader's dough hydration is 70%. Suas' hydration is 76% - a significant difference. Suas uses a poolish (100% hydration), and the poolish is 50% baker's percentage of the total dough. Leader uses all AP flour, while Suas' formula uses 13.6% whole wheat flour, the rest being AP. Leader's mixing instructions, as usual for his high-hydration doughs, call for an intensive mix (10-12 minutes at Speed 4). Suas specifies a short mix but 2 or 3 folds during bulk fermentation. Their shaping instructions are also significantly different: In spite of pointing out that “Stirato” means “stretched,” Leader tells you to shape the loaves like you do baguettes. Suas has you simply cut long strips of dough and stretch them to shape.

Of course, there is no end to variations with breads. The Il Fornaio Baking Book, from the bakery chain of the same name, has a recipe for “Sfilatino” which they call “Italian Baguettes.” Theirs are made with a biga. They are shaped as demi-baguettes, then stretched to about 15 inches long.

The “Pan Francese” I made followed Suas' formula and method from AB&P.


Poolish

Baker's %

Wt. (oz)

AP flour

100

3 5/8

Water

100

3 5/8

Yeast (instant)

0.1

1/8 tsp

Total

200.1

7 1/8

  1. Mix all the ingredients until well-incorporated.

  2. Ferment for 12-16 hours at 65ºF.


Final dough

Baker's %

Wt. (oz)

AP flour

79.52

11 7/8

WW flour

13.48

2 3/8

Water

70

10

Yeast (instant)

0.35

¼ tsp

Salt

2

¼ oz

Malt

0.98

1/8 oz

Poolish

50.03

7 1/8

Total

223.36

2 lb


Total dough

Baker's %

Wt. (oz)

AP flour

86.4

15 1/2

WW flour

13.6

2 3/8

Water

76

13 5/8

Yeast (instant)

0.3

1/2 tsp

Salt

1.6

¼ oz

Malt

0.78

1/8 oz

Total

178.68

2 lb


Method

  1. Prepare the poolish the evening before mixing the dough.

  2. Measure all the Final dough ingredients into the bowl. (I used a KitchenAid mixer.)

  3. Mix with the paddle until ingredients are well mixed – 1-2 minutes -then switch to the hook and mix at speed 2 or 3 for about 5 minutes. There will be some gluten development, but the dough will not clear the sides of the bowl. It will be like a thickish, glutenous batter.

  4. Transfer the dough to an oiled bowl and cover tightly.

  5. Ferment for 3 hours with 2-3 stretch and folds on a well-floured board.

  6. Prepare your oven with a baking stone and your steaming apparatus of choice in place. Pre-heat the oven to 500ºF about 30 minutes before the end of fermentation.

  7. Transfer the dough to a well-floured board. De-gas the dough and stretch and pat it into a rectangle about 8 x 12 inches. Dust the top with flour.

  8. Using a bench knife, divide the dough into 3 strips. Stretch them to about 15” long and place them on a well-floured linen couch. (I suppose parchment paper would serve.). Cover with linen or a towel.

  9. Proof for 30-45 minutes.

  10. Transfer the loaves to a peel and then to the baking stone. Turn the oven down to 460ºF and steam it.

  11. Bake for 22-25 minutes.

  12. Transfer the loaves to a cooling rack. Cool for at least 30 minutes before slicing.

Francese cross section crumb

Francese longitudinal section crumb

The loaves had a thin, crisp crust that got chewy as it cooled. The crumb was very open with some chewiness. The flavor of the whole wheat was present when tasted still slightly warm. I expect it to meld by tomorrow. The flavor was similar to ciabatta, not surprisingly. The bread was nice as a chicken salad sandwich for dinner.

David

Submitted to YeastSpotting


jennyloh's picture
jennyloh

I've been out of action for a while because my MacBook crash,  I couldn't manage my photos without my Mac,  and therefore have been busy baking, cooking,  taking pictures but not updating.


I just got back to Shanghai from Chinese New Year Holiday.  With another 2 days before work starts,  I have time on my hand to bake.  My son requested for his all time favorite - Olive Bread.  I decided to go with Daniel Leader's Local Bread - Fresh Herb Twist Recipe.  I like it because its simple,  yet,  the taste is good.  I've baked this bread twice before,  with dried herbs and with fresh herbs.  We decided the dried herbs taste better.  The taste of the fresh herbs was over empowering the bread taste.


This time,  I doubled the recipe so that I can make one with Herb and another one with Olives.


Herb and Olive Bread


It is indeed,  1 dough,  2 flavours - For the Herb Bread,  I split into 2 dough and did a twist,  For the Olive Bread,  I kept it in a Brotform.  Each of the Bread weights about 920g.

I did notice that somehow,  with this bread,  according to the book,  I baked it at 220-230 degrees celsius,  425 F,  40 minutes,  somehow,  the lower part of the bread remains a little more most.  Why is that so?  

A few things that has been going through my mind as I cut the bread:  I've got my baking stone,  heated up properly.  Perhaps the temperature is not hot enough?  I've baked 10 minutes longer than the required time of 30 minutes,  timing should be alright.....

Well, any advice will be appreciated.


www.foodforthoughts.jlohcook.com

Ryan Sandler's picture
Ryan Sandler

My family is not so much in to football, but we are into bread.  This post will give you an idea how much.  You see, my mom taught me the basics of making bread when I was a kid.  However, she never went much beyond a basic white bread pan loaf (although these were always excellent).  Although I got her The Bread Baker's Apprentice for Christmas a couple years back, she never got into the artisan baking thing, with pre-ferments and all, and found the whole process a little intimidating.  But this year, for Christmas, she asked for a baking lesson from me.  Today was the day.

The plan: to bake three types of bread in one day, making two batches of each so that I could make one and demonstrate, and then she could make one.  Limitted to her standard (but quite good, as I discovered) home oven, this required staggering the batches over the course of the day.

On the roster: Italian Bread (from BBA), Potato Rosemary Bread (also from BBA), and French-style rustic bread (Pain Rustique from Hamelman's Bread). All solid players that I can do in my sleep at home, and felt like ought to go fairly smoothly, while showcasing different flavors, shaping and slashing styles.

Let the games begin!

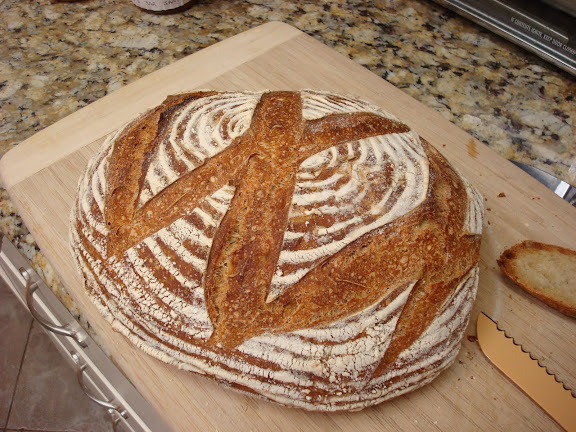
We showed up at my parents' place at 9am, bringing with us a pre-game miche:

Another Mighty Miche, ready for toasting
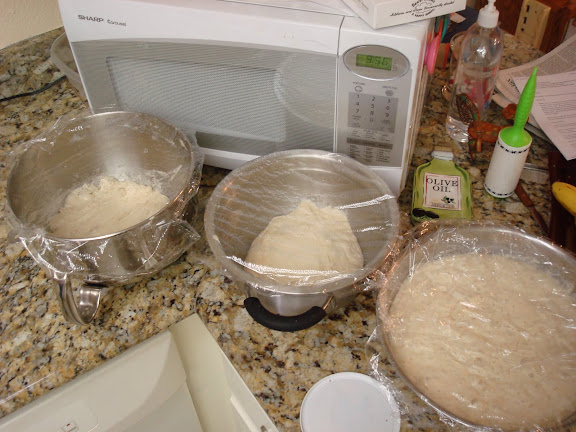
At 9:30 my dad took the baby, my wife went out shopping with her mom and sister, and my mom and I got to work.  First up was mixing Italian Bread--not much teaching there, although I demonstrated the power of the 5-minute rest for helping along gluten development

Italian Bread #1, in between the remaining biga and the poolish
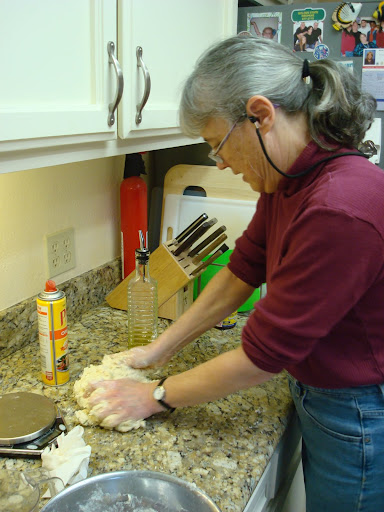
From there, the day proceeded in an almost-orderly fashion, alternating mixing, stretch-and-folding, dividing, and shaping with one bread and then another.  Mostly things proceeded smoothly, although there was a moment of panic when we realized that I'd dumped out, pre-shaped and final shaped Potato-Rosemary Bread #2 instead of #1, while #1 sat happily bulk fermenting for an extra half an hour.  Some improvisation was required (we pretended batch #2 had never been shaped, quickly shaped batch #1 without a pre-shape and pretended it had already been proofing for 10 minutes.  It worked.)

Mom kneading Potato Rosemary Dough
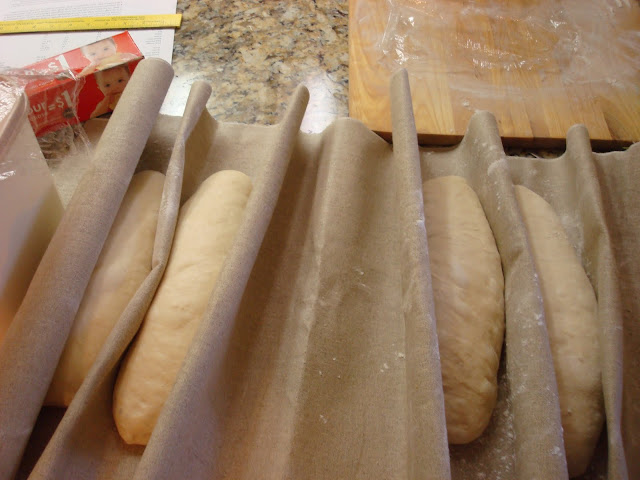
Italian Breads Proofing - "Mine" are on the left. (All on my new TMB/SFBI couche!)
 

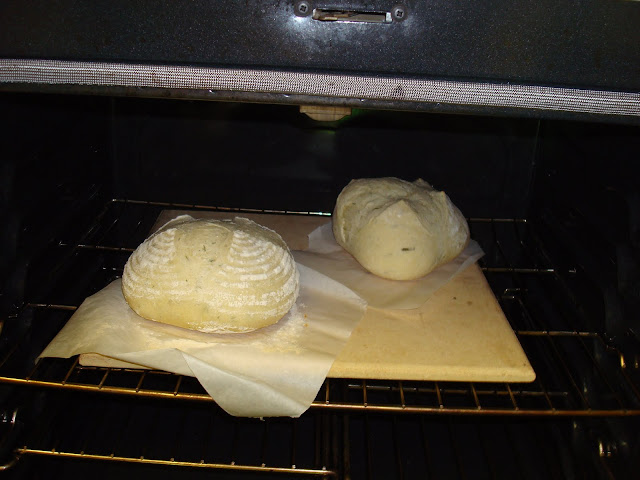
Potato Rosemary Breads in the Oven
 

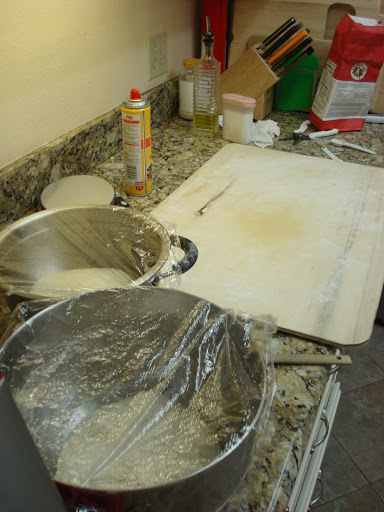
Rustic Breads in Bulk Fermentation - "Mine" is on top (Also my lovely SFBI/TMB proofing board)
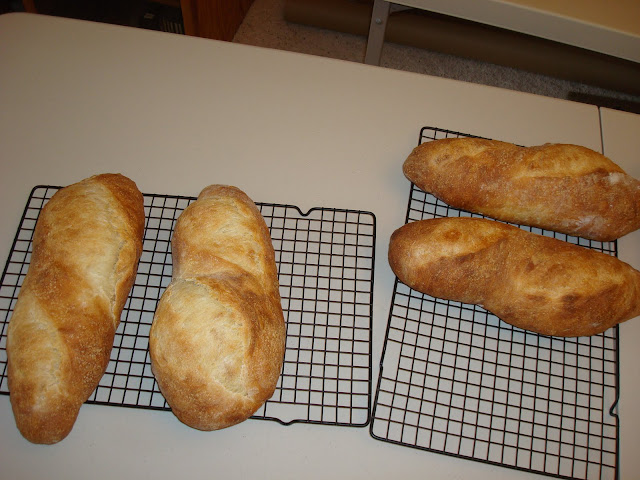
Italian Breads, Finished. Mine on the left (clearly under proofed!)
 

Rosemary Potato Breads (I don't even know whose are mine!)
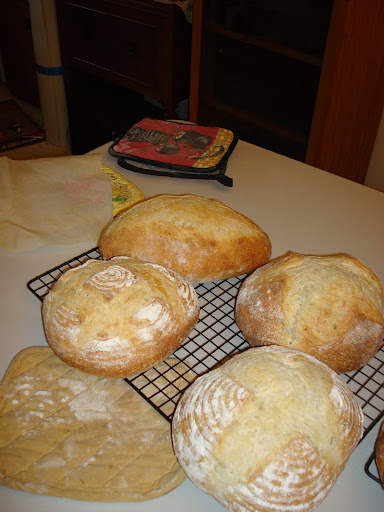
Rustic Breads  (Mine on the Right)
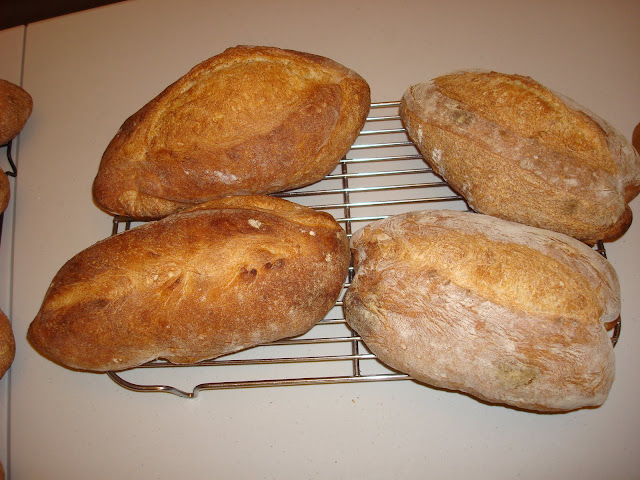
The hardest part of the whole business (besides being up on our feet all day baking), was teaching the shaping techniques.  I had the principles clear in my head (surface tension, surface tension, surface tension), but conveying the actual physical motions (which are just plain tricky anyhow) was quite difficult.  Practice was useful -- except on the Italian bread, I had my mom shape and slash one of "my" breads after I demonstrated the technique so she'd have an extra chance to get the hang of it.  What proved invaluable, however, was employing a dish towel a la Mark of Back Home Bakery to demonstrate.  I already thought that video was great when it was posted, but now I'm really grateful to Mark for making posting it! I only wish I'd thought to do that before we'd already shaped the Italian breads, rather than after.

The other main challenge was the oven--it was just too good!  My parent's gas oven held it's heat remarkably well, which meant that turning the temperature up before was actually unnecessary, and indeed counter-productive since amidst the chaos I forgot to turn it down after loading the breads.

The fruits of our labors
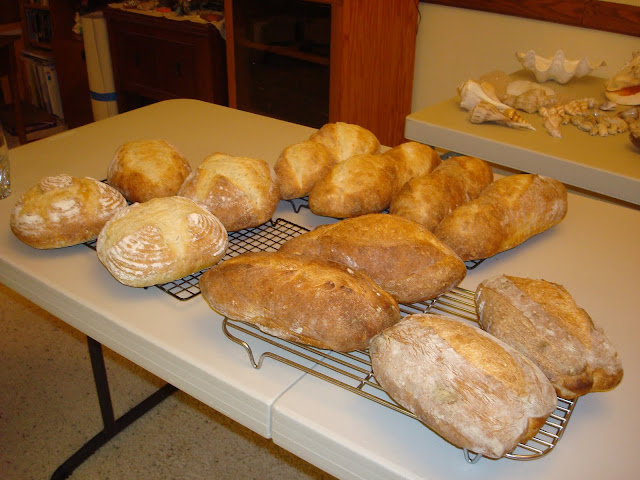
The bakers and their breads
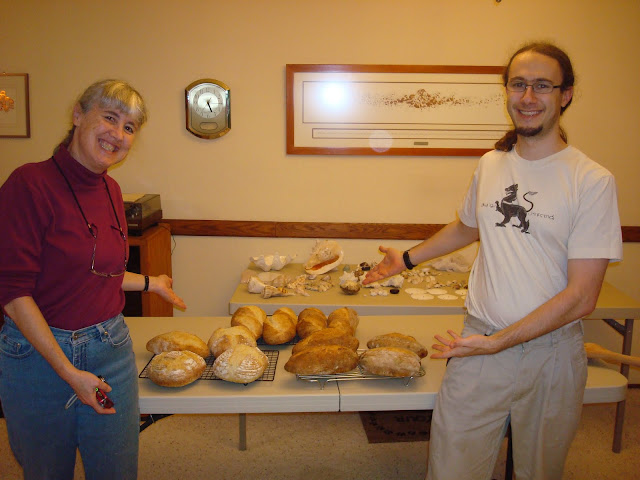
 

After we were done baking, we brought three choice loaves over to my in-laws for dinner (it was my father-in-law's birthday, by coincidence), and had a lovely meal.

Clockwise from left, Rustic Bread, Italian Bread, and Potato Rosemary Bread


It was a fun, busy, bread-ful day.  I'd do some things differently if I were to do this again (like use a bigger oven and do three batches instead of six!), but my mom and I had a great time.

Happy baking, everyone,

-Ryan

wayne on FLUKE's picture
wayne on FLUKE

My wife told me this morning that we were having Italian Sausage on pasta for dinner. I said "But I don't have any bread!" I decided to make Italian Feather Bread (which I have made quite a few times, but not lately) and try the steaming technique SylviaH described since I felt my previous steaming attempts were pretty weak. I am also using Better for Bread flour for the first time. (It is Buy One Get One Free at Albertson's this week.)

Beard on Bread - Italian Feather Bread original recipe here.

SylviaH steaming technique is described here.

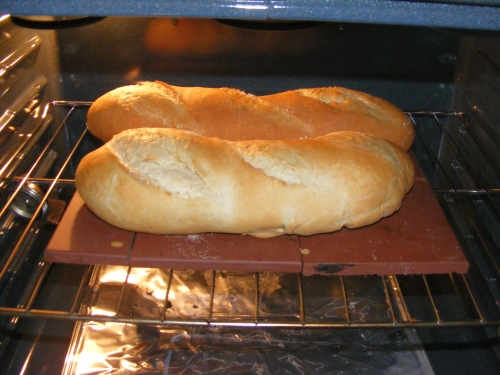
Here they are in the oven, almost done.

Almost Done!

Here are the ingredients I used.

  • Better for Bread Flour  700 grams
  • Water (room temp) 414 grams (about 60%)
  • Sugar 15 grams (about 1 Tbs)
  • Instant Yeast 13 grams (about 3.5 tsp)
  • Salt 14 grams (about 2 tsp)
  • Olive Oil (EVOO) 66 grams (about 1/3 cup)

Process

  • Combine flour, water, sugar, yeast, autolyze 20 min
  • Add salt and EVOO, then knead (I did about 6 min in Bread Machine dough cycle)
  • Rise in oil coated bowl with 3 stretch and folds on the counter every 30 min.
  • Divide in half, pre-shape, rest 10 min, shape into something (see pics).
  • Place in couche, seam down. (Couche is Chicago Metalic Italian Bread Pan lined with flour coated microfiber kitchen towels.)
  • Proof for about 45 mins, preheat oven to 425 with quarry tiles in place.
  • Heat wet towels in baking dish in microwave.
  • Put dish with hot towels in oven 10 mins before bread. Add 1 cup hot water.
  • Roll loaves, one at a time onto peel, slash, mist with water and put on quarry tiles.
  • Bake at 425 for 10 mins, remove pan with towels, rotate bread, bake for another 20 min.
  • Turn off oven, leave bread in another 5-8 min.
  • Let cool on racks.

At least that is what I intended. The 2nd loaf to go in the oven stuck a little to the peel (rimless sheet pan) and was half on/half off of the tiles. I got a couple of metal spatulas and got it back on, but not very straight. Decided to leave well enough alone. Good call.

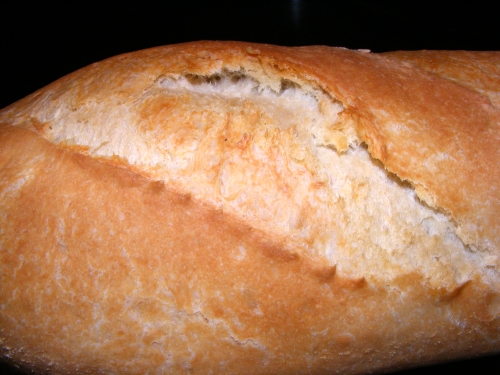
I was very happy to see the nice oven spring and opening of the slashes when I removed the towels. I am also very pleased with the look of the crust. Much better on all counts than previous attempts.

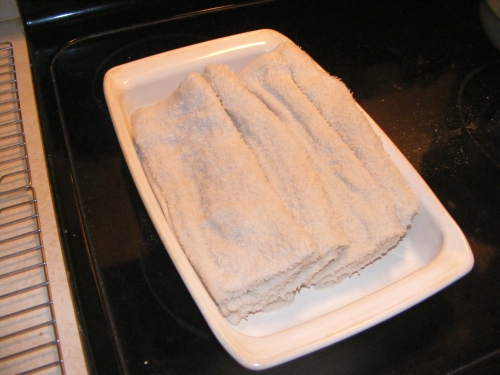
The main change I made to Sylvia's steaming method was to put all four towels in the baking dish in the microwave at once, and then tranfer the entire dish and towels into the bottom of the oven just before taking the loaves out of the couche. I added the 1 cup of steaming water when I put the bread in. I never saw much steam, but that may because it was warm and humid today in Florida.

Towels ready to go in oven

Ear and the required crumb close up, I would guess this is typical for 60% hydration?

Ear

Crumb

Sylvia, thanks for this technique, I will do it again for sure.

wayne

Submitted to YeastSpotting.

cliffgarz's picture

New Haven Style Italian Breads and Pastries

June 23, 2010 - 10:09am -- cliffgarz

I grew up in New Haven and there were two bakeries Apicella's and Venice bakery both made this great Italian bread and I am looking for a recipe so I can recreate it in the south as everything here is mush.   Also in New Have the old Verabs bakery used to make poppyseed horns needing a recipe for those as well as friselles


thanks


PS I just finished my brick oven to make New haven style pizza

turosdolci's picture
turosdolci


I wanted to share these pictures of the bread being sold in a stand in Dolceaqua, Italy.  It was a small festival displaying the products of Dolceaqua. The size of the bread was amazing. Imagine the size of the ovens. 


Pages

Subscribe to RSS - Italian Bread