The Fresh Loaf

A Community of Amateur Bakers and Artisan Bread Enthusiasts.

honey

ngolovin's picture

Maple syrup in breads

December 20, 2012 - 8:04pm -- ngolovin
Forums: 

Hi all,

I have been baking breads for a while.  I have seen all sorts of sweeteners used in breads such as honey, molasses, agave, brown and regular sugar.  I do not have a recipe with maple syrup.  I made this comment, while munching on my latest loaf, to my wife and was asked why.  That is a good question, so I thought I would pose this question to the forum.  Why isn't there a recipe that uses maple syrup as the sweetener in a bread?  If there is, please let me know where I can find the recipe.  I thank you all, in advance.

Happy Holidays!
Ngolovin

dabrownman's picture
dabrownman

Typo after typo,  My left fnger doesn't know what my right finger is doing.  This is way worse than dyslexia, which I had but sold to Lebanese rug trader and a lot more painful too.

With plenty of rye, WW and semolina bread in the freezer we baked off another as close to white bread as we ever make for the bread winners daily lunches.   My wife prefers Oroweat whole wheat bread but we are slowly winning her over to SD bread in the 25%-35 % whole grain range.


This one was 25% home ground whole grain bread with spelt, rye and WW ground from berries.   The remainder of the flours used for the bread were grocery bought bread flour and AP milled by KAF.


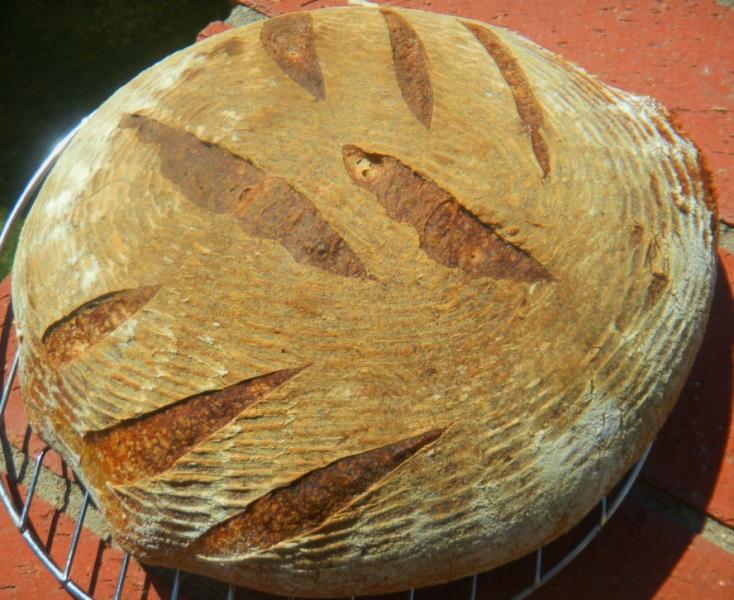
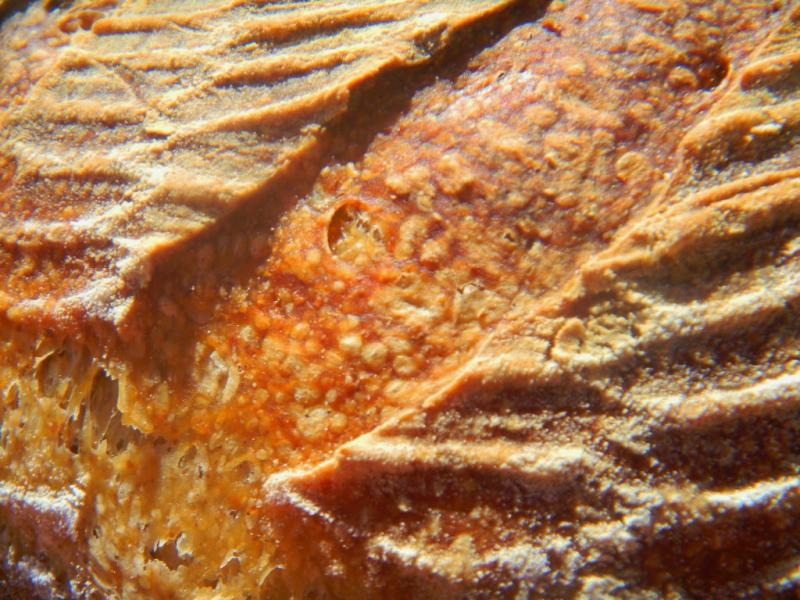
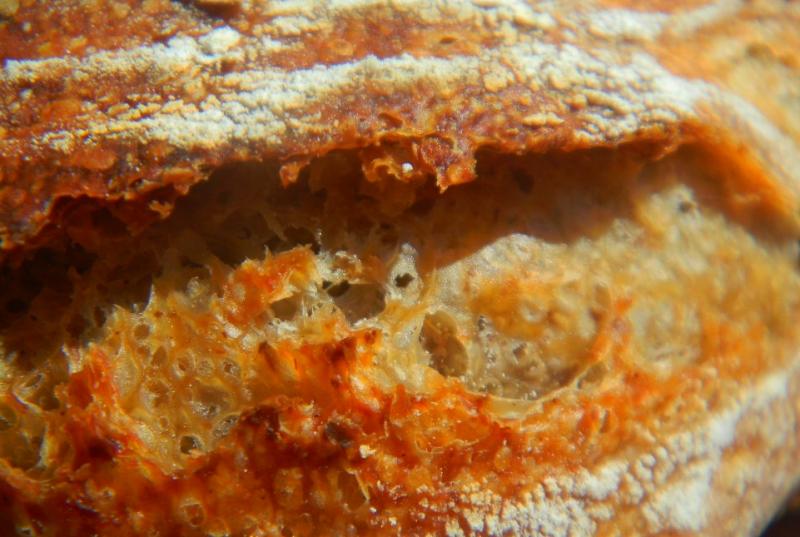
The bread baked up nicely browned with small to medium blisters.  The crust came out crisp but went soft and chewy as it cooled.  The bloom and spring were OK but nothing special.   The crumb was moderately open, soft, chewy and slightly glossy.  This bread had a bolder SD tang right after being cooled and we assume it will get better tomorrow. 


If you like David Snyder’s Pugliesi Capriosso and San Joaquin or Pierre Nury’s Rustic Light Rye you will like this bread.  For a nearly white bread it sure is tasty.  Just delicious.


The formula follows the pictures.

Method

The levain starter was equal amounts of rye sour, desem and spelt (a new one that we will soon convert to Kamut) and built up over (2) 3 hour and (1) 2 hour build.

The levain was refrigerated overnight after nit had doubled along with the autolysed flours which included the entire formula less the levain.  There were no sprouts, scald, soaker or add ins with the exception of the red and white home made malts, some ground flax seed and a tiny bit of honey.

The next day the autolyse and the levain were removed from the fridge and sat on the counter for 1 hour to warm.  The two were combined in the KA mixing bowl and kneaded with the dough hook for 8 minutes on KA2.  The dough pulled away from the sides at the 7 minute mark.  It came together easily for the 75% hydration dough.

It was rested in an oiled plastic tub, sized for a 836 g loaf, for 20 minutes before (4) sets of S& F’s were performed all in the tub.  The first set was 25 stretches with a ¼ turn each time.  The next set was 5 stretches less all the way down to the last one of 10 for a total of 70 stretches.

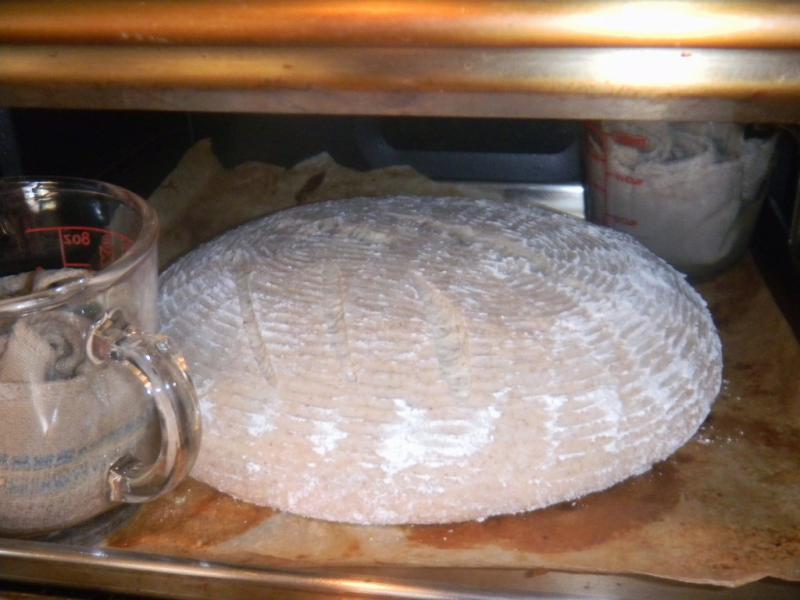
After the last S&F the dough was rested for 60 minutes before being pre-shaped and then shaped into a boule and placed into a rice floured basket seam side up.  The basket was sized to allow the dough to double when it reached the top.

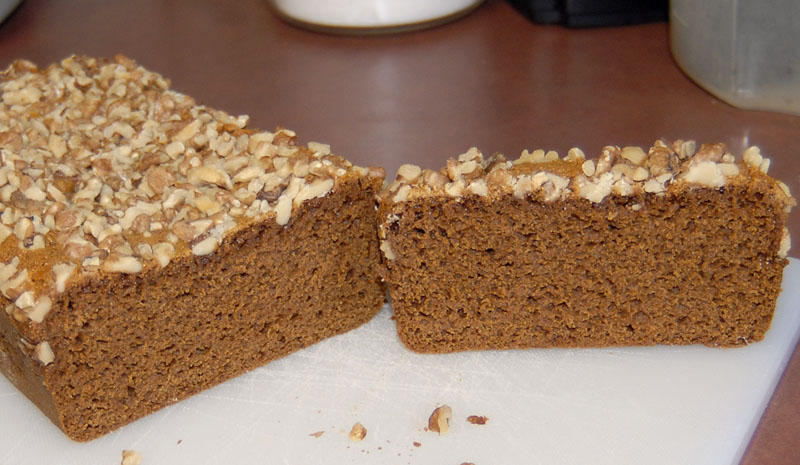
Sandwixh on the left made with last bakes Semolina Bread - good but not great like this bake.

The boule was them placed into a plastic trash can liner, the end closed with a rubber band.  The tented and basketed boule was placed in the refrigerator for a 12 hour retard.

Makes a great grilled hot dog bun! cantaloupe, cherries, black grapes, chips and pico de gillo. 1/2 ea plum and peach, 3 kinds of pickles and some Mexican beans - a typical but still a nice lunch to feature this  fine bread.

After 12 hours the mini oven was preheated to 500 F and (2) of Sylvia’s steaming cups with dish rage rolled up were micro waved until boiling.  The dough was covered with parchment and then the bottom of the mini’s supplied broiler pan.  The whole stack was overturned and the basket removed.

It was quickly slashed ¼” deep with a single sided razor blade, the steaming cups placed in the corner and the whole apparatus loaded into the mini oven’s bottom rack for 15 minutes of steam as the oven was turned down to 450 F.   When the steaming cups were removed at the 15 minute mark the oven was turned down to 400 F convection this time.

The boule was rotated every 5 minutes for the next 20 minutes when the boule was tested for temperature.   It was at 208 F and deemed done.   The mini oven was turned off and the bread allowed to sit in it with the door ajar for another 10 minutes to further crisp the skin.  It was then removed to a cooking rack.


Multi grain SD Starter - 25% Whole Grain Sourdough Boule     
      
Mixed StarterBuild 1Build 2 Build 3Total%
Multi-grain SD Starter **4500459.54%
AP025255014.12%
Dark Rye1500154.24%
WW1500154.24%
Spelt1500154.24%
Water452507019.77%
Total Starter135502521059.32%
** 15 g each Rye Sour, Desem & Spelt SD Starters   
      
Starter     
Hydration78.72%    
Levain % of Total25.12%    
      
Dough Flour      %   
Non - Diastatic Red  Malt20.56%   
Wheat Germ102.82%   
Dark Rye102.82%   
Spelt 102.82%   
Ground Flax Seed102.82%   
WW102.82%   
AP20056.50%   
Diastatic White Malt20.56%   
Bread Flour10028.25%   
Dough Flour354100.00%   
      
Salt71.98%   
Water 26073.45%   
Dough Hydration73.45%    
      
Total Flour471.5    
Water352.5    
T. Dough Hydration74.76%    
Whole Grain %25.77%    
      
Hydration w/ Adds75.29%    
Total Weight836    
      
Honey51.41%   


Felila's picture

Picking the ants out of the honey

August 7, 2012 - 4:59pm -- Felila
Forums: 

I bought a large jar of honey at Costco, much larger than the small jars of artisanal honey I was buying at my food co-op. I used to store my honey atop the microwave. Never had problems with ants, probably because the artisanal honey was put up in canning jars with tight lids. 

The Costco honey came in a cheaper jar that let ants get into the honey, even though the lid was screwed on. They were teeny tiny ants. Thousands of the buggahs!

bryoria's picture
bryoria

I made another batch of 100% whole wheat buttermilk bread from Laurel's Kitchen Bread Book yesterday.  This time I used freshly ground flour (hard red spring wheat) measured by weight, mixed all the ingredients except the butter for 2 minutes and then let the dough sit for 40 minutes in an attempt to hydrate the fresh ground flour a little bit.  Next time I would attempt this without the salt added as per the various threads on this site regarding autloyse - but yesterday I didn't come up with the idea until after I'd already added everything.

After the 40 minute rest I mixed it for 4 more minutes on speed 4 on the KitchenAid and added the butter in cold, small, pieces as per the recipe.  The butter didn't mix in very well so I moved the dough to the counter and kneaded the butter in for another minute or two, then let the dough sit in a covered bowl (in a cold oven with the lights on for warmth).  I let it rise for 2 hours and 15 minutes, giving a stretch and fold every 45 minutes.  Then divided it into two equal pieces, rounded them and let them sit for 15 minutes before forming them into pan loaves. 

I let the loaves rise for 1 hour, then baked them in a pre-heated 350F convect oven for 35 minutes.  They rose in the oven a little more and ended up the perfect size for sandwiches. 

This bread is always delicious and my family loves its softness and flavour for sandwiches and toast.  The fresh-baked heels are amazing and we usually snitch those from the sliced loaf before we freeze it - no one ever wants the heels for toast or sandwiches later anyway!

loydb's picture
loydb

I'm almost caught up! It's week 5 in the Inside the Jewish Bakery Challenge - Semester 1. This week was Honey Cake.  

This called for white rye flour. To make it, I milled whole rye and then sifted to 80% extraction. I think the walnuts were a little heavy, the centers never really rose even after 3 hours of cooking. Almonds may have been a better choice.

In spite of it being a really runny, gummy, goopy batter, it baked up incredibly light, and not nearly as sweet as I would have anticipated from the pound of honey in it. There is no gumminess at all.

awloescher's picture
awloescher

About two months ago, I decided I wanted to try baking bread.  I began perusing allrecipes.com, a site I have begun using quite extensively since I really began cooking a lot a half year ago.  I found a recipe for "Amish White Bread", and as it had good reviews, I decided to try it, just for a sandwhich bread.  It went very well, considering the fact that I hadn't really taken much time to learn about bread baking.  After the bread had undergone its first rise, I discovered that the outside of the risen dough was a little dry.  After it had proofed, the outside of the dough was again just a little dried out.  I formed the two loaves, popped them in the oven, and had to take them out about ten minutes prior to the end of the prescribed baking time. 

The two problems I encountered came from me allowing the dough to dry out, I believe.  The loaves both had an enormous crack along the side and top, and as I found out when cutting and eating, there was a little portion inside each loaf that was not quite done. 

Now, these didn't prove to be too big of problems, however.  My wife LOVED the bread, despite the very small vein of almost-baked dough.   As for the cracks, although they were more accidental and pronounced than the natural cracking that (often purposely) occurs from the oven spring, they weren't a big deal.

Needless to say, I was hooked, and had to learn more about this (then) mysterious process of baking.  So the next day I went to the local bookstore, bought their only book on bread baking (The Art of Baking), and checked out two books from the library (Daily Bread and Peter Reinhart's Whole Grain Breads).  Within about a week I had read through all three, and here I am...baking away! :)


johannesenbergur's picture
johannesenbergur

Ingredients:

  • 1 dl (100g) lukewarm to warm water
  • ½ dl (50g) plain naturel yogurt
  • 15g fresh active yeast
  • 8 g honey
    (pref. liquid)
  • 10 g sea salt
  • 10 g olive oil
    (this is a minimum, feel free to use more, I reckon 25g would be ideal)
  • 250g various types of flour, I used and recommend:
    30g Graham flour
    70g semolina flour
    150g wheat baking flour
  • Poppy or sesame seeds or for sprinkle

This recipe is very small, the smallest I've ever made. Usually I double the ingredients mentioned, except for the yeast, the dough rises just fine with 15g.

Recipe:

(Work: 20 mins - 1st rise: 30 mins - work: 5 mins - 2nd rise: 35 mins - bake: 30 mins)
Estimated time from start to finish: 2 hours 

Mix the warm water and yogurt, so you get a tepid mixture. Add the yeast and stir till dissolved. Add salt and honey and dissolve. Add the flour to the mixture, I ususally add 100g, mix and add then add more.

Knead the dough for approximately 10 minutes, put it into an oiled container, cover it with a hot teatowel and leave it to rise for 30 mins or so, can be more or less, usually more means better and less means less good.

Should be doubled after half an hour and shape it into a loaf. Place the loaf onto your baking surface of choice. Pat the bread with milk and sprinkle the seeds on top of it. Cover it again with a warm towel and let it rise for 30-60 minutes; Afterwards put the loaf into your oven.

Bake for approximately 30 minutes, until the crust is golden and it makes that hollow sound you know so well, when you knock on the bottom of it.

Enjoy.

Pages

Subscribe to RSS - honey