The Fresh Loaf

A Community of Amateur Bakers and Artisan Bread Enthusiasts.

hazelnut

dabrownman's picture
dabrownman

After our recent experiments with 100% whole grain bread, and DaPumperizing some of them, we found out that our limited supply of what we call white breads was exhausted.  These ‘white breads’ still have 20%-30% whole grains in them so they have some decent flavor and healthfulness.


We thought we would go Italian for this bake because of the sneaky ricotta, goat cheese and citrus cheese cake my apprentice baked while no one was looking.   It had also been awhile since we had done a chacon shape too.  We could have done an Italian shape like an Altamura but these shapes usually need some durum flour in hem and we are saving the last of Desert Durum for something else.


Instead of out usual pesto, parmesan and sun dried tomato Italian bread that we like so much we decided to go in a different Italian direction by using figs, hazelnuts and ricotta cheese to go along with the 22% whole grain Rye, spelt and WW that was mainly used in the levains.


Yes, we had 2 levains for this bake but they were both of the SD variety instead of YW we usually use for 1 of them.  We used out Rye Sour and our Not Mini’s Ancient WW starters for this bake.  We love what both of them do for bread so why not combine them and see what happens.


So not to have enough to do for this bake we also decided to use whey water for some of the liquid and do a Tang Zhong with 25 g of the dough flour with an additional 125 g of water not included in the liquid amounts in the formula.


We thought about throw in some of our aromatic seed mix but the apprentice nixed that at the last minute wanting to know what was German about this bake anyway?  For being mainly nutzoid when it comes to breaking the bread mold, she can be traditional when you least expect it – usually right before doing a nose rip on you – which is also not expected.


These levains built themselves up to doubling in 4 hours so only one build was needed to get them full strength.  We did not retard the levains when built as is our usual practice of late but we did do a 4 hour autolyse of the dough flours with the malts, VWG and Toadies.  We kept the nuts, figs, cheese and salt out.  Usually we put the salt in the autolyse so we don’t forget it but thought we try to have Lucy remember to put it in later.

After the 2 levains, the Tang Zhong, ricotta cheese and autolyse came together, we mixed it withy a spoon for 1 minute and then did 4 minutes of slap and folds before adding the salt.  This dough feels much wetter that the just short of the 69% total hydration with the add ins.  This is due to the Thang Zhong and the cheese. 

After the salt went in, we did another 8 minutes of slap and folds before the dough finally came together fore a 20 minute rest.  We then did (3) sets of S&F’s on 15 minute intervals and incorporated the nuts and re-hydrated figs in the 2nd one and by the 3rd one they were well distributed.   The wet figs also added some more unaccounted liquid to the mix. 


After a hours worth of ferment on the counter the dough was bulk retarded for 12 hours, ala Ian’s typical retard mastering.  In the cold it had risen to the rime of the bowl and after 1 ¾ hours on the counter the next morning it has risen above the rim of the bowl .

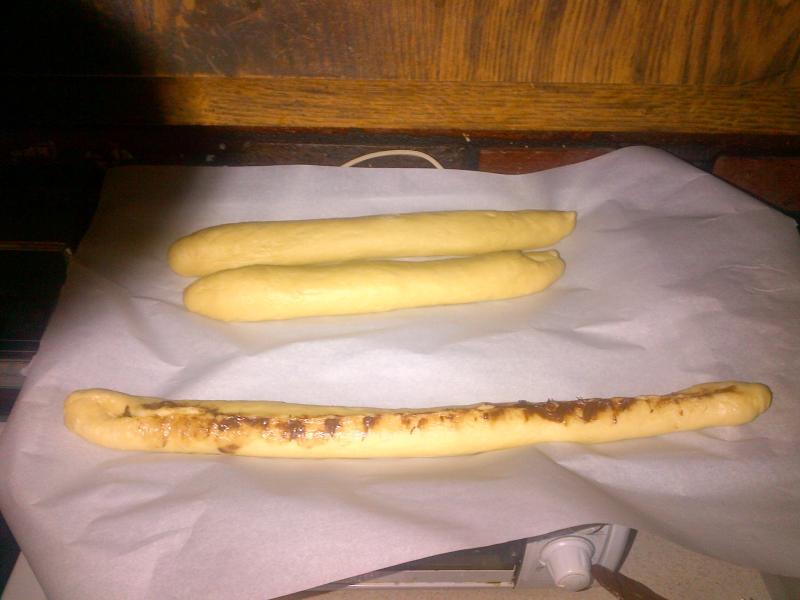
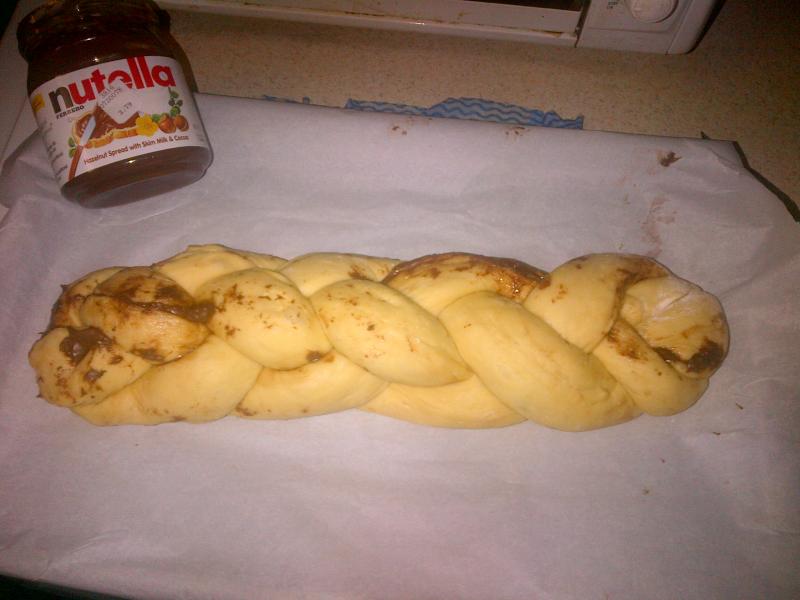
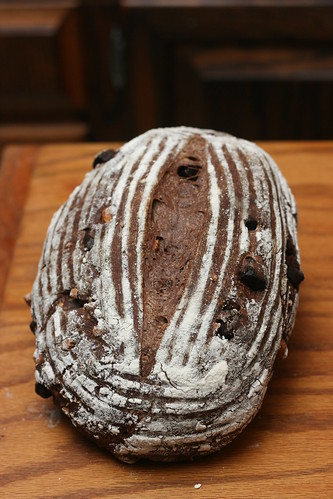
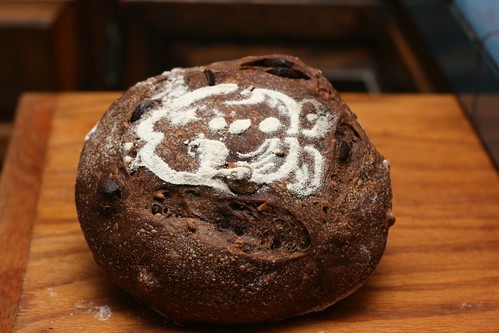
We then divided it and shaped the knotted rolls; one each for the bottom of each basket, and shaped the twisted rope in addition of the oval basket so these Chacons wouldn’t end up looking too similar after baking.   So no braids, balls or other intricate shapes and designs in the bottom of the basket were used in keeping with this simple Italian bake.

After 2 hours of final proof on the counter in a plastic bag, they were ready for Big old Betsy that had bee preheated to 500 F with one of David Snyder’s lava rocks in a large cast Iron skillet along with a large size one of Sylvia’s steaming pans with 2 rolled up towels in it.  Both were put into the oven half full of water when the 40 minute preheat started and they supplied their usual mega steam.  We also used top and bottom stones as we always do since they never come out of the oven.

My apprentice thought that the loaves were over proofed again when the came out of the bag since the dough jiggled like jello or a croissant and the dough had risen above the rim of the baskets.   But, since Chacons do not need to be slashed, they went straight into the oven on the bottom stone after un-molding onto parchment paper and peel.  They still managed to spring nicely anyway and my apprentice’s over proofing fear was as unfounded as her legal immigration status.

After 2 minutes the temperature was turned down to 460 F and then after a total of 12 minutes the steaming apparatus came out of the oven and the temperature was turned down to 425 F , convection this time.  The loaves were rotated on the stone every 5 minutes for 15 minutes when they tested 205 F and were removed from the oven to a cooling rack.

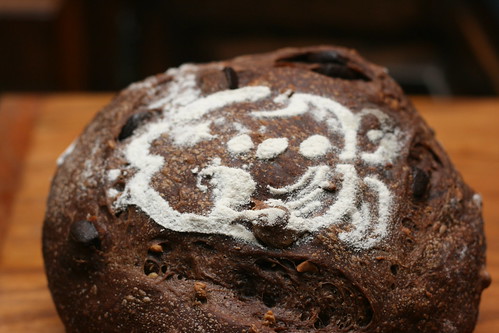
The loaves cracked well on top as they should and they ended up being nicely browned,  crisp but un-blistered despite the long retard and mega steam.  They are awfully nice looking loaves none the less and we can’t wait to cut into one to see what the crumb looks like.

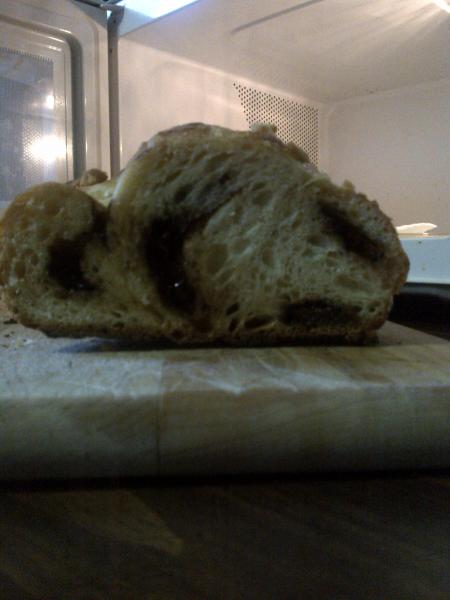
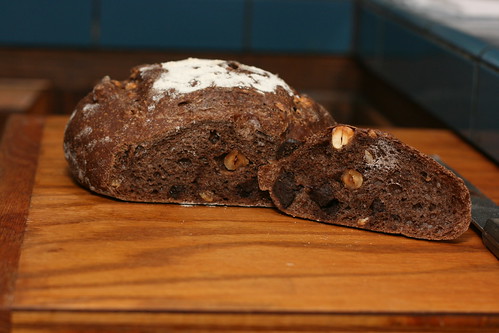
The crumb turned out fairly open, glossy and super soft.  The Tang Zhong really came through as it always does.   I like to use it on whole grain, multi-grain breads since we discovered that it does the same thing for these breads as it does for white breads.  Now we know it isn't just the YW that makes the crumb soft.  We like this bread very much and it is worth the extra effort required to pull it off. 

Formula

WW and Rye Sour Levain

Build 1

Total

%

WW SD Starter

25

25

3.79%

Rye Sour Starter

25

25

4.67%

Spelt

25

25

4.67%

Whole Wheat

50

50

9.35%

Dark Rye

25

25

4.67%

Water

100

50

9.35%

Total

250

200

37.38%


Levain Totals


%


Flour

125

23.36%


Water

125

23.36%


Hydration

100.00%


Levain % of Total

17.82%


Dough Flour


%


Whole spelt

5

0.93%


Dark Rye

5

0.93%


AP

525

98.13%


Dough Flour

535

100.00%


Salt

10

1.52%


Whey 200 Water100

300

56.07%


Dough Hydration

56.07%


Total Flour

660


Soaker Water 300 & Water

425


T. Dough Hydration

64.39%


Whole Grain %

22.27%


Hydration w/ Adds

68.92%


Total Weight

1,403


Add - Ins


%


White Rye Malt

3

0.56%


Red Rye Malt

3

0.56%


Toadies

6

1.12%


VW Gluten

10

1.87%


Ricotta Cheese

100

18.69%


Adriatic & Mission Figs

115

21.50%


Hazelnuts

71

13.27%


Total

308

57.57%


Weight of figs is pre re-hydrated weight


Justkneadit's picture

Monstrous Bloom Again...Need help

September 20, 2012 - 5:08pm -- Justkneadit

Well, I did it again. Crazy bloom that has me scratching my head. I will list the process I used to make this Lavender Hazelnut Sourdough Boule, but could this bloom be a product of my stater being young..(12 days)? I will say the taste turned out much better than I anticipated. The hazelnut gave a smooth nutty flavor and the lavender didn't creep in until close to swallowing (well it did reach the nose first). Neither ingredient was overpowering, which was pleasing. Would be fitting to slather with honey!

daveazar531's picture
daveazar531

I was in the mood for nutella so i started googling what i could do with the stuff and i ran accross this

Steamy Kitchen Article

But i am tring to not use the NK bread as much anymore so i used the BBA recepit for Challah. the only thing i didnt do was let the  4 strand loaf proof for 90 minutes. its getting late and i didnt want to wait. i got some decent oven spring(gas oven, no steam). For a rookie who doesnt really follow the "rules" im really happy with the result.

Up intill the shaping of the braids i followed BBA formula. I scaled and preformed the braids so they would roll easyer then I used a serated knife to open each braid and load it with nuttela.


Pinching them shut can get messy but i realised that if you let the weight of the braid strech the dough as you pinch it is much cleaner

 Considering i only let the loaf rest 10 minutes before putting it in the oven and i didnt bother with steam im happy. I would have liked my if the loaf had a better shine to it. A better glaze then the one I used (egg whites and a little half an half) might be the right move next time

Crumb pictures from this morning

SumisuYoshi's picture
SumisuYoshi

Pane alla Gianduja (Chocolate Hazelnut Sourdough)

Although it may not have been readily apparent from this website, I am a chocolate fiend. If it is made from or with chocolate there is a good chance you can get me to try it. I like making chocolates truffles, filled chocolates, and chocolate desserts. I really prefer the term chocovore, to chocoholic... It isn't that I'm addicted, it is more just that is what I was born to eat! Now, in addition to chocolate, I love hazelnuts. Coming to the natural conclusion here, I love gianduja, if you've never had it you should really do your best to find some and try it. Gianduja is a combination of finely ground hazelnuts and chocolate. I may or may not have a shrine to chocolate and hazelnuts in my closet.

I had offered to send a friend a loaf of bread for her Christmas present (a prospect to which she agreed), and she had told me to make whatever I felt like for her, no real request. Knowing that she is also a fan of chocolate, I decided to create a chocolate bread for her, and this is the result! The bread includes both chocolate and hazelnuts in the dough (as cocoa powder, hazelnut flour, and hazelnut butter) and as inclusions in the dough (chocolate chunks, chopped hazelnuts, and whole hazelnuts). All of this comes together in a delicious (if a bit heavy from all the inclusions!) loaf of bread. The dough, and the finished loaves are very fragrant, and filled the kitchen with a lovely chocolate scent you don't quite expect when making bread. I've already made a second batch, and discovered this bread makes for delightful French toast (if you leave out cinnamon or other spices and put cocoa powder in the batter, the batter is excellent on banana slices this way too!).

Pane alla Gianduja

Makes: 2 medium, or 3 small loaves

Time: Day 1: Elaborate starter. Day 2: Mix final dough, fold dough shape, proof, and bake.

Ingredients:

  Ounces Grams Percent
Starter      
Bread Flour 8 oz 230 gm 100
Water 5.25 oz 150 gm 67%
66% Levain 3 oz 85 gm 38%
Final Dough      
Starter 16.25 oz 461 gm 80.2%
Bread Flour 17 oz 482 gm 81%
Cocoa Powder 2 oz 56.7 gm 9.5%
Hazelnut Flour 2 oz 56.7 gm 9.5%
Water 14.5 oz 411 g 69%
Honey 2 oz 56.7 gm 9.5%
Hazelnuts 4 oz 113.4 gm 19%%
Chopped Hazelnuts 3 oz 85 gm 14.3%
Hazelnut Butter 2 oz 56.7 gm 9.5%
Chocolate Chunks 7 oz 198.5 gm 33.3%
Salt .3 oz 8.5 gm 1.4%
Final Weight      
  70 oz 1986 gm 333.6%


Directions:

  1. Elaborate your starter however you choose, but ending up with the same flour and water weights. (or make a commercial yeast preferment) Allow it to rise overnight.
  2. The next day cream the starter with the water for the recipe, then add in the honey and hazelnut butter.
  3. Mix together the flours, cocoa powder, and salt, then mix in the starter, water, honey, and hazelnut butter til the dough just starts to come together as a ball. Let the dough sit covered in the bowl for 20 minutes
  4. Lightlyy dust your counter or work space with flour and scrape the dough out. With lightly floured hands, give the dough a stretch and fold and then flatten it out into a rectangle. Spread about one third of the hazelnuts and chocolate chunks over the top of the dough, and fold the dough into the center again. Give it another fold to incorporate the additions and then repeat with the rest of the chunks and hazelnuts. Briefly fold some more or knead the dough to more evenly distribute the addtions, just a few turns.
  5. Leave the bowl covered for 40 minutes to an hour, turn the dough out (seam side up) and give it another stretch and fold, then return it to the bowl. This, plus the folding during the addition of the chocolate chunks and hazelnuts should develop the gluten plenty.
  6. Let the dough rise until nearly doubled, and turn it out again onto your work surface.
  7. Prepare well floured brotforms, or flour a towel you can use for the final proofing of the bread. Treating the dough gently, seperate it into however many pieces you want loaves. Either shape the loaves into boules, or do a letter fold and stretch them tight for brotforms. Place the shaped loaves in brotforms or on the towels (seam side down)
  8. Leave the loaves, covered, to proof, for me this was about an hour and a half.
  9. Preheat the oven to 500 degrees with your baking stone (on the middle rack) and steam pan inside and heat 2 cups of water to just shy of boiling.
  10. Very gently grab loaves rising on a towel, and move them to a peel with flour, cornmeal, or parchment paper. If using brotforms, just invert the loaves onto parchment or a peel. Just before you load the loaves into the oven give them a few shallow slashes. Load the loaves into the oven and carefully pour the hot water into the steam pan. Be careful of the window and light bulbs in your oven. As soon as the loaves are loaded, turn the oven down to 390
  11. Bake for 15 minutes, turn loaves 180 degrees and remove parchment paper if using. Continue baking for another 10-20 minutes. It may be a bit hard to tell if these are done when judging by color, you'll have to rely on the feel of the loaf, it should sound nice and hollow. Remove finished loaves to a cooling rack and let sit for at least 1 hour before cutting.

I tried a stencil again with this loaf, following the advice from MC of Farine, I removed it part way through the bake, sprayed with water and dusted with flour. The stencil this time is one version of the Mayan glyph for chocolate: kakaw(a)! This stencil was a bit more tricky as the center piece is connected to the rest by only very small pieces, and there are many small details. I think it came out pretty good looking though!

Now for some pictures:

Pane alla Gianduja (Chocolate Hazelnut Sourdough)

Pane alla Gianduja (Chocolate Hazelnut Sourdough)

Pane alla Gianduja (Chocolate Hazelnut Sourdough)

Pane alla Gianduja (Chocolate Hazelnut Sourdough)

Subscribe to RSS - hazelnut