This was something of an unusual weekend in bread-baking for me in that I made two recipes that were fairly experimental. I just posted my experience with this week's sandwich bread, a 100% sprouted wheat bread. My dinner bread this week was the German Sourdough Rye recipe from Laurel's Kitchen Bread Book. I had not originally planned to make this, but got both whole wheat and rye sourdough starters going this past week and just couldn't resist trying one out. I was leaning toward this recipe for my first attempt, and decided to give it a try after reading some positive reactions from other Fresh Loafers.
My preparation started Thursday night when I began striving to get my rye starter as active as possible (thanks to advice I got here earlier in the week). I followed Laurel's directions for this starter, which means that it's around 200% hydration, but even so it was doubling between feedings. I may stiffen it up in the future, but want to keep it like this for now to experiment (by way of comparison, my new whole wheat starter follows the 75% hydration instructions in Reinhart's Whole Grain Breads).

On Friday evening, I added a bit of rye flour and water to create a much stiffer mixture, what Laurel calls the "basic sour". This sat overnight, then more rye flour and water were added on Saturday to turn it into the so-called "full sour". No pictures of these, since they were pretty nondescript. The basic sour did have a terrific aroma after fermenting overnight, however.
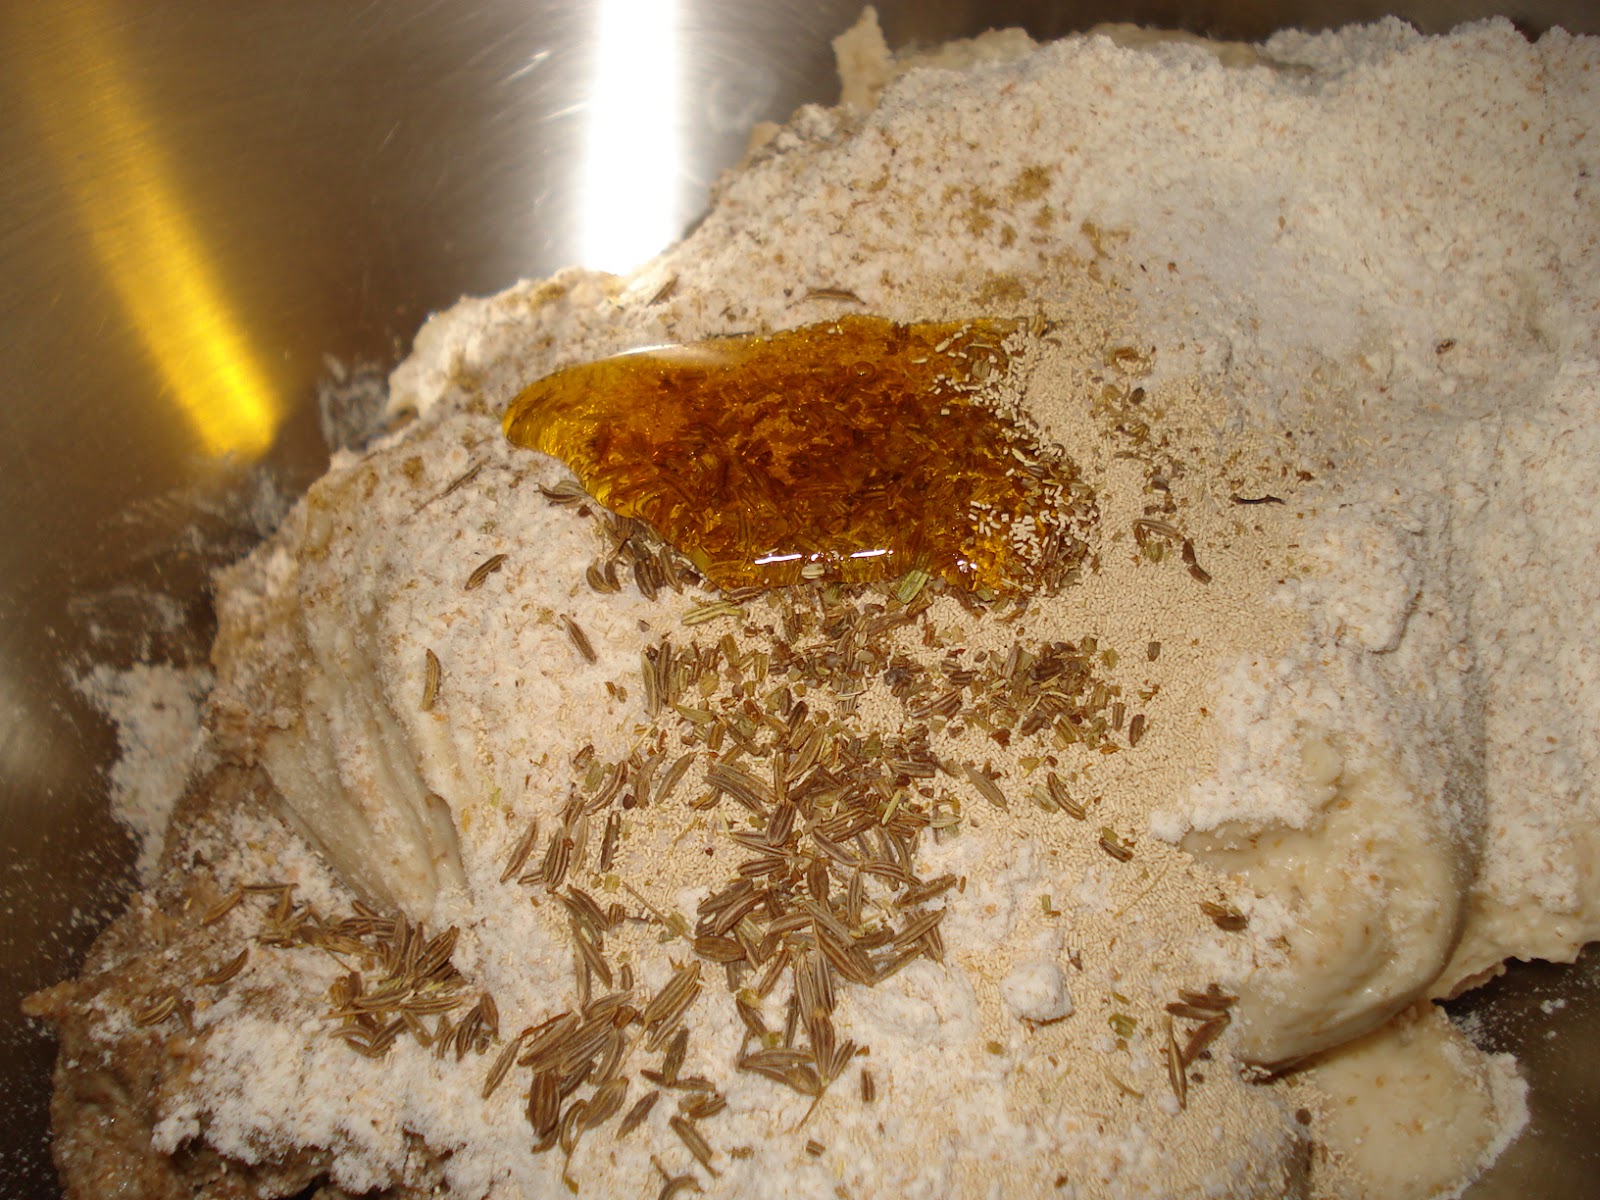
Around four hours after forming the full sour, it was time to add the final ingredients. These included a good amount of yeast, so I haven't really proven whether my starter can leaven anything, but I decided not to deviate from the recipe on my first try. Other than the yeast, flour, and water, the only ingredient was caraway seeds, making this a much leaner bread than most of Laurel's.
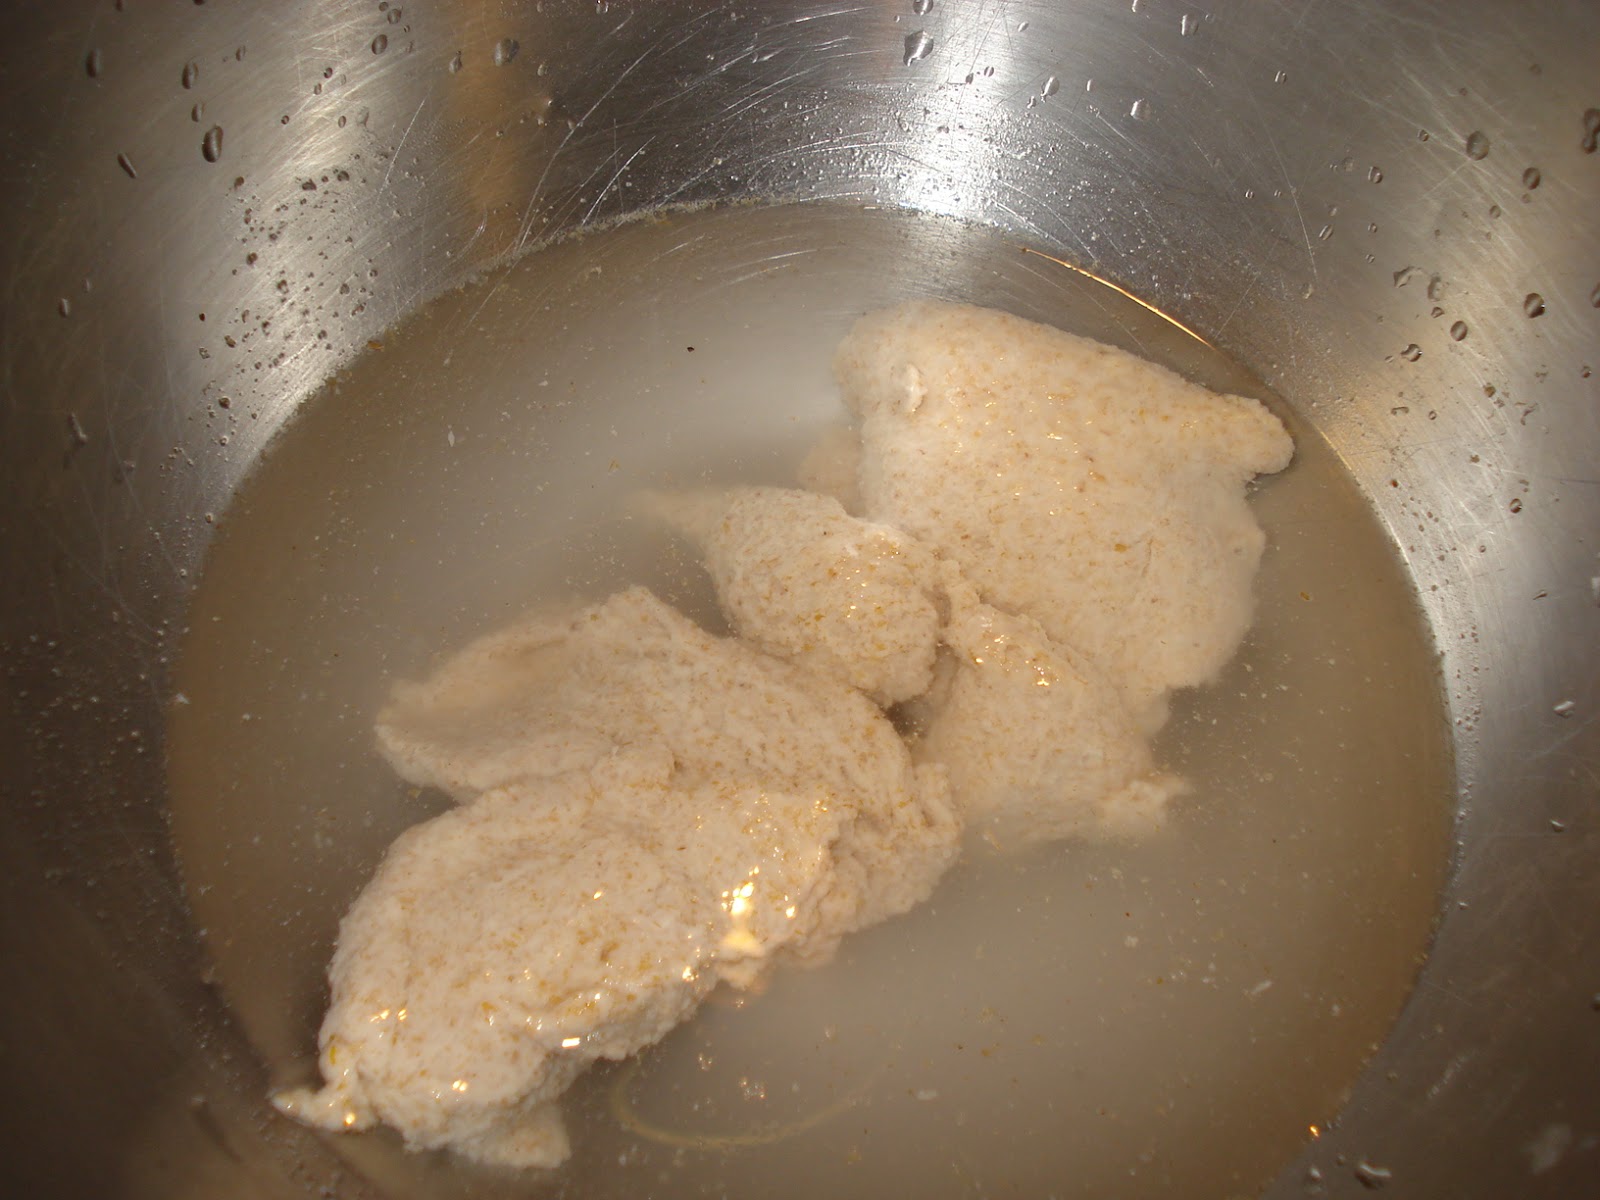
One piece of advice in the Laurel's Kitchen Bread Book that I've found quite useful is her technique on steaming bread. The dough is placed into a casserole (a two-quart, round-bottom Pyrex dish in my case) to proof, then just before baking, several tablespoons of water are added to the casserole and the lid is placed on top. It's a very convenient method of steaming, plus it gives your bread a neat shape. I'm not yet experienced enough to tell whether it's as effective as other methods. Below is a picture of the setup at the beginning of proofing. I added a bit of cornmeal, partly to help prevent the loaf from sticking to the pan and partly because I think it complements the rye very nicely.

After adding the final ingredients, the only recommended rise was a 45-minute proof. Because the bread was made of 2/3 rye flour and 1/3 whole wheat, I was not expecting much of a rise and did not check on the dough during this time. Oops! When I came back, I was greeted with the below site and popped it into the oven as quickly as possible.

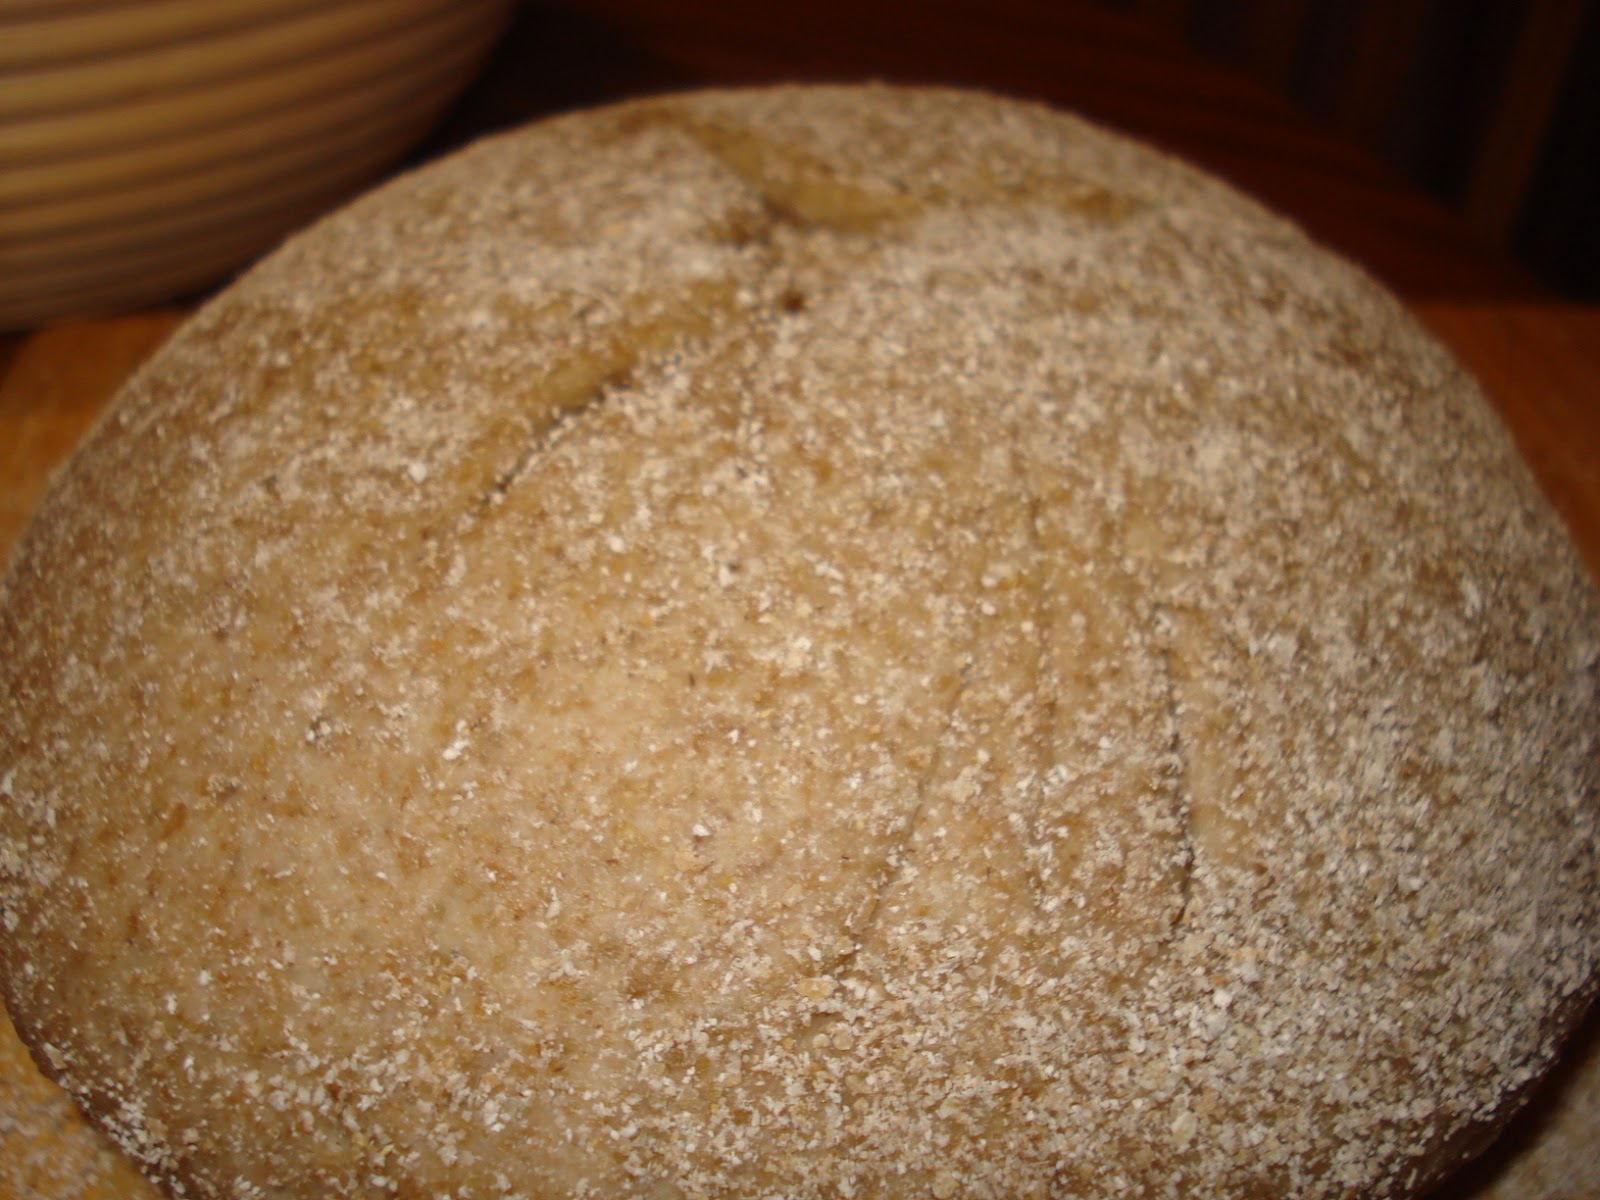
I was a bit worried about overflowing my casserole after that proof, but fortunately the bread did not rise much further in the oven. I rarely get spectacular oven spring from breads with a high percentage of rye, so I'm unsure how much of this was due to my overpoofing and how much was due to the nature of the recipe. In any case, here are photos of the resulting crust and crumb.


The cornmeal gave a nice color to the sides of the crust, but was invisible on the bottom, so I may try using a bit more there next time. The crust was thin and crispy, just as I was hoping. My camera doesn't do so well at closeups, but I was also extremely happy with the crumb (except for a few larger air pockets, which I'll tentatively blame on poor shaping). Before this, the breads I've made with a high percentage of rye ended up extremely dense, coarse, and crumbly. This loaf had a much more open and incredibly smooth crumb. Even better, thanks to reading Whole Grain Breads recently, I think that I sort of understand why.
As far as taste, there was a slight sourdough tang, but probably not as much as I would have liked (it smelled sourer than it tasted). In addition, while I'm not usually a big fan of caraway seed, I think that this bread could use more. The recipe recommended 1/4 teaspoon per loaf, I doubled it, and I probably could have quadrupled it. That being said, the flavor was definitely more appealing and complex than any other high-percentage rye I've made. I will definitely be making this one again...but probably not until I've tried some of the high-percentage ryes from Whole Grain Breads.