The Fresh Loaf

A Community of Amateur Bakers and Artisan Bread Enthusiasts.

fresh milled flour

mwilson's picture
mwilson

On a flying visit to Dorset my family and I stopped off in Sturminster Newton to take a tour around the water mill. Wonderful! A very informative and interesting tour provided by delightfully friendly staff reminded us of times gone by. Fully automated machinery that is surprisingly old for the ingenuity. I highly recommend this tour.

 
This work is licensed under a Creative Commons Attribution-Noncommercial-No Derivative Works 3.0 License

At the end we were given some flour milled from locally grown wheat. Thank you Tony.
 

A few days later I set about making a loaf with this newly acquired flour

I can’t provide a comprehensive recipe as technically this wasn't without issue and I had to make a few on the fly adjustments to my devised recipe.

To begin I sifted the flour using my drum sieve to remove the majority of the bran because I don’t really like dense breads.

I fermented 80% of the flour as a Biga pre-ferment. However after around 16 hours the dough had deteriorated a little, but still, more than I would like. This flour really can’t handle much fermentation.

On putting the final dough together, after even a gentle mix the dough became overly slack and so I added a little extra white flour and some stock firm sourdough to compensate.

The final dough was a little on the weak side but it still managed to almost triple in size before baking. Oven spring was fairly good too.

Fully fermented Biga, Remaining sifted flour, total removed bran and my sieve.
 

The finished loaf with some of the sieved bran sprinkled on top.


Crumb


PiPs's picture
PiPs

Formula

Overview

Weight

%

Total dough weight

950g


Total flour

555g

100%

Total water

400g

72%

Total salt

11g

2%

Prefermented flour

100g

18%


Starter build – 10 hrs 23°C


Starter

20g

20%

Ryeflour (Kialla Milling)

100g

100%

Water

100g

100%


Final dough 25°C


Starter

200g

43%

Sifted fresh milled Wheat

227g

50%

 Sifted fresh milled Spelt

227g

50%

Water

300g

65%

Salt

11g

2%

Method

  1. Autolyse 20 mins
  2. Knead 5-10 mins
  3. Bulk ferment two hours with two stretch and folds at 30 mins apart in first hour
  4. Preshape and bench rest for 10 mins
  5. Shape and proof for one and a quarter hours
  6. Bake in preheated covered pot for 10 mins at 250°C then 10mins at 200°C. Remove bread from pot and bake a further 20 mins at 200°C

___

This bread will be taken to work for a lunch gathering so I have no crumb shot to show nor time for photos this morning or I will miss my bus :)

Cheers, Phil

Earlybirdsf's picture
Earlybirdsf

Just made a trip out to Central Milling, which is actaully called "Keith Giusto Bakery Supply". They have moved into a new location. 755 Southpoint Blvd, Petaluma, CA. 866-979-2253

They have a very large selection of organic bulk flours. Now, you can call ahead, and they will pack 5lb bags. They ask that you please call ahead though, otherwise, you will wait for some time. If you are buying in 25 or 50lb bags, no problem.

Under construction, is a Bakery School, on site, that will be open soon.

Please email me your contact, if you are intersted in bulk flour. We were told that if enough of us order, they will deliver to SF, as they deliver to the Ferry Bldg twice a week.

Earl


dmsnyder's picture
dmsnyder


I've read with great interest discussions of home milling flour since I first joined TFL, but not wanting to get into the more arcane techniques of grain tempering, multiple graduated sifters and the like put me off. My interest was boosted by MC's interviews with Gérard Rubaud, who uses fresh hand milled grains to build his levains. (See Building a levain "à la Gérard": step 1) My recent experience chopping rye berries by hand did it though. I ordered the grain mill attachment for my KitchenAid Accolade mixer.

I'd been looking at grain mills for some time. I considered the Nutrimill, but I don't need to grind pounds and pounds of flour, and, from what I've read, it does not grind as coarse as I'd like to make cracked and chopped grains. Hand-cranked mills look cool, but my tiled kitchen counters don't work with appliances attached by vises. So, the KitchenAid attachment was a nice solution. I used it today for the first time.

KitchenAid Grain Mill

Based on my reading of reviews of this device, I ground some hard red winter wheat and some spelt berries by putting each through three passes of increasing fineness. I just ground about 200 g of each. There was no indication that this strained my mixer motor in the least. Each pass took 30 seconds or less. The resulting flour was a tad coarser than what I buy already milled, but finer than, say, semolina.

Fresh ground spelt flour

Fresh ground hard red winter wheat flour

My formula and procedures take off from Chad Robertson's “Basic Country Bread” in Tartine Bread.


Total Dough


Ingredients

Wt (g)

Baker's %

KAF Sir Galahad (AP) flour*

800

73

Fresh-ground WW

200

18

Fresh-ground Spelt

100

9

Water

850

77

Salt

20

1.8

Total

1970

178.8

*Note: The small amount of WW and Dark Rye in the levain are not calculated separately in the Total Dough.


Levain


Ingredients

Wt (g)

Baker's %

KAF Sir Galahad (AP) flour

70

70

KAF WW

20

20

BRM Dark Rye

10

10

Water

100

100

Ripe levain

40

40

Total

240

240

  1. Dissolve the levain in the water. Add the flours and mix thoroughly.

  2. Ferment at room temperature for 12 hours (overnight).


Final Dough


Ingredients

Wt (g)

KAF Sir Galahad (AP) flour

700

Fresh-ground WW

200

Fresh-ground Spelt

100

Liquid levain

200

Water (80ºF)

750

Salt

20

Total

1970

Procedures

  1. In a large bowl, dissolve 200 g of the levain in 700 g of the water.

  2. Add all the flours and mix to a shaggy mass. Cover tightly.

  3. Autolyse for 25-30 minutes. (Longer would be okay.)

  4. Sprinkle the salt over the dough and add 50 g of water.

  5. Knead in the bowl by squishing the dough between your fingers until all the water has been incorporated and the salt is well-distributed. Then, still in the bowl, fold the dough over itself a few times.

  6. Transfer the dough to a large clean, lightly oiled bowl or other container, such as a rising bucket. Cover tightly. If possible, place the dough in an ambient temperature of 75-80ºF.

  7. After 30 minutes, stretch and fold the dough in its container 15-20 times. (By the end of this, the dough should be smooth, and it should pull away from the container easily when you stretch it.) Re-cover the dough. Repeat this at 30 minute intervals for two hours, then one more time an hour later. (The dough should have expanded by 25-50% and be light and full of small bubbles which you can see if your container is transparent. If it has been fermented at a cooler temperature, give it another hour, or even 2 hours.)

  8. When the dough is fully fermented, transfer it to a lightly floured board and divide it into two equal pieces.

  9. Pre-shape the pieces as rounds. Cover with plastic or a towel and let them rest for 20-30 minutes.

  10. Shape as boules or bâtards. Place in bannetons or en couche and cover.

  11. Proof for about 90 to 120 minutes, depending on ambient temperature.

  12. Pre-heat your oven to 500ºF. If not baking covered, pre-heat a baking stone and prepare your oven for steaming. (I baked these boules in Lodge Combo Cookers.)

  13. If baking uncovered, bake at 460ºF with steam for about 40 minutes. Then turn off the oven and leave the door ajar for another 10 minutes to dry the crust. If baking covered , bake at 480ºF for 15 minutes, then at 450-460ºF uncovered for another 25-30 minutes.

  14. Transfer the loaves to a cooling rack.

  15. Cool thoroughly before slicing.

Boules after baking 15 minutes, covered

Boule, cooling

Crumb

Chewy crust and tender crumb. Whole wheat dominates the aroma of the bread sliced still warm but the flavor is sweet and mellow without any perceptible sourness. I'm looking forward to tasting it toasted tomorrow morning.

David

Submitted to YeastSpotting


dlt123's picture

Bread Books for Home Milled Flour

April 7, 2009 - 5:15pm -- dlt123
Forums: 

Hello, just a quick question which I don't think I've seen addressed here, but are there any Bread cook books that are targeted for those of us who mill our own flour at home?

Thanks,

Dennis

---- ---- ---- ---- ---- ---- ---- ---- ---- ---- ---- ----
Belief has no affect on reality.

My Website: http://www.roadtobetterliving.com

bwraith's picture
bwraith

Home Milled and Sifted Sourdough Crumb

Home Milled and Sifted Sourdough Loaf

The home milling and sifting adventure continues. My most recent effort felt like a big step forward in several ways. Tempering, based on some suggestions by proth5 in response to a previous blog entry, was explored. Multiple successively finer passes of the mill were used this time, including re-milling of the sifted results from various steps in the process. Home ash content tests were performed, to understand better the distribution of bran and outer seed coat particles across the various outputs of my milling process. The outputs were then blended to a desired ash content and a sourdough loaf was baked. Photos of the process are posted, as well as a video of the tempering system I rigged up at the last minute (this is more for entertainment, but it may have helped). A process flow chart is posted showing the steps followed to mill and sift this flour, as well as a spreadsheet showing the ash content analysis for the various outputs of the milling process.

Notes on the Bread

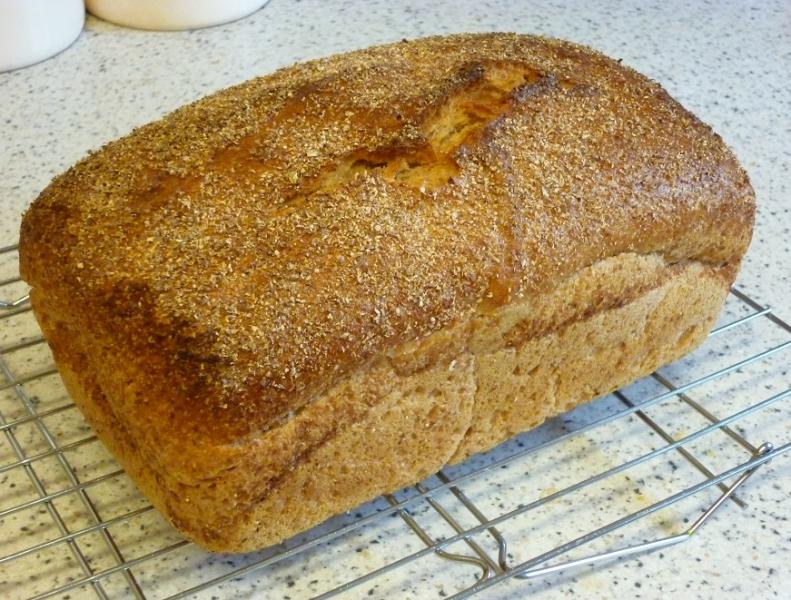
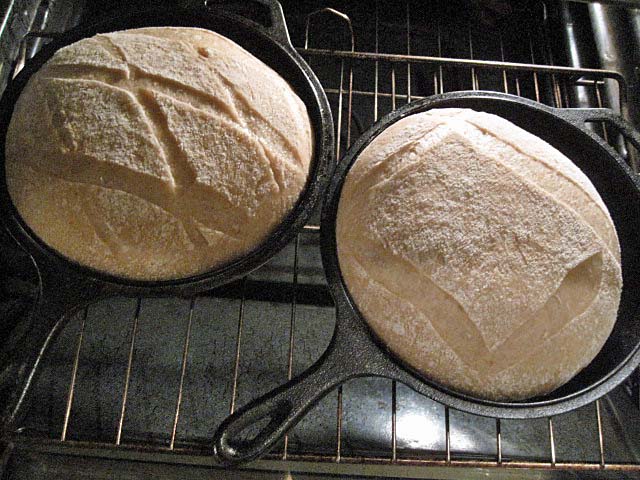
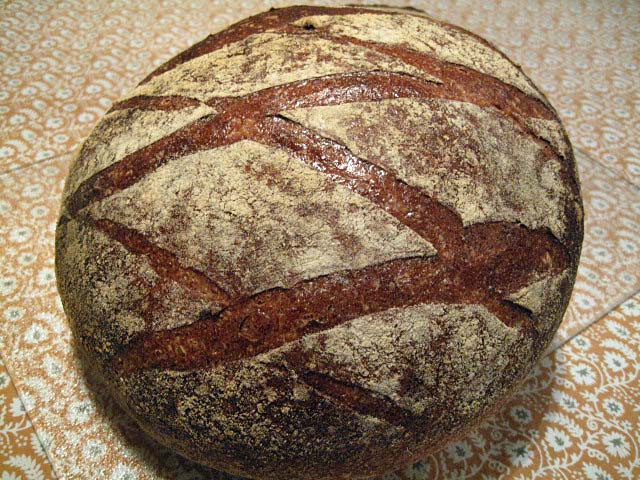
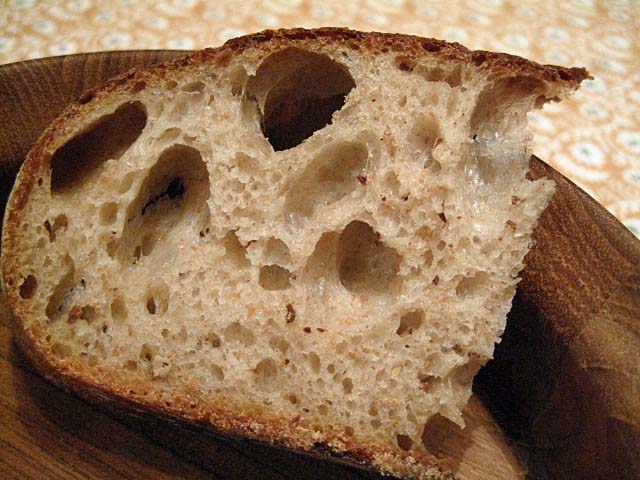
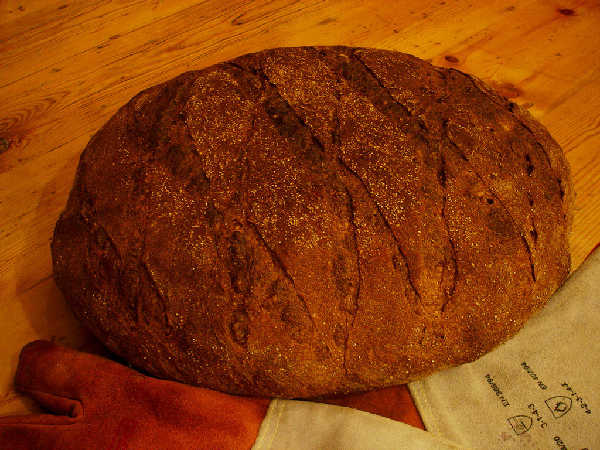
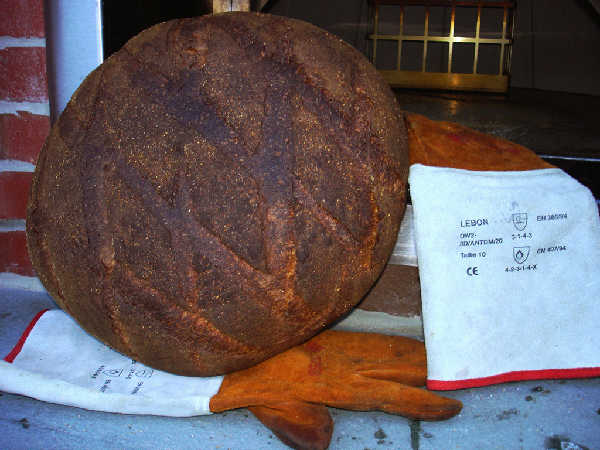
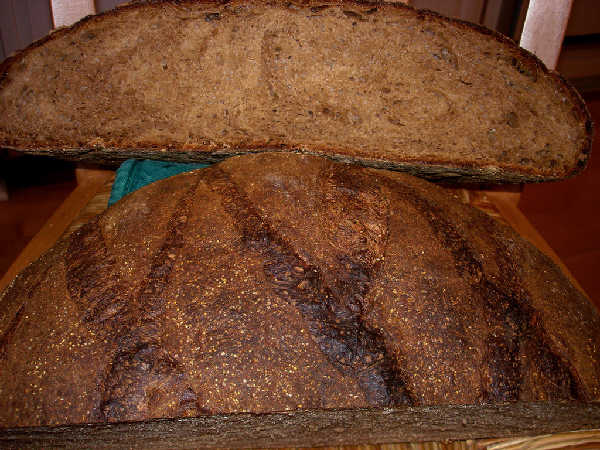
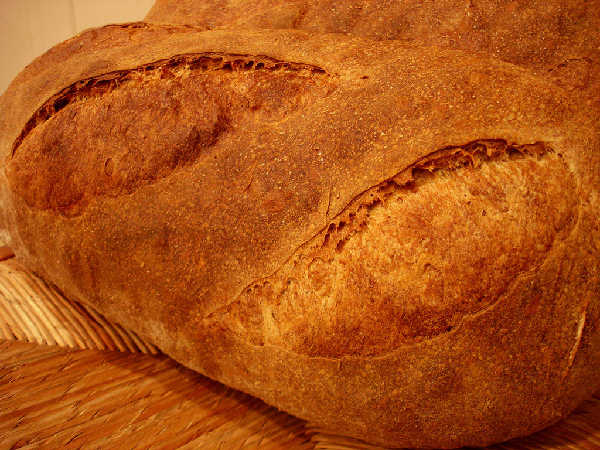
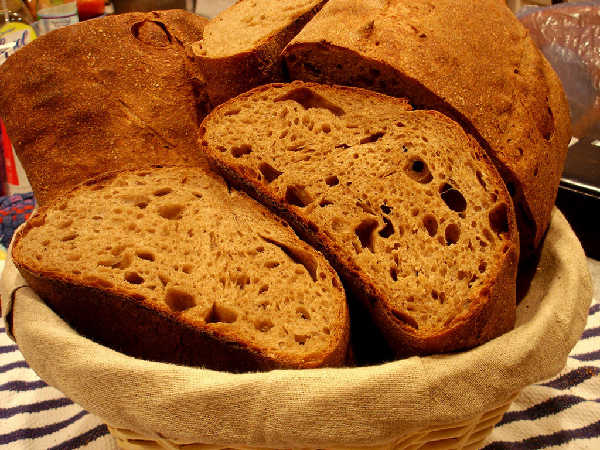
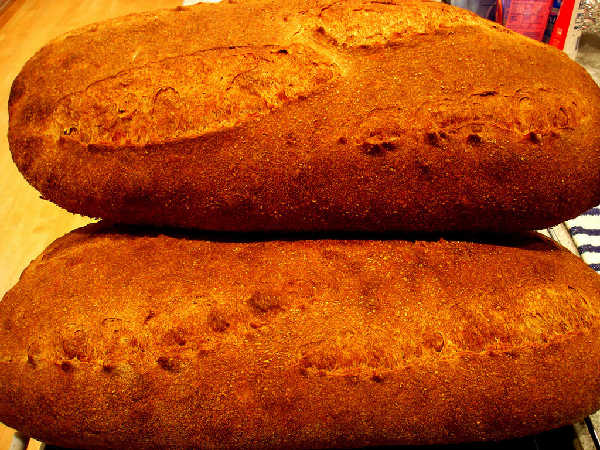
The recipe for the sourdough loaf is similar to that for previous blog entries except no whole wheat was used in the levain and the rye was lightly sifted through a #25 sieve to remove the larger bran particles. A levain was prepared with 15% fermented flour as a percentage of total flour in the dough. The rye flour was 5% of the total flour, and the remainder of the flour was the home milled and sifted blend from this adventure. The rye flour went into the levain. The hydration was 79%, which proved to be too high. I realize the water absorption is in between whole wheat and white flour, so I probably would have been happier with a hydration around 74%. The resulting dough was closer to a ciabatta dough than I was intending, but the bread that resulted was wonderful. I was using my brick oven for some braising earlier in the day, which forced me to refire the oven in an attempt to bring up the temperature. I mismanaged the heat a little, which caused the somewhat scorched bottoms of the loaves you see in the photos. The resulting bread had a much lighter crumb than previous attempts, showing that I was much more effective at separating out the dark from light components of the berry.

Tempering

Based on a great suggestion from proth5, I explored tempering the wheat berries before starting to mill. Proth5 added 2% water to the berries. Some discussion in "Wheat Flour Milling" by Posner and Hibbs suggested 14%-17% moisture content. A Delmhorst G7 Grain Moisture Meter was used on Heartland Mill "Milling Wheat (M2 product)" and found to have a 10.6% moisture content. I decided to split the recommendations of proth5 and the suggestions in "Wheat Flour Milling" and added enough water to the grain to bring the moisture content to 14%. In a later discussion with a representative of Meadows Mills (my mill is a Meadows 8 inch stone mill), 14% was considered a touch too high, and 13% was suggested as a reasonable moisture content for my mill. So, Proth5 suggestions were very good, but by then I had already added the water to the berries.

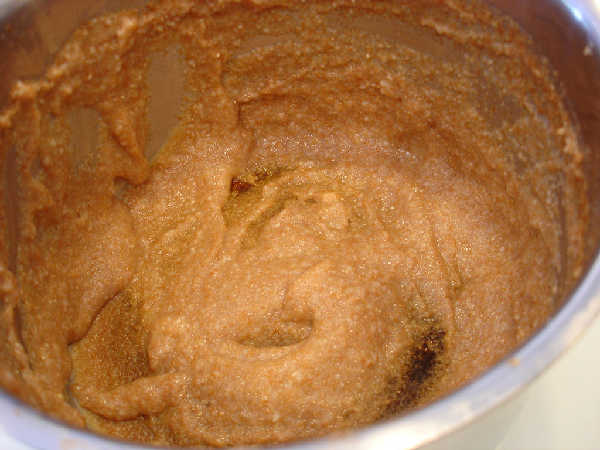
Concern for very even moisture distribution motivated a couple of strategies for tempering the wheat. First, an atomizer was used to spray the water a few grams at a time onto berries, stirring in between sprayings to initially do a good job spreading the water evenly throughout the grain. I then borrowed the rotisserie from my outdoor grill, and rigged it in my workshop to be able to mount a plastic container of grain on it. In order to rotate the grain for a few hours without putting undue strain on the rotisserie, it was counterbalanced by attaching some small, heavy vices on the counterweight, which was too small on its own. A video of the contraption is available, as it is hard to describe accurately, but easy to understand once you see the video. The rotisserie was used for a few hours until the wheat seemed fairly dry to the touch. It was then allowed to sit for about 30 hours before milling.

Multiple Pass Milling and Sifting

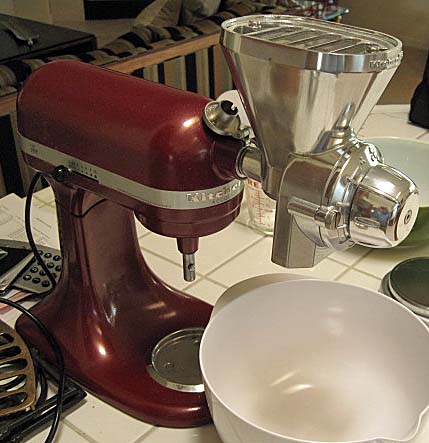
After reading some of the chapter on milling in "Wheat Flour Milling" and browsing through various diagrams of milling processes, I took a wild shot at doing what I could as a complete novice to approximate the processes in a general way with my Meadows 8 Inch Stone Mill, and a series of sieves stacked in a Sieve Shaker. The equipment is described in an earlier blog entry.

The basic idea was to first mill very coarsely to separate the bran gently from the rest of the berry, followed by sifting out the flour from the darker material, followed by re-milling and re-sifting the darker material to obtain more flour. True to the discussions in "Wheat Flour Milling", the whiter flour was extracted from the 2nd, 3rd, 4th, and 5th passes, not from the first pass. I was surprised to discover this, but the ash content results showed much lower ash content for passes 2-5, particularly for the flour extracted from 3rd and 4th passes.

Passes 1-4 were successive, meaning that the "coarse red material" sifted from the #40 or #60 sieve was re-milled and resifted in series. In pass 5 the coarser results of passes 2 and 4 were mixed, re-milled, and re-sifted. In pass 6 the very coarse, mostly bran output caught in a #40 sieve was re-milled and re-sifted.

A process flow chart is posted that shows the details of the milling and sifting procedure followed.

Ash Content and Blending

Six flours, two coarse red "products", and 1 "bran" were the final results of all the milling and sifting above. Home ash content tests were performed on all of those products, as well as on sample saved from some of the intermediate steps. A spreadsheet is posted showing the results of the ash content measurements.

The results show that the flour through a #60 sieve that looks very much like Heartland Mills Golden Buffalo has a very high ash content. It was the flour from passes 2,3,4, and 5 that went through a #60 sieve that ended up having lower ash content. The flour from pass 1 had an ash content of 1.4%, not that far from whole wheat. In earlier one or two pass attempts, the ash content was probably closer to 1.4%, which explains the almost whole wheat quality of the breads from my first two tries. The ash content of passes 2 and 5 was around 1%, a little lower than Golden Buffalo flour from Heartland Mill. The flour from passes 3 and 4 was lowest, around .7% and much closer to a white flour, which might be something like .55%.

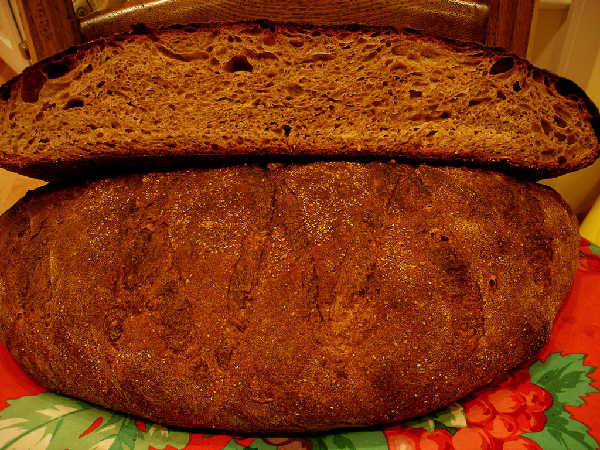
In the spreadsheet I created blends of the various outputs, so that I could get the ash content desired. As it turns out, by combining all the "flours" and leaving out all the coarse red and bran products, an ash content around 1.1%, maybe a little lower but very comparable to Heartland Mill Golden Buffalo would be obtained. So, all the flours were blended to obtain the flour used in the bread pictured above. This bread was clearly lighter than previous attempts. The dough handled much more like white flour, created a satin smooth surface texture, and seemed strong and extensible. The yield was much higher than in previous attempts, 85% of the final products and 81.5% of the weight of the berries before tempering, yet the ash content was lower than flour obtained in previous attempts that only yielded around 65% of the initial weight of the berries.

Nutritional Editorial Comment

Sifting, as done here, does remove some of the bran, outer layers, and germ from the flour. However, since the ash content is around 1.1% and whole wheat is around 1.7%, it can be argued that around 2/3 of the outer layers is making it into this flour. So, although it is not a pure whole grain flour, it still has much of the material from the outer layers. By dusting the loaf with the bran, further fiber is added. As a results, this bread should contain a significant proportion of the nutritional benefits of freshly milled whole grain flour. For me, it's worth doing this to be able to enjoy breads with lighter flavors and textures closer to white flours, without much loss of the nutritional values and freshness of milled-on-demand flour.

A More Practical Approach (Maybe)

Many of you may immediately view this little adventure as very impractical - with good justification, too. However, it at least is an example of creating flour of various grades at home, a drastically scaled down version of what happens in a real mill, doable at home, even if a little too large for the majority of home bakers.

I believe a simple version of this could use one #60 sieve and one #40 sieve and a Retsel Stone Mill or other similar mill that provides good control of the coarseness of the flour output. If set to much coarser settings, multiple passes could be performed on the coarse results caught in the #40 and #60 sieves. The sifting could be done by hand, even in quantities up to around 2Kg, although it is a little tedious and laborious. Maybe only 3-4 passes would be done, to minimize the labor, but the results of running tempered berries through at a coarser setting, and then re-milling more finely the coarse results caught in the sieve and re-sifting should allow the extraction of a reasonable flour similar to Golden Buffalo, just as shown above.

Where From Here

Even with a sieve shaker, the sifting is the most tedious and time consuming part of this process. The milling for all the steps combined for about 2Kg of berries was probably only about 10-15 minutes. The milling goes very quickly. However, the sifting drags on for 20 minutes at a time at first. Later steps are quite fast, and the last couple of passes can be done more quickly by hand, given the reduced amount of product.

I've ordered a Meadows Mill Eccentric Sifter (Goetter, hehe?) to add to the burgeoning list of equipment in the workshop. My hope is that this will make the sifting take only minutes at a time, more comparable and well matched to the milling speeds. Of course, this is all massive overkill for home baking. Yes, massive, massive overkill, no question. However, it is a hobby pursued with passion that may not always make sense in practical terms. It is the beauty of the home engineering, the resourcefulness required, and the delicious freshness of the bread that all contribute to the enjoyment.

Another remaining nagging missing piece of the puzzle is a flour analysis tool that would allow more thorough understanding of all the outputs, such as protein content, moisture content, water absorption, and ash content. Maybe I've figured out the ash content using the conductivity method described previously, but it seems to take a good 12-24 hours to get useful results from it. I'd like to be able to get quick turn-around for these measurements, in order to optimize the milling and sifting strategies.

Update (1/28/07)

Loaves Made With Flour From Meadows Sifter

Loaves Made With Flour From Meadows Sifter - Crust

I received the Meadows Eccentric Sifter (see video) and conducted a milling, sifting, and baking session (see photos), as well as some home ash content tests to check out the results with the new sifter. The Meadows sifter is far faster than my original approach with a sieve shaker and produces 4 separations simultaneously with great ease.

The sieve shaker had some advantages, in retrospect. You could inspect the results easily and fine-tune the sifting strategy very easily and quickly. Also, very little product is lost using the mining sieves, which is valuable for the smaller amounts I tend to do each time. The Meadows Sifter kept a couple of pounds in it, probably in the nooks and crannies of the wooden sieves and some built up on the fabric sleeves used to transport the flour. The Meadows Sifter made it more difficult to inspect or change the sifting process, as the sieves are tightly bolted down with wing nuts on long threaded rods. You can open it up, but it's much more time consuming than it is to detach and separate the mining sieves.

In this milling session, I tempered the wheat to a 13% moisture content. The tempering process was shortened to only 12 hours as a result of impatience to test out the sifter. The first pass through the Meadows 8 Inch Mill was troublesome. The breaker tripped even though I had the mill set to a fairly wide opening of about 1/8 turn on the adjustment screw. After several tries, I was able to complete the first pass with the screw open between 1/4 and 1/8 turn. A while later, I tried running untempered wheat at 10.6% moisture content through the mill, and it also had a tendency to jam the mill. Since I really don't have the slightest idea what the right opening is for the first pass through the mill, I'm not sure what to conclude. On the one hand, the milling went very smoothly with wheat tempered to 14% moisture content for more than 24 hours. On the other hand, the Meadows representative seemed very clear that 13% moisture content or less was preferred for the Meadows Mill. However, when I used less moisture and less tempering, the milling seemed more difficult on the first pass. All subsequent passes were uneventful, even on the finest settings.

After completing the milling session, I ran some home ash content tests. Clearly the yield of lower ash content white flours was much lower. I believe this again had to do with using lower moisture content wheat tempered for a shorter time. The flours seemed more like my earlier attempts with the Retsel mill, where one or two passes with untempered wheat berries resulted in a flour much closer to a whole wheat flour.

The sense that the flours were darker was corroborated by the home ash content tests, which showed the flour coming the the #60 sieve had an ash content almost as high as Heartland Mills WW flour (I'm making my flour with Heartland Mills "Milling Wheat (M2)". Output from subsequent passes had an ash content close to 1%, whereas in my earlier attempt with 14% moisture content 24 hour tempered berries, the flour from passes 3-4 that was the whitest had an ash content of about .75%. I think this explains why my earlier one or two pass attempts made loaves that seemed so much more like whole wheat loaves than my more recent multi-pass attempts with well tempered 14% moisture content wheat.

In order to get a flour something like Heartland Mills Golden Buffalo, I had to accept a lower yield this time. The home ash content tests take at least 24 hours of soaking, so I used color and inspection of the flour, plus the knowledge that the middle passes would be lower in ash content to blend the outputs to get a flour of the same approximate "color" as the Golden Buffalo. My "high touch" method came out to have an ash content almost equal to that of Golden Buffalo, but my yield was only about 65% this time, whereas I had a lower ash content with close to 80% yield in my earlier attempt with berries at 14% moisture content and tempered for more than 24 hours.

The loaves were made without any diastatic barley powder this time, and the crumb had no hint of gumminess. The color of the crust stayed slightly lighter than before. The gluten seemed a little better this time, which makes me wonder if the protein content or quality from this session was slightly better. It's hard to say, because I reduced the hydration based on the previous results, and this dough may have behaved well just because of more optimal hydration. However, maybe the gluten quality is somehow improved due to the different ash content, tempering method, and sifting method.

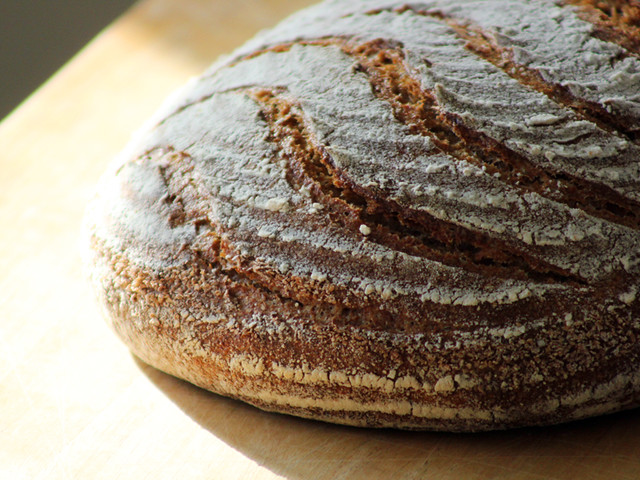
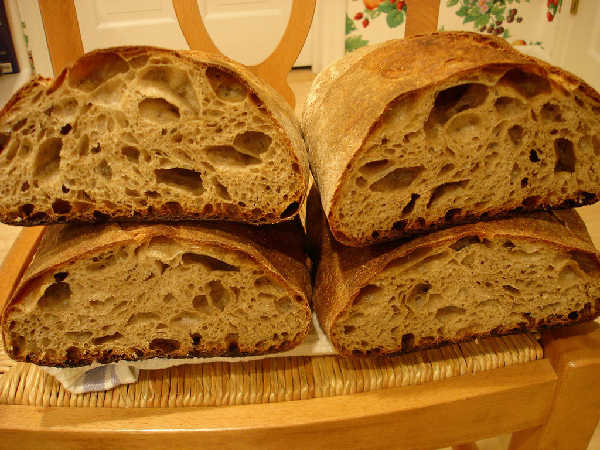
The loaves that resulted were very good. As noted above, the crumb was a touch darker than the last one, which correlates with the higher ash content measurement. However, the crumb was still much closer to a white bread, similar to the last one, as opposed to earlier attempts that were clearly closer to a whole wheat bread.

bwraith's picture
bwraith

Below is a photo of my third attempt at home milling and sifting, which resulted in a flour very similar to my favorite "high extraction flour", Heartland Mills Golden Buffalo flour. The processes used on my second and third tries are explained further below. Additional photos of the process have been posted.

Home Milled Miche - Third Try

First Try

The first bread from my home milling and sifting project, blogged earlier, looked like a 100% whole wheat bread. Unfortunately, I still hadn't figured out a way to do home ash content testing, but from the results, a guess at the ash content of the flour that went into my first try might have been something like 1.4%. So, it had some of the darker material sifted from it and therefore had a lighter crumb than a 100% whole wheat flour might have produced, but the color and flavor was closer to 100% whole wheat.

Second Try

Home Milled Miche - Second Try

My second try was a little lighter but still closer to whole wheat in character. I allowed the sifting process to go on longer and used a couple of passes. After one pass through the Retsel mill at a fairly fine grind and then sifting through a stack of sieves (#25,35,45,60,70,80) on my sieve shaker, the breakout was as follows. A video of the equipment in operation is posted for fun.

Sieve SizeAmountpercentdescription
#2525g4%bran
#3542g6%middlings and bran
#4570g10%middlings
#60107g15%middlings and flour
#7063g9%cream flour
#8099g14%cream flour
thru #80311g43%white flour
total717g100% 

I then took the 219g caught by sieves 35,45, and 60, and re-milled them at about the same settings as the initial milling. The output of this second milling was then fed through the #60 sieve. The output was 53g of coarse material caught in the #60 sieve and 156g of somewhat creamy, grayish flour that went through the #60 sieve.

I then created a flour that is about 82% extraction by combining the all the flour that fell through the #60 sieve on the first pass with enough of the flour that fell through the #60 sieve on the second pass to constitute 82% of the total output. The resulting flour was lighter than on my first try, but the bread that resulted still had a color more like a whole wheat bread, although slightly lighter in color. The flavor was noticeably different, though. The second try had a flavor with far less of the grassy flavor of a whole wheat bread. Again, this flour was made before I had a way to test for the ash content, but I imagine from the color of it, that it was probably about 1.25% ash content. It was slightly darker than Heartland Mill Golden Buffalo flour. My second bread also had 5% whole rye and 10% whole spelt in it, as did the first one, so part of the whole wheat character of these loaves is caused by the addition of 15% whole grain flour.

Home Milled Miche - Second Try - Crust and Crumb

Third Try

I received my Meadows 8 Inch Stone Mill and decided to have another go at milling and sifting. Of course, the new mill works differently than the Retsel. The stones are much larger and turn much faster. I can't seem to get the grind anywhere near as fine as the Retsel will produce with just one pass. However, the Meadows mill is far faster, especially when re-milling flour. The Retsel takes forever to re-mill flour, and seems to heat up too much on a second milling. The Meadows Mill takes less than a minute to grind a few cups of grain, and re-milling the output takes only slightly longer.

I was happy to discover that for the amounts I would normally do - not more than a 5 pounds at a time, the flour was very cool coming out of the mill. In fact, it was noticeably cooler in temperature than the flour coming out of the first pass with the Retsel mill. I imagine that equation would reverse for much larger amounts, as the Meadows would heat up over time to a higher temperature, given the large stones turning at much higher revolutions per minute.

This time I went for about a 70% yield. I realize in retrospect that my first pass was probably too coarse, which resulted in only about 600 grams going through the #60 sieve and 323 grams caught in the #25 sieve, out of a total output of 1815g. I then re-milled the middlings from that sifting, and the output was 350g through the #60 sieve. One more pass resulted in an output of another 244g through the #60 sieve. The flour coming through the #60 sieve from this pass was lighter than previous attempts.

I did another sample of about 300g which was milled at the finest settings a couple of times. The result was a finely milled whole wheat, more like what would be done on a very fine first pass with the Retsel. The result was sifted through a #25 and 50 sieves to get 240g of flour, with only 15g of "bran" caught in the #25 sieve and middlings of only 40g. This was probably too fine. I'm slowly beginning to understand what setting of coarseness of the mill will result in a good distribution of particle sizes for more efficient sifting to get the flour desired.

The resulting flour was actually 68% of the total flour made during this session trying a couple of different strategies. This time, I was able to measure the ash content, at least approximately, using the home ash content measurement mentioned in a previous blog entry. The ash content is around 1.05%, maybe a little lower than Heartland Mills Golden Buffalo flour, which their site says is around 1.13% ash content and I calculated to be around 1.2 with my test, such as it is.

Resulting Bread

Home Milled Miche - Third Try - Crust and Crumb

A similar bread to previous attempts was made with this flour. However, I omitted the 10% spelt and raised the hydration to about 81% to compensate. I may have gone a little too far with the hydration, as I had some trouble getting the loaf to hold its shape well. Due to some unanticipated distractions, the loaf was about 20 minutes late getting into the oven, so it was also slightly overproofed. The result was therfore flatter than I would have liked. However, the crumb, crust, and flavor were all very good. I believe this loaf is very similar in most ways to country miches made with Heartland Mill Golden Buffalo flour in the past. The color is a little darker, but I believe that has more to do with the fact the flour is not aged, as the ash content clearly indicated that my flour was lower in conductivity than the Golden Buffalo flour and should therefore be a little closer to white flour than the Golden Buffalo flour. The texture of the dough and the general behavior of the flour while handling it seemed very similar to what I have experienced with the Golden Buffalo flour. By the way, the wheat berries used for this flour was Heartland Mills M2, which may be similar to the wheat berry product they are using to create the Golden Buffalo flour. Overall, I'm extremely happy with this result. The flavor and freshness of the home milled flour is a delight, and the prospect of being able to freshly mill a desired grade of flour on demand is pleasing.

Future Attempts

Now that I have a better feel for the right mill settings, my plan is to do a multiple pass approach, this time hopefully more systematically and with better mill settings. The outputs of the various passes will be saved and ash content measurements performed on each one. Hopefully, I can then make the process much more efficient and flexible. With ash content measurements available, blends can be created based on ash content of the final flour desired, and hopefully better yields will result for the same ash content, with better coarseness settings on the mill on the first and subsequent passes.

bwraith's picture
bwraith

Cream of Wheat Middlings

My home sifting project resulted in "middlings", a term I may be using incorrectly. What I mean by middlings is the stuff I sifted out that is finer than bran but was coarser and darker than I wanted for the flour being produced.

This output of my milling and sifting process had a coarseness similar to semolina or maybe a little more coarse. It was a fairly dark brown. I refrigerated it, thinking it might be useful for dusting a couche or some other purpose eventually. To some extent, I was hoping to discover some good food use for this part of my output, which should contain a fairly large nutritional content, since it has much of the darker, vitamin-rich outer layers of the wheat berry in it. My more whole grain oriented friends might be less disapproving of my use of less than 100% whole wheat flour in some of my breads, if I could show that the other parts of the whole grain are still being used. Also, my wife is more interested in whole grain nutrition, so she asked me to save it, probably also imagining some good use she might discover for very freshly ground outer layers of the wheat berry.

The nice thing is that I can see this output will be consumed nearly as quickly if not more quickly than the bread that was made from this sifting session. My whole wheat loving friends would be happy, since we would be eating 100% fresh ground whole wheat by eating the bread and having the cream of wheat middlings and bran for breakfast.

This morning it occurred to me that the "middlings" were a lot like cream of wheat in consistency, just browner. I decided to try making "cream of wheat middlings". I forgot to measure, but roughly speaking the recipe was 1.5 cups water, 1.5 cups skim milk, 0.5 tsp salt, 1.5 cups of "wheat middlings", and about 0.5 cups of "wheat bran", the coarsest output of my sifting process. I then brought it to a strong boil, dropped the heat to low, and let it simmer, stirring periodically, for about 15 minutes.

The resulting gruel was served with some milk poured on it, and some brown sugar sprinkled over it. My 13 year old son wolfed this concoction down with great delight, saying it was very good. I thought it was a great breakfast, more flavorful than cream of wheat and probably nutritionally much superior, and it would have significantly more bran fiber, for those who might like that aspect of it. I tried adding raisins to some of it, which I thought made it even better but my son thought detracted from it.

bwraith's picture
bwraith

Recently, I've been attempting to grind and sift my own flour. The grinding is straightforward with a Retsel Mil-Rite, an excellent home stone buhr mill or my new Meadows 8-inch stone mill. However, the mysteries of sifting the flour have been less straightforward. A subsequent blog entry will deal with my progress on grinding and sifting my own flour. The sifting project motivates the need for measuring the ash content of my flour.

Ash Content

Ash content in general is the percentage of inorganic matter in a sample of some material. It is used in many different ways to analyze agricultural products, at least, based on some cursory sampling of articles on the internet.

About.com says defines ash content as:

The nonvolatile inorganic matter of a compound which remains after subjecting it to a high decomposition temperature.

A traditional method for determining ash content is to place a sample of known weight in a furnace at high temperature (600F or higher) for a number of hours (12 hours, for example) such that all the water, volatile compounds, and organic matter either evaporate or burn. After that, the remaining material is weighed. Ash content is the weight of remaining "ash" expressed as a percentage of the original weight of the sample. The remaning mass will be the inorganic non-volatile compounds that were in the original sample.

Flour ash content in Europe is measured using a dessicated (dried out) sample  of flour, so the original weight of the sample doesn't contain any water. In the US, a moisture content of 14% is assumed (typical for white flour before it is dried out), so US numbers for ash content differ from the same European measure by the amount of water in the original sample.

An Important Characterizing Measure of Wheat Flour

Ash content is widely used in Europe to classify flours. When you see "type 55", for example, the 55 refers to the ash content, which would be 0.55% of dry matter in this flour. In the US, it is often available by searching a manufacturer's or supplier's web site for flour specifications (often hidden somewhere hard to find), or more often, by calling someone in their testing department.

Why Ash Content

The inorganic matter in a wheat berry is heavily concentrated in the outer layers, such as the bran, various seed coatings, and the germ. As you traverse from the outer coatings to the outer endosperm and then to the inner endosperm, the concentration of inorganic matter steadily drops.

During milling, the flour is ground, then sifted, then ground again, and sifted again repeatedly. When the milling process is complete, a large number of bins of product will result from very coarse to very fine, and from very dark to very light flours. The whitest flours will have less ash content, and the darker flours will have more ash content. At this point, various grades of flour may be created by blending the flour from the bins.

Ash content then summarizes how much of the outer layers made it in to the final flour, regardless of how it may have been milled, sifted, and blended.

The importance of measuring ash content was immediately obvious to me as I tried to mill and sift at home on my own. An infinite number of possible permutations of grinding and milling could be imagined. For example, I tried grinding very coarsely, then sifting, then grinding the coarser results of the sifting again, then sifting again. Another version was grinding very finely and sifting into more and finer sizes. I also tried grinding coarsely, then regrinding, then sifting. Of course, the possibilities are endless. In each of these cases, flour resulted that made good bread, seemed light in color, and fine in texture. The difference to the eye and the feel in the hand was not great between one and the other, at least not to me, a first-time home miller.

Measuring ash content of my results would make it possible to know at least approximately how much of the outer layers had made it into each type of flour resulting from the various grinding and sifting processes tried. Also, once a given process is adopted and used consistently, calculating the right blend of the various outputs of the milling process to achieve a desired ash content, depending on the type of flour needed, should also be fairly easy.

The Theory

Distilled water doesn't conduct electricity. However, if some salt is dissolved in distilled water, it will conduct electricity. The ions contributed by the salt are charged particles that will travel through the water in the field created by the voltage difference on the electrodes of the conductivity meter to create a flow of electric current. The higher the concentration of salt, the higher the conductivity of the water and salt solution will be. The diverse mineral content in the inorganic matter that makes up the "ash content" of the flour ionizes the water in the same way described above for salt. If the flour has a larger amount of "ash content" it will also contribute a larger quantity of ionizing compounds to water, increasing the conductivity. 

The Equipment

To measure conductivity you need a conductivity meter. In the field of water quality measurement, "Total Dissolved Solids" is a standard measurement, but it is essentially a measure of the conductivity of the water being tested. So, you can use either a "conductivity meter" or a "TDS Meter". In my case, I had obtained a Hanna 9813 pH meter a number of years ago, and it turns out it also had a conductivity meter function. However, it was easy to discover conductivity meters on the internet, by searching on terms like "Conductivity Meter", "TDS", "Total Dissolved Solids", "Water Quality Meter", and so on. One place I found was http://www.technika.com. Also searching on "Hannah Meter" might work, since that's the brand of meter I have that has both pH and conductivity meters, both useful functions for flour measurement.

You might wonder why a standard digital multi-meter wouldn't work. I tried to use one unsuccessfully. First of all, you would have to carefully mount the probes to maintain the same distance apart and total surface area exposed to the water. However, it gets worse. The DC current used by a digital multi-meter to measure resistance causes the ions to build up on the electrodes, so the measurement just goes higher and higher the longer you leave the electrodes in the water. Conductivity meters made for measuring water impurities use AC current to measure the conductivity so the above problem with an ohm-meter doesn't occur, have probes made of less reactive conductors, and are designed to maintain proper spacing of the electrodes.

The Method

I found a couple of papers on the internet describing methods of measuring ash content with conductivity. One was especially useful for home measurements and was titled, "Electrical Conductivity of Flour Suspensions and Extracts in Relation to Flour Ash." published in 1977 in the Journal of Cereal Chemistry. The method described below was derived from the discussion in this paper.

The method is very simple. Mix 100 grams of distilled water (should be distilled water to get good results) and add 5 grams of the flour to be tested in a container. Stir thoroughly to completely hydrate the flour. Periodically stir for about 12 hours. After the flour has settled to the bottom of the jar, measure the conductivity of the water. For the best measurement, allow the flour to settle on the bottom so there is clear water to measure. The clear water will have a higher conductivity than recently stirred and cloudy water. At first the conductivity rises, as the various compounds that contribute to the conductivity of the water dissolve, but at some point the conductivity will stabilize. In my case it took a long time, maybe 12 hours or so, for the conductivity to stop changing. The conductivity measured can then be calibrated by measuring flours with known ash content and fitting a curve of conductivity to the known ash content. In practice it looked very linear, so even a simple proportional relationship would give reasonable results, based on my admittedly minimal sampling.

         ppmuS/cmash %
hmap2150.310.50
home713850.551.05
hmgb4200.601.13
hmww4700.671.70
wrye5300.761.90

The table above shows measured conductivity in ppm, as the meter represents it for TDS or "Total Dissolved Solids" in parts per million salts for a hydroponic solution and also shows conductivity in the more standard measure of milli-Siemens per cm. I don't know the ash content, but based on some flour specification information from Heartland Mill, I filled in rough numbers and then used them to approximate the ash content of my "71% yield, fairly white bread flour" sifted from a couple of passes with my new Meadows 8 inch mill and a couple of siftings with a number 60 sieve in my new SS-100 Econo-Shaker sieve shaker.

The method in the paper heated the samples to boil them for a short period, then cooled and centrifuged the samples to create a clear liquid with the dissolved minerals in it. I didn't want to deal with boiling or somehow obtaining a centrifuge. OK, maybe you could put your jars in bags, tie them to some rope and spin them like Argentine "bolas", but I recommend patience. It was unclear what the effects of boiling were from this paper, but it seemed to affect the measurement in some unexpected way. So, my approach is to keep it simple and just wait for the conductivity and the flour to settle, even if it takes a while.

Summary

You can obtain a reasonable estimate of ash content by mixing 5 grams of flour with 100 grams of distilled water, stirring periodically for a few hours and then measuring the stabilized conductivity and comparing to the same measurement for some reference flours of known ash content. I proceeded to make one of my favorite miche recipes and found this flour to give very comparable results to Heartland Mill Golden Buffalo flour, which is of similar ash content. The difference is I can mill my own version of the Golden Buffalo flour and obtain it absolutely fresh when called for. In addition, measuring and recording the ash content of the output from the various passes of grinding and sifting should allow me to blend the outputs in the right proportions to obtain a desired ash content for recipes that may call for more refined or less refined flour.

Subscribe to RSS - fresh milled flour