Submitted by Arcticteach on February 20, 2011 - 10:50pm

Mud oven losing heat through base layer

I am having problems with a new oven we build here at The American school of Kinshasa here in the Democratic Republic of the Congo. This is my third mud oven ( a la Kiko Denzer's book) and the other two work great! (both in Colombia) Fifth firing yesterday and it looses heat rapidly. I can see that the materials have all dried from the oven floor up, but there is still a clear line of not fully dried material below the oven floor (insulating mud with wine bottles) Seems like the bottom is taking an inordinate amount of time to dry. My guess is that the still damp materials below the oven floor are robbing the heat from the bricks and oven as soon as I pull the fire out. Does anyone have any hints or tips on drying this out? My plan is to fire the oven a couple of times a week. My wife says that I am not being patient enough.

Submitted by boule on March 24, 2010 - 4:57am

Building an earth oven


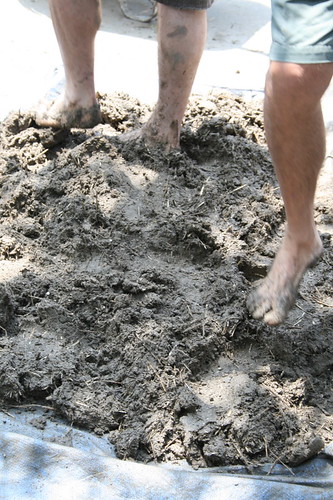
I am about halfway with my earth oven being built from Kiko Denzer's book. I also have the Alan Scott book, but decided on an earth oven as the reuse of material appeals to me. Many friends are highly sceptical about building with clay.

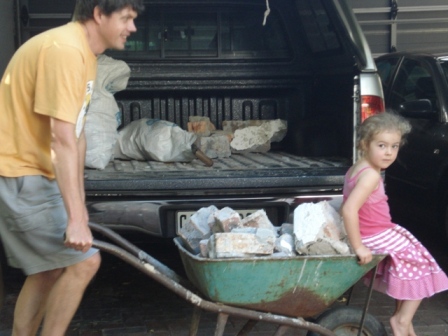
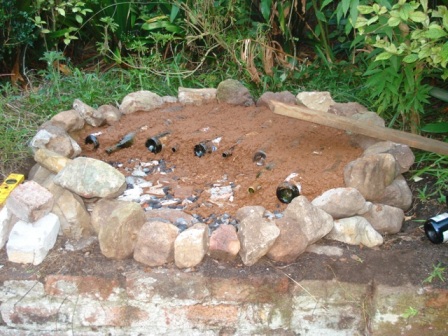
It took quite a while to scrounge for the material as I wanted to buy as little as possible. The rocks for the foundation I found in the garden and then I filled it with building rubble from a nearby restaurant that burnt down (hope that does not predict disaster with the oven). The gravel I found on an open lot where someone dumped it. The wine bottles are all from our own consumption over quite a while :).

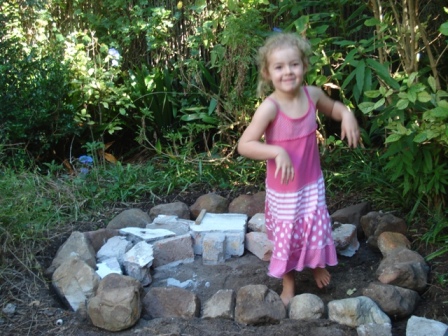
The hearth should be on a nice level once finished as the oven is being built on a terrace.

The sawdust I had to buy in the end and it cost about $4. The bag it came in was almost as expensive.

I realised that the front part needed some work and then happened upon some nice flat rocks. The next photo shows an improvement where the tongue will be.

I am now ready to bring the level up with a sawdust and clay mix around the slab. That will be followed with a thin layer of sand bedding for the fire bricks.

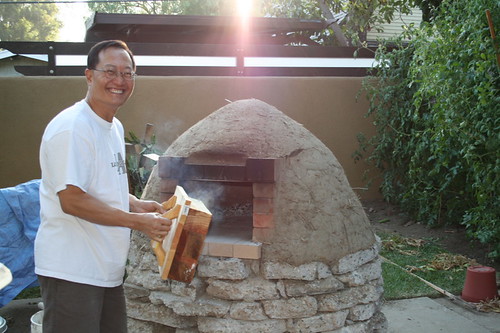
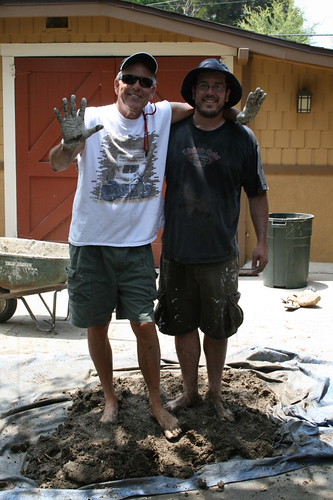
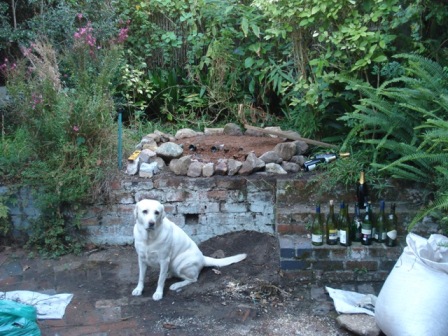
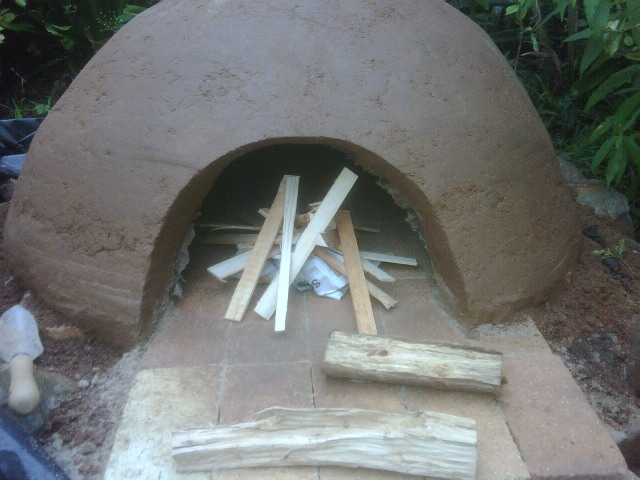
I finished the first layer all by myself and that was not a good idea. Some friends would have made it easier, but I was in a hurry and nobody was available on that sunny day. After two weeks of sitting underneath the sheet in pouring rain, I started a small fire. As you can see the clay was still quite moist. I wanted to see if the fire would burn before finishing with an insulation layer and the rest.

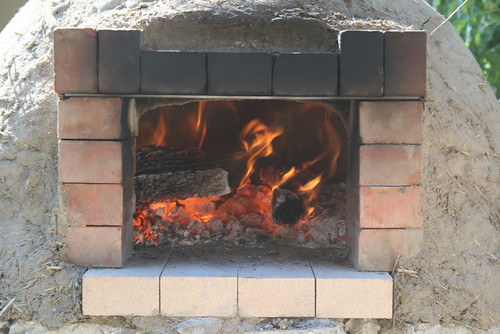
The fire burnt very nicely and started to dry out the clay.

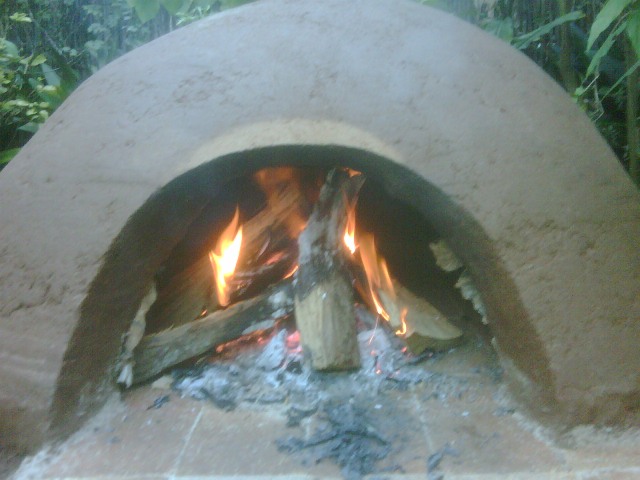
I let it burn for quite a while. The next day the oven looked dry, except for the bottom part where it was still moist. So I started another fire and made it nice and big. Oh, the horror: it cracked! I suppose that is what you get for being impatient.

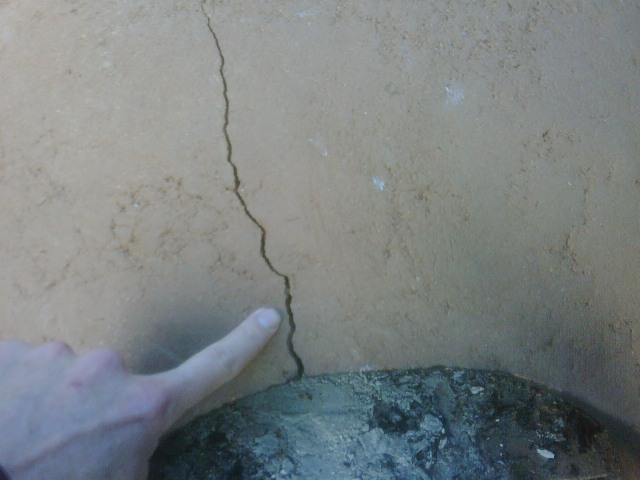
The crack then spread over the dome. I am hoping that it is not too serious, since it does not seem to have cracked right through. That means I cannot see through the cracks.

I am planning to patch it up with some sloppy clay, but I would appreciate any tips here.

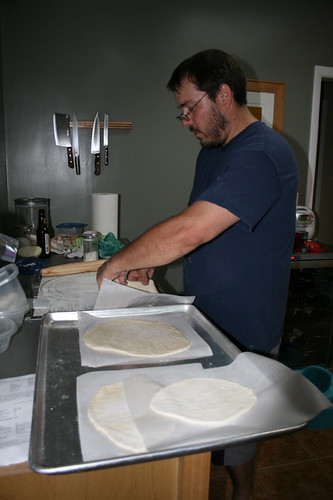
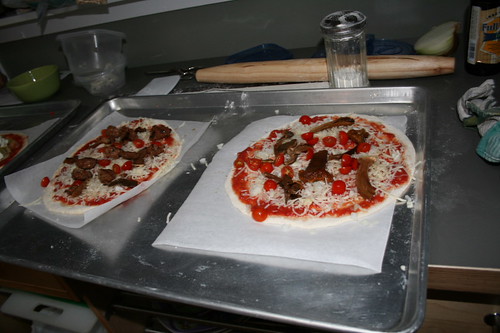
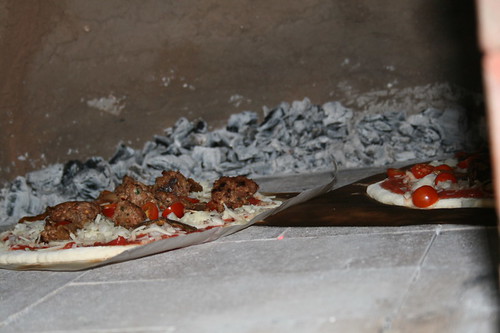
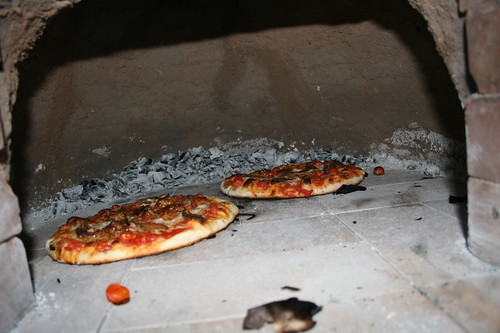
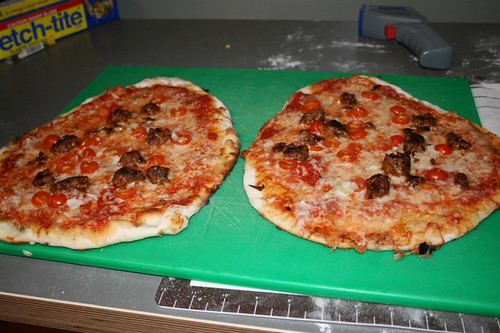
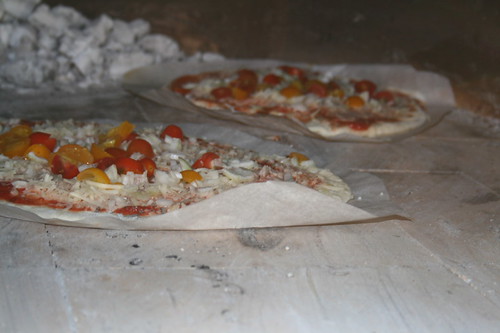
BTW, we cooked a chicken in the oven four hours after the fire died down. It went in for 2 1/2 hours and was beautifully soft. Because it was so late in the process, I had to brown the chicken in the electric oven.

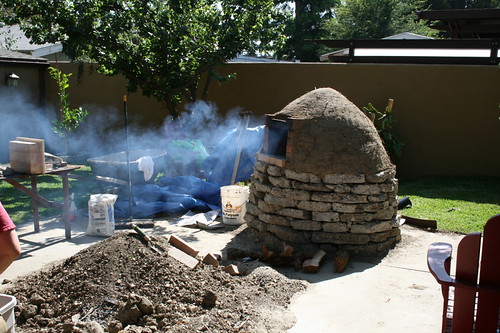
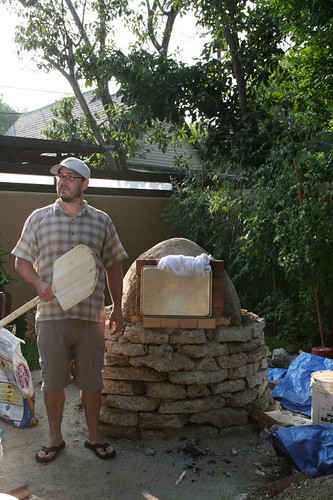
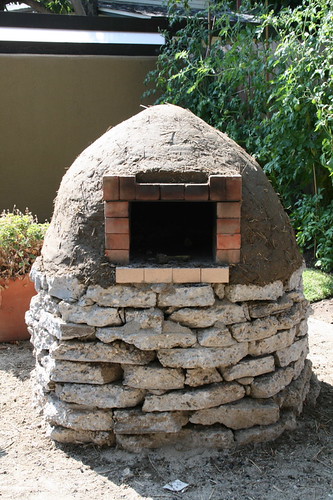
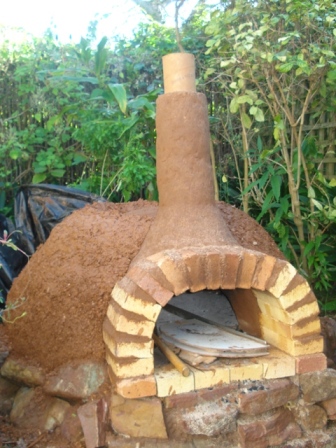
Now it is August and the process took much longer than anticipated. At least I think it is finished and I cannot wait for it to dry out.

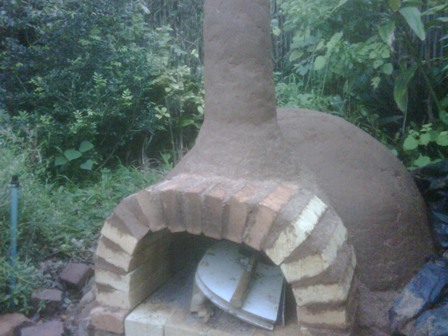
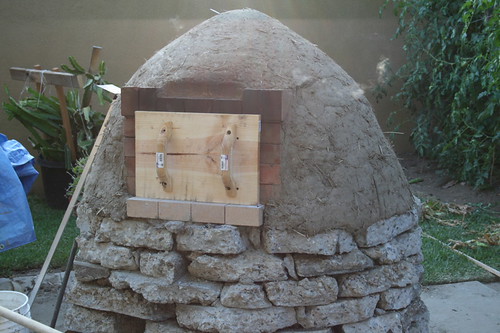
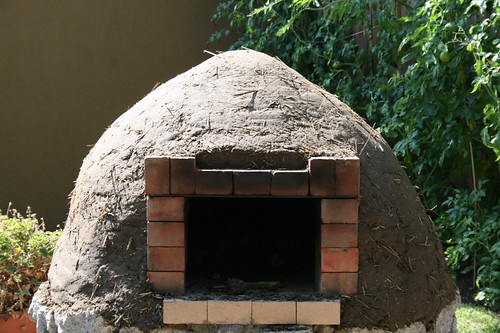
So I added a chimney and a brick arch. If I had to do it again, I am sure the arch would be better.

Some time later a friend helped me to add the insulation layer of clay slip and wood shavings. Here it is almost finished.

The past weekend I finished the oven. Guess who did not read the book again and forgot to chop the straw. Now I have a hairy oven. Unfortunately we are away this weekend, so I cannot try it out. Hopefully there is no rain the weekend after that, so I can fire it up proper and see what happens. Will post some pictures if it works out.

Submitted by CaperAsh on March 8, 2010 - 10:46am

Neophyte Learning Blog

This will be a regular series of posts documenting some of my learning experiences. I have recently made the decision to

a) learn how to bake bread

b) build a wood-fired oven

c) try to sell it (if good enough) at a local farmer's market where I live in Cape Breton Island, Canada.


I think many might find this amusing - some might even find it irritating - given my lack of experience!

Submitted by rich.boyd on December 6, 2009 - 7:22pm

Using eather oven in cold weather

I live up in Winnipeg and built an earth oven this past year.  It developed a couple of cracks (3/16 - 1/4").  I am wondering about using it in winter.  I probably wouldn't be using it in temperatures of less than -15F (-25C).  Will I risk severely cracking my oven if I use it in really cold weather?

Submitted by shimpiphany on July 27, 2008 - 10:01pm

earth oven - first firing for pizza


i finished the earth oven to the insulation layer a week ago, and had the first "dry firing" this weekend.

i've fired it twice to try and dry the insulation layer and track the fuel and heat usage, although i won't get accurate estimates on this until i'm sure the entire oven is dry, at least a few weeks from now.

on saturday, i fired it and made pizza. because of some bad scheduling on my part, i was unable to have any bread ready to bake in it, although we did use the tail end of the heat for potatoes and roasted garlic.

i'll fire it and bake bread this week, hopefully tuesday.

here are some photos:

here i am getting the fire started and losing some eyebrows:

here is the fire once it got going. after the fire got some momentum, it became a lot easier to keep it alive - wood placed in the oven would instantly burst into flames instead of needing to be coaxed. at this point, my infrared thermometer (which reads up to about 1000 degrees F) was off the charts:

the tongue of smoke. smoke means an inefficient fire. efficient firing and use of fuel is a very challenging part of this oven:

another view of the fire:

the infrared thermometer. its max is around 1000 degrees:

the themometer. a very fun tool:

here i am rolling out the pizza. i like the flat crust, so i use a rolling pin (blasphemy, i know):

the pizzas. porcini, homemade sausage and onion; and goat cheese and braised leeks. the sauce and crust are adapted from reinhart's american pie:

i'm experimenting with sizes to see how i can best maximize the floor space: 

cooking:

my father-in-law wielding the oven door, several 4x4's joined by countersinked (countersunk?) screws, joined to a 1x12 sleeve and mounted with two concrete float replacement handles:

with the door in place:

the finished product:

more to follow once i finally get some bread in there...


Submitted by shimpiphany on July 20, 2008 - 10:06pm

earth oven final layer - lots more pics


with the help of my dad and sister, i finished the insulation layer on the oven. the only thing left to do now is a plaster layer - which won't affect the performance. that means baking can begin as soon as this layer is dry enough.

before we applied the final layer, though, i ran a cook of four pizzas.

we gobbled the pizzas after they came out, so this is the only "cooking" photo.  i used parchment paper because i don't have all the oven tools yet, and couldn't clean out the ash.  my sister is fabricating most of them for me (she is an artist and metalsmith), so i should have all i need soon, well under my $200 budget:

a few days later we put on the insulation layer, a 5 inch thick layer of mud, sand and straw.

here we are mixing:

here's the final layer. we were all covered in mud with no one to take pics of the process, so i only have a photo of the end result:

i'm going to build the door this week, and with the weather as hot as it has been, it should be ready to bake by friday.

wish me luck, and thanks for all your support.

Submitted by breadnerd on September 26, 2007 - 8:34am

Earth oven construction, part 2

Continued from an earlier entry....


We let the first layer dry a few days, and some fairly big cracks started to form. I decided to pull out the sand to give the oven more room to shrink as needed, and to help it dry out faster. I cut a smaller door than the final size, you can see the final door scored into the surface:

Submitted by breadnerd on September 26, 2007 - 8:06am

Mud oven construction - foundation and first layer

I finally got up the gumption to move my construction photos over to my flickr account. Here they are in the entirety, I tried to make the titles fairly self-explanatory:

http://www.flickr.com/gp/7541655@N03/aX31kR


Here's a condensed version with some commentary:

First off is the foundation. Our frost line in in theory 48 inches, so we dug down quite a bit. We hit a VERY large rock, which made us decide the hole was big enough, and which we figured would act as a foundation in itself.

Submitted by Oldcampcook on May 9, 2007 - 10:50am

Decorum


I am going to have to stop reading this blog during the day time while I am at work.  It is very difficult to maintain a proper decorum while I am rolling on the floor laughing!

Old Camp Cook 

Submitted by pumpkinpapa on April 24, 2007 - 2:58pm

Earth ovens and breads

I found this on another list and thought there may be some here who would be interested to know that Kiko Denzer and Hannah Field are on tour promoting their simple designs for earth oven building and naturally leavened breads. The schedule is as follows: