The Fresh Loaf

A Community of Amateur Bakers and Artisan Bread Enthusiasts.

durum

Salilah's picture
Salilah

In the middle of March, we had a long weekend / short week in Sicily - great fun!

Varied breads - we had two completely different Pane Nero de Castelvetrano (one from a baker in Marsala, one from a supermarket in Sciacca) and one Pugliese I think (well, it looked like it) from a baker in Sciacca

This is the pugliese - well, 3/4 of it, with the supermarket Pane Nero behind it...  It was my favourite bread - light, yellowy, great crust, I loved the shape (Chris said why didn't I do a square bread - but it won't work very well in La Cloche!)...  Excellent toasted, drizzled with olive oil and with fresh tomatoes on top (+ garlic rubbed if wanted)

This is the supermarket Pane Nero - a long oblong, I guess baked in a pan.  Sesame seeds on the top.  Chris liked this one the best - it tasted like a good wholemeal, it was brown, quite a rich complex taste but boring crumb (well, I thought so)

The crumb shot of the two breads!  I must admit I looked at the Pugliese one and thought "My pugliese looks quite a lot like that!" which was very exciting <grin>

Now I really thought I had a photo of the other bread - but I can't see it!  It was a boule shape, it wasn't a very dark crust, whitish crumb, quite a nice taste but to be honest, nothing special, and we tended to go back to our own favourites for breakfast...

So I'll leave you with another photo instead - the ruins at Selinunte

Salilah's picture
Salilah

We are invited tonight to a Burns Night supper - long-running, we've been going for years!  I thought this time I should try to take some bread (though I wasn't confident enough to stop them buying bread - must be more confident!)

I recently purchased Bertinet's Crust, and Hanseata (I think) mentioned the Breton Bread, so I thought I'd give that a go, as unusually I had some fresh yeast.  As this was a new recipe, I decided to also do DSnyder's Pugliese as usually that works really well for me.  18 people so it felt like a big quantity was required - so I did around 2kg of each, which was a fun experience in itself, as I've not done these volumes before!

Ingredients - Breton Bread

Pre-fermented dough: 3.6g yeast, 3.6g salt, 180g strong white flour, 126g water - 6 hours or so (it went a bit faster)

Final dough: 10g fresh yeast, 750 strong flour, 200 buckwheat flour, 50 rye flour, 300g (all) pre-ferment, 15g sel gris, 700 water - total 2038g at 70%

Ingredients - Pugliese

200g starter, 720 water, 590 strong flour, 160 "00" flour, 250 durum flour, 20 salt - total 1940 at 75%

I thought originally the breton bread would be fairly quick, but the pugliese also went really fast - so I nearly ran out of proofing baskets!  As it was, I ended up doing 3 Breton and 2 Pugliese - both the Pugliese in the La Cloche, two of the Bretons on a stone with metal lid and the other in La Cloche

The Breton didn't rise as much as I'd hoped, even in the La Cloche - but I guess there's quite a lot of buckwheat in there!  I did bake it when I thought it was just about ready - so a bit quicker than planned...  Quite a thick crust (this one was under the metal lid), pleasant taste, went well with eggs this morning...

Not sliced the Pugliese as both are going down to the dinner, but it rose beautifully (as usual) and I hope will taste good

Challenges of timing - the Pugliese went a LOT faster than I expected - so rather than my usual proof overnight in the fridge, I baked them all the same day.  Luckily I have two ovens, so one had the stone and the other the Cloche!

Will see what the reaction is tonight
cheers
S

Salilah's picture
Salilah

I baked this yesterday - but we ate it today, so I hope that counts!

Another version of Jan Hedh's Lemon bread, with less lemon and added lemon thyme

Ingredients:
100g 100% white starter
180g durum flour
180g white strong flour
50g rye
130g water
100g cider
25g EVOO
8g salt
zest of half a lemon (would use more in future)
leaves from 6-8 sprigs lemon thyme (would use more in future)

Method:
Mix starter, flours, water, cider and autolyse 30m or so.  Add EVOO, salt, lemon zest, herbs - thorough mix
Several S&F roughly 30min intervals for 3 hours (you can tell I was improvising - poor records!)
Refridgeration overnight, then warmed up for around 30m then pre-shaped then shaped to batard
(warning: not sure if it was the EVOO but it was a pain to shape - wouldn't seal the seam!)
3 hours I think to proof in banneton, then 15mins under SS bowl at 240 then around 25-30m at 200

Good bread flavour; not very big holes but quite a soft crumb with quite thick crust.  Nice taste but would add more lemon & herbs next time!

and the crumb:

cheers - and Happy World Bread Day!
(buckwheat batard on the way - sadly no beechnuts as the birds beat me to it!)

S

jcking's picture
jcking


Following on the latest post of Varda, I'm giving Durum another go. Reading posts here, books  and other reading I'm treating Durum more like Rye and Whole Wheat. An additional point from Leaders book gives the dough a little more salt a final shape before going into oven. The vita C was my idea.

Makes two loaves.

Starter build;
50g KA Chakki Atta sour seed/starter (66% hydration)
120g Water
200g KA Chakki Atta flour
Overnite sourdough build of 12 hours

Final Dough;
800g KA Durum Flour
560g Water
24g Salt
500mg Vita C tab, crushed and dissolved in the water
370g starter

Bakers Percent;
100% flour
68% water
2.3% salt

5 mins, Hand/spoon mix (all the above)
30 mins, rest
5 mins, knead with rolling pin
10 mins, rest
(knead and rest three times)
Stretch and fold
30 mins, bulk ferment
Stretch and fold
30 mins, bulk ferment
Divide and rough shape
15 mins, rest
Rough shape (pre-heat oven 475°F with stone and cover)
30 mins, proof at 80°F (in home made proof box)
Final gentle shape with brown rice flour and place on parchment paper, slash
(no more proofing)
Slide loaf/s with parchment into oven, add steam
10 mins, add more steam
10 mins, lower oven to 400°F
5 mins (remove cover if using) lower oven to 350°F
10 mins more then turn off oven, open oven door and vent
(use newspaper or similar to fan oven)
Close oven and leave bread in for 10 more mins
Cool and enjoy the fruits of your labor!

Batard and Large knotted roll.


Batard 14" long and large roll 9".

Nice thin crispy crust with a hint of sweet. I'm thinking this dough could make a nice bagel.

Jim

P.S. Sorry Varda no tunnel of love :-)

loydb's picture
loydb

I finally got a new pasta maker to replace the one I destroyed via water and overestimating my ability to remember how to reassemble it. :) This time, I went with a motor! I stuck with an Atlas 150, which was a great machine for me until I went all Mr. Fixit on it.

Previously, I'd been using store-bought flour. Last night was my first try with it using flour I milled myself, though I hedged my bets on this one with around 33% King Arthur Bread Flour. I didn't find a lot on milling pasta flour using the search, so hopefully my experiments will aid searchers somewhere down the line.

Attempt #1
I didn't think to take pics of anything but the final product, I'll do better on the next run, promise. All grains are from Pleasant Hill.

I started out with 6 oz of durum wheat (14%)  and 2 oz of hard white wheat, milled fine, mixed with 3 oz KA. By the time it was all said and done, I easily added another 1-2 oz of KA.

Put the milled flour in a bowl, make a well, crack two room-temperature eggs in it, add a couple of healthy pinches of kosher salt (1.5 t maybe?). Whisk with a fork to blend in flour from the edges. When it gets too dry, pour in a little bit of room temperature water (I ended up using just over 3/4 cup of water). Eventually it becomes too heavy to stir with a fork, switch to a spatula or spoon or whatever you use. I chose to hand knead this instead of using my DLX, so I have some sense memory of the dough development as experiments progress. 

After it comes together in the bowl, move to a heavily-floured surface and knead for 8-10 minutes. Mine was really, really soft and damp, and I used a lot of KA flour by the time the kneading was done. It still felt really soft, almost like focaccia. Put the dough into an oiled bowl and cover with plastic wrap. I let it sit 45 minutes. 

I rolled it out about 3/4" thick (using a lot more flour), cut off a chunk about the area of slice of cheese, and started running it through the Atlas. Lemme just say right now, if you're thinking of buying one of these, get one with a motor. It's so nice to be able to work solo, and it takes less than 3 seconds to move the motor from the flattening rollers to the cutter and back. I folded it back on itself a couple of times at setting 0 and setting 1, then progressed until setting 4, their recommended thickness for the spaghetti cutter.

Moved the motor to the cutter, and ran the first sheet through. It was a gummy, messy disaster. Fortunately, it was going to be discarded anyway (as per the recommendations for first-time use).

Clean up, consult the manual. If it fails to cut, add flour to the dough and run it through the rollers.

I liberally sprinkled the cutting board, cut off another square of dough, floured both sides, and ran it through at 0. Folded, floured, repeated. Move to 1, same thing. As it got thinner, I sprinkled flour on the sheet of dough and gently massaged it over the surface, then flipped and hit the other side. Finally, I sprinkled some flour directly on the cutting rollers. 

I should talk here about the texture of the dough. I didn't do any sifting, so all the bran was still in the dough, which felt kind of grainy. When at the final thickness, I could feel the bran in relief when spreading on the KA flour. This was the first thing that concerned me.

Back to the rollers -- this time, everything came through the cutter mostly intact, but the individual strands of noodles were, in some cases, still clinging to each other, looking vaguely like a computer ribbon cable. This was the second thing that concerned me.

I hung the noodles on the drying rack, and the bran in the tiny noodles made them feel almost like they'd been rolled in sand. This was the third thing that concerned me.

At this point, my wife is on the way home from work. I have a bunch of noodles that I'm pretty sure are going to be a gummy, grainy mess. Oh well, I've got dried pasta in the pantry, I can always break it out if necessary.

The noodles hang out and dry for around 45 minutes. Now, they feel like dry, sandy ribbons. I'm not optimistic.

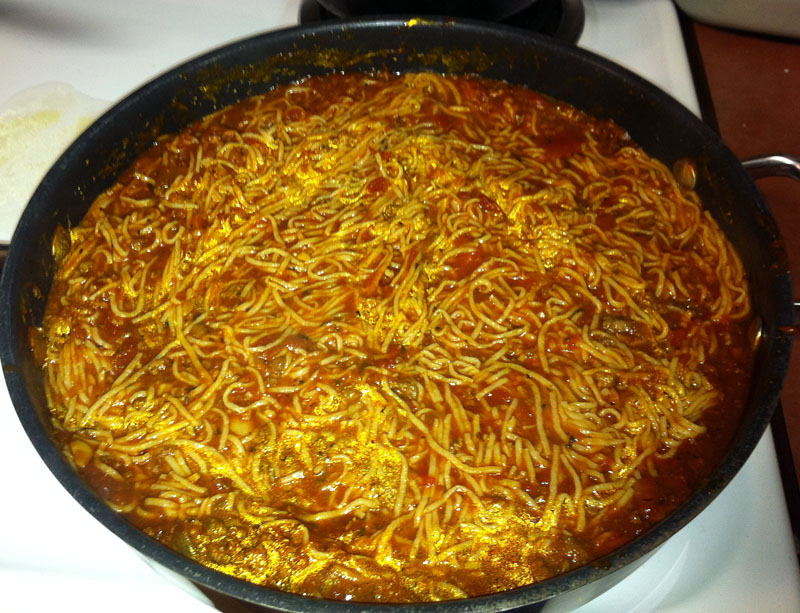
I throw the noodles in 6 quarts of boiling salt water to which I've added 1 T of olive oil, and boiled them for 4 minutes, stirring every 30 seconds or so to keep them from clumping up, then drained them in a collander before adding them to the sauce for about 90 seconds on the stove.

Fearing the worst, I added some fresh-ground asiago and parmesan and tried some.

They were fantastic.

Nothing stuck together, and there was no grainy-ness. It was amazingly tender. 

Heartened by the success, I'm going to try using more fresh milled flour next time, perhaps only using the KA for adjustments (which would still end up being a couple of ounces if it runs to form).

varda's picture
varda

Sometimes you have to back up to move forward.   I have tried to make 100% whole durum bread a couple times and couldn't achieve a good density or crumb structure even if I was happy with other things.    I found myself decidedly confused by the durum - did it want a long ferment so that the dough could develop without a lot of manipulation, or did it need a short ferment because it develops much faster than regular wheat doughs?    I decided to back up in the percent of durum and then move forward stepwise to see what I could learn.   So last night and today, I made a sourdough boule with 40% whole durum flour.    Even though I was only at 40% I tried to use the gentle methods that durum seems to need, so I mixed everything by hand, stretched and folded in the bowl with my hands, and generally did whatever I could not to frighten the durum.    I also retarded overnight for convenience sake.    Hydration is 68%.   Prefermented flour is 23%.   I used my regular wheat with 5% rye starter.   Here are some pictures of the result:

Next up:  60% whole durum boule. 

Salilah's picture
Salilah

Well, what a cute loaf!

Using the recipe from Franko
http://www.thefreshloaf.com/node/24172/first-success-altamura-project
which builds on others - I thought I'dgive it a go.   I'd tried a version with some white flour added - but not this time...

Building the Preferment:

I used the white wheat starter I have, and couldn't measure out a small enough quantity, so ended up with
30g starter (wheat, 100%)
50g durum flour
50g water

This was in the kitchen for around 6 hours I reckon?  Bubbly and light at the end

Main Dough:

135g preferment (yes, high, I wanted to use all I had)
135g water
252g durum flour
(after autolyse, 5.6g salt)

Autolyse for around 30mins - I find the durum flour really soaks up the water!  A few S&F over the next 3 hours - fairly thorough after adding the salt, and less later.  Into the fridge overnight in a plastic container

Today - out of the fridge but still in the container for around 90 mins (driving from Cambridge to London!).  Shaped here (roughly) and covered - it didn't rise much, but I was concerned as it had had a long bulk fermentation.  About 90mins from shaping into oven

Baking: 250C for first 10 mins under a metal cloche (equals steam) then 10m at 220C, 10m at 200C, 10m at around 140C, then 10m with oven switched off (it is a small loaf!)

Results:

A very cute little loaf - I could improve my shaping, as although I did follow instructions, it is not quite right. 

However - after about 20m out of the oven (singing for at least 10m) I had to eat - really yummy!  One of the few I have felt are really successful - I could easily eat the rest of the loaf now!  Sweet taste, lovely golden crust, I'd prefer more of an open crumb but definitely worth repeating...

Very pleased - I will make this again (need to buy more flour) - a cute little lunchtime loaf!


Juergen Krauss's picture
Juergen Krauss

Inspired by the recent blogs about Pane di Altamura by Franko

http://www.thefreshloaf.com/node/24102/pane-di-altamuramy-ongoing-project

http://www.thefreshloaf.com/node/24172/first-success-altamura-project

and David Snyder

http://www.thefreshloaf.com/node/24139/pane-tipo-di-altamura-quotlocal-breadsquot,

and by the then hot weather I decided to try out this intersting bread.

In Britain I found three suppliers of Italian flours, so I ordered some.

I got semola di grano duro rimaccinata (the semolina used for bread) by Divella, from near Bari. The grains seem to be a blend from European countries.

I also got tipo 00 soft wheat flour "La Farina di Don Arcangelo", and durun semolina by the same make, both from Altamura. The semolina is coarser and makes wonderful pasta.


Here a picture of the flours:

No 1: TRS fine semolina (durum), which is availlable in Asian shops. Origin: EU countries (to compare)

No 2: La Semola di Don Arcangelo, from Altamura

No 3: Semola di grano duro rimaccinata by Divella, milled near Bari

No 4: La Farina di Don Arcangelo, from Altamura (tipo 00)

No 5: Shipton Mill No 4 organic strong white flour (my current standard flour, to compare)

To try out the Italian flours I wanted to make a bread I knew well: I used the Pugliese formula I learned at the Lighthouse Bakery with two changes:

1. I used 20% semola rimaccinata and 80% tipo 00 (for biga and dough)

2. I found an interesting baking profile in Italian bread blog: Preheat at maximum temperature, bake for 60min with no steam and turn to 200C immediately.

The result is quite amazing, my best Pugliese yet. The taste is not as sweet as the one made with English flour, but it has more depth, and an amazingly elastic yellow crumb. A good contrast to the thick crunchy crust.

Next I tried an Altamura style bread, but I got rushed, and the temparature in our kitchen dropped.

Not quite understanding the durum leaven I mixed too early. The resulting bread took a long time to raise, the crumb is uneven and it tastes very sour. But I am satisfied with my first attempt, I really like the consistency and feel of the semolina dough.

Here a picture of the loaf:

All in all it is great fun to work with these flours,

and it is really wonderful to find so much inspiration here on TFL.

Special thanks to Franko and David,

Juergen

 /* UPDATE */

The inside of the Altamura bread:

I think the main problem here was fermentation control: The temperature in the kitchen dropped by about 5C during the last elaboration of the starter, and the effect was more drastic than on wheat or rye starters. I used the starter far too early. Lesson learned

The sources for the flours:

http://www.mattas.co.uk for the Divella semolina

http://www.mediterraneandirect.co.uk/ for the altamura flours - they seem to be out of stock now (as of 8 July 2011)

DeCecco has an online shop (for European countries) where they sell Semola di grano duro rimacinata. They are based in Puglia,but like Divella they seem to use grains from all over the place. I didn't try that (yet).

http://www.dececco.it/eshop/en/


johannesenbergur's picture
johannesenbergur

So... time to try something new and the pictures of the pita breads on the right side of TFL has always appealed to me.

Being European, I had to use some other measurements and didn't bother getting the exactly like the recipe, so here's what I did, inspired by http://www.thefreshloaf.com/recipes/pitabread.

Ingredients: (Made 8 pita breads á 50g)


  • 1 dl tepid water
  • 15g fresh yeast
  • ½ dl plain natural yogurt (I can't seem to stop using this in my creations)
  • 5g sea salt
  • 5g honey
  • 10g olive oil
  • 50g durum/semolina flour
  • 150g regular wheat baking flour + some for dusting and adding as nessecary.
  • Optional: Spices (I used a tiny bit of ground chilli, smoked paprika and ground cilantro)


Mix the yeast with the water, add the yogurt, oil, salt and honey, mix well with a fork, till it's a greyish, oilish mixture.
Add the flour, a little at a time (100g) and stir with the fork as long as it makes sense.

Knead for around 10 mins or so. Let it rise under a luke warm tea towel in a warm place for 30 mins.

Carefully fold and strech the dough, and make a sausage. Cut the dough-sausage into appropriate size lumps, I weighed them and made them 50g. Let the pieces rest and rise for 5 mins.

Use a rolling pin to flatten the dough and hopefully you'll succeed in making them circular as well. Just make it really thin, not paper thin, but 3-5mm thick.

By this time your oven should be really hot (max. heat) and if you have a baking stone (which helps), it should be hot as well. Place the pancake lookalike dough onto the stone and bake them for 3 mins in 200°C or to taste. The breads should blow up like balloons.

Cut them up sidewise and enjoy your pitas.

Filling suggestion:
Garlic and herb roasted shoulder of lamb, sweet corn, tomato, cucumber, salad leaves and hot salsa.

...I'm going to quit blogging now and eat some more...

Pages

Subscribe to RSS - durum