The Fresh Loaf

A Community of Amateur Bakers and Artisan Bread Enthusiasts.

durum flour

dmsnyder's picture
dmsnyder

In October, 2011, I baked a bread I called “pugliese capriccioso.” The formula was based on my best understanding derived from reading formulas in American books of what typical breads from Apulia are like. I baked another version, differing in the use of a firm starter (biga), in February, 2012. I remain unbiased by personal experience of the authentic bread, but the breads were good. Several other TFL bakers have made these breads, and all those reporting found them good as well.

More recently, I baked Hamelman's “Durum Bread,” which is 100% durum flour. I didn't like it as well as my pugliese, but my posting stimulated some interesting discussion regarding this type of bread and has prompted me to try a re-formulated pugliese capriccioso, using a higher percentage of durum flour.

My new formula uses a stiff biga made with bread flour (12.7% protein). Fifty percent of the flour is “fancy (finely milled) durum.” Forty percent of the flour is pre-fermented. Hydration is 80%


Total Dough Ingredients

Wt (g)

Baker's %

Bread flour

180

36

AP flour

70

14

Fine durum flour

250

50

Water

400

80

Salt

10

2

Active starter (50% hydration)

36

7

Total

946

189


Biga Naturale Ingredients

Wt (g)

Baker's %

Bread flour

180

100

Water

90

50

Active starter (50% hydration)

36

20

Total

306

170

  1. The day before baking, mix the biga.

  2. Ferment for 8 hours at 70ºF.

  3. Refrigerate overnight

Final Dough Ingredients

Wt (g)

AP flour

70

Fine durum flour

250

Water

310

Salt

10

Biga naturale

306

Total

946


Method

  1. Take the biga out of the refrigerator and let it warm up for about an hour.

  2. Mix the water and flours to a shaggy mass, cover and autolyse for 20-60 minutes.

  3. Sprinkle the salt over the dough and add the biga in chunks.

  4. Mix at Speed 1 for 1-2 minutes until the ingredients are well-mixed.

  5. Mix at Speed 2 for about 10 minutes. The dough will be quite slack. It will almost clean the sides of the bowl and form a ball on the dough hook, but a large portion of the dough will still be on the bottom of the bowl.

  6. Transfer the dough to a lightly oiled bowl with a tight-fitting cover.

  7. Ferment at 76ºF for 2 1/2 to 3 hours with a stretch and fold at 40, 80 and 120 minutes.

  8. Divide the dough into two equal pieces. Pre-shape into balls and let the dough rest for 10 minutes to relax the gluten. (This wasn't much of an issue. The dough was extremely relaxed and extensible.)

  9. Shape the pieces as tight boules and place them seam-side down in floured bannetons.

  10. Place the bannetons in a food-safe plastic bag or cover with a damp towel. Proof the boules at 85ºF until the dough springs back slowly when you poke a finger into it. (About 2 hours)

  11. 45 minutes before baking, preheat the oven to 500ºF with a baking stone and steaming apparatus in place.

  12. Transfer the loaves to the baking stone, seam-side up, steam the oven and turn the temperature down to 460ºF.

  13. After 12 minutes, remove the steaming apparatus. Bake for another 14 minutes or until the loaves are done. The crust should be nicely colored. The internal temperature should be at least 205ºF.

  14. Leave the loaves on the baking stone with the oven turned off and the door ajar for another 10 minutes to dry the crust.

  15. Transfer the loaves to a cooling rack. Cool completely before slicing.

These loaves are about half the size of my previous pani pugliesi. One will be gifted to my Italian language teacher who grew up in Palermo and loves bread, I am told. I'm eager to hear her assessment of my pugliese's authenticiy.

These smaller loves have the appearance of miniature versions of the larger ones, with similar crust color and texture. The crust was firm when they were first taken out of the oven, but it softened as the breads cooled. I was hoping the folds would open some with oven spring. That's why I baked them seam-side up. They opened up a bit on one loaf. They probably would have opened more if I had under-proofed a bit.


Slicing revealed the crumb was moderately open – less so than the pugliesi made with 25% durum, more so than the 100% durum loaf, although that had lower hydration also. The dough had been quite yellow, but the baked crumb was less yellow.

The crust was thin and chewy. The crumb was tender and cool-feeling. The flavor was not as sweet as the previous pugliese versions, but the crust in particular had a nuttier flavor. This bread was more enjoyable eaten with other foods than alone, in my opinion. I am curious how the flavor will develop over the next couple days.

David

Submitted to YeastSpotting

Isand66's picture
Isand66

It's not quite New Years Eve yet, but I figured it was time to try some champagne in a sourdough bread anyway.  What goes better with champagne than some orange juice?  (I hate strawberries so that was not an option!).  I added some dried blood orange peel  to the starter and the final dough to add some nice fruity flavor.

I created a durum semolina starter and used durum flour along with some KAF French Style flour for the final dough.

The end result was a nice slightly sour bread with orange and champagne overtones.  The crust came out nice and crisp with a moist crumb.

Durum Starter

227 grams Durum Flour (KAF)

71 grams AP Seed Starter

4 grams Blood Orange Peel

151 grams Water at Room Temperature (80-90 degrees F.)

Mix ingredients in a bowl until thoroughly combined.  Cover the bowl and let it sit at room temperature for around 8 hours.  The starter should almost double when ready to proceed.  You can either mix in final dough or put in refrigerator for at most 1 day before using.

Main Dough Ingredients

425 grams Starter from above

275 grams Durum Semolina Flour

200 grams French Style Flour (KAF)

35 grams Potato Flour

25 gram stabilized Wheat Germ (KAF)

16 grams Sea Salt or Table Salt

29 grams Harvest Riesling Vinegar

25 grams Olive Oil

10 grams Blood Orange Peel

375 grams Champagne (Room temperature)

Procedure

Mix the flours, stabilized wheat germ and orange peel with the champagne in your mixer or by hand for 1 minute. Let it rest covered in your bowl for 20 minutes.   Next cut the starter into small pieces and put in bowl and also add the  oil and salt.  Mix for 4 minute to incorporate all the ingredients.  The dough should form a sticky ball at the end of 4 minutes mixing.

Next take the dough out of the bowl and place it on your work surface.  Do a stretch and fold and rest the dough uncovered for 10 minutes.  After the rest do another stretch and fold and cover the dough and let it rest for 10 minutes.  Do one more stretch and fold and put the dough into a lightly oiled bowl and let it sit at room temperature covered for 2 hours.  After 2 hours you can put the dough into the refrigerator for 24 hours or up to 2 days before baking.  Feel free to do some additional S & F's if you feel it is necessary.  I baked the bread about 14 hours later.

The next day (or when ready to bake) let the dough sit out at room temperature for 1.5 - 2  hours.

Next, form the dough into your desired shape and put them in floured bannetons, bowls or on a baking sheet and let them rise covered for 2 hours or until they pass the poke test.

Score the loaves as desired and prepare your oven for baking with steam.

Set your oven for 500 degrees F. at least 30 minutes before ready to bake.  When ready to bake place the loaves into your on  your oven stone with steam and lower the temperature immediately to 450 degrees.    When both loaves are golden brown and reached an internal temperature of 200 degrees F. you can remove them from the oven.

Let the loaves cool down for at least an 2 hours or so before eating as desired.

Isand66's picture
Isand66

If you live in New York like me you are spoiled as there is little doubt we have more bagel shops than anywhere in the country and most of them are very good.  I have tried bagels in other cities and usually they taste like a dense tasteless ball of dough.  Since I usually can get great bagels in my town I usually don't make them myself but I figured I would give it a go with a twist of course.

I decided to use my apple/blueberry yeast water to make a durum and high gluten flour starter.  I built this as usual in 2 steps as outlined below and I used King Arthur's Sir Lancelot high gluten flour along with some more durum flour in the final dough.

To shape the bagels I used the technique outlined in the excellent book "Inside the Jewish Bakery" which instructs you to form the dough into ropes and after cutting off the correct size piece to adjoin the rope together and roll out to seal.

I must admit I need more practice with this technique as some of my bagels ended up looking like a blind man-made them.

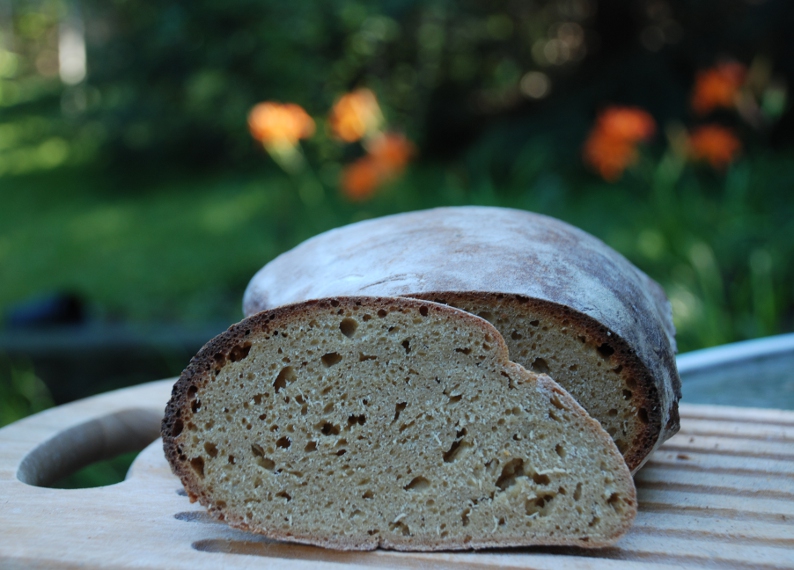
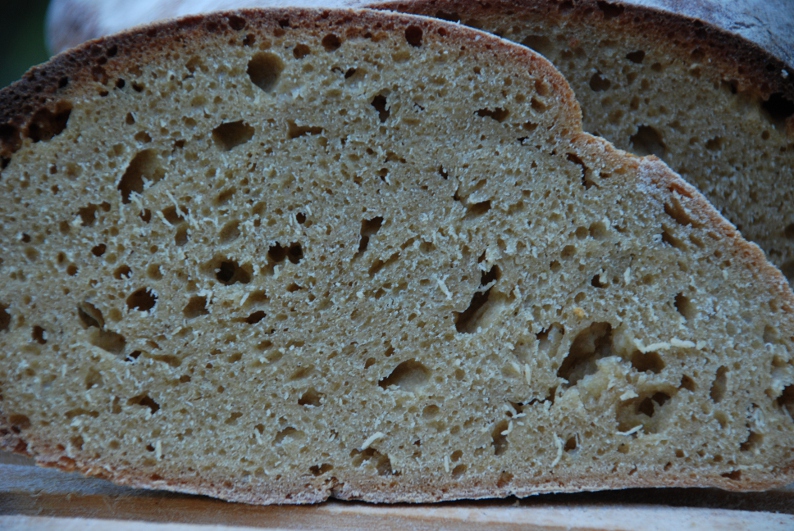
The end result was satisfactory.  The durum combined with the yeast water provided a nice slightly nutty flavor with a nice moist crumb.  I don't think I'm ready to open up my own bagel shop yet, but overall they made a nice toasted bagel with cream cheese.

Directions for Yeast Water Levain

Yeast Water Starter Build 1

60 grams Sir Lancelot High Gluten Flour (KAF)

60 grams Durum Flour (KAF)

120 grams Yeast Water Starter

Mix the flour and Yeast Water in a bowl until thoroughly combined.  Cover the bowl and let it sit at room temperature for around 4 hours.  The starter should almost double when ready to proceed to build 2.

Build 2

Add ingredients below to starter from above and mix until incorporated.  Cover with plastic wrap and let sit at room temperature for 4 hours.

50 grams Sir Lancelot High Gluten Flour (KAF)

50 grams Durum Flour (KAF)

100 grams Yeast Water Starter

Main Dough Ingredients

400 grams Yeast Water Levain from above

450 grams Sir Lancelot High Gluten Flour (KAF)

100 grams Durum Flour

38 grams Vegetable Oil

25 grams Malt Barley Syrup

14 grams Seas Salt or Table Salt

170 grams Water at Room Temperature

Procedure

Mix the levain with the water to break it up in your mixer or by hand.  Next mix the rest of the ingredients in your mixer or by hand for 2 minutes on speed #1.  Change to speed #2 for 4 minutes and then place on your work surface and knead by hand for about 2 minutes.  You should not have to add any flour as the dough should be tacky  but pretty stiff and easy to knead.

Place the dough in a lightly oiled bowl and cover it.  Let it rest in the bowl for 3 hours.  After 3 hours turn the dough out onto your unfloured work surface and form the dough into a log shape.  Cut it into 2 pieces and roll each piece into a 2" diameter rope.  Let it rest covered for about 20 minutes to relax the dough.  Roll one of the ends of the rope into a strand about 8 to 10 inches long and wrap it around your knuckles and break it off with your thumbnail or a bench scraper.  Roll the overlapping ends against your work surface to seal the bagel.  You may need to spray some water on the surface to help roll and seal the bagels.

Place the bagels on a parchment lined baking sheet and cover with oil sprayed plastic wrap.  Place the bagels in your refrigerator overnight to develop the maximum flavor.

The next morning heat your oven to 460 degrees F. while at the same time prepare a large pot of water and bring to a rolling boil.  Add another 25 grams of malt syrup to the boiling water (note this is not listed in the total ingredients).  Next add 2-3 bagels at a time in the boiling water and remove them once they start to float.

Place the bagels on a cooling rack and immediately add your toppings of choice.  I used toasted onions, poppy seeds, toasted garlic mix and parmesan cheese mix.

Once the oven has come up to temperature, place the bagels on your baking sheet again and bake for 15 to 20 minutes until they are nice a brown.

Remove them from the oven when done and let cool on a rack for about 20 minutes or longer before diving in.


Cosmo Waiting Patiently for a Bagel
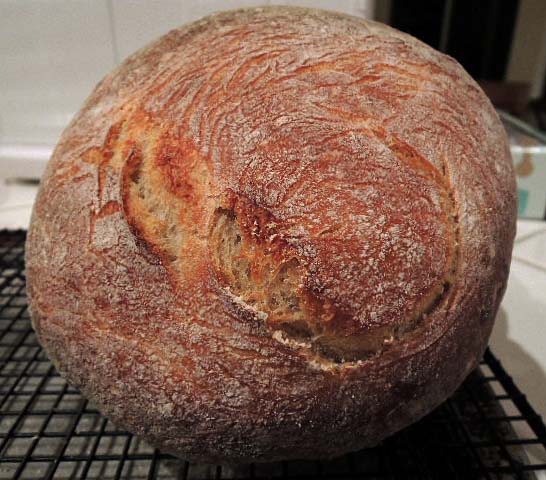
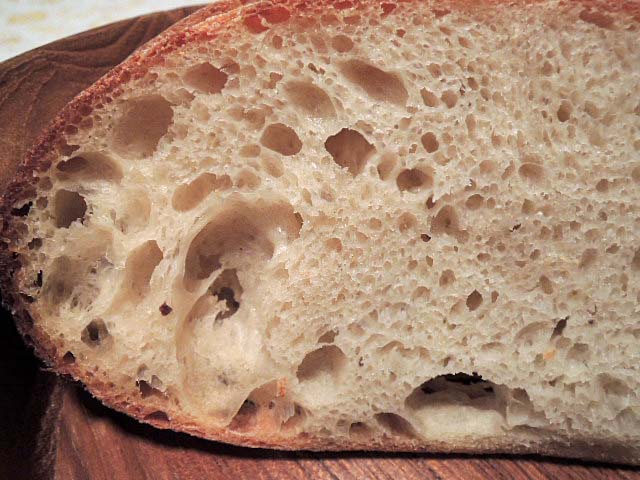
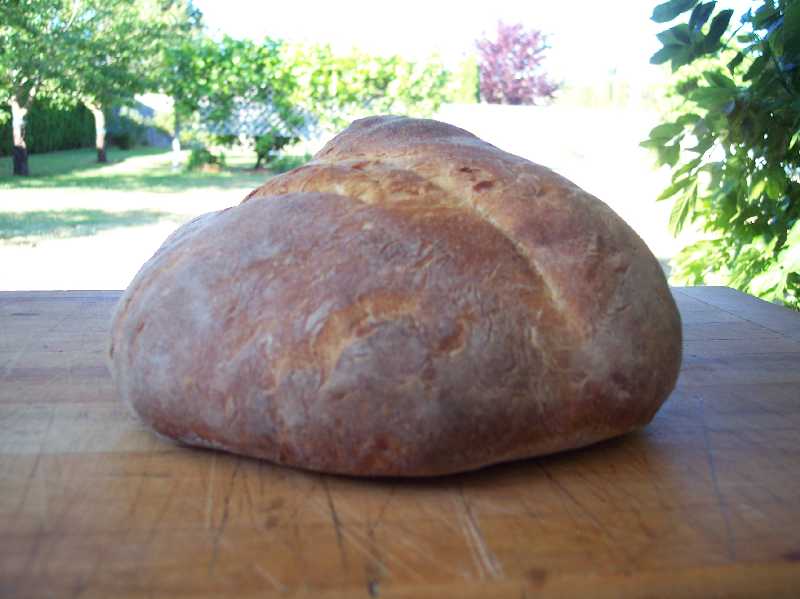
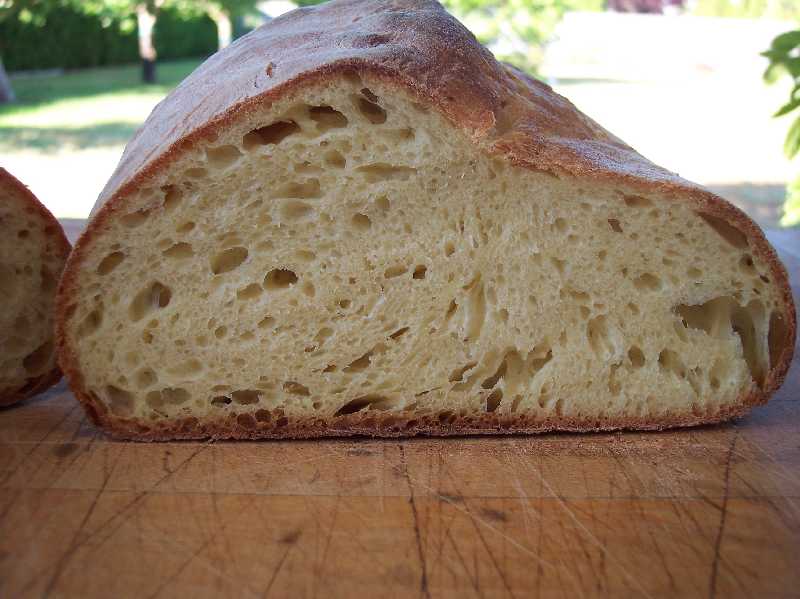
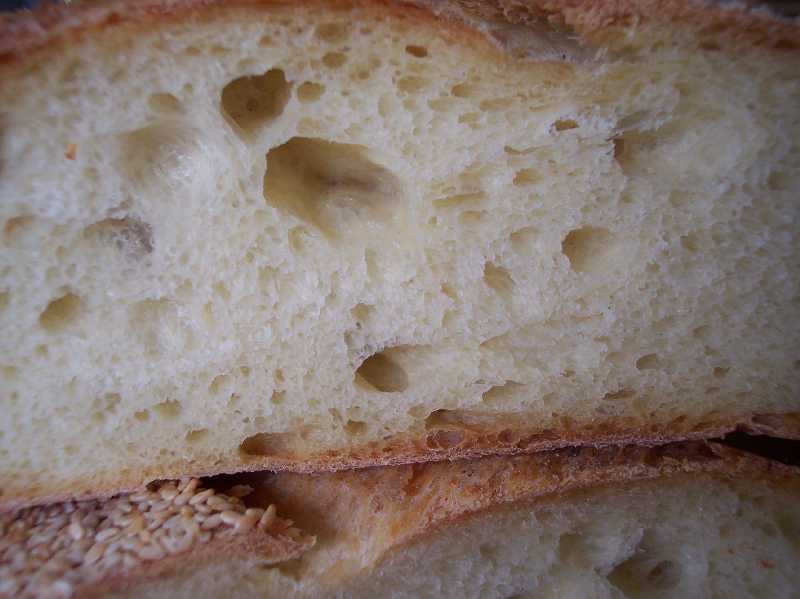
varda's picture
varda

Franko's projects have a way of capturing my imagination.   His Altamura bread did that in spades.   Then to top it off when Sylvia showed her Altamura loaf sitting on her WFO floor, I couldn't resist.    Today I followed Franko's formula http://www.thefreshloaf.com/node/24172/first-success-altamura-project to the tee.   The only problem was I didn't have the Giusto fancy durum flour - just my Golden Temple Atta.   I took Franko's advice and did the 4 Stretch and Folds in the bowl.   I wouldn't call them regular in the bowl stretch and folds though, since I used my hands and just gently manipulated the dough.   I had watched the clip of the Italian housewife (in the comments of Franko's post) handling the dough, and I tried to channel her, even though there is a big gap between us.   I also did all the mixing and initial kneading by hand.   The dough is very easy to handle and not sticky so this was fine.   It is the first time since forever that I haven't mixed in my Kitchen Aid. 

I hadn't really thought about baking with fire in, door open when I built my oven but it worked fine for one loaf.  


I didn't get quite as much oven spring as I would have hoped for, so I think there's plenty of room for improvement.   But I'm pretty happy with this bread.   Of course, my title is a misnomer.   This isn't Altamura bread since it's made with Atta - whole grain durum flour, most likely sourced from just about every country but Italy.   Maybe next time.

Franko's picture
Franko

Since posting my last effort at making the Pane Tipo Altamura http://www.thefreshloaf.com/node/24102/pane-di-altamuramy-ongoing-project it's been an unexpected pleasure to have received so much interest and support for this project from so many TFL members. Thanks to everyone who's responded with new information, tips and suggestions, videos, etc, but especially to David Snyder for taking enough interest in the project to do his own bake of the bread. http://www.thefreshloaf.com/node/24139/pane-tipo-di-altamura-quotlocal-breadsquot

It's always a bonus when you have David's insight and scrupulously well taken notes to refer to. I found them very instructive before beginning this latest bake. Thanks David!

Although I strayed slightly from some of the criteria outlined in the Altamura DOP document, http://eur-lex.europa.eu/LexUriServ/LexUriServ.do?uri=OJ:L:2003:181:0012:0019:EN:PDF I feel I could have stayed within the criteria and produced a bread of similar quality and attributes as this latest effort. Something I'll endeavor for future bakes now that I have a much better understanding of the process.

The most significant difference between the DOP regs and what this mix included is the percentage of preferment. The DOP calls for 20% of preferment and I used 24.25%. Overall hydration (not counting that of the starter) was slightly higher than 60% regulation at 62% . Other than that it stayed reasonably close to what was outlined in the DOP.

The differences between this dough and the last one were like night and day in terms of the texture and fermentation. The preferment was considerably stronger, and why I'm sure that had I used only 20% instead of the 24%, I would have achieved very similar results. The lower hydration of this dough also made a world of difference to the crust and crumb.The crust is crackly, with a good chew to it, and a rich, toasty flavour.The crumb is wonderfully moist, almost spongy, with a medium level sour background that lasts on the palate well after eating. It's not so strong that it wouldn't compliment anything within reason on the sweet side, and pretty much everything on the savory. Very tasty stuff indeed!

Taking this bread out of the oven last night was one of those classic whooohooo! moments I know all of us have from time to time in our baking pursuits. It's been a while since I've had one of those, and the first I've had since starting this endeavor, so it's a genuine pleasure to be able to share what I regard as a first success of the project with everyone here on TFL.

Formula, procedure and photos below.


Best Wishes,

Franko


Pane Tipo Altamura


Ingredients

%

Kg/Grams

Preferment


Semolina flour starter

32

32

Duram flour

100

81

Water

100

81

Total


194


Final Dough


Durum flour

100

800

Water

59.2

474

Preferment

24.2

194

Sea salt

1.9

17

Total weight


1.49

Total Hydration

62.9


PROCEDURE:

Semolina flour starter;

Mix equal portions of semolina flour and tepid water and keep covered at 65-70F. Refresh daily over the course of 3 days. Reduce the water by 50% on the last feeding to thicken the starter and build acidity.


Preferment;

Build the preferment over 24 hours in 3 stages using equal increments of the total flour and water indicated in the formula. Keep covered at 70F.


Final Dough; Hand Mix- DDT 76-79F Oven temperature of 450F


Combine the flour, water, and preferment and autolyse for 30-40 minutes. Add the salt and adjust the hydration slightly if needed to form a medium firm dough. Knead the dough on the counter for 3-4 minutes until the dough is smooth and cohesive.

NOTE: throughout the kneading and the stretch and folds to come be aware of any signs of tearing on the dough surface. When this starts to show, stop working the dough and let it rest.

Place the dough in a bowl and cover with linen or plastic wrap and begin the 2 1/2 hr bulk ferment.

Stretch and fold the dough in the bowl every 30 minutes during the course of the bulk ferment. The S&F's can be done several times (8) before tearing begins to show depending on the individual tolerance of the dough at hand.

After the last S&F allow the dough to rest for 15-20 minutes then round and rest a further 15minutes. On a well dusted counter press the dough into a thick disc. Fold the bottom half of the dough to almost meet the edge of the top half, or approximately an inch back from the edge.

Place the dough on well floured piece of linen, cover with another piece of floured linen and begin the final rise of 1 to 1-1/2 hours. When the dough is not quite fully proofed slide a peel under the dough and transfer it to a 450F preheated oven and stone. Leave the door ajar and the vents unblocked for the first 10 minutes. Note: No steam is used.

Close the door and bake for 15 minutes before rotating the bread for even colouring. Continue baking for 10 minutes before lowering the temperature to 430F with a further 15-20 minutes of bake time. Lower the temperature to 300F, prop the door ajar and bake for 10minutes. Tap the bottom of the loaf for a hollow sound to ensure complete baking.Turn the heat off and leave in the oven for ten minutes then remove to a wire rack and cover with linen. When the bread has cooled for 6 hours or more dust off the excess flour before slicing.

dmsnyder's picture
dmsnyder

Franko's recent blog about his project to bake Pane tipo di Altamura (Pane di Altamura...my ongoing project) reminded me that this bread had gotten lost on my “to bake list.” I have baked a number of breads with semolina and a couple with durum (finely milled durum flour) my favorite of which has been Tom Cat's Semolina Filone from Maggie Glezer's "Artisan Breads".  However, I've never before baked an 100% durum bread. My reading about the Pane di Altamura and Franko's blog inspired me to attempt this bread, finally.

I have three books with formula's for Pane tipo di Altamura: Carol Field's “The Italian Baker,” Franko Galli's “The Il Fornaio Baking Book” and Daniel Leader's “Local Breads.” The first two use a yeasted biga and additional commercial yeast. They also use a mix of bread flour and semolina. Leader's formula uses a biga started with yoghurt and semolina flour. Leader's formula also differs from the other two in specifying a higher dough hydration. Based on my bias in favor of wild yeast and my past positive experiences with breads from Leader's book, I based my formula on his.

I deviated from Leader's formula and method in a number of ways which I will describe. I converted my stock starter to a durum biga and did not use yoghurt. The major compromise was that I only fed my starter once with durum flour. I had planned on three refreshments before the final mix, but the weather forecast is for temperatures over 105ºF for the rest of the weekend. Since it is only expected to get to a chilly 98ºF today, it seemed prudent to bump up the baking schedule and try to avoid using the oven when it's 105 or 107ºF. So, what's described is what I actually did, with notes indicating significant deviations from Leader.

Semolina biga

Wt.

Baker's %

Active sourdough starter

50 g

71

Fancy durum flour

70 g

100

Water

57 g

81

Total

177 g

252

  1. Disperse the starter in the water. Add the flour and mix thoroughly.

  2. Ferment at room temperature for 12-14 hours.

Notes

1. Ideally, one would add one or two additional builds to convert the biga to 100% durum.

2. Leader's formula for the final dough calls for 200 g of semolina biga, but his formula for the biga produces only 177 g. If you follow Leader's formula, you need to build more biga than this.

Final dough

Wt.

Baker's %

Semolina biga

170 g

34

Fancy durum flour

500 g

100

Water

350 g

70

Salt

15 g

3

Total

1035 g

207

Notes

  1. Leader's formula calls for 200 g of biga. I was only able to use 170 g. Given the very warm kitchen temperature today, using less starter is probably reasonable.

  2. Accounting for the flour and water in the biga, the final dough hydration is actually 71%.

  3. Leader specifies 3% salt in his formula without indicating why this bread has more salt than the usual 2%. Note that, if you calculate the baker's percentage of salt accounting for the flour in the biga, 15 g is actually 2.6% of the total flour

Method

  1. Mix the final refreshment of the biga 8-12 hours before the final dough mix and ferment it at room temperature.

  2. In the bowl of a stand mixer, disperse the biga in the water. Add the flour and mix with the paddle for 1 minute.

  3. Cover the bowl and autolyse for 20 minutes. (Note: Leader does not call for an autolyse, and, as far as I can tell, this is not used in Altamura.)

  4. Add the salt, and mix with the dough hook at Speed 3 for 5 minutes. The dough should be smooth and pass the window pane test. (Note: Leader says to mix at Speed 4 for 10-12 minutes. However, my dough was very smooth and passed the window pane test after 5 minutes at Speed 3. Perhaps this was a benefit of the autolyse.)

  5. Transfer the dough to a lightly oiled 2 qt container.

  6. Ferment with the bowl tightly covered for 3-4 hours or until the dough has doubled in volume. Stretch and fold in the bowl at 30 and 60 minutes. (Note: Leader does not call for the S&F's.)

  7. Transfer the dough to a lightly floured board. Shape into a boule.

  8. Dust the boule with semolina flour and place it in the center of a clean, dry kitchen towel dusted with semolina. Bring the corners of the towel to the center and tie them, “to make a snug bundle.” (Note: Leader describes this procedure being used in the Altamura bakery he visited and by the village women who brought their own dough to the bakery for baking. However, the videos I've seen of Altamura bakeries in action show the loaves being proofed en couche.)

  9. Proof the loaf at room temperature until it “balloons inside the kitchen towel” - 1-1/2 to 2 hours. The loaf is ready to bake when an indentation made by poking a finger into it springs back slowly. (Note: My loaf was proofed for 90 minutes in a 78ºF kitchen. The surface of the loaf was quite dry at the end of proofing. I imagine this contributes to the famously chaotic blooming of the folded loaf during baking.)

  10. About an hour before baking, preheat the oven to 500ºF with a baking stone and steaming apparatus in place.

  11. Transfer the loaf to a lightly floured board.

  12. Stretch the loaf into a rectangle about 6 x 16 inches, with a narrow side nearest you. Fold the near edge all the way up to meet the top edge, and seal the seam. Now, bring the folded near edge 3/4 of the way up towards the far edge, and seal the seam all the way around so the lip of the far part of the loaf is flattened. The loaf should now be shaped as a half-circle. (Note: An alternative, shape, which is also traditional, called a “priest's hat” is made by cutting a very deep cross into the boule with a bench knife and pulling the corners well apart. The opening is then dusted with semolina flour to keep it from sealing during oven spring.)

  13. Transfer the loaf to a peel dusted with semolina flour and dust the surface of the loaf with flour.

  14. Turn the oven temperature down to 400ºF. Transfer the loaf to the baking stone . Steam the oven lightly.

  15. Bake for 40 to 50 minutes until the loaf is “mahogany-colored all over and golden where it splits open.” (I removed my steaming pan after 15 minutes and switched to convection bake at 375ºF for the remainder of the bake.)

  16. Transfer the loaf to a cooling rack and cool for at least 1 hour before slicing.

    Initial mix before autolyse

    Dough mixed, ready for bulk fermentation

Pre-shaped boule, ready for proofing


Proofing 

Proofed and ready for the final shaping

Dough stretched out. First step in final shaping.

Shaped loaf, ready to bake

Pane tipo di Altamura

Pane tipo di Altamura crumb

Pane tipo di Altamura crumb close-up

The aroma and flavor of the bread are most remarkable for a prominent sourdough tang. The flavor otherwise is very nice, but I cannot identify distinctive flavors I would associate with durum, as opposed to other wheat flours. The crust is chewy over the fat part of the loaf but quite crisp over the flatter part.

David

Submitted to YeastSpotting

Franko's picture
Franko

Carol Field's 'Italian Baker' is the oldest book in my ever growing collection of books on bread and pastry making, and still one my stand-bys that I refer to often. One of the breads included in her chapter on regional and rustic breads is the Altamura bread from the town of the same name in the region of Puglia. The bread is one I've wanted to make for many years but have never run across a local source for the type of durum flour needed to make it. Finally this Spring, as some folks may remember from previous posts to this blog, I was able to have some shipped from Giusto's in San Francisco to my home on Vancouver Island. A bit of an indulgence as far as the shipping costs involved and not one I'll be repeating anytime soon.


While I was waiting for the flour to arrive I began doing some online research on Pane di Altamura, as well as putting in some queries to Nico/nicodvb and Andy/ananda , both of whom kindly responded with lots of useful information from their own experiences with the bread. Many thanks to both of them for sharing their knowledge with me! One of the things I wasn't aware of, and that Andy mentioned in our correspondence is that Altamura bread has protected or 'DOP' status in the EU. "The bread of Altamura is 'officially the first product in Europe to bear the DOP in the category''Bread and bakery products.'' http://translate.google.co.uk/translate?hl=en&sl=it&u=http://www.panedialtamura.net/&ei=z8ypTaaxK5CahQe2kdzFCQ&sa=X&oi=translate&ct=result&resnum=11&sqi=2&ved=0CHQQ7gEwCg&prev=/search%3Fq%3Dpane%2Baltamura%26hl%3Den%26rlz%3D1R2ADFA_en%26site%3Dwebhp%26prmd%3Divnscm


With further searching I found the EU document proclaiming the status and historical background of the bread, along with information outlining the material and methods used to produce authentic Pane di Altamura, here; http://eur-lex.europa.eu/LexUriServ/LexUriServ.do?uri=OJ:L:2003:181:0012:0019:EN:PD


After reading through this document I decided to try and follow the authentic formula as much as possible rather than using Ms Field's recipe, which she describes as an "Altamura type" that uses a biga instead of the traditional natural leaven called for in the DOP formula outline. Developing an active durum/semolina flour starter from scratch takes a little less than 48 hours I discovered. Natural yeast just gobbles up the available nutrients of durum at a rate I've never seen before with other grains. This fact has been the biggest obstacle to me in trying to achieve a reasonably acceptable loaf, simply because the starter or the leaven was reaching it's peak long before my sleep and work schedules permitted me the time needed get a mix going. The first mix I made was pretty much a disaster and needed to be rescued with baker's yeast, the second and third attempts had slightly better results but still not great. This last attempt, while not a home-run by any means, is the best to date in terms of the final shape. This one has a much better flavour than the last three as well, but the crumb is not as open as I think it could be and the crust is not at all crusty. The original formula indicates a 60% hydration level, however I increased this by 9% as the dough was a little stiff for my liking. This, along with the fact I used steam instead of baking with the oven door open for the first 15 minutes as indicated in the DOP procedure,was likely a critical error on my part towards achieving a proper crust. Old habits die hard, so I've highlighted that part of the procedure in my notes for the next attempt.

Regardless of the fact I've only had what I'd call marginal results with this project so far, I am enjoying the challenge of trying to reproduce this ancient and venerable bread.

Best Wishes,

Franko

Franko's picture
Franko

I was browsing through Saveur's online magazine the other day and ran across a recipe for a tomato and cheese pie from Sicily called Scaccia. The recipe can be found at the link below.

http://www.saveur.com/article/Recipes/Tomato-and-Cheese-Pie

It caught my eye not only because it looked and sounded delicious, but also because it uses durum flour for the dough. Having recently acquired 25lbs of the stuff, I've been on the lookout for any recipes that call for it, and thought I'd give this Scaccia a try.

The formula for the dough is simply flour, olive oil, salt and water, which makes a pasta dough that can be stretched out into a very thin sheet and then spread with a thick tomato sauce and cheese. The recipe indicates it can be rolled out with a pin, but that proved impossible for the dough I'd made. In hindsight I'm not sure I'd want the dough so well developed that it could be rolled out anyway, as I think it might make it a little too chewy. The next step of trying to fold this to create several layers of dough and sauce (similar to laminating a croissant or puff pastry dough) was the tricky part. My attempt was moderately close to the procedure described in the recipe, but only because I used the largest icing spatula I had to help me fold the dough over on itself. The dough was hand mixed, and then developed using the slap and fold technique until it was able to come cleanly off the counter, but the next time I mix this I'll use a bit less water to make the dough a little easier to work with. The recipe from Saveur calls just for tomato sauce and caciocavallo or pecorino cheese in the filling, but I used a blend of pecorino and provolone instead. Since I had some thin slices of spicy Capicola sausage on hand, I added some of those for good measure as well. Once I'd managed to get it folded over, more cheese and sauce were added, then another two folds with more cheese and sauce going on. Next onto a parchment lined sheet pan and sprinkled with the last of the cheese and placed in a 500F oven for 10 minutes, then for 35-40 minutes at 400F. Once out of the oven I let it cool on a wire rack for 20 minutes while I made a warm scallop and prawn salad to have for dinner. By the time that was ready, the Scaccia was cool enough to eat, but still warm and soft on the interior, with a cheesy, slightly spicy aroma coming from it. The best way I can describe the flavour and texture of this pie is that it reminded me of what the top layer of a well baked lasagna tastes like, only softer. I'm not sure if what I made is what Scaccia is supposed to be like, but this tastes fantastic just the way it is. A few photos of the procedure and results below.

All the best,

Franko


Franko's picture
Franko


A few weeks back I went looking to find a source for Fancy or Extra Fancy Durum flour here in B.C. or Western Canada but drew a complete blank with all my usual local retailers. Durum Atta flour for chapatti and other Indian baking is readily available but the x-fancy is nowhere to be found...at least for now. Fortunately breadsong http://www.thefreshloaf.com/user/breadsong  was able to give me a hand and put me in touch with one of her contacts at Giusto's in San Francisco who was quite happy to fill my 1 bag order. The shipping cost was fairly steep, but now at least I had 25lbs of beautiful, finely milled durum flour that I could use while I try to source something a little closer to home. One of the several breads that I wanted the flour for is a recipe from Maggie Glezer's 'Artisan Baking' called Tom Cat's Semolina Filone. David Snyder as well as many others on this forum have posted on it, but it was David's post of his bake of this bread that really inspired me to give it a try. Link to David’s post below:

http://www.thefreshloaf.com/node/8114/tom-cat039s-semolina-filone-maggie-glezer039s-quotartisan-breadsquot

I won't go into a step by step of the procedure since David has already covered that thoroughly in his post, with our methods and experiences with the dough being almost identical. The one notable difference being that I didn't find I needed to add any extra flour because of the dough being “gloppy” during the initial mixing. This may be because I was using a blend of Canadian AP and Bread flour, likely with a higher gluten content than the KA-AP that David used.

This is a really nice dough to work with and an easy mix by hand for the quantities given in Glezer's formula. After a 3 hour bulk ferment the dough is soft, supple, and very extensible with it's 33% prefermented flour from the poolish allowing for easy molding. Very similar to a baguette dough I thought, and something I'll try molding this dough as in future mixes. There will certainly be future mixes since this is a great tasting bread in all respects. I love toasted sesame seeds, so any bread covered in them is going to taste wonderful to me, but the crumb and crust just on their own work perfectly together, creating a good crunch from the crust with, to borrow one of David's terms, a nutty flavour. I didn't notice the nut flavour so much in the crumb as he did, rather I found a very slight acidity highlighting the mixed grain flavours. I know that several folks on this forum have noted the lack of flavour that durum flour has but whatever contribution it makes overall to this formula surely must be positive. The texture of the crumb is almost feathery soft but has good chew somehow as well, which surprised me. Again, possibly a factor of the flour combination used in this mix, and not something I'd want to change in future mixes. This bread being a natural for open faced sandwiches with fresh tomato and cheese or dry salami and pepperoncini with a little EVOO drizzled over, that's exactly what I had for a very enjoyable lunch this afternoon.

Franko


Pages

Subscribe to RSS - durum flour