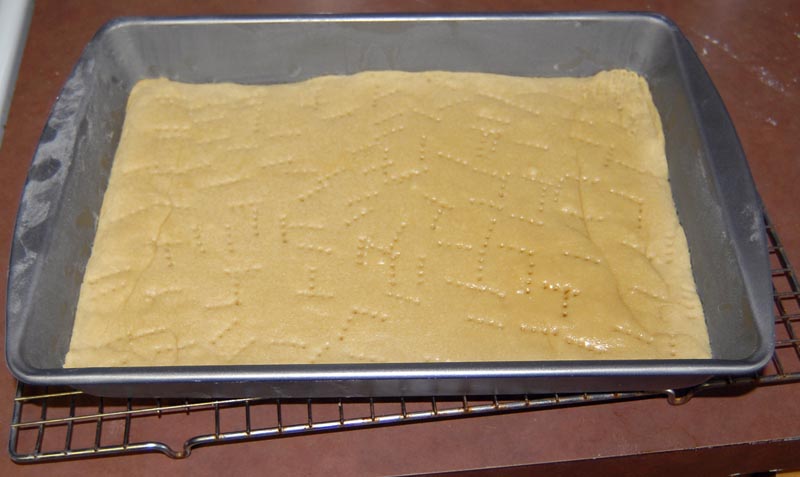
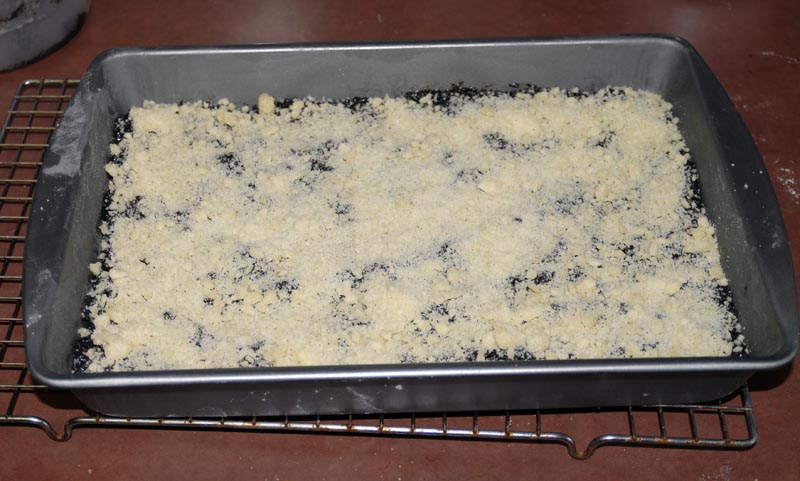
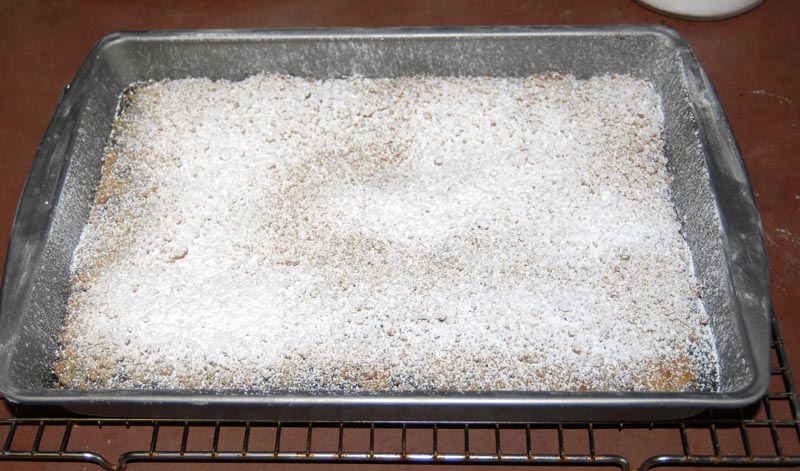
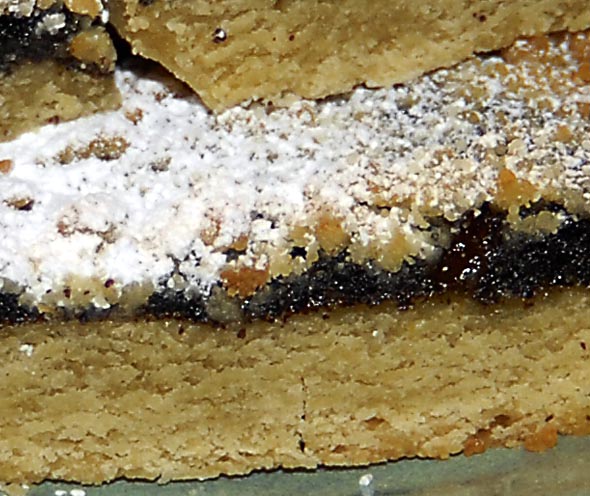
The bars are made up of three sub-recipes: 1-2-3 dough, a poppyseed filling, and streusel on the top. I used KA bread flour instead of home milled this time.
Baking notes:
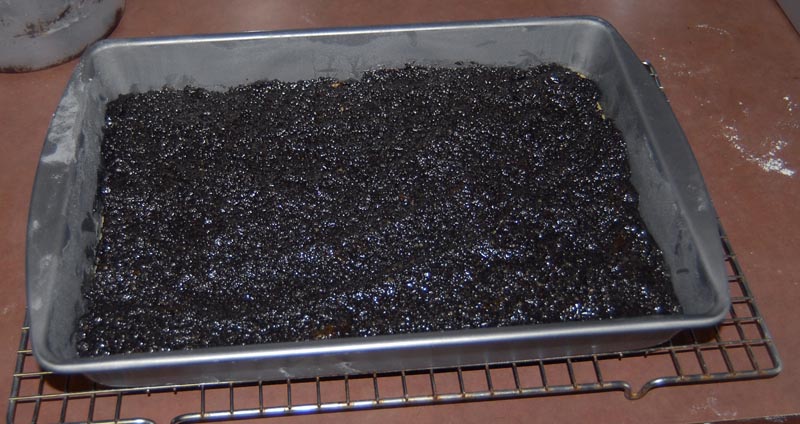
The food processor did nothing for my poppy seeds -- I ended up using my blender, which did a great job.
I ended up adding almost a half cup extra of water while boiling the poppyseed mix.
Also, through bad reading, I boiled the honey rather than adding it at the end.
I cooked the shortbread an extra 10 minutes to get some color into it (and it's still pretty pale)
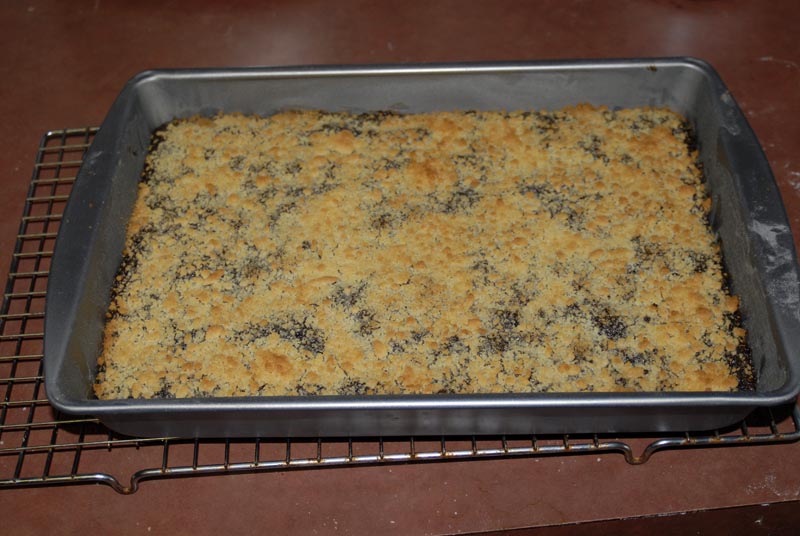
I cooked the final bars an extra 15 minutes, with the broiler on for the last 2 mins, to get the streusel browned
These bars are illustrative of why I'm in the challenge -- they have a (wonderful) flavor that I've never encountered, and would have never thought to try. I'm hoping there's still half a pan left for my wife to take to the office tomorrow, I really don't need to eat all of these :)
There was some strong verbal abuse to be heard in the BreadLab kitchen this morning. The air trembled with ancient Dutch strong language when that elusive and downright arrogant confectionery that calls itself "French Macaroon" failed in the oven... yet again!
Four failed bakes in a row is a hard blow to take, but: Back to the drawing board! Retreat and start from scratch, learn from your mistakes and have another go! The battle is lost, but the macaroon war is definitely on! The BreadLab vows to tame this fickle French "petite mandigotte" one day soon!
Meanwhile, to boost baking confidence, go back to what you know best. Let your genes take over and bake what is ingrained somewhere deep inside your memory. Something you know so well, you could reproduce its smell, taste and texture with your eyes closed, simply because it has been with you your entire life.
Dutch Macaroons
Browsing the story of the French Macaroon, it seems the intricate colorful variety we love so much today, hasn't been around in its present form all that long. In 1830 they were still served as two separate halves, spiked with liqueurs, jam or spices. It was Pierre Desfontaines of the French patisserie Ladurée who, at the start of the 20th century gave us the "Paris macaroon" that is so "en vogue" today:
Around the same time, here in Holland things were hardly as gay as in Paris, where slums were taken down, the Grands Boulevards were taking shape, and the Paris we know today came into being. The industrial revolution brought a lot of money to the city.
Meanwhile, in Gouda (where the famous cheese is produced), a Dutch baker was at the other end of the wealth spectrum, and probably could only dream of colorful macaroons in his shop window just like the ones in Paris.
Instead, he was wondering, in good old fashioned Dutch Calvinist spirit, if all those left over scraps of dough at the end of the baking day could still serve some purpose. He whisked up some molasses with brown sugar and cinnamon, put all the scraps of dough together, baked it into a wafer, sliced it in half, put in a big dollop of syrup in between the two layers, slapped them back together and sold them as "stroopwafels" (syrup wafers).
Two layers with a filling in between... Let's call it a Dutch Macaroon! Not nearly as dainty and intricate as the French variety, but just as satisfying in the end ! And a perfect way to boost shaken baking confidence, since they are pretty much fail safe.
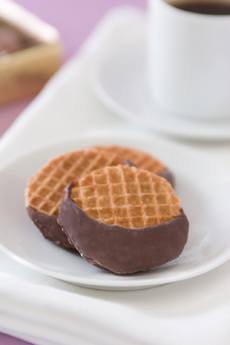
The stroopwafel took The Netherlands by storm, and the rest of the world is falling for it as well, or so it seems. In New York City they are dipped in chocolate and called Dutch Moon Cookies, for unknown reasons they are considered valuable bounty in a cartoon involving wolves (note the small dutch flag on the side of the treasure chest!)
And what about this tutorial on how to properly eat a stroopwafel?
The Recipe
All in all enough reason to get your waffle iron out and make your own stroopwafels! If you love these cookies, you will love them even more home made. Nothing can beat eating it fresh, crunchy and warm.
Here is the video recipe from the BreadLab.
Stroopwafels
for the dough: 4 cups (500 gr.) low gluten flour 1/2 TS cinnamon 1 cup (250 gr.) softened butter 1/2 cup (100 gr.) white caster sugar 2 large eggs 0.25 ounce/7 grams instant yeast 1/2 cup/118 gr. warm water
for the syrup: 1 1/2 cup (300 gr.) brown sugar 1 cup (250 gr.) butter 1 TS cinnamon 6 TBS dark corn syrup
Dissolve the yeast in the water and add to the flour together with the softened butter, the eggs, sugar and cinnamon. Combine all ingredients well, form into a ball and let it rest for about 45 minutes. It will have slightly risen by that time and the dough feels silky to the touch, but doesn't stick.
In the meantime, prepare the syrup mixture by gently heating up and dissolving the ingredients over a medium low heat, stirring in the butter and making sure the sugar doesn't burn. Once the sugar has dissolved, turn off the heat and stir every once in a while for a smooth consistency while it cools.
Heat up your iron to a medium high heat and form ping pong ball sized balls out of the dough. Put them in your iron and bake for about 30 seconds per cookie. Use a cookie cutter to cut out a perfect circle. Slice the cookie in two layers while it is still warm and use a thin sharp knife.
All that is left to do now, is put the syrup between the two halves and slap them together. The syrup might have cooled too much to work with; simply return it to the heat and gently warm it through again. Don't let the sugar burn!
Enjoy, Freerk
P.S. You would do me a big favor endorsing my BreadLab iniative. Every "like" will get me closer to realizing a 6 episode documentary/road movie; chasing the best bread Europe has to offer. Thanks in advance!
So I am no baking novice, but when it comes to baking bread I am not nearly as experienced as I am when it comes to cookies!
I have previously made successful white bread (with some help from everyone here in the past) and was hoping that I could get a few pointers before taking on my first Italian loaf, especially since I am making it for my future in-laws this weekend!
Carol Field is probably best known as the author of The Italian Baker. While it was first published in 1985, twelve years after Beard on Bread, it was certainly at the leading edge of the artisan bread movement in America. It is still frequently cited as the best book on Italian baking ever published in this country. I have never seen The Italian Baker, and my searches for it found it to be out of print with used copies selling for high prices. I'm delighted to have discovered, just yesterday, that it has been revised and is currently scheduled to be released in November, 2011. (The Italian Baker, Revised: The Classic Tastes of the Italian Countryside--Its Breads, Pizza, Focaccia, Cakes, Pastries, and Cookies)
Carol Field has written several other cook books, an Italian travel book and a novel. I checked out her book, Italy in Small Bites, from the library this week. It is a book of Italian between meal snack foods, although many are considerably more substantial in both calories and nutritional value than what we think of as “snacks” in the US. Field's writing about the place of these foods in Italian culture is quite fascinating for anyone interested in food and culture. (DaisyA! If you haven't read this book, you must!) But, no more about that now.
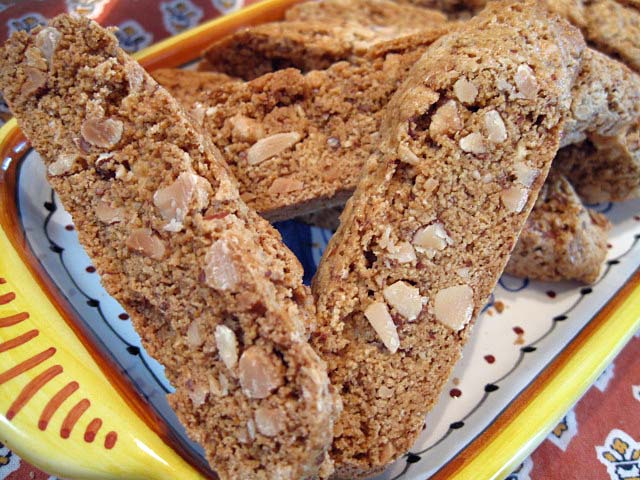
I had the afternoon off and looked for something from Italy in Small Bites I could bake before dinnertime. I chose “Biscotti di Greve in Chianti.” I've never met a biscotto I didn't like, but my wife has a dislike of anise flavored cookies, so the type of biscotti with which I was most familiar was out. These biscotti, which Field had from a bakery in Greve are flavored with almonds, vanilla and orange zest, all of which we like. The recipe was also attractive in that it is mixed in a food processor and seemed quick and easy.
Biscotti di Greve in Chianti
Ingredients
2 cups (280 g) unbleached AP flour
1 cup sugar
1 tsp baking soda
Pinch salt
2 eggs, room temperature
1 egg yolk, room temperature
1 tsp vanilla extract
2 tsp grated orange zest
1 ½ cups dry roasted almonds
1 egg, beaten with 1 tsp water for glaze
Procedure
Measure the flour, sugar, baking soda and salt into the bowl of a food processor with the metal blade and pulse to mix thoroughly.
Mix the eggs, egg yolk, vanilla extract and orange zest in a two cup measuring cup.
With the processor running, pour the liquids over the dry ingredients through the feed tube. Mix to a shaggy mass, not until a ball forms.
Pour half the almonds into the ball and pulse a few times. Repeat with the rest of the almonds.
Transfer the dough to a lightly floured board and press it into a coherent mass. (This is the hardest step. I used my hands and a bench knife to fold the dough, which started out as discrete granules of dough mixed with nut fragments, into something that stuck together after folding and pressing repeatedly.)
Preheat the oven to 325ºF.
Divide the dough into 2 or 3 parts and form each into a log, 2 inches across. Brush each log with the glaze. Place the logs, at least 3 inches apart, on a buttered and floured sheet pan or on sheet pan lined with parchment.
Bake 25-30 minutes until light golden brown.
Remove from the oven to cool, but leave the oven on.
Once the logs are cool enough to handle, slice each at an angle into ¾ inch thick cookies, using a serrated knife, and lay them on a lightly buttered cookie sheet.
Bake the cookies for 12-15 minutes on each side until golden.
Cool (and dry) before eating (If you can. I found that snacking on the log ends during the second baking assisted with this step.)
These biscotti are very tasty. They are less sweet than most, with a nice almond flavor. The orange flavor is very subtle. I haven't tasted them yet dipped in cappuccino or in wine, but I think that's how to enjoy them best.
For New Year's Eve I decided to share this wonderful traditional Dutch cookie-recipe.
Up to this day people in the northern and eastern regions of The Netherlands eat this waferthin cookie for NewYear's Eve.
They come in two varieties: flat and rolled up.
The flat ones you eat the 31st of December, the rolled up ones you can eat starting the 1st of January.
The flat wafers represent the old year that has fully unfolded. The rolled up wafers stand for the new year, that still has all of its secrets rolled up in it self
This recipe yields at least twice the amount shown in the picture.
To make the cookies waferthin you will need a WAFER IRON.
TRADITIONAL DUTCH NEW YEAR'S EVE COOKIES
500 grams AP flour
450 grams white caster sugar
30 grams of vanillasugar
5 eggs
200 grams unsalted melted butter
lukewarm water if needed
Combine the eggs, caster sugar and vanilla sugar in a large coleander.
Mix at high speed over a pan of hot water ("au bain marie") until the eggs turns slightly whiter and the mixture is nice and frothy.
Take the coleander away from the hot water pan. Sift the flour into the mixture. Add the melted butter little by little to form a smooth batter, about the consistency of yoghurt. The batter should "ooze" from the spoon.
Add some lukewarm water if needed to get the right consistency.
Spoon a dollop of batter on to the heated wafer iron and press hard for about 8-10 seconds. The wafer should come out nice and golden brown.
When making flat wafers: leave on a rack to cool.
When making rolled up wafers: roll the wafer onto a fingerthick wooden ladle or thin rolling pin. Let them set for about 20 seconds and transfer to a cooling rack.
Wishing all of my TFL-friends a healthy, inspiring and positive 2011! Thank you for all the feedback on my posts. I hope you will all continue to make me a better home-baker in the coming year!
This week has been the week of baking lots of Christmas cookies - this year I've been doing the cookie baking (Floyd's still in charge of supplying our dinner breads ;) Im nowhere near making those pretty sourdoughs myself!)
Yesterday I made a big batch of Sour Cream Sugar Cookies. I didn't have any lemons on hand to add the rind so I substituted some lemon juice (and only after dropping it in did it occur to me that with the baking soda in there I might have been producing a volcano, but luckily nothing of the sort occurred and the cookies turned out delicious) and I separated the icing into different bowls and added some color and let the kids paint the cookies with little paintbrushes so they were nice and festive. I'd forgotten that the cookies grew a little bit, so they held their shape but did spread out a little.
-------
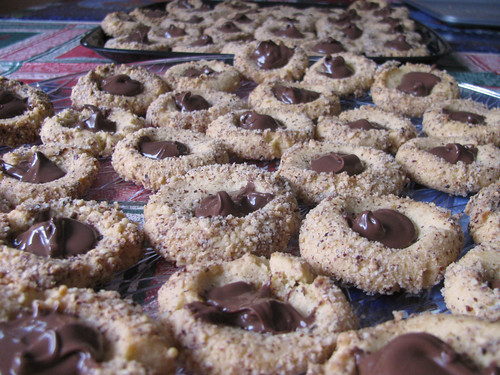
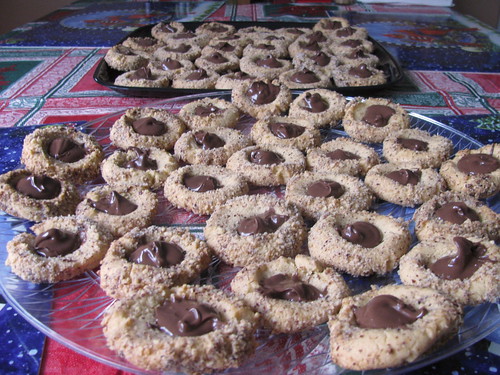
The exciting new thing I tried this year came about after an accidental purchase of too much Nutella. I'd not seen the double-jars I had hidden in the back of the pantry and had purchased yet another jar - well with all that Nutella something has to be done!
Someone sent me a link to this recipe and I decided to try it. The recipe there was a bit more uptight than my patience allows, so here is the slightly simplified version of what I made:
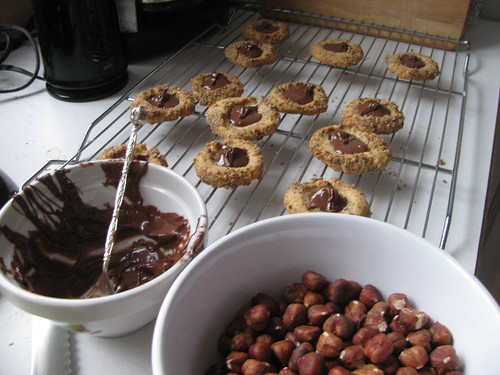
Start with roasting the hazelnuts: I got a bag of shelled hazelnuts in the bulk section and spread them on a pan and broiled them until they were toasted. I used about 1 1/2 cups. Next, put them in a little food processor to chop them into little crumbs. (As it turns out, I'm hearing that most folks peel the skin off the nuts when they roast them - I didnt do this and think they taste fine, particularly with such a sweet cookie. I'm also finding that the skins are actually better for you - does anyone know why the norm is to peel them?)
Next, the dough:
Into the bowl of a mixer, beat until creamy a stick of butter and ½ cup sugar until it starts to get fluffy (I skipped the step of waiting to bring it to room temperature, but it didn't seem to matter - this helped too with not having to wait to chill the dough later)
Separate out 2 egg yolks, saving the whites in a smaller bowl for later use, and add the yolks in.
Add 1 tsp. vanilla
Then add 1¼ cups all-purpose flour,
1/8 tsp. coarse salt
and ¼ tsp. baking soda slowly until combined
Preheat oven to 325° F and line two baking sheets with parchment paper.
In a shallow bowl, mix the chopped hazelnuts with about 2-3 Tablespoons of sugar (to taste)
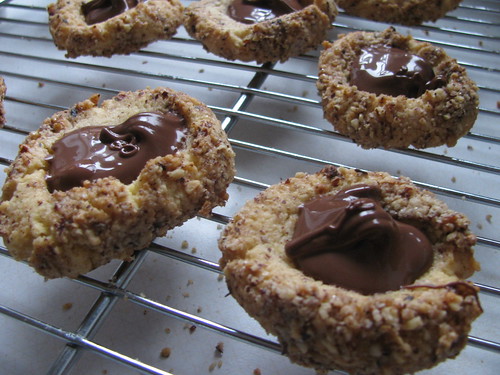
Roll the dough into small balls and then dip in the whites and then roll them in the nut mixture before placing them on the parchment with about an inch of space between them.
Squish a little hole in the center of each dough-ball to make a depression with a finger or little spoon, then bake for 10 minutesat 325° F
Remove and using a small spoon, squish the hole again, as it will grow a little bit puffy, before returning to the oven for another 10 minutes.
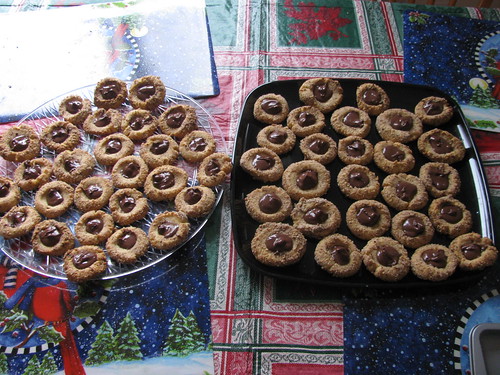
Allow them to cool a few minutes then move them to a rack, fill with a spoonful of Nutella. (Microwave at 30 seconds to get the chocolate stuff melty and runny)
Throw them in the fridge for a bit to let them set a bit, but these are going to be goopy even cooled.
This site is a gem ! An asbestos gas warmer from 1896, a DIET bread with 9 eggs and 1 1/2 cups of sugar; cookies with citron - you figure out how much flour.
I get a lot of books from publisher, most of which I don't post about, but I received one today that I really like.
Biscotti: Recipes from the Kitchen of The American Academy in Rome, The Rome Sustainable Food Project comes out in a week or so. It is a little book but contains a really nice selection of cookie, biscotti, and meringhe recipes. There are a nice range of recipes, everything from basic sugar cookies to fava bean cookies, and while a few require ingredients that I don't keep around the house (fava beans, pine nuts), none of them that I've looked at strike me as terribly complex or inaccessible.
What else. The photography and typography are nice, the paper feels nice, it is just... a really lovely little book, one that feels more expensive than the thirteen bucks you can pick it up for right now. It'd make a nice, inexpensive gift for anyone you know who likes to cook and bake but hasn't yet caught the bread bug.
I've not baked any of the recipes from it yet, but I shall soon.
I was in Ireland a couple of weeks ago, where the caramel squares are available everywhere. We had one very memorable variation, which had a rather dry filling, almost like a peanut butter filling texture, but without the peanutbutter, I think. All the other varieties had gooey caramel. For those who have never had them, they are a shortbread base with a layer of caramel over them, topped with melted chocolate.
Very delicious, and having come home to make the gooey variety, I would like to find the dry kind. Anyone have a recipe?