The Fresh Loaf

A Community of Amateur Bakers and Artisan Bread Enthusiasts.

cold ferment

Justkneadit's picture
Justkneadit

After my sourdough boule disaster this past weekend, my bake with baguette a l'ancienne recipe boosted my confidience a smidgen...

and...

and also some crumb...

Now, it doesn't have deep open crumb the size of the Grand Canyon like DonD, txfarmer or Ian, but it is an improvement and I'll take it. I followed the same recipe as last week except:

  • No rye and a full 500g of KAF AP
  • 26 hour autolyse and 26 hour fridge proof
  • Minimal handling, flipping board would help immensely

The crust was thin but crunchy and the crumb was creamy and fantastic! I swear it almost had a hint of butter. My girlfriend actually woke up at 6 am when they came out of the oven, grabbed half a baguette, muttered delicious and went back to bed. I laughed. Any comments or critiques feel free!

Ian,

Amazing the difference between the 12 and 24 hr  cold autolyse.

wassisname's picture
wassisname

Back to basics in my quest for a whole wheat sourdough that doesn't take over my weekend or keep me up half the night.

The method this time is about as conventional as it gets, except for the long, refrigerated pauses.  Some of my previous attempts were so far from my usual routine that simply getting my head around them was a chore, and the bread suffered as a result. My brain will only put up with so much! 

The guiding premise of this attempt did turn out to be "less is more".  The dough sits around for so long that it tends to get worn out by the time it goes in the oven.  So, this batch was subjected to less kneading, less bulk ferment time at room temperature and less final proof time.  And it feels like I'm moving in a better direction.  It's not perfect, but it's something worth tinkering with.

This formula is for 2 loaves - approx. 2 kg total final dough.

Day One - starter build

286g whole wheat bread flour

50g whole rye flour

252g water

110g whole wheat starter @ 75% hydration

Mix everything, knead for 5 min.  Ferment @ room temp (65F) for 12 hrs, then refrigerate 10 hrs.

Day Two - final dough

700g whole wheat bread flour

525g water

All of the starter

2 ½ tsp salt

+20g water for kneading

Mix flour and water. Autolyse 20min

Add starter and salt, knead gently with wet hands 7-8 minutes.

Bulk ferment 1 hr at room temp. then 21 hrs in refrigerator.

Day Three - proof and bake

Flatten out the dough and let it warm (covered) 1hr at room temp.

Divide and shape.

Proof  1 ½ hrs at approx 75F.  Preheat stone to 500F.

Bake 475F 15minutes - 10 minutes covered to steam.

Bake 425F another 40 minutes.


Next steps -

Leave out the rye.  As much as I love a little rye in everything I fear that it may be working against me in this case.  Maybe my reasoning is off, but I'm trying to protect the dough during its long, cold fermentation and rye generally encourages more fermentation, right?  We'll see.

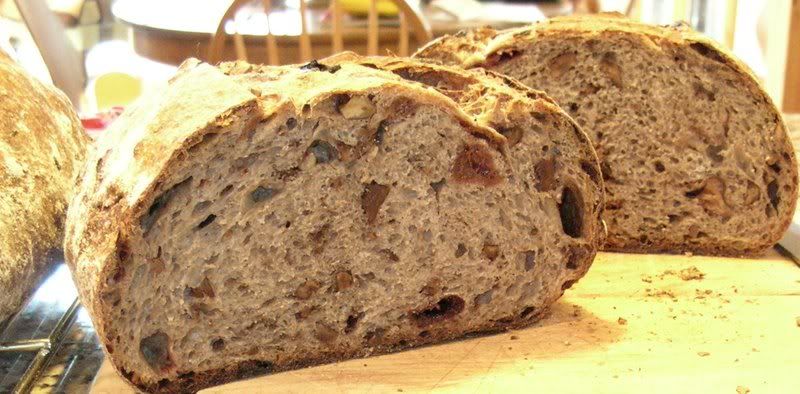
Lower slower bake.  The bread is a little dense and takes while to bake through.  It improves considerably after a day or two on the counter, which makes me think a little more oven time could help.  I'll keep the hot, steamy start then drop the temp a little more and bake a little longer.  I'll give it a bit of drying time with the oven off as well.

I think that will be enough tinkering for one bake.  Except maybe I'll also try... =) 

Side experiment - photos below

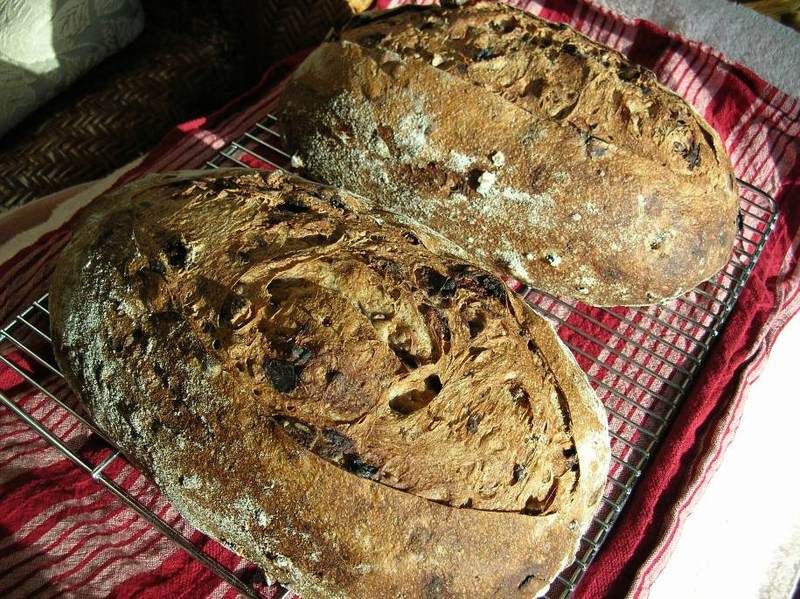
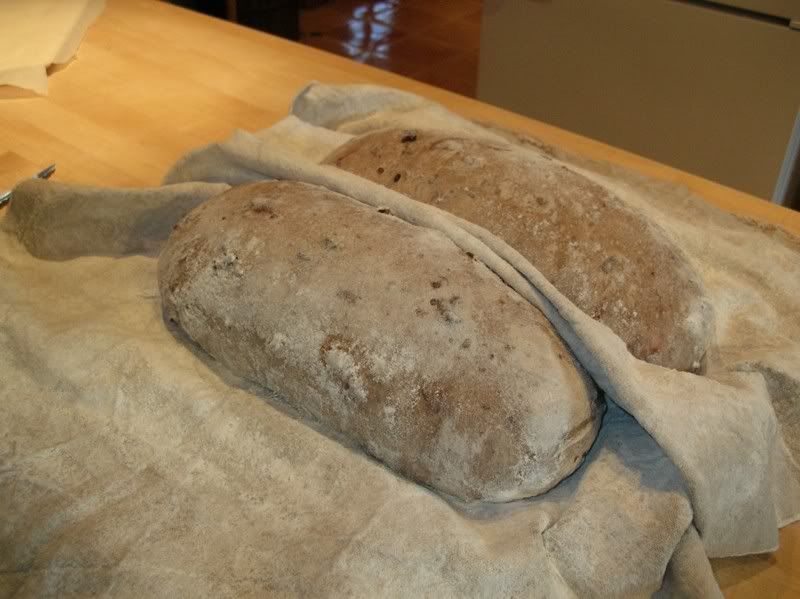
As I was shaping the first loaf  I decided to try something different with the second.  The loaf  on the right was shaped in traditional  batard fashion:  flattened into a rectangle, long ends pulled to the middle, then folded in half.  The loaf on the left was shaped along the lines of the boule method described in dmsnyder's excellent tutorial.  I gave it three foldings instead of one (not because I thought it would be better, but because I couldn't quite remember how it went, I just knew there was folding - now it is locked in my brain for next time!) and then gently coaxed it into an oblong shape.  There was no visible difference while proofing, but when they hit the oven they sprang very differently.  The boule shaped loaf clearly tried to return to its original shape, resulting in what I think was a better spring and a more attractive final loaf.  Thank you David!

Marcus

KitchenCrazed's picture

Baguettes for breakfast

January 20, 2010 - 9:06am -- KitchenCrazed

I recently got Peter Reinhart's Crust and Crumb and as always have thoroughly enjoyed reading his relaxed and expert advice on baking all types of bread.

My wife loves good bread and jam for breakfast so I thought I would make some baguettes using the French Bread master formula from the book that we could have for breakfast a few days ago.

It was the first time I had cold retarded dough and won't be looking back. In terms of the quality of the crumb and the chewy crunchiness of the crust these are definitely my best baguettes so far.

mountaindog's picture
mountaindog

I've always liked the walnut raisin pain au levain Dan Leader sells at Bread Alone Bakery near me, and I've been wanting to try something like this for awhile and finally got around to it this week, but with cherries and pecans.

Both Susan's yeasted version on her Wild Yeast blog and SteveB's version on his Bread Cetera blog gave me a craving for cherry pecan bread when I saw their photos....thanks for the ideas you two, your baked goods are so mouthwatering and professional looking...(I am unworthy of breadblogging in the same sphere as you two!)

I made this as a sourdough-only version and mixed about 30% whole wheat and 2.5% rye with AP flour. This mix gave a nice dark-colored but light-textured open crumb that tasted good with the fruit and nuts. You could obviously substitue rasins and walnuts, or anything else you can think of. I find it especially tastes great sliced, toasted, and served with cream cheese, and lasts a long time.

I soaked the cherries for a bit too long as they were a little too mushy and a some color washed out, but the bread tasted great, I'll be making this again a lot I think. It was very easy.

Here are the loaves just before slashing and loading into the oven, after their overnight cold retarding:

Here's the formula:

Pecan Cherry Pain au Levain

Makes 2 large 2.5 lb batards or oblong loaves.

Levain Build

% flour of levaingrams
starter (100% hydration with WW flour) 32.1% 45
warm water 85.7% 120
All-Purpose flour 100.0% 140

Final Dough

% flour final doughgrams
All-Purpose flour 66.4% 750
100% whole wheat flour 31.0% 350
100% whole rye flour 2.7% 30
flour subtotal 100% 1130
 
warm water 69.5% 785
sea salt 2.0% 23
ripe levain 27.0% 305
dried pitted sour cherries, soaked   240
toasted pecans   240

1)  12 hours before making final dough, create the levain using some ripe starter that has been fed and doubled. Mix well and cover in bowl until levain has risen to over double but has not yet begun to collapse, aprox. 10-12 hours at 65-70F. Toast the pecans at 350F for 10-20 minutes and let cool, then coarsly chop and set aside. Soak dried sour cherries in water overnight and strain next morning before making final dough.

2)  When levain is ripe, create final dough by mixing warm water with levain to dissolve. Mix all flours and salt in large bowl until evenly distributed, then add watered levain to flour mix with dough whisk, spoon, or hands until well combined. Cover and let rest for 1 hour at @ 70F. Tip dough onto counter, knead in the cherries and pecans lightly, and french fold for approx. 10 minutes with short 1-2 minute rests as needed to scrape together dough or relax it, and tuck in the fruit/nuts. The cherries and pecans may fall out and it will be quite messy at first, but eventually the dough will come together into a neat lump after 5-6 minutes or so. At end of kneading, round out the dough so that fruit/nuts are tucked inside and good skin of dough is on outside. Place dough in lightly oiled container and cover to rest for 30 min. After 30 min., turn out dough onto lightly oiled counter to give it one good gentle stretch and letter fold, then place dough back into oiled covered container. Repeat one more stretch and fold after another 30 minutes, then let dough continue to rise until doubled at @ 70F (approx. 2 more hours).

3)  Shape dough into 2 batards, place batards in floured couche, cover well so loaves don't dry out, and let loaves cold proof overnight at 40-50F for approx. 8-10 hours. Next morning, place loaves in warmer area (65-70F) while oven preheats for 45 minutes to 450F. Bake loaves on oven stone with steam (I pour 1 cup hot water from tea kettle into pre-heated cast iron pan on oven floor) at 450F for 15 minutes, then turn heat down to 400F for another 30-35 minutes until center registers 200-205F with instant read thermometer and crust is well-browned.

On a slightly different note: my last few batches of bread have been coming out smelling and tasting better than ever, I think it may just be this new flour I was able to pick up in a 50lb bag from Bread Alone Bakery down the road from me. It is an All-purpose flour from Canada with 11.5% protein, not sure about ash content. Anyone ever used or heard of this Oak AP flour before?I like it a lot. It handles nicely in dough.

tgw1962_slo's picture

cold ferment

January 8, 2009 - 6:47pm -- tgw1962_slo

Hello,

I just recently read about putting the starter in the refrigerator for overnight or up to 21 hours prior to adding into dough. This long refrigeration supposedly retards the fermentation process and helps add flavor.

Does anyone know about the validity of this process...?  I've heard about putting starter or dough into the refrig to slow down fermentation. But its the first time I've heard that this actually helps improve flavor.

If anyone can confirm this, I'd appreciate knowing. Thanks.


Tory

Subscribe to RSS - cold ferment