The Fresh Loaf

A Community of Amateur Bakers and Artisan Bread Enthusiasts.

Clay Baker

wayne on FLUKE's picture
wayne on FLUKE

I just made the Tartine Country Bread for a second time. I do not have a combo cooker and thought I would share my results with alternatives.

Both times I followed Chad's recipe and process carefully, but was afraid to add all the additional water the first attempt so used about half. The first attempt I did final proof in a colander lined with floured towel, pre-heated oven with Fibrament stone and baked in 8" cake pan with stainless "magic" bowl to hold in moisture. This worked OK, and had good oven spring and slashes (square pattern) opened nicely. Crumb was not as open as I hoped based on the oven spring.

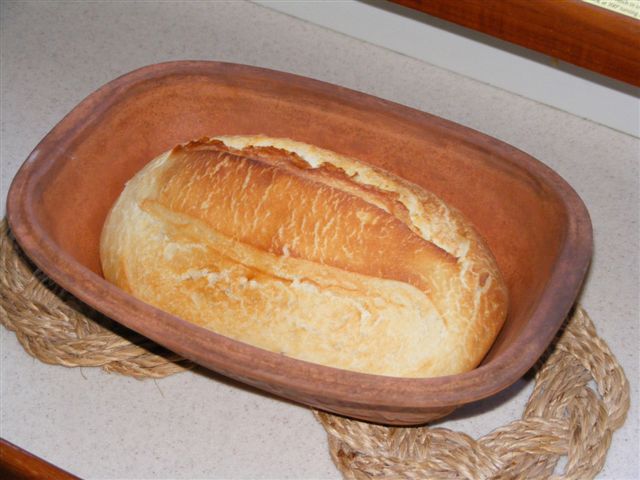
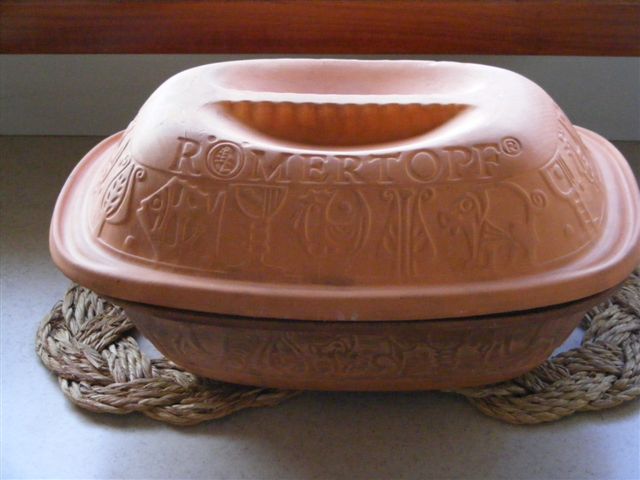
For the second attempt, I decided to try my Romertopf #111 Clay Baker. I did add all the extra water and I proofed the first loaf in the clay baker and baked starting in cold oven. Since the dough is pretty slack it spread to take the shape of the clay baker in spite of my attempt to shape with good surface tension, but had nice spring and I removed the cover after 30 min (450) and baked another 25 min which gave pretty nice color.

The second loaf was retarded in floured towel in oval wicker basket (in refer inside plastic bag) for about 6 hours to fit my schedule. I let sit on the counter for about an hour before transfering to the clay baker and baking starting in cold oven. The transfer was not as smooth as I hoped as it landed a bit sideways, but I left it alone and slashed it, one long slash which again was not perfect, but I resisted the temptation to mess with it.

Again uncovered after 30 minutes. This loaf had great oven spring and since it didn't have time to settle down into the baker it was a much more attractive shape and the slash opened and created a fantastic ear. Almost as nice as some of David's (dmsnyder) :-). Really! Both loaves had nice blistered crust.

This loaf was taken to a neighbor's for dinner and served with seasoned olive oil dipping sauce. It was a big hit! Proudest moment for a home baker is to have others compliment the results.

To summarize, best results were from proofing in basket and baking in clay baker (cold oven). I will now try this technique with Teresa's Basic White Sourdough using 100%Hydration Starter

wayne

wayne on FLUKE's picture
wayne on FLUKE

This has been a day of firsts.

  • Actually started last night by making the sponge for my "Wayne Thomas's English Muffins" and leaving it in the fridge overnight for first time.
  • Finished and cooked the muffins this morning, they look great.
  • Decided to try the #111 Romertopf clay baker (that my wife scored at a local thrift shop a couple of days ago for $6 !!) for the first time so I made a simple white bread from a recipe on http://www.fantes.com/romertopf.html called One Perfect Loaf.
  • This resulted in the first real "ear" I have managed to get (at least from one of the two slashes). I have started to slash with the double-edged razor on kabob stick thanks to this site. Some work still required.
  • I decided all these firsts were worth my first blog post.

I hope this tastes as good as it looks. It was far and away the most oven spring I have had. As soon as the bread cools I'll get a crumb shot and then post the pics. I imagine some would say this should be a little darker. I agree, but the wife likes it this way for sandwiches. Also, I am baking this in an anemic gas oven on our boat. I followed the recipe as far as soak bottom, proof in bottom, soak top, place in COLD oven. After removing the top for the last 5 mins, I realized it was never going to brown (always a problem in this oven) so I stuck it in the microwave/convection on broil for a few minutes. I think next time I'll remove the top sooner, as it was still moist inside after 45 mins (at an attempted 450+).

Comments and suggestions always welcome. Love this site.

wayne


Mini Oven's picture
Mini Oven

Ready in 3 1/2 hours?  (Make it longer if you wish, use 1/2 teaspoon of yeast, add salt & caraway and use cold water to make it rise slower.)

Wheat shaped form ... White Bread   crusty

  • 450g hot water (you can just manage to keep a finger in it)
  • 7g instant yeast
  • 650 g Wheat flour (250g AP, 400g Bread flour)
  • 1 1/2  to 2 teaspoons table salt
  • 1/2 teaspoon ground caraway
  • olive oil for bowl & form

Pour hot water into a large 2.5 ltr. mixer bowl and sprinkle with yeast.  Add the flours and stir until all the flour is moistened and a shaggy dough has formed.  Cover and let stand 2 hours or until the dough has risen up to the cover.  Remove cover and scrape out dough onto a lightly floured surface.  Sprinkle with the salt and caraway.  Fold or roll up the dough and knead to blend for about two minutes.  Shape into a tight ball and cover with the bowl.

Soak top and bottom of a Clay form (total volume 2 liters) 10 min in warm water.  Allow to drip dry and surface water to absorb, one minute.  Smear inside with olive oil.  Re-shape and tighten dough to form a loaf.  Rub with oil and place into bottom form.   Oil the inside of cover and place over dough.  Set in cold oven for 15 minutes.   Turn on oven to 225°c  (440°F) on Hot air (convection) and time for 45 minutes.   Remove form and brown loaf another 5 minutes in hot oven on rack.   Cool on rack for 15 minutes and serve warm with bread knife on cutting board. 


I was given this form for Christmas without any instructions.  As you can see the ingredients add up to just over a kilo of dough, about the right amount to fill this two liter volume form.  The loaf crust is very crunchy and thick.  The crumb slightly chewy and tender.  I removed the top for the last 5 minutes of baking but wished I had removed the whole form to let the bottom brown more as well.   Slices are almost round and crumb is fine.  The oil in the form adds to an almost buttery flaky crust.   This loaf was sliced warm.

Mini


Subscribe to RSS - Clay Baker