The Fresh Loaf

A Community of Amateur Bakers and Artisan Bread Enthusiasts.

Ciabatta

jarkkolaine's picture
jarkkolaine

After making my first yeast water bread, I discarded most of the yeast water, leaving about two table spoons, added a big handful of raisins and a table spoon of honey, and then filled the jar about two thirds with water. I’m not sure if this is how it’s usually done, but it worked very well: In a couple of days, the mixture had developed a very fruity and inviting smell with lots of bubbles.

I wanted to drink the liquid but resisted and started a new bread dough instead.

Following the lead of Ian and others, this time it was time to mix in some of my sourdough starter to play with the taste a bit. I was hoping to make a boule quite similar to the one I had made the first time (and usually love to make), but because of some mistakes in calculating the proportions of water and flour (I forgot to account for the water in the starter!), ended up with Ciabatta—which was actually good, as we were just about to leave on a two day trip to Tallinn, and Ciabatta makes delicious picnic sandwiches…

Anyhow, here’s the recipe. 

First build of YW starter: (evening)

  • 60 g Yeast water
  • 60 g White flour

Second build of YW starter: (about 8-10 hours after previous step, I forgot to time everything properly…)

  • All of the starter from previous step
  • 200 g Yeast water
  • 200 g White flour

Final dough: (About 4 hours later, in the afternoon)

  • 400 g YW starter (which at this point looked a lot like a regular poolish starter)
  • 100 g Sourdough starter (100% hydration, refreshed the night before)
  • 750 g Fine, rather white spelt flour
  • 700 g Water
  • 20 g Salt

The dough was quite wet, so I gave it an autolyse (it was only about 15 minutes, as I was itching to get my hands in the dough) and worked it for 20 minutes on the table.

After that, the dough rested for 4 stretch and folds at 30 minute intervals. Then I cut pieces of the dough and let them rest on a heavily floured couche for about an hour or so as the oven heated up. I baked the breads on a baking stone for 35 minutes.

...And here’s what came out from the oven:

I am very happy with the resulting flavor:  I can’t say I taste any of the fruit anymore, but it’s a little sweet, not really sour at all. And the boys liked it (filled with some salami, cheese, boiled eggs and cucumber):

Let’s see what happens next time, as the yeast is now feasting on some fresh fruit… (And looks and smells more and more like a drink! I might have to start making cider or something, soon ;))

mwilson's picture
mwilson

I made an enormous ciabatta weighing nearly 1 kilo. I used an 18hr-fermented biga starter and a combination of medium and weak flours. This thing was massive!

Biga:
400g '00' flour from Shipton Mill
160g cold water
1.3g Instant yeast

Final dough:
Fermented biga
320g cold water
200g plain flour (9.4% protein)
24g Extra virgin olive oil
12g Non-diastatic malt powder
12g Salt
2g diastatic malt powder 

olive oil for S&f.

Method:
To make the biga, first weigh all the ingredients. Put flour and yeast in the mixing bowl and turn on the mixer adding water gradually to form breadcrumbs and let run until you get a dry dough. Roll out the dough and fold up. Cover and leave overnight at cool room temperature for 18hrs.

Next day weigh all ingredients and cut the biga into pieces. Mix biga and 150g of water until combined. Then add flour, malts, salt and mix adding the rest of the water in stages. Once the dough begins to clean the mixing bowl add the olive oil and finish the mix to achieve a satin-smooth, slightly sticky dough.

Place dough in a well oiled flat and wide container. Cover and rest. Stretch and fold the dough at 20 minute intervals until the dough almost doubles in size. Rest for 20 minutes before shaping business letter style. Roll shaped dough in flour, give it a final dust of flour and leave to proof until doubled in size. Stone-bake with steam.

I had to shape and proof the dough very carefully being so huge already and not having a very big oven, stone or proofing tray/peel.

Baked ciabatta dimensions: 15"x9"x4.5".

Crumb - open and very, very light.


Probably one of the best ciabatta's I ever made. Subtle and moreish in flavour. Perfectly chewy and shreadable in texture.

Felila's picture

Ciabatta with coconut milk

June 14, 2012 - 6:06pm -- Felila
Forums: 

I started with my old reliable, a ciabatta recipe from this site, but made it with more white bread flour than whole wheat. I replaced the mix of water and olive oil with coconut milk and one egg. No water at all. The dough was extremely soft and supple; I nearly decided to add more flour. It ended up being three-day bread. One evening I started the poolish; the next day I mixed the dough and did two stretch and folds; I retarded the dough overnight and shaped it into two batardes the next day. 

dabrownman's picture
dabrownman

We haven’t made SD ciabatta in a long time and wanted to make one that included some YW in the levain, had some semolina, rye and WWW for flavor while using mostly AP and a little bread flour for the rest of the dry.  We added some VWG to up the gluten of this dough and improve its crumb.  We also took some of our standard pizza dough ingredients; the mix of herbs, garlic and sun dried tomato and added them with some chia seeds.

 The crust came out nicely browned and crunchy and softened as it cooled.  The crumb was open, soft,glossy and moist.  The herbs, garlic and sun dried tomatoes came though but were not over powering.  The SD tang was there in the background but it was subdued due to the YW and no retarding of the dough or starters to bring out the SD flavor.  We didn’t do two separate levains this time but mixed the YW right into the SD starter from the beginning.

 This might well be the best tasting ciabatta we have ever made – just delicious!


 It looks to be some fine sandwich bread for paninis by putting the crust of the bread on the inside and grilling the inside of the bread on the outside of the sandwich. Formula and Method follow.  Here is a nice beer can chicken sandwich with lettuce and Amish Swiss, chips, berries and some salad and a chocolate sandwich cookie. 

Method

Make the YW and SD levain in 3 stages each 4 hours apart for a total of 12 hours.  The levain will triple in volume

The next morning autolayse the flour with the water for 1 hour in the mixer bowl.  Add the levain and knead with dough hook on KA 8 for 8 minutes or until the dough releases from the bowl.  Add the salt and chia seeds and knead on KA 8 for 1 more minute.  Place in a well oiled plastic covered bowl for 15 minutes.  Do 4 S & F’s every 15 minutes in the bowl.  Add the herbs garlic and sun dried tomato and do 2 more S & F’s.  Let ferment and develop in a well oiled bowl until the dough at least doubles.  This will take about 3 hours

Turn out onto a well flowered counter, shape into (2) 8”x14” rectangles with an oiled dough scraper, dimple top with fingers, spray top with oil and cover with a dusting of flour and plastic.  Let rest 60 minutes.

After 60 minutes, preheat oven for 45 minutes at 500 F regular bake with steam and stone in place.  With 2 dough scrapers, transfer ciabatta to a floured parchment paper on a peel by flipping in over at the same time.  Reshape as necessary.  Slide onto stone and steam for 6 minutes.  Remove stream, turn loaves 180 degrees and bake another 6 minutes at 450 F convection this time.  When the internal temperature reaches 205 F it is done but not finished.

Turn off oven, leave door ajar and bread on the stone for another 8 minutes to crisp the ciabatta crust.  Move to a cooling rack to cool to room temperature.

Semolina, Rye and WWW Ciabatta w/ Chia Seeds, Herbs and Sundried Tomato      
       
Mixed Starter    Build 1    Build 2    Build 3     Total      % 
SD Starter2500253.69% 
Yeast Water30100408.00% 
AP55506016516.00% 
Water25354010016.00% 
Total Starter1359510033066.00% 
       
Starter      
Hydration74.65%     
Levain % of Total24.54%     
       
Dough Flour        %    
Rye255.00%    
Semolina20040.00%    
White WW255.00%    
Bread Flour8016.00%    
AP17034.00%    
Dough Flour500100.00%    
Salt102.00%    
Water500100.00%    
Dough Hydration100.00%     
       
       
Total Flour677.5     
Total Water632.5     
T. Dough Hydrat.93.36%     
       
Hydration w/ Adds92.67%     
Total Weight1,345     
       
Add - Ins        %    
VW Gluten51.00%    
Chia Seeds204.00%    
Total255.00%    
       
 Herbs and Veggies     
1 Clove Garlic      
1/2 T Garlic Chive      
1/2 T Rosemary      
1/2 T Sage      
1 T Sundried Tomato    


mwilson's picture
mwilson

Flavoured Ciabatta made using traditional methods. Suitable for sandwiches.

Traditional Biga - left to ferment for approx 15hrs at cool room temp.
300g '00' Flour, medium strength
150g cold water
1.1g Instant yeast

Final Dough - kept warm at 28c.
420g Biga
70g '00' Flour, medium strength
4g Malt Powder
7g salt
140g water
28g good quality extra-virgin olive oil.
sun-dried tomatoes to taste

Method
Mix biga by hand using downward pressure to a smooth, dry dough. Leave at room temp overnight for about 15hrs.
Next day, cut the big into pieces add malt powder, flour and an equal amount of water. Mix until smooth. Continue mixing adding the remaining water in stages.  Add salt with the last of the water. Finally add the oil and mix to full gluten development before folding in the  tomatoes.

Place dough in a well oiled flat and wide container. Leave to rise at warm temp (~28C). Stretch and fold at 30 min intervals until the dough is strong enough to sit high. Wait until almost double in size (~3hrs) before dividing in two.

Leave pieces to rest for 20 mins before shaping like a business letter. Dust with more flour and proof until double with cracks in the flour (~2hrs)
Bake.

Proofed:

Total dough volume is approx 4 times that of the mixed dough.

Baked:

Oven spring was great as with any well made ciabatta, rising vertically, swelling like a balloon. 

Crumb:

Extremely soft and porous crumb.


Michael

Isand66's picture
Isand66

The last time I made Ciabatta I made a sourdough version that came out quite good.  In my never-ending quest to try to create something new and hopefully great tasting I came up with the concoction below.

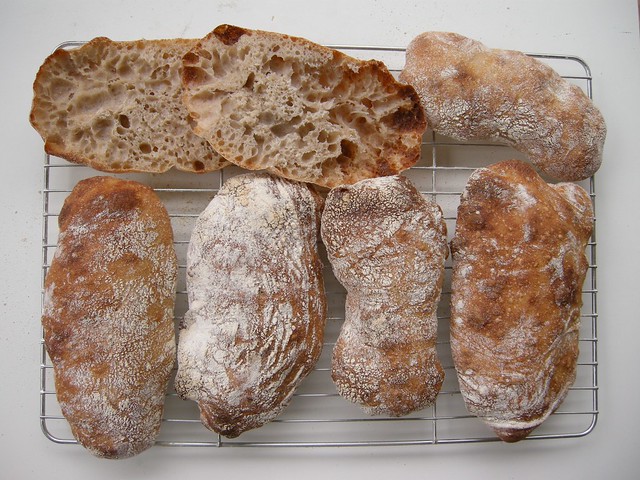
I decided to go with a straight forward yeasted version of Ciabatta but I wanted to get more flavor in the final product.  I happen to love onions, so I figured why not add some carmelized onions and to get some stronger wheat and nuttiness flavor in the bread I decided to use some spelt and rye flour along with a low protein French style flour from KAF.  This combination resulted in by far the best Ciabatta bread I have ever made or tasted in my not so humble opinion :).

I followed the standard operating procedures from Peter Reinhart's Artisan Breads Everyday for the Pain a L'Ancienne Rustic Bread and modified the ingredients as mentioned above.  The only thing I would change maybe is to add some cheddar cheese next time which would really put this one over the top.

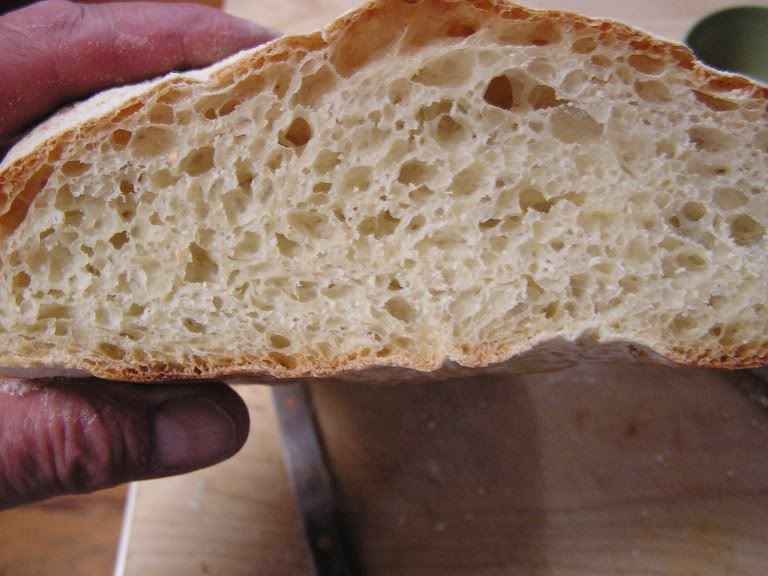
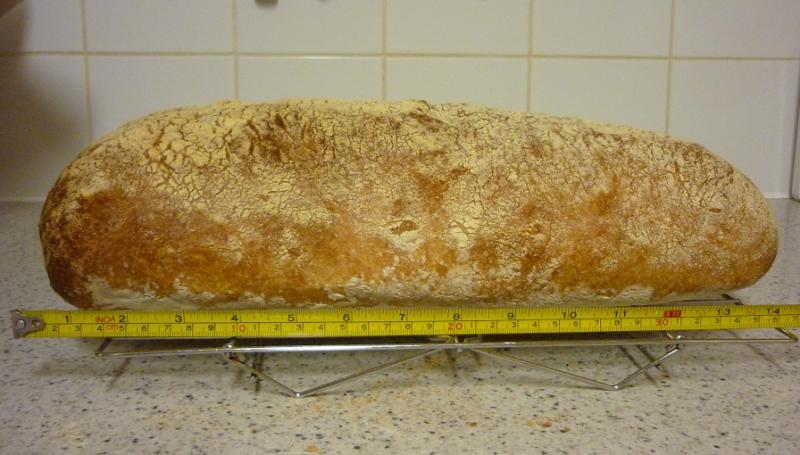
You can really taste the onions and the rye-spelt mixture and the open crumb was nice and moist.

If you give this one a try I would love to hear what you think.

Here are the ingredients and procedure I followed:

Ingredients

13 oz. KAF French Style  Flour (you can use All Purpose if you don't have French Style)

4 oz. Medium Rye Flour

3 oz. Spelt Flour

16 oz. Ice Cold Water (55 degrees F.)

0.4 oz. Salt  (1 3/4 Tsp.)

.14 oz. Instant Yeast (1 1/4 Tsp.)

1 Tbs. Olive Oil

17.5 oz. Carmelized Onions

Directions

Cut up half of a medium size sweet onion and saute for 5-8 minutes on medium low in a frying pan or bake on a sheet pan in your oven.  Let the onions cool before adding them to the dough.

Add all the ingredients into the bowl of your mixer except the onions and stir for 1 minute on the lowest speed. The dough should be rather sticky and rough at this point. Let it rest for 5 minutes in the mixer bowl.

Add the cooled onions and mix on medium low using your paddle attachment for one minute. In my case I have a Bosch which only has one mixing/kneading attachment. The dough will still be very sticky but should very soft and much smoother. Transfer the dough to a lightly oiled bowl using a dough scraper or spatula. Cover the bowl and let it rest for 10 minutes.

After 10 minutes transfer the dough to a lightly oiled work surface. Make sure you oil your hands and do a stretch and fold on all sides of the dough and flip it over and form it into a ball. Put the dough back in the bowl and let it rest for another 10 minutes at room temperature. Do this stretch and fold process three more times over the next 30 to 40 minutes. You can do the stretch and fold in the bowl itself if you prefer. I personally like to do it on the counter.

After you do the last stretch and fold put it back in the bowl and cover it tightly and refrigerate overnight or up to 4 days. The dough should rise to almost 1 1/2 its size in the refrigerator.

Take the dough out of the refrigerator at least 3 hours before you plan to bake and let it sit at room temperature.  Around 1 hour after taking the dough out of the refrigerator, place a large piece of parchment paper either on your work area or the back of a baking pan and dust with flour to cover it completely. Using an oiled or wet dough scraper gently remove the dough to the work surface. You want to be very careful so you don't degas the dough and kill the big air holes you want to achieve.

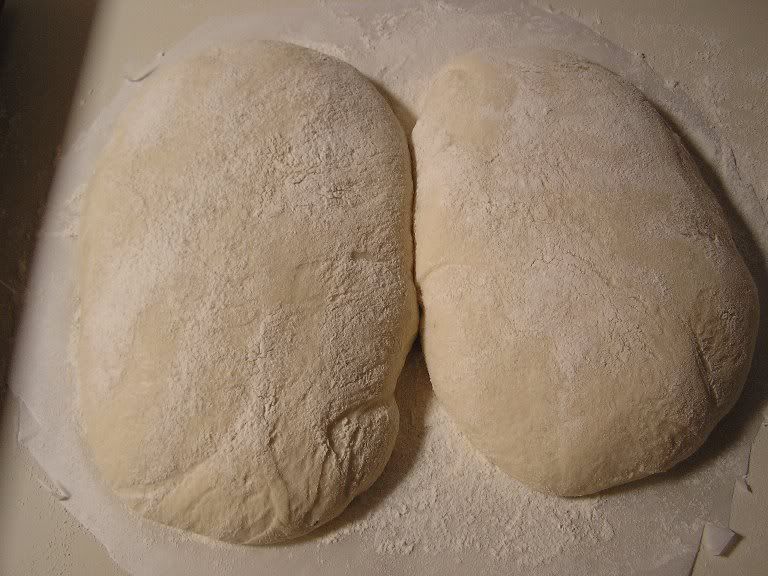
Flour your hands and lightly dust the top of the dough. Use your hands and a metal dough scraper and form the dough into a 9" square and be very careful again not to manhandle the dough and degas it.

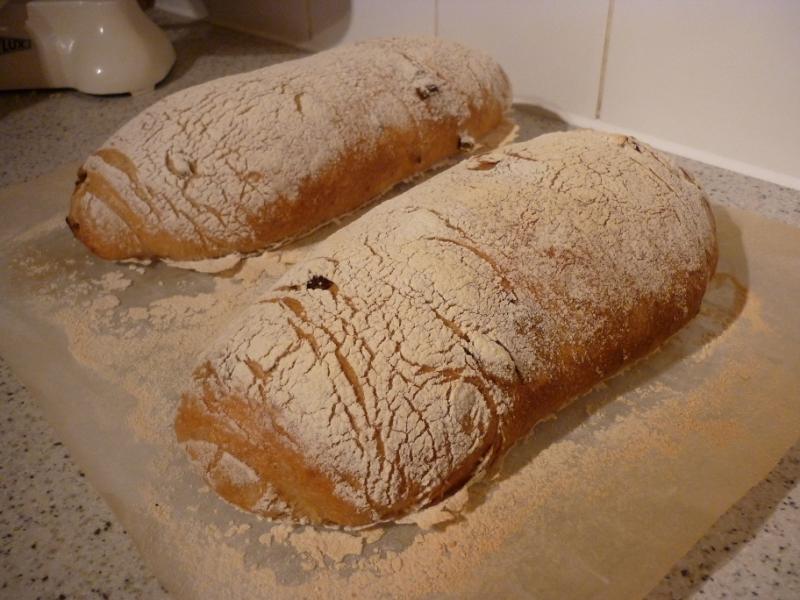
Next, cut the dough into either 3 small ciabatta or 2 larger size loaves. I opted to go with the 3 smaller size ones.

Gently fold the individual dough pieces into thirds like an envelope. Make sure to be very careful and not to apply any pressure. Roll the folded dough in the flour to coat it and lift it onto the parchment paper and roll it in the flour again. Rest the dough seam side down and repeat with the other piece(s) of dough.

Spray the tops of the dough with oil (I use a baking spray) and cover the pan with plastic wrap very loosely. You can also use a clean lint free kitchen towel.

After 1 hour of resting, roll the dough pieces very gently so the seam side is now facing up and lift them with your floured hands to coax them into either a 7" rectangle if making the larger size or 5" rectangle. Try to get them to be as close to a rectangle shape as you can when you put them back down on the parchment paper.

Let them rest covered loosely again for 1 hour.

About 45 minutes before baking, pre-heat oven with baking stone (I use one on bottom and one on top shelf of my oven), to 550 degrees F.

Place an empty pan in bottom shelf of your oven or a cast iron skillet.

Pour 1 cup of boiling water into pan and place loaves into oven. I also spray the side walls of the oven with water 2 to 3 times for added steam.

Lower oven to 450 Degrees and bake for 12 minutes and rotate the bread and bake for an additional 15 to 20 minutes until bread has a nice golden brown crust and the internal temperature reaches 200 degrees. The bread should have puffed up a little and should be hard when you tap it.

Let it cool on a wire rack for 45 minutes (good luck waiting that long!) and enjoy!

The bread should have nice large irregular holes and should be soft after cooling.

This post has been submitted to the Yeast Spotting Site here: http://www.wildyeastblog.com/category/yeastspotting

suzyr's picture
suzyr

This is in reference to Chef Reinhart's Ciabatta with Biga.  I think what helped me was to re-read the directions time and time again. And to watch different videos. I feel it was successful...thank you Chef.


Pages

Subscribe to RSS - Ciabatta