Never give up!
It has been a while since we last made a white bread that didn’t have some outlandish concoction of ingredients to make it healthier than your average slimy white slice. So we toned this one down as it is meant for the wife’s daily bag lunch.

She is more traditional in her love of Oroweat Whole Wheat Bread to contain her sandwich fillings but we also wanted a bread that we could be sure to deliver some real whole grain goodness, wheat taste, extra light sourdough flavor, not too sweet, a soft, moist, yellowish, open crumb and a nice dark brown chewy crust once the bread cooled.

We hoped that our whole grain combination yeast water and sourdough starter in conjunction with soft white wheat (home ground), durum atta and WWW and the semolina, wheat germ, malts, bread and AP flour in the dough would provide what we were looking to get bread wise at the end of the day.


A little honey would supply a hint of sweetness and the whole soft white wheat berry soaker would supply some extra crumb texture and bite that we like so much. We also used some yogurt whey water, from earlier Greek yogurt making this week, for part of the liquid trying to enhance the sour taste. All together it is a simple white bread easily prepared that is fun to; make, bake, admire and devour.
 \
\
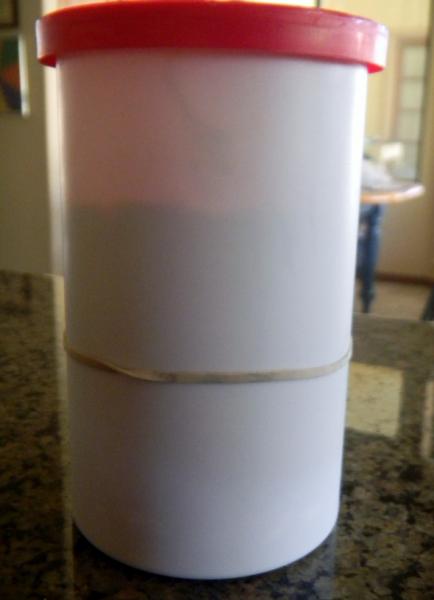
This was the original move from bamboo couche to the floured basket - not horrible so far. Then 4 hours later in the fridge the whole time..... and the oven wasn't even preheated .......

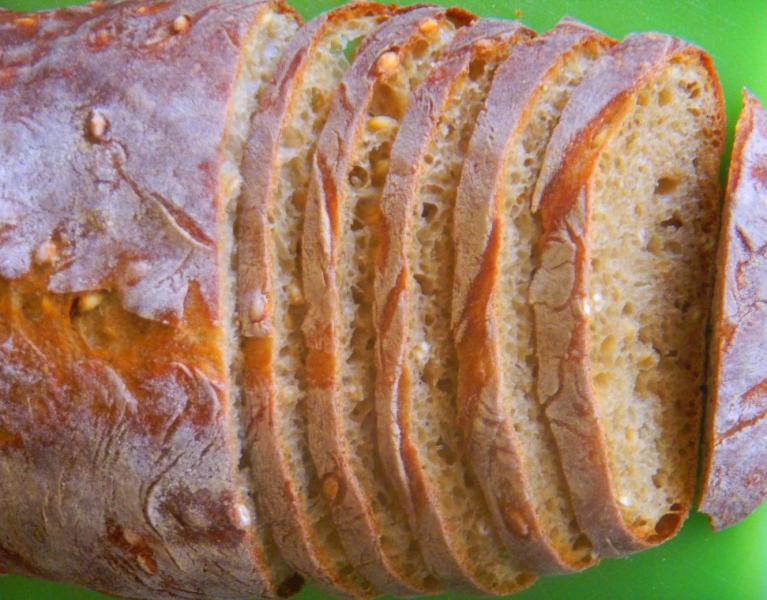
This is a fine everyday eater and we got what we mostly desired along with a great wheat taste. We were surprised how balanced the taste was between wheat and sour. We loved it crumb color too. It is delicious bread that is perfect for everyday lunch sandwiches of all kinds.


We also got to use our bamboo double barrel batard couche that has been unloved for some time but we only used one barrel for this1,126 gloaf that is 35% whole grains, 74% hydration and where the levain is 30% of the total weight except……..

That is not what happened!
Well, that was the way it was supposed to be. After shaping and loading the bread in the bamboo couche, it proved to be too small, so I switched it too a larger batard shaped woven basket lined with a rice flour coated towel and chucked it into the plastic bag and right into the fridge after reshaping for the 18 hr retard. There was no proofing on the counter.

When I checked it in 4 hrs, right before bed time, this thing had exploded out of the basket like the Nile in full Spring Flood! It might have been over proofed – a heck of a lot! Immediately we fired up big old Betsy since this blob wasn’t going into the mini and got 2 of Sylvia’s steaming pans going for the 40 minute warm up.

When pre heat was over the dough was really loose and still spreading. I overturned it onto parchment and a peel and scored it, why I don’t know since it was already spreading like a ciabatta and scoring only made it worse. By the time I got it into the oven, throwing another 1/2 cup of water in the bottom of the oven as the door slammed, it was only 1” high and a full 10”wide.

It sprang great to almost 3” high before settling back to 2 ½” in height. It was late by the time it cooled and was wrapped. I’m guessing the yogurt water, inconjunction with the honey and the (2) malts enzyme action had something to do with making this dough look like a meth crazed, whack job on steroids. Never had a dough go berserk while in the fridge for retarding after shaping before. I didn’t have a clue anything was wrong until I checked on it at the 4 hr mark. The method that follows is the one that should have been.

I got a fairly nice badly scored ciabatta out of what was supposed to be a sandwich loaf. Next time this is going into a loaf pan from the get go and watched carefully.

The ribs would have almost fit this bread perfectly if the loaf had been split length wise like a ciaabatta :-) The ribs turned out sort of normal - before the bread fiasco thoiugh.

A nice brie and Colby jack grilled cheese sandwich using this bread with left over potato salad and BBQ baked beans, 1/2 ea of the 3 P's - pear, peach and plumb each stuffed with blue berries, 1/2 banana, black grapes, another 1/2 pear with brie and Colby jack , cantaloupe chunks with carrot pieces and a nice little salad with yellow and red papper topped with tomato and feta. A decent lunch for a decent sandwich bread.
The Method
Making this bread is pretty straight forward compared to our insane kitchen sink recent bakes. First you build the combo YW and SD levain using (2 ) 3 hour builds, mixing in the 3rd build WWW flour and then immediately refrigerating it.
Then you make the soft white wheat soaker and let it sit out for 4 hours before refrigerating it overnight. No scalding or microwaving required if you have the time and patience for it to soak a long while.
I also ground up the soft white wheat berries from the freezer and added the rest of the flours, home made malts, and salt to the ground flour in a bowl. The water and yogurt whey was added, mixed in well and allowed to autolyse on the counter for 2 hours before being refrigerated over night.
The next day, the now nearly doubled in volume levain and the autolyse were removed from the fridge and allowed to come to room temperature – about 2 hours. The two were mixed together in the mixing bowl with a dough hook on KA 2 for 4 minutes and KA 3 for 2 minutes until it pulled away from the sides.
The dough was then allowed to rest for 20 minutes in an oiled bow lbefore (3) sets of S&F’s were done 15 minutes apart. The soaker was drained and dried with a paper towel and incorporated on the 2nd S& F. After the 3rd S&F, the seeds were well distributed and incorporated nicely. The dough rested in an oiled bowl between S & F’s. The dough was then formed into a ball and allowed to ferment and develop for 60 minutes on the counter in the same oiled bowl.
It was then pre-shaped and final shaped into a batard, and placed into the parchment lined, bamboo couche seam side up. The couche was then wrapped in a tall kitchen trash bag, allowed to proof for 330 minutes before being refrigerated overnight while the bartard doubled in volume.
The next morning the mini oven (MO) was preheated to500 F, and 2 of Sylvia’s steaming Pyrex cups, half full of water with a rolled up hand towel inside, were heated to boiling in the microwave. The batard was removed from the fridge and the trash can liner, turned over by rolling on the underlying parchment, poorly slashed and placed onto the top vented mini broiler pan with the 2 steaming cups.
The baking apparatus was placed into the MO and allowed to steam for 12 minutes with the temperature being turned down to450 Fafter 4 minutes. At the 12 minute mark the steam was removed and the temperature was turned down to425 F(convection this time) and allowed to bake another 20 minutes. The batard was rotated every 5 minutes until the internal temperature in the center of the loaf reached205 F.
The MO was turned off, the door positioned ajar and the loaf left inside for 10 minutes to crisp the skin. The bread was then moved to a cooling rack.
Formula follows the pix’s as usual.
35% Whole Grain YW & SD Semolina, Durum Atta White Bread with Soaker | | | | | |
| | | | | |
Mixed Starter | Build 1 | Build 2 | Build 3 | Total | % |
Multi-grain SD Starter ** | 20 | 0 | 0 | 20 | 3.27% |
Yeast Water | 75 | 0 | 0 | 75 | 18.03% |
Durum Atta | 40 | 35 | | 75 | 18.03% |
WWW | 0 | 0 | 35 | 35 | 8.41% |
Whole Soft White Wheat | 75 | 0 | 0 | 75 | 18.03% |
Water | 20 | 35 | 0 | 55 | 13.22% |
Total Starter | 230 | 70 | 35 | 335 | 80.53% |
** 10 g each Rye Sour & Desem | | | | | |
| | | | | |
Starter | | | | | |
Hydration | 71.79% | | | | |
Levain % of Total | 29.75% | | | | |
| | | | | |
Dough Flour | | % | | | |
Non – Diastatic Red Malt | 3 | 0.72% | | | |
Wheat Germ | 10 | 2.40% | | | |
Semolina | 100 | 24.04% | | | |
AP | 200 | 48.08% | | | |
Diastatic White Malt | 3 | 0.72% | | | |
Bread Flour | 100 | 24.04% | | | |
Dough Flour | 416 | 100.00% | | | |
| | | | | |
Salt | 8 | 1.92% | | | |
Y. Whey Water -155, Water -152 | 307 | 73.80% | | | |
Dough Hydration | 73.80% | | | | |
| | | | | |
Total Flour | 611 | | | | |
Water | 447 | | | | |
T. Dough Hydration | 73.16% | | | | |
Whole Grain % | 34.53% | | | | |
| | | | | |
Hydration w/ Adds | 73.98% | | | | |
Total Weight | 1,126 | | | | |
| | | | | |
| | | | | |
Soaker | | % | | | |
Soft White Wheat | 50 | 12.02% | | | |
| | | | | |
Add ins | | % | | | |
Honey | 10 | 2.40% | | | |


