There's a bumper crop of Swiss chard in the backyard. Love spanakopita, saag etc, and a lot of the harvest has gone on those dishes, but a couple of weeks ago 'calzone' began to beat an insistent rhythm in my head. I began to imagine a filling of Swiss chard, ricotta, feta, mushroom, ham maybe...
I bake SD pizzas weekly, so thought I should be able to wing it with calzone (haven't made it before). I adjusted the dough to be a little firmer, concocted that filling I had envisaged, and voila:
There's a couple of lessons in this pic.
Lesson #1: The steam-release slashes in the top of the calzones closed up because the dough was still not firm enough, despite adjusting the flour content up. Note to self - make the dough firmer for calzones than pizzas (my usual pizzas are thin-crust SD and high hydration).
Lesson #2: The calzone at the top of the pic is misshapen. This is because I foolishly shaped and filled it on the benchtop and had to try to shift it on to baking paper to get it on to the peel and into the oven - duh! If you make a firm dough, not such a problem (you could maybe just load directly on to a semolina-sprinkled peel), but I was lucky to salvage it at all.
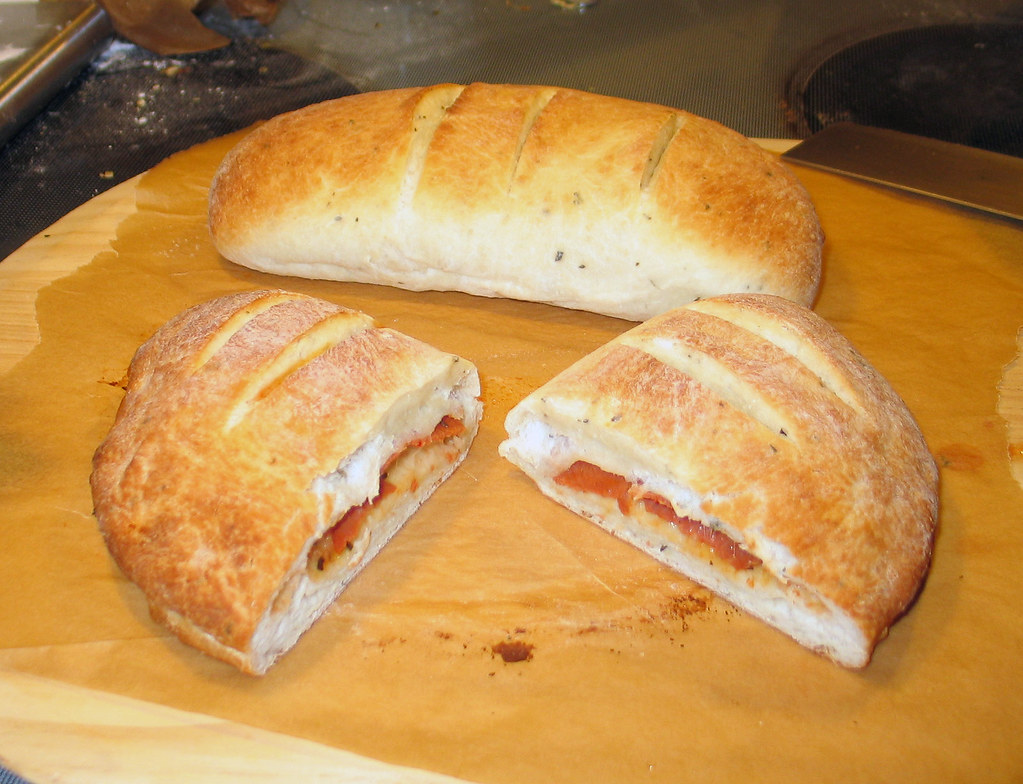
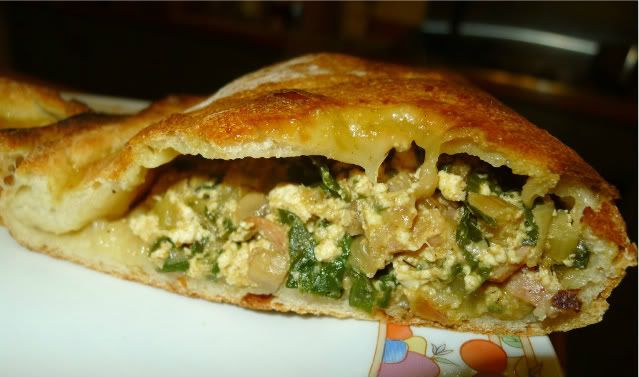
Here's a cross-sectional shot:

Ideally, I suppose there shouldn't be that caving under the crust, but I've had calzones from good pizzerias that also have that, so I wasn't too concerned. Most importantly, the filling worked extremely well and the calzones were just delicious. All the oohs and ahhs suggested that this was the beginning of a special relationship (not sure that sentence came out quite as intended).
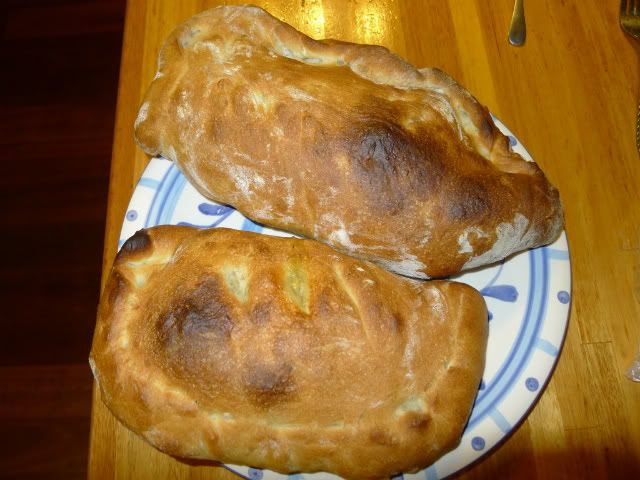
A week later, calzone night again! This time I firmed up the dough more and added some ham to the filling. SO much easier with a firmer dough, and the slashes on top stayed open. The resulting calzones were again ridiculously good - better than any I have had out. And second time around, my shaping had improved (though not my photography - to avoid the green hues our CFL kitchen lights impart, I had to use flash):
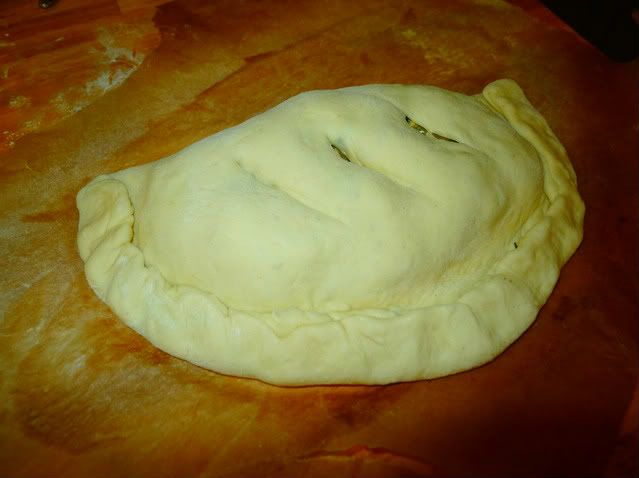
Pre-bake... Start with a circle of dough stretched out like pizza, but not as thin. Spoon the filling in a pile on the half of the dough circle closest to you, leaving a margin of 3 cm or more for the seal. Bring the dough forward over the filling, lining up the edges. Fold the edge back over once, then press down all the way along with the tines of a fork, as with an apple pie. Fold over again and seal with your thumbs or a finger (this is the final stage, after which the pic was taken). A little milk brushed on first can help the dough seal to stick.

The top was brushed with milk so it didn't burn during the bake.
Wonky angle, but you get the idea.
Out of time, but will return and post my recipe directly.
OK, took a while longer to get back than anticipated, but here's the recipe:
------------------------------------------------------------------------------------------------------------------------------------
Sourdough Calzone
Dough (makes 3 calzones or pizzas):
20g SD starter @ 100% hydration
3 small pinches dry yeast
300g water
500g baker's flour (AP would probably be fine, also)
6g salt
- Stir up starter and water, then add other ingredients and mix (I do it by hand).
- Let stand 30 mins
- Tip out on to lightly floured bench and knead 5 mins, or until gluten starts to develop and dough loses most of its stickiness. If dough is very sticky and unworkable, add a bit more flour as you knead - but only a bit.
- Divide dough into three portions of same weight, and form into tight balls. Roll around in oiled plastic containers (I use one per ball) so balls are covered in oil, put lid on containers and store in fridge 1-3 days.
- If you want to bake same day, allow 5 hours to proof outside fridge prior to shaping and baking. For retarded dough, remove from fridge about 3 hours before shaping and baking. (I'm assuming a moderate ambient temp, say 21-24C/70-75F...if higher or lower, you'll need to adjust proof times out of fridge accordingly).
Filling:
200g Swiss chard leaf, chopped
50 stems, fine-chopped
150g mushroom, chopped
1 onion, chopped
1 clove garlic, chopped
1 chilli, chopped
2 slices leg ham, chopped (optional)
200g ricotta
50g feta, crumbled
35g provolone (or any tasty melting cheese), grated
35g fresh-grated mozzarella, grated
25g milk (approx)
pepper, dried oregano, paprika to taste
NB: Salt not necessary - the feta provides sufficient salt
- Fry onion and Swiss chard stems on moderate heat a few minutes, then add mushroom and cook until done.
- Add garlic and chilli and fry another couple of minutes. Don't let garlic colour.
- Combine cheeses and add enough milk to achieve nice consistency. Combine all ingredients and mix gently.
Shaping:
- Flatten dough ball slightly with palm on sheet of baking paper, then spread gently and gradually from centre with fingers to form circle. I find it best not to use rolling pin, as this adversely affects aeration - you want the air left in the dough.
- See above (under pre-baked picture) for rest of shaping directions.
- Prior to loading into oven, cut 3 slashes on top of calzone, then brush with milk.
Baking:
- Pre-heat oven to 250C/480F with pizza stone. Transfer 2 calzones on baking paper to pizza stone (they should just about cover the stone).
- After 10 mins, lower temp to 225c/435F. Bake another 7-10 mins. Check to make sure crust is not burning, and lower temp a little further if necessary (I didn't need to, but of course, ovens vary).
---------------------------------------------------------------------------------------------------------------------------------
Highly recommend you give these babies a try. Fantastic change from pizza, and if you have a backyard crop of Swiss chard or similar, this is one of the best ways I've come across to devour it! Serve one per person with a nice shiraz or other red of your choice and fresh salad, and line up the DVD. You won't be in any shape to do anything more strenuous!
Cheers!
Ross