The Fresh Loaf

A Community of Amateur Bakers and Artisan Bread Enthusiasts.

Braid

Juergen Krauss's picture
Juergen Krauss

Being a home baker, one of the most amazing things for me to achieve in my baking is consistency. As a home baker one gets rarely the opportunity to bake big batches, and the natural limits are oven capacity and proving space.

During the last four weeks I have been asked twice to bake for larger occasions, and I managed to churn out about 70 braided rolls on each occasion. Great fun, and also quite a learning curve in managing resources and dough handling.

The first occasion was my mother-in-law's 80th birthday; I used the Rich Sourdough Barches recipe from “Inside The Jewish Bakery”, a great recipe. I made 70 rolls (60g each) in different shapes and with different toppings, and a 12 strand braid of 1200g, in 6 batches over 2 days (working fulltime on my job during the day). After the first two batches the oven window blew (while my wife made supper, I was still on the train), and a commuter friend offered spontaneously his kitchen, which I gladly occupied until 1.30 am that night and got all my baking done.

Here a photo of the rolls made that night:


The arrangement on one of the tables looked like this:


The second occasion was the winter fair at my son's school. The theme was “Fire And Ice”, and I have been gently volunteered to create “Fire n'Iced Buns”.

A couple of days before Bo Friberg's “The Professional Pastry Chef” had arrived, and I was keen to try out some recipes from this huge book.

I chose to base the buns on the Rich Cardamom Sweet Dough – various tests and tastings showed this to be an easy to handle and very tasty formula.

Curiously, although it is a yeasted dough, it omits a bulk ferment – it is meant to be rested for just 10 minutes after kneading (to relax the gluten).
I tested this, and made two more small batches, one proofed as I would (poking test), and one overnight in the fridge.
The original method and the chilled version were quite similar, but the “properly“ fermented version yielded buns that were quite dry.

I will give the percentages of the Cardamom Dough as I adapted them below.

I made the final buns with Cardamom Dough, my Chocolate Chilli Dough (adapted from the Cardamom Dough), and peppermint Icing. Half the Chocolate dough was without chilli.

Because I managed to scale shape 12 buns in about 10 minutes I baked 65 buns (40g each) in 6 batches, starting at 5.30am and finishing with the decoration at 9.00am.

Here some photos of the "Fire n'Iced Buns":


The buns above have been glazed with hot apricot jam, but haven't been iced yet. Unfortunately I haven't got any good pictures of the final product.

And here the formula:

IngredientChocolate Chilli DoughCardamom Dough
 %Weight%Weight
Bread flour100733.0100772.5
Cocoa Powder536.600.0
Cardamom1.057.717.7
Chilli Powder0.64.400.0
Ground Ginger0.181.300.0
Ground Cloves0.0930.700.0
Chocolate Chips (small)1073.300.0
Sugar14.92109.414.23109.9
Salt1.319.61.269.7
Yeast (instant)1.60911.81.5311.8
Butter7.5655.416.74129.3
Milk42.13308.840.17310.3
Egg20.19148.019.25148.7
Yield204.6421,500.0194.181,500.0

Method:

Melt the butter and set it aside to cool a bit.

Mix milk, yeast, egg and sugar.  Let it stand for about 15 minutes.

Add this mix to the solid ingredients and mix to incorporate.

Add the butter and knead until you have a smooth, soft dough that easily comes off the bowl or worktop.

The chocolate dough will be stiffer, but in the end both doughs will perform similarly.

Rest for 10 minutes to relax gluten, and then shape.

You can also put the dough into the fridge right away and use it later. (I kept it in the fridge overnight) 

 Excellent videos about shaping and braiding can be found on Youtube, e.g.

http://www.youtube.com/watch?v=PmxDKuGLWuE

http://www.youtube.com/watch?v=DUZEz4elX8E

Let the shaped buns rest until just not doubled in size. ( Try the "poke test" on the white dough, it should still be elastic)

Bake at 190C for about 10 minutes.

Happy Baking,

Juergen


Cintounas's picture

Tsoureki - Challah

October 10, 2012 - 8:03pm -- Cintounas
Forums: 

I recently made the Greek Easter bread, tsoureki. It's similar to a challah.  A rich and sweet  egg bread that is braided with 3 strands. I made 6 loaves and all of them have a section in the braid where the dough looks pulled and torn. How can I prevent this from happening again?  I'm not sure if it means it was over or under proofed or something I did in the baking part?  Thanks for any feedback in advance.  

Juergen Krauss's picture
Juergen Krauss

On our last visit to my parents in Germany I chatted with my sister-in-law who lives in Switzerland - about bread.

She tried to make the Zopf many families enjoy in Switzerland on Sundays, but she couldn't reproduce the flaky texture which is so typical.

After a bit of research I found a recipe on www.schweizerbrot.ch which worked very well for me, and this Zopf has become quite popular with friends and family.

It is essentially like a Challah without sugar and goes well with all sorts of sweet toppings, as well as cheeses.

As flour you can get a special Zopfmehl in Switzerland, which usually is a blend of white spelt (10% to 30%) with plain white flour.

I used 20% spelt.

Here the formula:

Ingredient Weight Percent
white plain flour 800g 80%
white spelt flour 200g 20%
milk 300g 30%
water 300g 30%
egg 60g (1 large) 6%
butter 120g 12%
fresh yeast 30g 3%
salt 20g 2%
yield 1830g 183%

Mix ingredients without butter first, and work until gluten is somewhat developed.

Add butter and work the dough until it is elastic, smooth and makes a nice windowpane test.

Let double in size (this took about 1 hour at 23C), fold and let rest for another 30 minutes.

Divide and shape into a braid (I usually make 2 braids from this amount of dough, the recipe source suggests one big 2-strand braid)

Put ther braid(s) onto baking perchament, apply eggwash, let rest for another 15-30 minutes, egg-wash again.

Bake on lower shelf in pre-heated oven at 200C for about 50 minutes (depending on size, my half-size braids need about 45 min).

Part of the bread got eaten before I could take a photo, here is part of the remains (Iwill post a better picture when available):

Butterzopf 1

The crumb is flaky as it should be when you tear the bread:

Enjoy,

Juergen


Finn's picture

Grandma Venni's Nisu

December 16, 2010 - 11:41pm -- Finn

Oh do I have fond memories of nisu. My Grandmother ALWAYS had some at her place. When I was young I would have it with maito(milk) and now with coffee. You can dry slices of it in the oven sprinkled with cinnamon sugar which we call korppu. You can eat the korrpu either dipped in coffee or soaked in a bowl of hot milk as a delicious breakfast or night-time snack.

Terrell's picture
Terrell

Greetings, bakers!

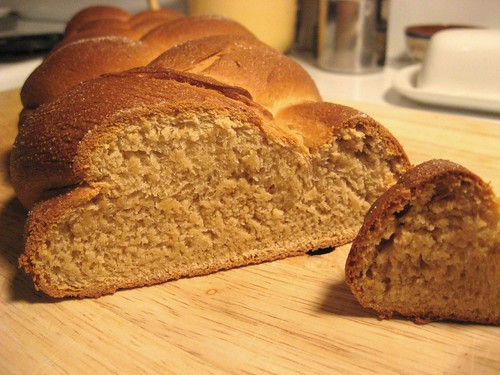
It's been a pretty good week in Portland. After months of being out of work, I have two jobs, seem to be on track for a third and I'm pretty sure at least one of those will continue post-Christmas. I know it's just seasonal work, but I'm really feeling like this Portland experiment has just taken a decided turn for the better. To celebrate, I decided to do a sweet bread this week. Thumbing through the Point of Departure, the bread book I've been baking my way through, I came across a recipe for a Cardamom Braid. That fit the sweet bread criteria and seemed appropriate for the seasonal nature of the new job. My brother married a woman who is half Swedish and cardamom braid is mandatory at their Christmas morning celebrations. She won't open a present until the braid is sliced and ready to eat. It's always delicious so I decided to see how close this recipe would be to theirs. Turns out, it's not quite the same. Lydia's version is flatter and sweeter, probably uses a softer dough and more sugar. I also seem to remember a bright yellow color, possibly saffron, that this one doesn't have. And my crust was way browner, partly my fault from letting it bake a few minutes too long, but also inherent in the recipe. Hers is barely golden and very soft, definitely not the crispy crust I got. On the other hand, the taste of my loaf was excellent, slightly sweet with a spicy cardamom flavor. I also liked the moist, chewy texture. I'm thinking next time a lower oven temperature, a slightly softer dough and brushing with something other than milk might get me exactly what I want.

Cardamom Braid from The Better Homes and Gardens Homemade Bread Cook Book
  • 1 cup all-purpose flour
  • 1 package active dry yeast
  • 3/4 teaspoon ground cardamom
  • 3/4 cup milk
  • 1/3 cup sugar
  • 1/4 cup butter
  • 1/2 teaspoon salt
  • 1 egg, lightly beaten
  • 1 3/4 to 2 cups all purpose flour (I substituted white whole wheat flour here with excellent results)
  • small amounts of milk and sugar for brushing and sprinkling

In a large bowl combine one cup of all-purpose flour, the yeast and the cardamom. In a small saucepan heat the milk, sugar, butter and salt until warm, stirring frequently to melt the butter. Add the milk mixture to the dry ingredients. Add the egg. Beat the mixture well for several minutes. Stir in enough of the remaining flour to make a moderately soft dough. (I used almost all of the two cups but I think I will back that off slightly next time.) Turn out onto a floured surface and knead till smooth, about 5 or 6 minutes. Place in greased bowl, turning once to coat and let rise, covered, until double, about an hour and a half.

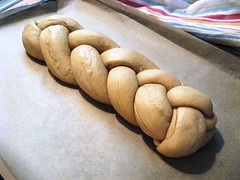
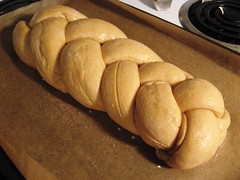
Braided    Risen

When double, punch down and divide in thirds. Let rest while you prepare a pan. I use two nested jelly roll pans lined with parchment paper but you can grease if you prefer. Roll each third into a 16-inch rope and place about one inch apart on prepared pan. Braid loosely, pinching the ends together and tucking them under. Cover and let rise until double, about 45 minutes.

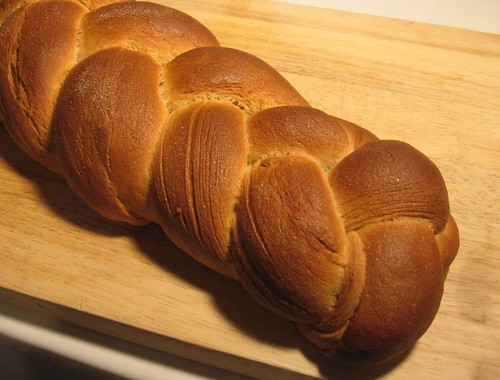
Preheat oven to 375. (Next time, I'll try it at 325, I think.) Brush with milk and sprinkle with a tablespoon of sugar. (I plan to look for some decorative sugar for this step.) Bake for 20 to 25 minutes. (I got distracted and let it go almost 30 which was too long.) Remove from baking sheet and cool on wire rack.

Baked

I'm looking forward to making this for Christmas morning with the great-nephews. I think it will be a hit. Any of you Scandahoovians out there want to give me tips for making this perfect?

 Sliced

ejm's picture
ejm

A while back, Julie J was asking for advice on how best to crush cardamom for her Finnish cardamom buns. As soon as I saw the recipe, I knew I had to try it! And finally, this week, I got the chance.

pulla

I'm not sure if this is how the buns are supposed to look. I pretty much guessed about how much of an indentation to make for the butter. And as I was inserting butter into the thumb holes, I completely forgot about sprinkling extra sugar on top as per Julie's instructions. But I did think of using some inferior apricot jam on two of the buns. It turns out that this is a great way to use and improve apricot jam! I decided to make a 3-strand braided loaf as well. And then when I was placing the buns on the tray and worried that they were too close together, I shaped 4 of the rounds into snakes and braided them together into a smallish 4-strand round loaf.

pulla

Did I take my advice to use the coffee grinder to crush the cardamom? Ha! That would have been too easy. I used the mortar and pestle. Remind me to use our big sharp knife next time. The mortar and pestle is way too labour intensive and leaves rather large chunks of cardamom behind. Or perhaps I will follow my own Fresh Loaf advice to use our coffee spice grinder. Luckily, large chunks of cardamom taste good and are soft enough that we aren’t risking getting broken teeth... and the crumb is beautifully soft and moist. Absolutely delicious with or without extra butter! (The extra butter is really unnecessary! But oh so good!)

-Elizabeth

pulla


edit: link to JulieJ's pulla recipe fixed.

zolablue's picture
zolablue

I baked my first challah last Thursday and wanted to share.

I was unsure what to expect but it was so much fun. I’d been meaning for some time to bake a recipe from Maggie Glezer’s book, A Blessing of Bread, which is a wonderful compilation of traditional Jewish recipes from around the world. Floyd has written a very nice review of the book here.

http://www.thefreshloaf.com/bookreviews/ablessingofbread

I decided to start with Glezer’s own personal recipe for sourdough challah. I love making sourdough and was interested to see what the texture of this bread would be compared to a yeasted challah which I have eaten only a couple times.

The recipe seemed easy to me despite the fact Glezer calls it expert. I’m not sure why but, again, I’m new to challah. The dough was so easy to mix together and then, as Glezer puts it, the time involved is mostly waiting after that.

She says to bake it to a dark brown which I did. I’m not sure if it is considered too dark or not but it was really a beautiful color and I do typically bake my bread darker as she instructs in Artisan Baking.

The crumb was amazing to me. It was very creamy and soft and almost reminded me of an angel food cake. It has remained moist to this day (5 days later) as there are only two of us to eat and can’t quite get rid of all the bread I bake. I am going to cut very thick slices of what is remaining to freeze and later use to make French toast.

I decided for my maiden voyage into challah bread I would make an elaborate braid. I used the six-strand braid version and got a lot of help from the video Glezer did showing how to do it. Gosh, the internet is awesome! Just as she said it makes a beautiful, very high loaf.

Braiding ChallahFine Cooking Video, Maggie Glezer

http://www.taunton.com/finecooking/videos/braiding-challah.aspx?

I’m posting the recipe so those of you who are new to challah as I am can have a chance to make it and perhaps will be inspired to buy this lovely book. For those who have made challah for years I’d love it if you tried the recipe and let me know your thoughts on it compared the some of your favorite traditional recipes.

More of my photos can be seen here:

http://zolablue.smugmug.com/gallery/3500289#197395950

Thank you to each and every one of you on this site that have been such inspirations in baking such as Floyd, Bill Wraith, Susanfnp, Mountaindog, JMonkey, Browndog, Bluezebra, Eric, SDBaker, Mini Oven, Dolf, Qahtan, Zainab and so many others. All you wonderful bakers have helped me incredibly along the way over the past few months that I have been baking so many thanks to all.

My Sourdough Challah - Maggie Glezer's personal recipe from her book, A Blessing of Bread

Sweet sourdough breads are delicious and well worth the time (which is mainly waiting time) if you are a sourdough baker. The sourdough adds a subtle tang to my challah, and the crumb has a moister, creamier texture that keeps even longer than the yeasted version. While it’s true that challah or, for that matter, all bread was at one time sourdough (the Hebrew word for leaven, chametz, means “sour”), challahs have definitely gotten sweeter and richer since the introduction of commercial yeast. To convert such recipes back to 100 percent sourdough, the sugar has to be cut back in order for the dough to rise in a reasonable length of time (sugar that is more than 12 percent of the flour weight inhibits fermentation), so this version will taste slightly less sweet than the yeasted one, a deficit completely overridden by the rich complexity of the sourdough. I have also changed the all-purpose flour to bread flour, which has more gluten, to counteract the starter’s propensity to loosen the gluten (the acids in the starter change the proteins, a natural part of sourdough baking).

Skill Level: Expert

Time: About 20 hours (about 8 1/2 hours on baking day)

Makes: Two 1-pound (450-gram) challahs, one 1 1/2-pound (680-gram) challah plus three rolls, or sixteen 2-ounce (60-gram) rolls

Recipe synopsis: Make the sourdough starter and let if ferment overnight for 12 hours. The next day, mix the dough and let it ferment for 2 hours. Shape the dough and let it proof for 5 hours. Bake the breads for 15 to 40 minutes, depending on their size.

For the starter:

2 tablespoons (35 grams/1.2 ounces) very active, fully fermented firm sourdough starter, refreshed 8 to 12 hours earlier

1/3 cup (80 grams/2.8 ounces) warm water

About 1 cup (135 grams/4.8 ounces) bread flour

For final dough:

1/4 cup (60 grams/2 ounces) warm water

3 large eggs, plus 1 for glazing

1 1/2 teaspoons (8 grams/0.3 ounce) table salt

1/4 cup (55 grams/1.9 ounces) vegetable oil

3 tablespoons (65 grams/2.3 ounces) mild honey or a scant 1/3 cup (60 grams/2.1 ounces) granulated sugar

About 3 cups (400 grams/14 ounces) bread flour

Fully fermented sourdough starter

Evening before baking - mixing the sourdough starter: Knead starter into water until it is partially dissolved, then stir in the flour. Knead this firm dough until it is smooth. Remove 1 cup (200grams/7 ounces) of the starter to use in the final dough and place it in a sealed container at least four times its volume. (Place the remaining starter in a sealed container and refrigerate to use in the next bake.) Let the starter ferment until it has tripled in volume and is just starting to deflate, 8 to 12 hours.

Baking day - Mixing the dough:

In a large bowl, beat together the water, the 3 eggs, salt, oil, and honey (measure the oil first, then use the same cup for measuring the honey — the oil will coat the cup and let the honey just slip right out) or sugar until the salt has dissolved and the mixture is fairly well combined. With your hands or a wooden spoon, mix in the bread flour all at once. When the mixture is a shaggy ball, scrape it out onto your work surface, add the starter, and knead until the dough is smooth, no more than 10 minutes. (Soak your mixing bowl in hot water now to clean and warm it for fermenting the dough.) This dough is very firm and should feel almost like modeling clay. If the dough is too firm to knead easily, add a tablespoon or two of water to it; if it seems too wet, add a few tablespoons flour.

The dough should feel smooth and very firm but be easy to knead.

Fermenting the dough:

Place the dough in the warm cleaned bowl and cover it with plastic wrap. Let the dough ferment for about 2 hours. It will probably not rise much, if at all.

Shaping and proofing the dough:

Line one or two large baking sheets, with parchment paper or oil them. Divide the dough into two 1-pound (450-gram) portions for loaves, one 1 1/2 pound (680-gram) portion for a large loaf and three small pieces for rolls (the easiest way to do this without a scale is to divide the dough into quarters and use one quarter for the rolls and the rest for the large loaf), or sixteen 2-ounce (60-gram) portions for rolls. Braid or shape them as desired, position them on the prepared sheet(s), and cover them well with plastic wrap. Let proof until tripled in size, about 5 hours.

Meanwhile, 30 minutes before baking, arrange the oven racks in the lower and upper third positions if using two baking sheets or arrange one rack in the upper third position if using one sheet, and remove any racks above them. Preheat the oven to 350°F (180°C/gas mark 4). If desired, preheat one or two baking sheets to double with the baking sheet(s) the loaves are on. Beat the remaining egg with a pinch of salt for glazing the breads.

Baking the loaves:

When the loaves have tripled and do not push back when gently pressed with your finger but remain indented, brush them with the egg glaze. Bake rolls for 15 to 20 minutes, the 1-pound (450-gram) loaves for 25 to 35 minutes, or the 1 1/2-pound (680-gram) loaf for 35 to 45 minutes, until very well browned. After the first 20 minutes of baking, switch the loaves from front to back so that they brown evenly; if the large loaf is browning too quickly, tent it with foil. When the loaves are done, remove them from the oven and let cool on a rack.

Pages

Subscribe to RSS - Braid