The Fresh Loaf

A Community of Amateur Bakers and Artisan Bread Enthusiasts.

boule

MarieH's picture
MarieH

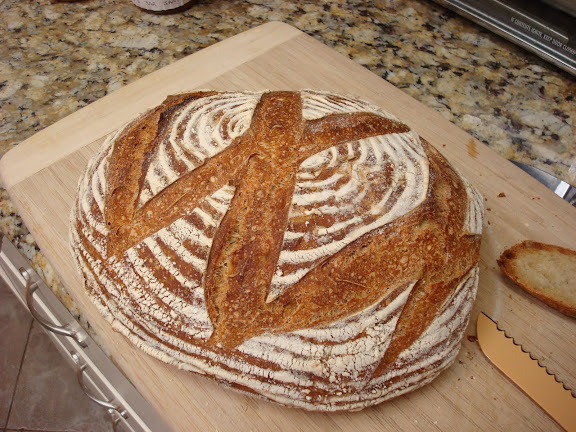
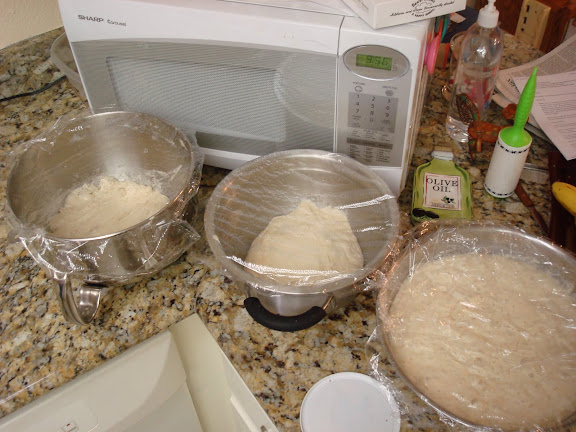
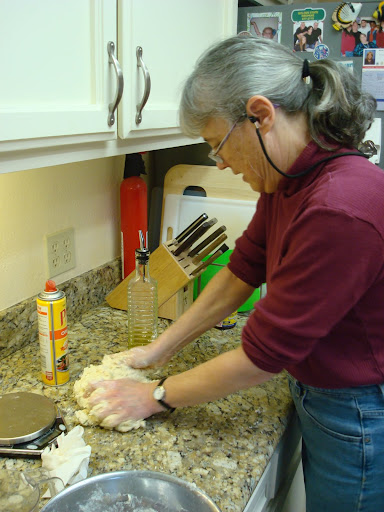
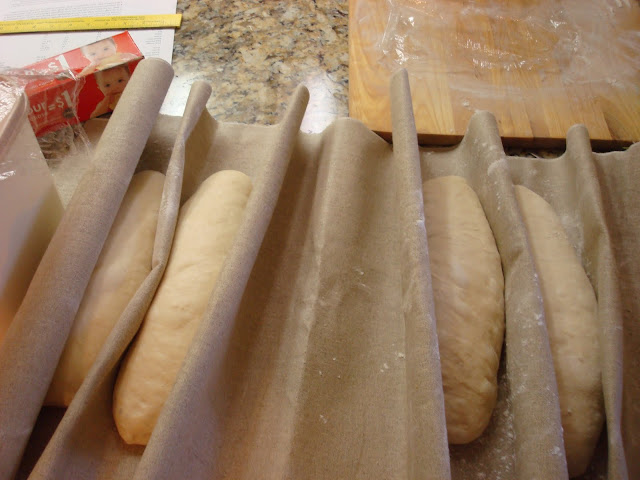
I've been baking bread a long time and I'm still amused by the narrow line between success and failure. I fed my sourdough starter last night in preparation for baking a (singular) rustic loaf today. When I looked at the starter early this morning it had grown to over 16 oz. by weight. Being a frugal person I decided to use all the starter and made a monster ball of dough. I blended 2 recipes, substituted and blended flour, and basically just winged it with autolyse, proofing, and shaping. I ended up with a 2 1/2 pound boule and 20 2 oz. rolls. I stayed on the right side of that fine line somehow and ended up with great looking bread and awesome crumb and taste.


And just because I like a challenge, I made a 100% whole wheat focaccia at the same time. I almost crashed and burned with getting everything in and out of the oven on time, but again I stayed on the line.

The lesson?  Learn to trust the instincts you develop through experience and have some crazy, risk-taking fun! It is a hobby, right?

Whole Wheat Focaccia

This 100% whole wheat flour recipe was adapted from the King Arthur Flour Whole Grain Baking cookbook.

Biga

Mix together until well blended. Cover and let stand at room temp for 12 to 16 hours.

4 oz. KAF white whole wheat flour

4 oz. water

Scant pinch of yeast

Dough

In the mixer bowl of a stand mixer add:

All the biga

9 oz. water

1 oz. orange juice

12 oz. KAF white whole wheat flour

3 Tbs Vital Wheat Gluten

Pinch of ascorbic acid

2 tsp salt

3/4 tsp instant yeast 

With the paddle beater, mix on the lowest speed until dough starts to come together. It will be very wet and slack. Scrape down the paddle and add 1 to 2 Tbs water if the dough seems too dry. Mix on the lowest speed for 2 minutes. Increase speed to medium and knead for 4 minutes. The dough will be very soft.

Cover and let rest in the bowl for 30 minutes. Scrape the dough onto a silicon mat and fold like an envelope length-wise and width-wise (4 folds). Return to bowl, cover, and let rest for 30 minutes. Repeat the fold process again, and let rest for 30 minutes. Repeat the fold process once more and turn out onto a parchment-lined half sheet pan. With oiled hands, press the dough outward to the pan edges. When dough stops spreading, let it rest for 10 minutes then continue pressing the dough out with your fingertips. The dough will not cover the pan - it will be approximately a 10" x 13" oval.

Cover and let rise for 30 minutes while preheating the oven to 500 degrees. I use a baking stone set in the bottom third of my oven. Uncover the dough and drizzle with olive oil. With greased fingers, gently dimple the dough. Sprinkle with coarse salt. Bake in the pan on the stone for 18 to 20 minutes until a deep golden color.


Ryan Sandler's picture
Ryan Sandler

My family is not so much in to football, but we are into bread.  This post will give you an idea how much.  You see, my mom taught me the basics of making bread when I was a kid.  However, she never went much beyond a basic white bread pan loaf (although these were always excellent).  Although I got her The Bread Baker's Apprentice for Christmas a couple years back, she never got into the artisan baking thing, with pre-ferments and all, and found the whole process a little intimidating.  But this year, for Christmas, she asked for a baking lesson from me.  Today was the day.

The plan: to bake three types of bread in one day, making two batches of each so that I could make one and demonstrate, and then she could make one.  Limitted to her standard (but quite good, as I discovered) home oven, this required staggering the batches over the course of the day.

On the roster: Italian Bread (from BBA), Potato Rosemary Bread (also from BBA), and French-style rustic bread (Pain Rustique from Hamelman's Bread). All solid players that I can do in my sleep at home, and felt like ought to go fairly smoothly, while showcasing different flavors, shaping and slashing styles.

Let the games begin!

We showed up at my parents' place at 9am, bringing with us a pre-game miche:

Another Mighty Miche, ready for toasting
At 9:30 my dad took the baby, my wife went out shopping with her mom and sister, and my mom and I got to work.  First up was mixing Italian Bread--not much teaching there, although I demonstrated the power of the 5-minute rest for helping along gluten development

Italian Bread #1, in between the remaining biga and the poolish
From there, the day proceeded in an almost-orderly fashion, alternating mixing, stretch-and-folding, dividing, and shaping with one bread and then another.  Mostly things proceeded smoothly, although there was a moment of panic when we realized that I'd dumped out, pre-shaped and final shaped Potato-Rosemary Bread #2 instead of #1, while #1 sat happily bulk fermenting for an extra half an hour.  Some improvisation was required (we pretended batch #2 had never been shaped, quickly shaped batch #1 without a pre-shape and pretended it had already been proofing for 10 minutes.  It worked.)

Mom kneading Potato Rosemary Dough
Italian Breads Proofing - "Mine" are on the left. (All on my new TMB/SFBI couche!)
 

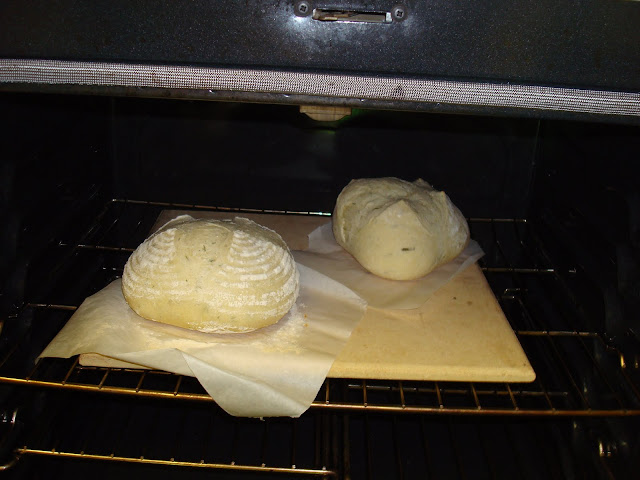
Potato Rosemary Breads in the Oven
 

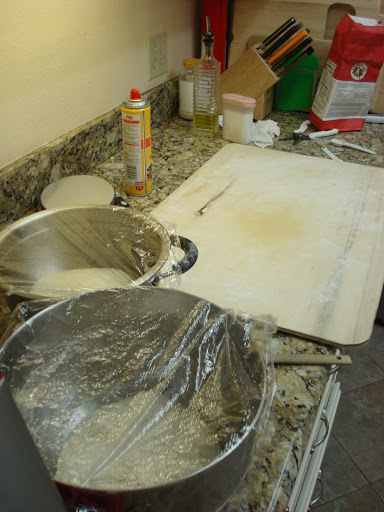
Rustic Breads in Bulk Fermentation - "Mine" is on top (Also my lovely SFBI/TMB proofing board)
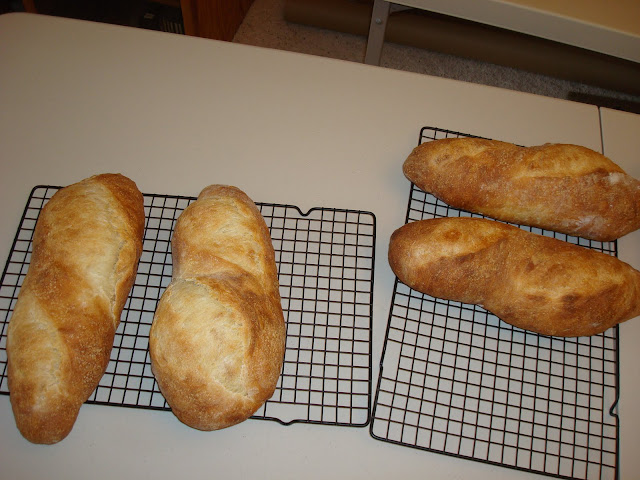
Italian Breads, Finished. Mine on the left (clearly under proofed!)
 

Rosemary Potato Breads (I don't even know whose are mine!)
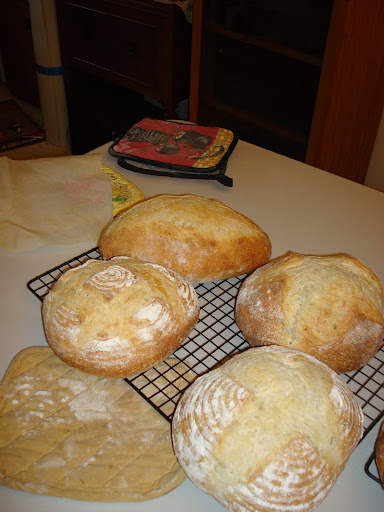
Rustic Breads  (Mine on the Right)
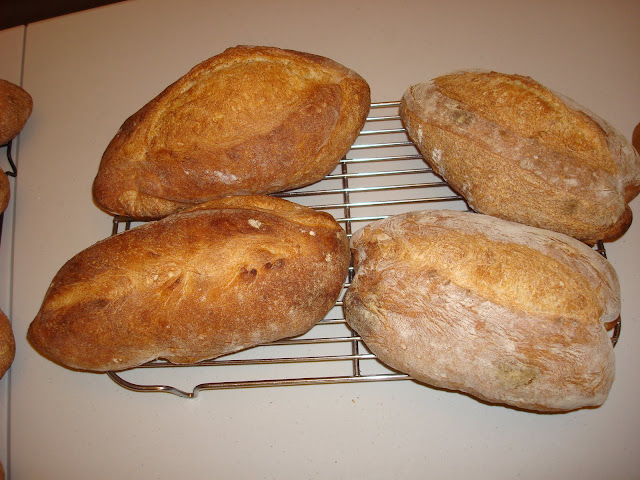
The hardest part of the whole business (besides being up on our feet all day baking), was teaching the shaping techniques.  I had the principles clear in my head (surface tension, surface tension, surface tension), but conveying the actual physical motions (which are just plain tricky anyhow) was quite difficult.  Practice was useful -- except on the Italian bread, I had my mom shape and slash one of "my" breads after I demonstrated the technique so she'd have an extra chance to get the hang of it.  What proved invaluable, however, was employing a dish towel a la Mark of Back Home Bakery to demonstrate.  I already thought that video was great when it was posted, but now I'm really grateful to Mark for making posting it! I only wish I'd thought to do that before we'd already shaped the Italian breads, rather than after.

The other main challenge was the oven--it was just too good!  My parent's gas oven held it's heat remarkably well, which meant that turning the temperature up before was actually unnecessary, and indeed counter-productive since amidst the chaos I forgot to turn it down after loading the breads.

The fruits of our labors
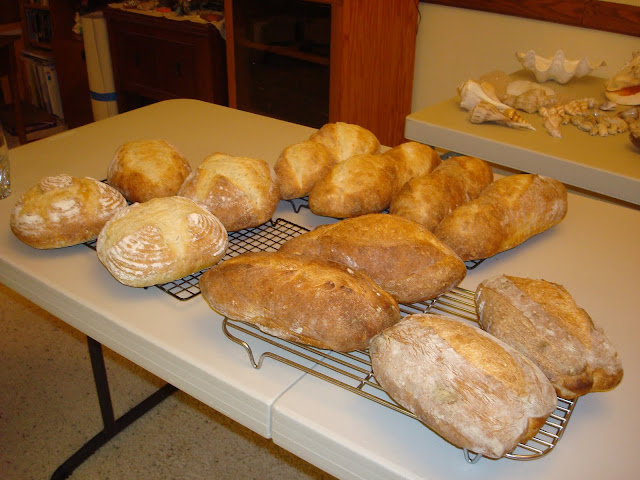
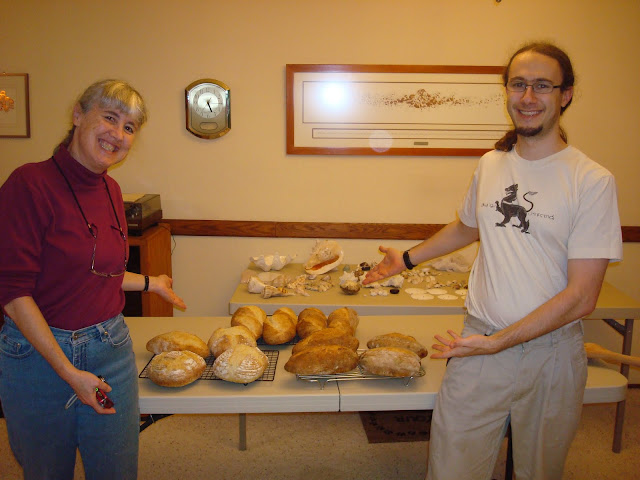
The bakers and their breads
 

After we were done baking, we brought three choice loaves over to my in-laws for dinner (it was my father-in-law's birthday, by coincidence), and had a lovely meal.

Clockwise from left, Rustic Bread, Italian Bread, and Potato Rosemary Bread
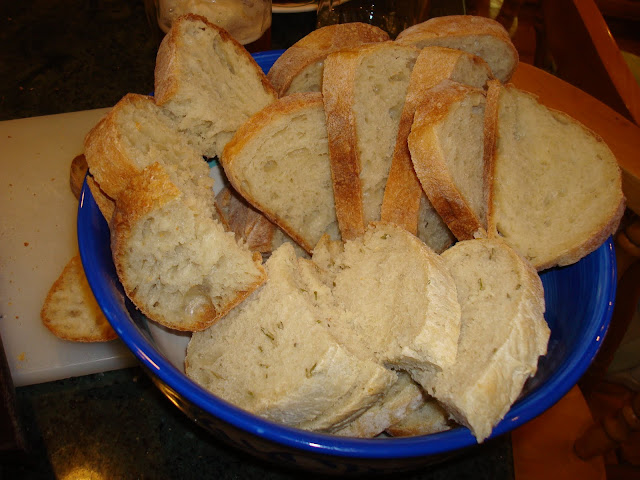


It was a fun, busy, bread-ful day.  I'd do some things differently if I were to do this again (like use a bigger oven and do three batches instead of six!), but my mom and I had a great time.

Happy baking, everyone,

-Ryan

EdTheEngineer's picture
EdTheEngineer

Greetings everyone!

This is my first post, having been lurking here for a few weeks. This is a fabulous website and it has accelerated my learning and increased my enjoyment of my new hobby a great deal. I started baking bread a few months ago as an antidote to revision for my university finals. My initial attempts were flat and dense bricks and puddles, more like squashed soda breads. But since finding this site a few weeks ago I've been inspired to put a bit more energy in and try out some of the techniques I've been reading about and watching on the various youtube videos dotted around.

I thought yesterday that I'd have a first attempt at baguettes, having previously been put off by reading it was difficult to make an actual 'baguette' rather than baguette-shaped sandwich bread. The first hit in the search was the Anis Bouabsa recipe. I wanted to have them ready for this evening's dinner so couldn't quite stick to the method prescribed. My method was:

- Poolish - 250g flour, 2g yeast, @100% hydration. Fridge for 7 hours.

- Allow an hour to warm, add the rest of the ingredients. Fridge for 2 hours then in the pantry (which is about 10 degrees C at the moment) for 5 hours. 

- Pre-shape and rest for 40 mins

- Proof for about 50 mins

I slit and sprayed with water, then put them (on baking paper) on the floor of the Aga, which has had a small pan of water on a higher shelf boiling away for the duration for constant steam. Took about 35 minutes to cook - a bit longer than the recipe says - the floor of the Aga is at a lower temperature than the recipe calls for but my feeling is that having them directly on a nice, big, heavy, high thermal mass aga oven floor is A Good Thing. I don't have a stone slab but I guess putting that higher in the oven would be the better way to do it.

I wasn't expecting much - this was a real step up in shaping complexity (I was guided by the <i>excellent</i> Ciril Hitz videos) and more difficult slashing than my usual cave-man technique. But I was pleasantly surprised by what came out of the oven!

Three Baguettes

You can see my shaping is a bit inconsistant (not to mention wrong in ways that are less immediately obvious to me!) but they just about look the part. They sang and crackled promisingly on the cooling rack and I had to try one before dinner. You know, just to test... it tore just like the baguettes I've had in france and biting in was a lovely crunch followed by tasty chewiness. The crumb was on the right lines, I think:


Baguette Crumb


I'm really quite excited to try this again. Next time I'll plan ahead more thoroughly and give it the 21 hours fridge fermentation that the original recipe calls for. I'll not bother with the poolish stage either (I did it as I thought it might give me the flavours and gluten development a little quicker).

I've been getting quite into using a poolish. I've just come back from a bit of travelling and decided tot to make a sourdough starter until i got back (just so I could be around to care for it) so a poolish seemed like a good stop-gap for getting a bit more flavour out of the flour. For fun, here's a photo of another recent session.

- 1kg of flour (2/3 whole grain 1/3 strong white), 500g of which was in a 100% hydration poolish overnight in the fridge. 

- 20g salt.

- 20g fresh yeast

- teaspoon of dark brown sugar.

Produced a pair of boules, finished in different ways:

Pair of boules

I cut the slashes quite deel on the nearer boule, but the loaf still sprang right up to the point of stretching them out flush with the rest of the crust. Given they have so much spring left to give, should I prove them a bit longer?

Anyway, thanks for reading, now I need to go an feed my new starter!


Ed 

dmsnyder's picture
dmsnyder

I have read so many bread baking books and viewed so many videos on shaping boules, but I didn't really "get it" until I saw our instructor, Miyuki, do it in the SFBI Artisan I workshop I attended a couple weeks ago.

I will attempt to show what I learned in still photos with descriptions. I hope that viewing these and then reviewing some of the excellent videos available might help others who are struggling with this technique.

Mis en place

You will need:

1. a batch of fully-fermented dough

2. a lightly floured "board" on which to work.

3. a scale, if you are dividing the dough.

4. a bench knife or other cutting implement, if you are dividing the dough

5. prepared bannetons or a couche on which to rest the formed boules for proofing


Procedure


1. Weigh your dough

2. Divide it into equal pieces.

3. Pre-shape each piece gently, incorporating any small pieces of dough on the inside. 

4. Rest the pre-shaped pieces, seam side down and covered with plastic or a towel  on the board for 20-30 minutes.

5. Prepare your bannetons or couche for receiving the shaped boules.


6. After the pre-shaped pieces have rested, shape each as follows:

* Pick up the piece and turn it smooth side down.

* Gently fold the long ends together under the piece.

* Rotate the piece 90º in your hands, and fold the other two sides together.

* Place the piece on an un-floured board, smooth side up.


* Cup your hands around the piece, and gently drag it 3 inches or so towards you in such a way that the edge closest to you sticks to the board and is dragged under the dough, thus stretching the top of the piece into a tight sheath containing the dough.


Note the position of the markers before stretching

After the stretching, the marker at the apex of the boule is unmoved, but the one that was at about 40º North, is now about at the equator.

* Rotate the dough 90º and repeat. Do this 3-4 times until the bottom of the boule is relatively smooth and the whole boule has an unbroken, smooth sheath.

Note that there are no visible seams on what will be the bottom of the boule, after the procedure described.


* Place the boules in bannetons, smooth side down, spray with oil and place each banneton in a food-grade plastic bag to proof. (Alternatively, place the boules seam side down on a couch and cover with a fold of the couche, plasti-crap or a towel.)


Well, there it is. For me, being able to visualize the stretching of the "skin" of the boule between a fixed North Pole and a point on the side, using the board to "grab" the bottom of the boule as I dragged it towards me was the "aha moment." I hope it makes sense to others.

The goal (to form a tight gluten sheath) in forming other shapes is fundamentally the same, but the method is entirely different.

Comments and questions are welcome.

Happy baking!

David


Aivaras's picture
Aivaras

Hello all, my name is Aivaras. Long story short, more than half year ago i decided to try baking bread, or at least something resembling bread, because I've never baked anything, and then i found TFL. I want to thank all members on TFL, because almost everything i learned i learned from here. I'm starting blog to post some of my older bakes and to try to post after i bake something.

This is Boule (baked on 5/02) i probably would not have baked, except that I made mistake when preparing starter for my weekly bake of Gerard Rubaud bâtards. I was preparing last build for starter and accidentally ended with 100% hydration starter which i decided to refrigerate shortly after mixing. While it was staying in refrigerator, I saw breadbakingbass post and since I had Malted Barley flour which i never tried to use, i thought to give it a try.

Formula:

200g T150 Organic stone ground flour

400g T80 flour

260g T55 flour

100g Organic Malted Barley flour

240g Liquid Levain

24g Salt

580g Warm Water

Total - 1.8Kg; Hydration - 65%

Method:

Mix starter 1:2:2 ratio (GR flour mix: 70% T55, 18% T150, 9% T80 spelt, 3% T160 rye) leave 20 minutes and then refrigerate for 48 hours.

After 48 hours dissolve starter in water, mix only with T150 and Malted Barley flour, cover tightly and leave at 25C for 45 minutes.

After 45 minutes mix half of left flour and leave for 20 minutes, then mix rest flour and leave for another 20 minutes.

Add salt and mix for few minutes.

Ferment at 25C for 2 hours.

Lightly shape into boule, place in lined basket and proof for 2 hours.

Preheat oven at 250C, Bake for 50 min at 230C with steam for 15 min.

Nickisafoodie's picture
Nickisafoodie

As my baking evolves I am drawn more towards hearty rye sourdough breads in the northern European style.  I also like big and bold flavors that complement the rye and sour nuances of the bread. 

Thus my spur of the moment decision to also add the following to my 2.5lb loaf:

1 tbs fresh ground black pepper

2 tbs red pepper flakes (pizzeria type)

1 tbs fresh diced rosemary

1 tbs Greek Oregano

2 tbs sesame seeds

1 tbs nigella seeds (black caraway used in Russian Rye breads)

2 tbs flax seeds

1 tbs poppy seeds

The bread itself is 25% whole rye and 40% whole wheat (both fresh ground), bread flour for remainder.  My rye starter (100% hydration) was in full force by 5pm.  I added rye and whole wheat to make my basic sour which was approx 50% of the recipe plus all of the seeds. 

After 5 hours of fermenting I added the herbs and remaining ingredients targeting 68% hydration.  30 minute autolyse then mixed until gluten was developed.  There was only one stretch and fold given the high percentage of rye and my preference for developing the gluten early via the mixer in this style of bread. 

After kneading there was a 10 minute rest followed by pre-shaping and another 10 minute rest.  Shape into boule’, place in linen lined basket, cover top and place into a plastic bag.  Let rest overnight in refrigerator for an 8 hour fermentation.  The next morning I removed from refridgerator for the hour it takes to preheat oven and stone.  Baked at 470 degrees for 10 minutes with steam, then reduce oven to 430 degrees for another 50 minutes until internal temperature of 198 degrees. 

Note: Bread rose nicely in refrigerator.  However I didn’t flour my peel properly resulting in some deflation in getting the bread off of the peel.  And I butchered the slashing.  The crumb developed nicely and you can see the red pepper flakes and seeds if looking closely.

The bread is very complex due to the herbs, rye, seeds and sour, and additionally has a nice kick given the red pepper!  Simple can be best, but in this case the herbs and seeds compliment it well. The sour element was pleasantly noticeable and not lost.  Deep rich rye flavor which would go well sliced thin with cream cheese on smoked salmon.  Or with your favorite omelet... 


breadbakingbassplayer's picture
breadbakingbass...

Hey All,

Just wanted to share with you 3 boules from tonights bake.  It's a sort of whatever flour I had left recipe.  I will post a crumbshot tomorrow.  Enjoy!

Tim

Ingredients:

Levain:

100g AP

50g SD starter at 60% hydr.

50g Water

Final Dough:

374g AP

314g WW

468g Water

14g Kosher Salt

200g Levain

1/4 tsp ADY

1371g Total Dough Yield

Instructions:

8:45am - Mix Levain

7:25pm - Mix final dough, cover, autolyse for 30 minutes.

8:00pm - Knead 1 minute using wet hands in mixing bowl without adding any extra flour, cover let rest.

8:30pm - Knead 1 minute, cover, let rest.

9:40pm - Divide into 3 equal parts, shape into boules, proof in lightly floured linen lined bannetons.  Arrange baking stones and steam tray in oven and preheat to 500F with convection.

10:30pm - Turn out boules onto peel, slash as desired, place in oven directly on stone.  When last loaf is in, add 1 cup water to steam tray, close.  Bake at 450F no convection for 10 minutes.  Rotate, bake for 30 more minutes.  Loaves are done when internal temp reaches 210F.  Cool completely before cutting and eating.


breadbakingbassplayer's picture
breadbakingbass...

Hey All,

Just wanted to share with you my Granola Boule from my bake on 5/3/10.  It turned out better than expected.  Enjoy!

Tim

Ingredients:

350g AP

150g WW

150g Firm SD Starter at 60% Hydration

450g Water

120g Raisins

100g Granola

50g Non-fat Dry Milk

10g Kosher Salt

1/8 tsp Instant Yeast

1381g Total Yield

What I did:

5/2/10

10:00pm - Mix all ingredients in large mixing bowl with wooden spoon well, cover let rest.

10:45pm - Knead dough using french fold method a few times (4-8 times) using wet hands, transfer to oiled plastic tub, cover and let rest.

11:30pm - Turn dough, place in refridgerator.

5/3/10 (Next Day)

8:30am - Turn dough, return to fridge, go to work.

6:35pm - Take dough out of fridge, turn dough, cover and let rest.

8:45pm - Shape into boule, place in lightly floured linen lined banneton, place in plastic bag, proof for 2 hrs.

9:45pm - Arrange baking stone in oven along with steam pan, preheat to 500F.

10:45pm - Turn boule out onto lightly floured peel, slash as desired, place in oven along with 1 1/2 cups water in steam pan.  Bake 15 minutes at 450F.  Rotate, bake for 40 minutes at 425F, then 10 more minutes at 400F.  Loaf is done when internal temp reaches 205F.  Cool completely before cutting.

Sent to Yeastspotting on 5/5/10

jennyloh's picture
jennyloh

I made these today with a chef.  This recipe was meant to go into a bread machine,  which of course,  the machine is me.  I made this all by hand. I tried 2 things today.  1 was to cover the loaf with a claypot to bake,  and another stay in the claypot to bake.  Of course it turned out that the one that stayed in the claypot got a nicer crust - golden brown.

But somehow with this formula,  the bread didn't rise too much,  I might have overproof it - 1 1/2 hours.  Went out for supper during that time,  by the time I got back, the dough looks more than ready.  The one with the claypot covered had a little more rise,  as I baked it immediately after I return.  Here it is:


The one that goes into the claypot,  didn't rise much. Just a little jutting up from the top that I score.  


Both were not as crispy as I like....I still do not have baking stone....sigh....I can't find it in China yet....can someone send me one?!....  But the inside is chewy, soft,  and the taste is a little more salty - I don't know if this is because of the salt I added or the chef that was quite well fermented....weather was good over here in Shanghai...warming up...


The crumbs are well spread out,  not a lot of holes. And the 2 loaves have slightly different taste,  somehow the boule turns out to be less salty,  why?  perhaps I left it overnight in the fridge,  it had absorb what ever is in the dough.


I guess I can say this is a pass?...


Jenny

www.foodforthoughts.jlohcook.com


bakinbuff's picture
bakinbuff

I decided to try making a savory olive bread using my usual sourdough recipe, and just adding herbs and chopped Queen olives.  I would occasionally buy an olive baguette from our nearest supermarket, until they stopped making them.  It was a good thing I only bought them occasionally, they were delicious and somewhat addictive.  Anyway, having enjoyed getting the hang of basic sourdough bread, I decided this would be the perfect base for an olive bread.  Because I have lots of fresh Rosemary growing in the garden, that seemed like an obvious and delicious addition, and who can eat Olives and Rosemary without a little Oregano?  Anyway, I mixed it all up yesterday morning, let it triple over about 4 hours, shaped and popped it in the fridge.  I re-shaped just before bed, and baked this morning.  All I can say is YUM!!!  I don't know whether this loaf will make it past today...


Recipe and Method:

1 Cup of high hydration starter directly from fridge

1 Cup of freshly ground whole wheat flour

1.5 Cups of strong White Bread Flour

1 scant  tsp salt

Handful of pitted sliced Queen Olives

Handful of finely chopped Rosemary

Pinch of Oregano

1 Tbsp Olive Oil

A few splashes of warm water


I mixed everything up in a bowl with a stiff plastic spatula, then turned it out and kneaded for 10 minutes until smooth and elastic.  Placed back in oiled bowl and covered with clingflim, and left in a slightly warmed oven for 4-5 hours.  By then it had nearly tripled so I shaped into a boule, placed on parchment paper on a baking tray and put in the fridge.  Reshaped at 10pm and put back in the fridge.  Took out of the fridge and turned on the oven with roasting pan and stone inside at 8am.  Baked in preheated oven under the roasting pan for 20 minutes at 250C, then reduced temperature to 190C, removed roasting pan and baked another 15 minutes.  I let it cool on the counter and cut when just barely warm.  Yum yum yum!  Will try REALLY hard to wait until lunch to eat another slice......


Pages

Subscribe to RSS - boule