The Fresh Loaf

A Community of Amateur Bakers and Artisan Bread Enthusiasts.

barley

hungryscholar's picture
hungryscholar

I've been experimenting with beer bread and granary style bread. For this round I used a doppelbock along with some stuff labeled malt powder that I got at my local Korean grocery store. I tried it with WW flour as is included in a lot of recipes, but I felt like it was competing with the malt powder, so this one is just AP flour, plus what's in my starter.

I think this was 9 hours from mix to start of bake. I kneaded it for about 5 minutes after I mixed it and then let it bulk ferment for around 3 hrs at ~86F, shaped as a boule and let it proof in a towel lined bowl for another 6 hrs at 86F again before slashing and baking at 450 F for 40-45 min. The big revelation for me on this bread was using a lame to make the slashes. Up until now I've been using various knives and the difference blew me away, hence the crazy pattern- I was just enjoying the ease with which I could make the cuts.

Submitted to YeastSpotting

>

   
Granary Bread
Ingredients grams
AP Flour 270
Total Liquid 180
Water 22
Beer 158
Salt 6
Malt Powder 30
   
Stiff Levain 51
Total Dough Weight  537
Isand66's picture
Isand66

I have about 100 recipes and counting I want to try from old cookbooks as well as new cookbooks, not to mention all the recipes I have saved from various blog posts and websites.  Having said that I decided to experiment on my own instead and came up with a variation of Peter Reinhart's San Francisco sourdough using durum flour, stone ground barley flour and some roasted wheat germ as well.  I was very happy with the results with the exception that I didn't do a great job of shaping the loaves and they became slightly misshapen.  I do have to say though that the malformed shapes fortunately did not affect the taste.  The crumb was a little tighter than I would have preferred, but overall the bread had a nice nutty sweet flavor and went well with my wife's bow-tie pasta and chicken in a cream sauce she made tonight for dinner.

If anybody decides to try this for themselves, I would love to hear about your results.

Ingredients

15 ounces 65% Hydration Starter Refreshed

2.5 ounces Stone Ground Barley Flour (I use King Arthur Flour)

10 ounces European Style Flour from KAF (or Bread Flour)

5 ounces Extra Fancy Durum Semolina Flour (King Arthur Flour)

2.5 ounces Roasted Wheat Germ

14 ounces Luke warm water, 90 - 95 degrees Fahrenheit

2 1/2 Teaspoons Sea Salt

2 1/4 Teaspoons Instant Yeast  (you can omit the yeast if desired and let the dough sit for 1 1/2 hours to 2 hours before refrigerating)

Directions

Using your stand mixer or by hand, mix the water with the starter to break up the starter.

Add the flours, salt, yeast (if using), and mix on the lowest speed for 2 minutes.  Let rest for 5 minutes.

Mix for 4 minutes more on medium speed, adding more flour if necessary to produce a slightly sticky ball of dough.

Remove dough to your lightly floured work surface and need for 1 minute and form into a ball.

Leave uncovered for 10 minutes.

Do a stretch and fold and form into a ball again and cover with a clean moist cloth or oiled plastic wrap.

After another 10 minutes do another stretch and fold and put into a lightly oiled bowl that has enough room so the dough can double overnight.

Put in your refrigerator immediately for at least 12 hours or up to 3 days.

When ready to bake the bread, shape the dough as desired being careful not to handle the dough too roughly so you don't de-gas it. (If you did not use yeast, let it sit in your bowl for 2 hours before shaping).

Place it in your bowl, banneton or shape into baguettes.

Let it sit at room temperature for 2 hours covered with oiled plastic wrap or a wet cloth.

Pre-heat oven with baking stone (I use one on bottom and one on top shelf of my oven), to 500 degrees F.

Slash loaves as desired and place empty pan in bottom shelf of oven.

Pour 1 cup of very hot water into pan and place loaves into oven.

Lower oven to 450 Degrees and bake for 25 - 35 minutes until bread is golden brown and internal temperature reaches 200 degrees.

Let cool on cooling rack and enjoy!

This post has been submitted to the Yeast Spotting Site here: http://www.wildyeastblog.com/category/yeastspotting

Please feel free to visit my other Blog for older posts at: http://www.mookielovesbread.wordpress.com

Franko's picture
Franko


Pane de Campagne with Red Fife 75% sifted and Rye Bread with Barley 

The bread I've been making most often over the last month or so is a Country style bread similar to Robertson's Tartine CB that I've adjusted to suit my preference for a more sour flavour than his formula results in. The percentage of leaven is 15% greater than Robertson's 20%, and instead of using just white and whole wheat flours, it has a mix of AP, Red Fife 75% sifted, and Dark Rye flours, all of them organic. The combination of these three flours in the respective percentages of 75%, 15% and 10% seems to be the sweet spot for my tastes and makes for a well rounded flavour profile that I enjoy eating on a daily basis. Mostly it gets used in sandwiches but I like it for toast and preserves as well, making it a versatile bread for my everyday use. The dough has a 2 1/2 hour bulk ferment in the Brod & Taylor proofer at 76F/24C, with a stretch & fold at 60 and 120 minutes. After it's rested for a 1/2 hour it goes into the refrigerator covered until I get home from work the next afternoon, about 20 hours later. I have previously made this bread in only one day but the flavour result is nowhere near as deep or complex as when it's left for the long haul. That this long cold fermentation also accommodates my work schedule is a huge bonus for me since I don't always have time to bake on my days off. Other than that the procedure is much the same as for Tartine Country Bread, though I don't necessarily use a Dutch Oven when baking it off, simply because I don't always want a boule shaped loaf. The batard shaped loaves won't develop the nice dark caramelization that they would in a DO environment, but sometimes a batard shape is preferable for sandwich making. I guess I'll have to wait until I can build or buy a WFO to have it both ways. Until then, baking directly on the stone delivers a well flavoured crust, that if I've taken it at the right point (slightly less than full proof), will send shards of crust flying as soon as the knife bites into it. So far my brother, step-son, and his father-in-law have all tried it and loved it, but that's sort of like preaching to the converted since they like their bread on the sour side anyway. The Red Fife sifted used in this formula I realize has limited availability to most folks, but I think that a high extraction flour or a sifted whole wheat would work just fine. Having enough of the bran in small particles gives this formula a good deal of it's flavour, but doesn't create a coarse texture and mouth-feel, which I feel gives the bread a broader range of appeal...if you like your bread tangy to begin with.

 Procedure for Pain de Campagne with Red Fife 75% sifted 

  • Mix all ingredients for levain and ripen for 14-18 hours @ 70F

  • Final dough:

  • Autolyse the flours and water for 1 hour.

    Mix all ingredients except the salt on 1st speed for 3-4 minutes until dough is cohesive. Add the salt and continue mixing for 7-8 minutes on 2nd speed until the dough is uniform and well developed.

  • Bulk ferment at 76F for 2 hours giving 2 stretch and folds in the first 2 hours. Place dough in refrigerator over night, or for up to 18 hours. Remove from fridge and bring allow the dough to sit at room temp for 90 minutes.

  • Round lightly and rest for 20 minutes.

  • Shape as desired.

  • Final rise of 2-3 hours @ 78F or until slightly less than fully proofed.

  • Place on a floured or parchment covered peel, score as desired, and bake in a preheated 500F oven with stone or Dutch Oven. Use preferred steaming method if baking on a stone.

  • Reduce oven heat to 460 and bake for 15-20 minutes, rotating the loaf for even colouring ( remove the lid if using a DO) and bake for 25-35 minutes longer. * Note* heavier loaves of 1600 grams or more will require longer baking times as will higher hydration loaves.

  • Turn the oven off, prop the door open slightly and leave the loaf in the oven for 20 minutes to cool gradually.

  • Wrap the loaf in linen and place on a wire rack for 12 hours or longer before slicing.

    The formula spreadsheet can be found through the link below.


https://docs.google.com/spreadsheet/ccc?key=0AjicIp92YPCTdDZxVHFiMmRXQkFoVmZHWl9kZXZBcHc

 This next loaf is one of my bread experiments gone uncharacteristically right on a first try for a pleasant change. Elizabeth David's 'English Bread and Yeast Cookery' is a book I've been reading off and on over the Fall, which I think had a lot to do with finally deciding to make a bread that uses barley as part of the grist. I've consumed a fair bit of barley over the years but mostly in liquid form, so shortly before the week of Christmas I picked up some whole barley grain at the local organic store to see if I could come up with a way to use it in a sour bread of some kind. The 'barley project' needed to be put on hold till after Christmas, as other more Seasonal matters took precedence, giving me some time to think about how to use the barley. Taking inspiration from some of Andy's/ananda http://www.thefreshloaf.com/blog/ananda  posts where he utilizes a “boil-up” as he calls it, for softening various grains before adding into his bread mixes, I thought this would be a good place to start. At this point I hadn't formalized a recipe, nor did I have an entirely clear concept of what I wanted or how to go about it, other than the boil -up. It's funny how sometimes it takes forever to come up with a formula concept, while at other times it can just come to you while watching a pot of water come to a boil. While I was watching the water and barley simmering away, softening and opening, I thought to myself that this eventual mash would be an excellent medium to grow wild yeast in....like for beer perhaps? One of those light bulb moments for someone who doesn't brew beer. Once the grains were soft enough to mash with a fork and had cooled to room temp, mature rye starter, along with a scant amount of salt was added to the mash. The plan was to let the mash ferment slowly over the course of a few days to build flavour, the addition of salt would help keep it in check and hopefully prevent a runaway fermentation. After 4 days at 70F in the B&T proofer, the mash had developed a distinctly (or stinky according to my wife) sour nose to it. Rather than push it any further and run the risk of contamination the mash was transferred to the fridge for safe keeping until I was ready to use it in the final mix. Including an altus in the mix came to me just the day before I'd planned to make the bread when I ran across a heel of Horst Bandel Pumpernickel in our freezer. I remembered having saved it for this very purpose and this seemed like the perfect opportunity to use it up. The mix itself went as it would for a typical high ratio rye bread, with little gluten development and a sticky paste to work with. With some minor adjustments for hydration it formed a slightly wet paste, but came together without too much effort. Bulk ferment was around 80 minutes at 81F/27C, then shaped, using the wet hands/scraper method to form it into a log shape then deposited into a 4 1/2”x 9 1/2” Pullman tin, sprinkled with barley flakes, lid on, and set in the B&T proofer for a final rise of 2 1/2 hours at 81F/27C.

Full formula and procedure below.

After 20 minutes in the oven the bread was giving off a noticeably beery aroma that gradually changed to a rich, roasted fragrance of grain and malt over the remaining course of the bake. At first taste the bread is just inside my sour tolerance level, but the flavour is fantastic! Malty, sweet & sour, with a moist, chewy bite to it, it's the sort of bread that delivers on all levels. I expect it will pair well with other foods once it's mellowed over the next few days and the initial sharpness has come in to balance with the other ingredients, but my guess is I'll be eating most of it just for it's flavour alone.


Wishing everyone the very best for the New Year!

Franko 

PROCEDURE


Mash


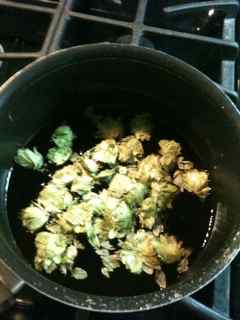
Combine the water and whole barley in a heavy bottom pot and bring to a slow boil, cooking and stirring till the grains become soft. Add the rye meal and salt, stir and allow to cool to room temperature.


Mix the rye and barley mash 4-5 days in advance of the final mix and allow to ripen at room temperature 70F/21C for the first 48 hrs, then keep in the fridge or at a temperature of 50F/10C max until ready to make final mix. Allow the mash to come to room temperature before including in the final mix, or gently warm on low in the microwave. The mash should have a strong sour smell when ready to use and longer ripening times may be necessary.


Sour

Mix the mature sour with all of the water and 50% of the rye flour and ripen for 14-18 hr at 70F/21C with the second feeding of rye flour at the midway point of the ripening period.


Altus

Soak the old rye bread in hot water and leave overnight. Squeeze as much water as possible from the bread, reserving the water for the final mix. The old bread should be of a high percentage rye bread, the darker the better.


Final Mix DDT-81-84F/27-28C

Combine all the ingredients except the sour and mix till thoroughly combined. Add the sour and continue mixing till the paste is smooth and uniform. Using wet hands and a scraper, work the paste on the bench by scraping and folding it over itself for several minutes, adjusting hydration as needed to achieve a medium consistency. The dough should be slightly on the wet and sticky side. Place the paste in a bowl and begin the bulk ferment.


Bulk Ferment

Ferment the paste for 60-90 minutes. Times will vary according to individual conditions, but the paste should show a small increase in volume during this period.


Shaping and Final Rise

Form the paste into a log shape and deposit in a 4 1/2” x 9 1/2” paper lined or well glazed Pullman pan. Smooth the paste evenly into the corners and along the sides creating a slight peak from the sides to the center of the surface. Sprinkle the top evenly with barley flakes, brushing with water if needed to make them stick. Begin the final rise at a temperature of 82F/27-28C with some humidity present. Allow the paste to rise to within 3/4”-1/2” of the top of the pan before sliding the cover of the Pullman over top. The final rise may take upwards of 2 1/2 hours and should be monitored every 30 minutes to avoid over-proofing.


Baking

Place the closed pan on a baking stone in a well preheated 500F/260C oven and bake for 10 minutes before lowering the temperature to 460F/238C. Continue to bake for 45-50 minutes then lower the heat to 375 for an additional 15-20 minutes. Check the loaf to see if it has pulled away from the sides of the pan. If not continue baking till it has. Remove the lid from the pan, turn the heat off and leave the loaf in the oven for 30 minutes. Remove from the oven and cool for 5 minutes in the pan before de-panning to a wire rack. Wrap in linen and cool for 12-24 hours before slicing.

The formula spreadsheet can be found through the link below.

https://docs.google.com/spreadsheet/ccc?key=0AjicIp92YPCTdEptQl82UWtwdzFiUExjY3BHWXh4eEE


bread10's picture

Barley, buckwheat and spelt sourdough loaf

January 7, 2012 - 2:39am -- bread10
Forums: 

Hello, I generally make a spelt sourdough with sprouted rye grains (crushed but not milled). But for a change, I was thinking of making something along the lines of barley and buckwheat with spelt but not sure where to start with proportions etc.

Would you suggest using barley and buckwheat flour (the problem with that is sourcing fresh flour)? or soaking/sprouting the grains and crushing them?? I don't have a grain/flour mill, but I can use my coldpress juicer to crush them into a paste like I normally do with the rye grain.

jschoell's picture
jschoell

This is my second experiment with using beer brewing methods to make a bread.

This time I wanted to see how the flovor of hops would taste in a baked loaf. 

barley flour soaker. Leave at room temp overnight.


1 lb of malted barley of your choice... I used 90% special B and 10% chocolate malt. Place grains in a large pot and cover with water (no more than 2 cups) Slowly raise temp until it reaches 160F, then turn off heat, cover, and let sit for an hour. strain the liquid into a new pot. Save the spent grain for other fun stuff. 


add whole hops to the strained wort, and begin the boil. Boil for 30 minutes, keeping a loose cover on the pot to prevent evaporation. Allow to cool to room temp. Strain out the hops and your wort is ready to add to the dough!


Combine the flour, salt, sugar, and yeast. Whisk together. Tear up the soaker and add to the flour mixture. Add oil, wort and water. Mix until you get a ball, then transfer to stand mixer.

knead for 5 minutes, rest for 2 minutse and knead 2 minutes more.

Place dough in oiled bowl and refrigerate at overnight or longer if needed. 

On baking day: Remove dough from fridge and allow to reach room temp, about an hour. Stretch and fold and place back into bowl. After 30 minutes, do this again. ferment until dough reachews 1.5x original size. Divide into 2-3 pieces depending on size of loaves desired (I made two, but I think smaller loaves would be better for a more open crumb). Allow to proof for and hour. Preheat oven to 500F. Add water to steam pan, insert the loaves and reduce temp to 450. After 15 minutes, rotate and reduce temp to 350. Bake for 30 minutes or until center of dough reaches 200f. 

The finished bread had a moist, chewy sandwich bread texture. It is not very sweet. I does have a nice malt flavor and i can detect a little of the hop bitterness and flavor. I think I'll add more hops next time!

NOTE: all these amounts are approximate!

SOAKER

2 cups barley flour

a few grains of instant yeast

enough water to make a sticky paste (about a cup... I didn't take exact measurements.)

FINAL DOUGH

about 3 cups bread flour

2 tsp salt

3 tsp raw sugar

1 tsp instant yeast

1 tbsp canola oil

about 1 cup of cooled wort

about 3/4 cup water 


jschoell's picture
jschoell

I'm a homebrewer. One of the best smells in the world is a boiling pot of wort, and I've always wanted to somehow "eat" that smell. Well, this is what happened on my fist attempt at a "brewer's bread".


Day 1: 3/4 c KA bread Flour

  3/4 c Whole Wheat flour

          1/16 tsp instant yeast

  enough water to make a very sticky dough

mix well and let sit at RT for 18-24 hrs then refrigerate for a day.


Day 2: Go to your local homebrew store and pick up a pound of your favorite malted barley (or wheat). I used 3/4 lb caravienne and 1/4 lb belgian aromatic. Mash at 150F for an hour with one quart of water. I used a crockpot and a thermometer. Strain the wort into a bowl and sparge with a cup or two of boiling water. Process the spent grain in a food processor until it obtains a paste-like consistency. Refrigerate the wort and the grain paste overnight. 

Day 3: Cut up the biga into 10 pieces. Combine:

Biga

1 1/2 c bread flour

3/4 - 1 c spent grain paste (depending on how much "whole grain" you want to taste

2 tsp instant yeast

2 tsp coarse kosher salt

1 tsp canola oil (or whatever you like... try melted lard!)

1/2 c wort ( adjust as necessary... my final dough was very sticky)

Stir with a fork until you get a ball, then knead with dough hook on medium speed for 4-5 minutes. Rest dough 20 min, stretch and fold in bowl, repeat three times. form into loaves or boules, proof 2 hours. Set oven to 500f, pour 1 1/2 c hot water into steam pan and place loaves in oven. Reduce to 425f and bake for 15 min, rotate then bake for 10 min or until dark brown and center reads 200f.


I was expecting to get a dark, heavy brick, but I was pleasantly surprised by how light and crispy it turned out. Next time I'll add some hops!


Mebake's picture
Mebake

This is a Whole Wheat Barley Bread I baked yesterday. The recipe was made to include my barley flour.

Procedure:

Day 1:

Mix the Soaker contents in a Bowl until you form a ball. Put the dough in a an oiled container and leave at room temp. for 24 hours.

Mix the Biga contents in a Bowl until you form a ball. Put the dough in a a large oiled container and into a fridge for 24 hours.

Day 2:

Take the BIGA out to warm 2 hours prior to final mixing. Chop the Biga and Soaker into pieces and combine them. Distribute salt and yeast on top, and start mixing, resting 5 minutes after every knead. The Dough is wet, so you'll have to knead with wet hands. Form a Tight ball, and put the dough in a large bowl for 45 minutes fermentation.

Scrape the dough out, and divide it into two, three or four pieces. Preshape, rest for 5 minutes and then shape. Lay loaves in a floured basket for 45 minutes. Preheat Oven with two racks, and a steaming device to 470 F.

Cover the Oven glass, Load the doughs into the oven, and pour a cup of boiling water into a steaming device. seal the vent. 15 minutes later, remove the steaming devise and unseal the vent, and bake for 20 more minutes at 390F.

Cool on Rack for 2 hours befor slicing.

The flavor of this Bread is Nutty Wholesome, with a hint of barly sweetness in it. I think some honey would have enhanced the flavor more. i'll tweak this recipe in the future, God willing.


BNLeuck's picture
BNLeuck


Procrastinator's Sandwich Bread: Take 2

Continued from Procrastinator's Sandwich Bread.

So, while I was impressed with the taste and texture of the previous PSB, I still don't like the idea of all white bread. I grew up on white bread; my mother bought sandwich loaves from the grocery store like most busy moms, especially since she had little talent in yeasted baking, and my grandfather's specialty was potato bread. And while tasty, and surely better than the store-bought loaves, it still wasn't any paragon of nutrition. It took me a long time to like the taste of whole grains, but now I seemed to have flipped the other way... I don't really like white bread. I'll tolerate it, but I prefer whole grain.

And to make it even more difficult, I don't really like wheat -- at least, by itself. I find it bitter, and frankly, I don't do bitter. But I love rye, and barley, and corn, and oats, and... well, you get the picture. I actually really like white wheat, because of its less-bitter taste, but it's much harder to find for a good price. Red wheat is plentiful and cheap, so I just find it easier to mix it with other grains, or sweeten it, etc. Even white wheat has a bold flavor, though. You notice it right away. This isn't a bad thing, but it isn't what I wanted in this bread. I wanted subtle, behind-the-scenes flavor. The kind that makes you go, "Hmm, what is this? This is different. This is good."

So I chose barley. Mild, slightly sweet, and a perfect backdrop for the flax already in the recipe. This time, I chose to use only 1 cup of barley flour and 4 cups of bread flour. I need to know the threshold of the bread, when it goes from just enough whole grains to too much. I intend to gradually step up the amount of barley flour I use until I find it negatively affects the texture, flavor, and/or ease of use of the bread. I don't want to have to coddle this bread because it has whole grains. If I have to coddle it, I won't make it regularly. And that sort of defeats the purpose, doesn't it?

I show the recipe below for one loaf, though I doubled it this time around and made two loaves. Honestly, this dough is so easy to handle even by hand, I would make massive batches at once, but I only have one oven and two loaf pans. I'm sure if you scaled this out and made a baker's dozen it wouldn't be much more work than it is for one. I scaled back the yeast some this time, to see if it still rose quickly -- I noted little difference in rise times but a big difference in taste. Also, I used half buttermilk, half 1% milk this time around, and sprinkled with barley flakes instead of the 7-grain cereal. Very tasty! Though the barley flakes like to fall off some...

Procrastinator's Sandwich Bread: Barley Edition


  • .25c butter
  • 1c 1% milk
  • 1c reduced fat buttermilk
  • 2tbsp granulated sugar
  • 2tsp kosher salt
  • 4c bread flour
  • 1c barley flour
  • 1tbsp instant yeast
  • 2tbsp vital wheat gluten
  • 2tbsp ground flax seed
  • more milk for brushing
  • 1-2tbsp barley flakes (or topping of choice)


  1. Melt butter in microwave in a large measuring cup or bowl. (1 min on HIGH for me.)
  2. Add milk and heat to lukewarm. (1 more min on HIGH for me.)
  3. Add sugar and salt and stir to dissolve.
  4. Combine flours, yeast, gluten, and flax in a large bowl/the bowl of a stand mixer.
  5. Add liquid and mix to "shaggy mass" stage.
  6. Knead by hand or mixer until elastic. Dough will NOT clean bowl or form a ball; this is fine.
  7. Let rise until double, about 35 mins.
  8. Shape into a loaf, and put in greased 9x5in pan.
  9. Preheat oven to 350F; let dough rise 25-30 mins.
  10. Brush with milk and sprinkle barley flakes on top, then score loaf as desired. (I always do mine diagonally, corner to corner.)
  11. Bake for 25 mins uncovered, with steam, then cover with foil and bake another 20-35 mins, until internal temp is 190F.
Pictures to come tomorrow, when I un-lazy enough to upload them to my computer. LOL


Pages

Subscribe to RSS - barley