My wife and I have differing opinions about sourdough--I like it tangy, she likes it mild; sandwich bread--I like its crumb chewy, she likes it soft and fluffy; and biscotti--I prefer parmesan cheese, and black pepper, she craves ameretto-almond. But when it comes to baguettes we are 100% in accord: wheaty flavor, lightly chewy, open crumb, crackling crust. And in that order.
I've spent nearly two years working on a formula, and a process that yields what we want. I've learned quite a few things about baking in general, and baguettes in particular. I've also relearned a few lessons about myself. In this moment, I think I've reached the semi-experienced novice level--somewhat akin to the Sorcerer's Apprentice.
Please, this is just my offering of what I've found works for me.
Here's what I've learned about a formula: use quality ingredients; don't obsess over the quality.
Flours:I've lusted over descriptions of French milled flours, King Arthur's French-style, and Guisto's artisan flours: lusts never realized. It's simply a cost decision. I use King Arthur's super-market accessible, all-purpose flour. I've made a couple of excursions into other brands, with consistent disappointment. One brand's flavor was really nasty.
Salt: I use sea salt, purchased in bulk from a local organic food store. It's ridiculously inexpensive. My children, knowing my Foodie obsessions have gifted me, more than once, with Sal de Very Expensive. I've used it. I can't discern a difference; neither can my wife.
Water: Our well. (Suwannee River aquifer)
Yeast: SAF: as little as possible.
Flour (one kind), salt, water, yeast: it doesn't get any simpler than that.
Process: Herein, I've learned the biggest lessons. K.I.S.S.--Keep it Simple, Stupid! (I learned this, the first time, from a Navy Chief Petty Officer, when I was a bottom-of-the-ladder Seaman)--outpaces them all.
A few general lessons: These support K.I.S.S.
Be consistent: Use the same ingredients. Same brand, same type, same weight ratios, same temperatures, etc.. Which of course you won't so...
Make small changes (only one at a time if you have the discipline; I'm not yet that disciplined, but I am at the point that I never make more than two.)
Be consistent: Do the same steps, with the same tools, in the same order, for the same duration, at the same temperatures , etc.. Which of course you won't so...
Keep notes: what you used, what you did, what you changed, what you forgot, what resulted, what you're going to do next. Also, at the beginning of a follow-on bake review your previous notes, and write down what you're going to do. Underline the change(s).
Baguette specific lessons:
These are the things that work for me, with K.I.S.S. always in mind. I marvel at the time and effort other TFL'ers put into baking baguettes. I'm certain their results make my baguettes reminiscent of dog biscuits. Nonetheless, we (my wife and I) are happy with our results, so far, and the neighbors make complementary noises with their mouths full.
Flavor develops during fermentation: Yes, you've got to use ingredients you trust. They have to be capable of giving good flavor, but it's fermentation that exploits those qualities. Up to a point, retarded (chilled) fermentation develops flavor proportionate with the fermentation duration. I don't know what that point is. I've learned I get desirable flavor between 15 hours and 21 hours of retarding at 54°F. Furthermore, the desired flavors are more present after 21 hours compared to 15. hours. I'm fortunate to have a wine closet wherein the temperature is maintained at 54°F. I've not attempted retarding in a refrigerator--most home fridges are 38°F-40°F--but from reading TFL other bakers are having great successes.
Hydration differences don't seem to change the flavor profile significantly, or, at least, not as significantly as retardation time. I've investigated from 65% hydration to 72% hydration. Arguably, the more flour, slightly more flavor in that Hydration range, whereas, 15 hour retardation yields an excellent flavor, 21 hours a bigger excellent flavor.
Substituting sourdough levain for commercial yeast, makes a different bread. It's sourdough in a baguette shape. Delicious, sometimes, but not an accurate rendition of the modern baguette. Furthermore, sourdough levain masks the delightfully "wheaty" flavors a baguette can (and should) have. White flour, salt, water, and yeast: it doesn't get any simpler than that. (I'm looking forward to the hiding I'll get for this comment.)
Open crumb structure improves with retarded fermentation. I'm fairly sure this is accurate, however, mishandling can massacre the gain.
Don't ignore DDT. It gives one a finer control over results from retardation. Don't think of DDT as just small adjustments to room temperature water to hit the "magic" 76°F or 80°F. Pre-chill the formula's flour and use ice water in the dough's prep, to bring the mix to the planned chill temperature immediately. Chill the dough during autolyse, and return it to the chiller immediately after each manipulation, e.g., S&F.
Process, i.e., techniques: their flow and finesse, account for more than 50% of a baking success, especially with baguettes. (I actuallly think its considerably greater than 50%, but, then again, 85% of all people make up their own statistics.)
Here's a series of photos I took today of a 65% Hydration, 21 hour retarded baguette bake.
I've documented my earliest attempts to make baguettes here http://www.thefreshloaf.com/node/16377/overnight-baguettes . It gives the 72% hydration formula I started with. Most of my subsequent many tweaks involved exploring hydration, and retarding effects.

This is my post-retardation setup: I preshape the baguettes immediately and leave them to rest for 1 hour at room temperature.

After 1 hour rest, I shape and proof the baguettes (seam side up). Proofing time today was 1 hour.

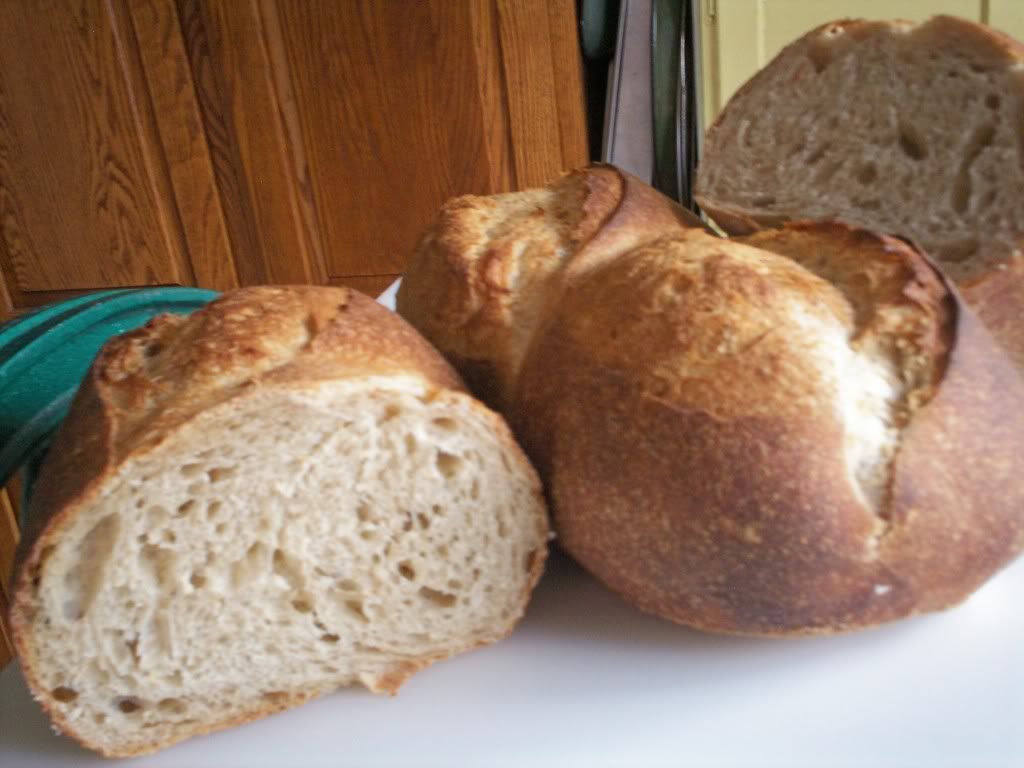
Here is the second loaf, slashed, and ready for loading into the oven. After many attempts, with various commercial peels, to load baguette loaves either serially, or in multiples I've settled on loading them serially with a home-made peel--it's really just a scrap piece of birch plywood, cut 2" narrower than my oven. I also load sourdough loaves (2) side-by-side serially using the board held along the narrow side. It works better than any of the commercial peels I've purchased--including the Superpeel.
I load the peel by simply flipping the loaf onto the rice flour dusted board, and slashing it. Then right into the oven, one at a time.

The oven, loaded to its meager capacity: 3 baguettes. You can see the only down-side to serially loading I've experienced. Oven-spring is already well underway in the first two loaves.
On the top shelf you can see the way I generate steam: two wetted towels. SylviaH convinced me to try this approach, and after the first try I stuck to it, but I made it simpler than her method (involves heating towels in the microwave). I wet the towel with 2-3 cups of the hottest tap water. I put the wet-towel tray on the top shelf, and switch the oven control from "Convection Bake" to "Broil" at 550°F. I do this about 6 to 10 minutes before loading the first loaf. I can watch the wetted towels begin to bubble. I switch the oven to "Bake" (conventional, shutting off the convection fan) at 500°F. Finally, after all loaves are loaded, I decrease the oven to "Bake" 450°F. After 10 minutes I remove the steam pan, restore "Convection Bake", and finish the baking. Early in my trials I discovered the rear-mounted convection fan dried out the surface of the most rearward loaf, and inhibited oven-spring. That's why I do all the oven mode switching.
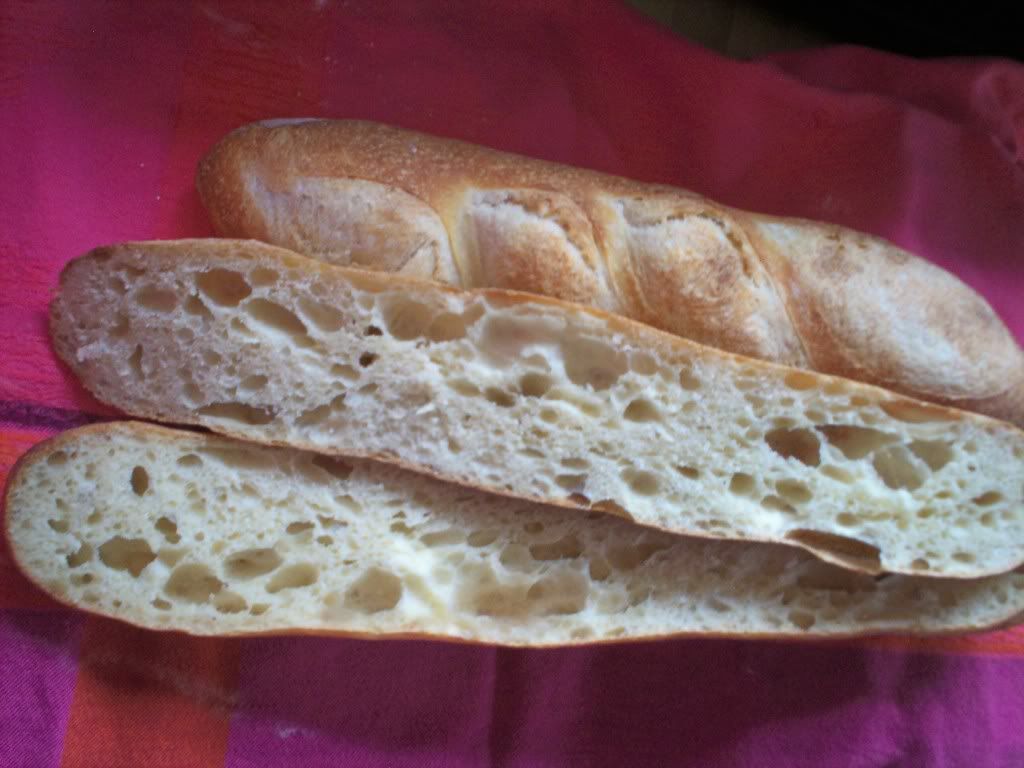
Results:

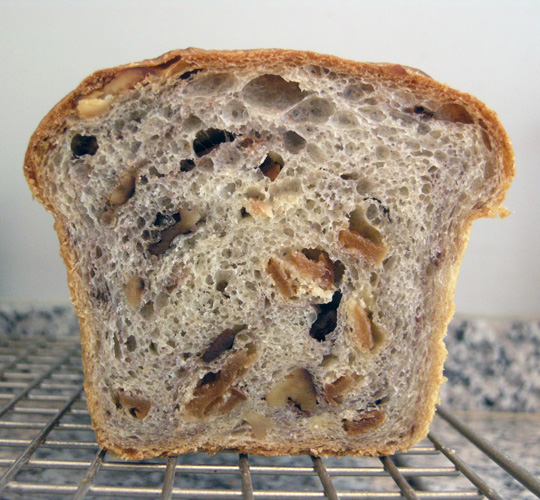
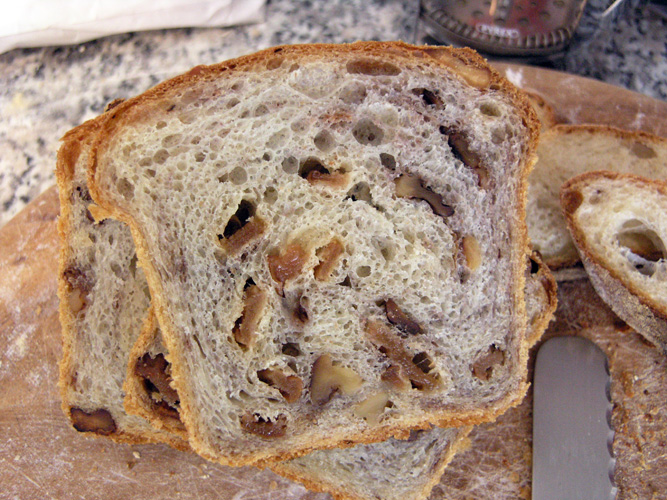
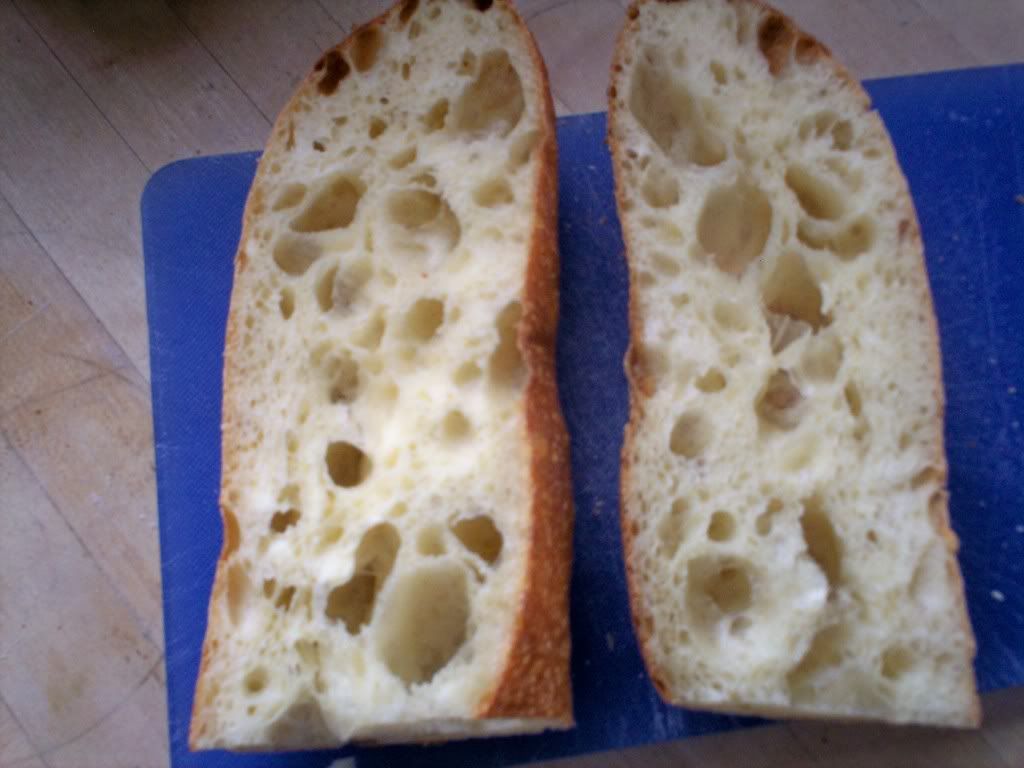
and the crumb.

Recall, this is a 65% hydrated dough. It's consistent open crumb like this that supports my arguement retarded fermentation supports open crumb development.
So far, I've not lost sight of K.I.S.S. I bake baguettes once each week, so if you see where I can make it simpler, please comment.
David G