The Fresh Loaf

A Community of Amateur Bakers and Artisan Bread Enthusiasts.

baguette

cookingbyheart's picture
cookingbyheart

http://vimeo.com/48925507

My guy, Paul, is a lover of bread. In particular, he loves a good baguette. Through him, I have been initiated into the life of baguette enthusiasm.  A good baguette is dark and crusty on the outside, fluffy and light on the inside. That seems simple enough, most baguettes should fit that description vaguely, but there is a scale within that description. In France we found that the artisanal handmade loaves are usually best and everything else is, well, not best.

In France, bakeries prepare baguettes and other breads daily, usually preparing a morning batch and an evening batch in order to provide the freshest loaves all day long. In order to stock the shelves with the freshest breads when the shop opens at 6a, Boulanger William Courderot begins his day at 1am. When we arrived to meet him at 5am, he was well into his daily routine. Each day, Courderot rolls out 600 traditional baguettes and each day they fly off the shelf.

There are many types of baguettes. The hand rolled ones are usually called tradition or l'ancienne, they are made in the old French way. You can literally taste the love with which they are made. This is why I advise you to steer clear of the standard machine made baguettes! They are usually lighter in color, less crispy. They are longer and more uniform, there is no trace of flour on the finished crust, and they are maybe 10 cents cheaper. I'm not sure why anybody buys them.

In the states, it's getting more and more possible to find quality bread but it's still always fun to see what you can do yourself. When we were in France, I made a pact to learn how to make a good baguette by baking them daily. But after a couple of sad attempts, I gave in to the fact that everywhere I looked I saw perfect baguettes for €1 or less. I was in the land of incredible baguettes and I wasn't about to waste time and empty calories on bad ones! It takes a lot of patience to come up with a method that works for you in your setting. It's tough for a recipe to account for the moisture or dryness of the air in your environment. Consumer ovens just don't get as hot as industrial ones. But have no fear, Julia Child is here! Julia offers a thorough recipe with helpful pictures in her book Mastering the Art of French Cooking, Volume 1, and you can see her recipe sans photos here.

One useful tip I can offer to fresh bread lovers: the best way to keep baguettes and other breads fresh and tasty is to wrap them in aluminum foil and freeze. If you have a big country loaf, cut it into smaller more manageable meal-size pieces and wrap each piece separately. When you want to eat some bread, place it in the oven or toaster oven at 350°F for about 10-15 minutes. When you can easily squeeze the baguette in your hand (with a glove of course), remove the foil, turn off the oven and put the bread back in the oven for another 5 minutes or so to crisp it up. Enjoy!

William Courderot's French Baguette

Ingredients

1 kg farine / ~7 cups flour

650 g eau / ~3 cups water

20 g sel / ~3.5 tsp salt

20 g levure / ~5 tsp yeast

Method

Mix all ingredients in kitchenaid or cuisinart mixer until smooth. Let rest for an hour and a half.

Flour prep area and separate dough into three equal pieces. Generously flour a linen cloth. Gently fold the dough over itself and roll while pushing the dough outwards until it becomes a long snake. Notice how little Courderot handles the dough as he forms it into baguettes. Don't handle the dough more than you have to. Place the baguettes on your floured linen cloth, cradling each loaf in fabric so they don't touch one another. Leave to rest for one hour.

Preheat oven to 550°F (or as high as your oven will go).

Use a new razor blade or very sharp knife to score the bread with evenly distributed diagonal marks, about 4-5 scores per loaf. Fill a cast iron pan with ice water and place it on the bottom rack of your oven. This helps keep a good amount of moisture in the oven while the bread bakes. Place the baguettes in the oven for 20-30minutes or until they are crusty and brown. When they're done, let them cool on a rack for 10 minutes or so before you break bread.

Enjoy!

-Cookingbyheart.org

Justkneadit's picture
Justkneadit

After my sourdough boule disaster this past weekend, my bake with baguette a l'ancienne recipe boosted my confidience a smidgen...

and...

and also some crumb...

Now, it doesn't have deep open crumb the size of the Grand Canyon like DonD, txfarmer or Ian, but it is an improvement and I'll take it. I followed the same recipe as last week except:

  • No rye and a full 500g of KAF AP
  • 26 hour autolyse and 26 hour fridge proof
  • Minimal handling, flipping board would help immensely

The crust was thin but crunchy and the crumb was creamy and fantastic! I swear it almost had a hint of butter. My girlfriend actually woke up at 6 am when they came out of the oven, grabbed half a baguette, muttered delicious and went back to bed. I laughed. Any comments or critiques feel free!

Ian,

Amazing the difference between the 12 and 24 hr  cold autolyse.

Justkneadit's picture
Justkneadit


After having a successful first try at my first of two recipes I will bake for a year, my sourdough boule, I gave DonD's recipe for Baguettes a l'Ancienne my best. I will say a good baguette is not as simple as it may seem, and I feel this recipe will take more time to become proficient.

The method to my madness...

Recipe:

Flour Mixture

  • 470g KAF AP
  • 30g Arrowhead Mills Whole Grain Rye
  • 300g Cold Water (38F)

Dough

  • 50g Cold Water (40F)
  • 10g Pink Himaylan Salt
  • 2g Instant Yeast

Procedure:

  1. Mix flour and cold water into a doughy blob. Temp of dough after mixing 63.7F. Place in fridge for 12hr at 42.2F.
  2. Pull flour mix out of fridge and mix in 50g of cold water and yeast. This was um...difficult at first. Between freezing my fingers and fighting the slimy mixture I finally brought it together, about 10 min. 
  3. Then add the salt and knead until distributed evenly, using Bertinet's method.
  4. Let the dough rest for 15 min, then began 1st of 4 S&F's at 30 min apart and then 2 S&F at 45 min apart.
  5. Place dough in oiled bowl, in to a plastic bag it went and then in to the fridge (44.2F) for 24hr.
  6. Pull out of the fridge, gently divide into three 270g pieces and gently preshape into a fat log. I used Ciril Hitz's method for prehaping and shaping. Cover with plastic and let rest for 1hr.
  7. Preheat oven to 490F. I gently degased and shaped then proofed en couche for 45 min seam side up.
  8. Misted sides of the oven, transferred baguettes to baguette pan, scored and placed in oven with 2/3 cup of boiling water. Immediately turned oven down to 460F. Bake for 10 min then remove pan with lava rocks and reduce to 430F for 10 min. Then turned off oven and opened the door and let the baguettes sit for 5 min. Allowed to cool for 30 min.

My results are as follows, but not exactly what I wanted.

Notes:

Crumb was no where near what I wanted or comparable to DonD's wonderful baguettes, but then again I have only just begun. Maybe no degas the next time and some work on shaping and scoring wouldn't hurt.

Crust color was a little light. Any tips?

What is the purpose of the rye in the recipe? The inside was nice and soft with a thin crunchy crust but I thought the taste was a bit off. In all honesty a may have forgotten the salt but I can't remember, mise en place right? So, the no salt could have been the culprit, not totally sure I forgot it though. Anyways I'm open to suggestion, critques or comments. Thanks!

Justkneadit's picture
Justkneadit

    I only recently delved into the world of bread, and before I overwhelm myself with the plethora of recipes I am going to hone in on the basics with 2 recipes. I have been reading Peter Reinhart's The Bread Baker's Apprentice and obtaining the "feel" for the dough is my end goal. Instead of relying on timers, I want to depend on my senses.

   My hope for this year long bread baking journey is to be able to bake an excellent sourdough boule and baguette. That is not to say I wont bake a few odd recipes here and there, but my main focus will be on the basic sourdough recipe posted by cranbo which I will use for my boule and the Baguettes a l'Ancienne recipe posted by DonD for my baguettes. Gaining experience using a sourdough starter and instant yeast will be invaulable. Already, I can see the subtle and sometimes obvious differences in the way each type of yeast acts on the dough. As I gain experience hopefully it will lead to better tasting bread.

   I must be honest, I will be posting rookie questions for quite some time, but I have noticed already how helpful the TFL community is and hopefully you all can guide me through my trials and errors. Well here goes a year of enjoyment.

Lane


nycbaker11's picture

Calling on all Master Baguette Bakers

August 21, 2012 - 7:54am -- nycbaker11

Hello Bakers...2 years ago I gave baguettes a try and I was so intimidated that I retired them from my baking list right there after lol.  Last week I got the urge to finally give it another try and I went with the Bouabsa version, pretty simple and straight forward but the outcome was eh... pretty lame . 

davidg618's picture
davidg618

Yesterday I made Orange Marmalade with Single Malt Scotch. It's bursting with flavors: rabid orange with a slightly bitter tang, and subtle smokey undertones of peat smoked whiskey. No ordinary baguette's wheatiness could stand up to this flavor.

Concurrently, I was making sourdough levain for my refrigerated seed starter's refreshment; I simply made 300g extra.

I made 1050g of 68% hydrated sourdough, with 66/24/10 ratio of All-purpose/Bread/Whole Rye flours. The levain was fed only with Bread flour, and I also let the levain ferment for 12 hours to develop its sourness a bit more. This is a slight variant of my usual sourdough 45/45/10 flour ratio; only 250g of levain is used in 1500g of final dough, and the levain ferments for only 8 hours. The dough was retarded for 15 hours @ 55°F. I shaped three 350g loaves into baguettes.

This combination of tweaks yielded yielded a bread with a baguette-like crumb, softer than my usual chewier sourdough, and a distincitve acidic tang that stands side-by-side with the bursts of orange rind, the scotch-smokiness, and the marmalade's bitter low note.

Whether, or not, these loaves are deserving of being called "baguettes of a different color" or are pretenders merely dressed up like baguettes, they certainly are keepers.

David G


Doc.Dough's picture

Alternatives to a laminated wood shaping surface

May 30, 2012 - 2:42pm -- Doc.Dough

I have Corian counters and had difficulty shaping baguettes due to working on a surface that was too smooth.  I imagine that others who have granite or Formica have similar issues.  I can put a slab of laminated maple on top which works just fine but makes the working surface higher than I want it.  I can also apply a thin slurry of flour/water to the counter and let it dry, which is about the same as wood from the perspective of surface friction but it does take a little time to get it ready and also time to clean-up when I am done.

I am looking for other alternatives.

Leandro Di Lorenzo's picture
Leandro Di Lorenzo

Hey, I don't post as much as i should here, but I'm excited about the new way of steaming, at least for me, that I used today!

First, I'm from Brazil, so sorry for some misspell or something :)

I was looking for a better way to create steam for bread baking, than I came up with a photo (on thefreshloaf) of a pressure cooker connect to the oven (eletric) by a tube, I didn't even know that a eletric oven has a tube on top by the stove, and then I said to myself " what the heck, let me try this!"

I decided to bake a regular poolish dough.

Total flour: 400g

Pre fermented flour: 150g + 150g of H2O

I started with 65% hydration, but I had to add a bit more H2O maybe 68 or 69% total, got a really old flour (KAAP)

2% Salt

A bit of yeast

Only thing I did different. I mixed The poolish flour H2O, yeast and a bit more malt than normal and let it rest for maybe 2.5 hours, I went to the gym rsrs.

After this period, added the salt and a tiny amount of ascorbic acid. I can only bake batards on my oven, so I can use a little more strength.

Then kneaded just enough, let it ferment for 1:30 min with a turn (45 min), divided, pre shaped shaped proof and bake. ufff!!!

But I'm getting out of track... Wanna talk about the steam!!! Hahaha

The bakeing took 27 min. total

Here is a photo of my new steaming method

I steamed the oven before, don't know why cos when I opened the oven door all the steam came out lol, and after loading.

And for 15 sec in one minute intervals for 10 min.

After that let it bake for more 10 min, turn the bread and more 7 min in the oven, maybe a bit much, it burned the bottom :(

I loved the results!!!

Check it out!! Some pics...


I think is the first time than I bake with steam instead of vapor. I mean, I tried before with hot water, but I don't know if is the same, cos here I'm using the steamer.

I tried to show some cracks on the crust, I don't know if you can see it on the pics.

I think is worth trying, I will again tomorrow, with a bit of rye on the poolish ;) ....

So that's it!!! Hope you like it!!! Happy baking!!!! =)

BTW One last photo...

That's the layout inside my oven!!!

Regards,

Leandro Di Lorenzo


proth5's picture
proth5

With a lot of baguette dough and a home oven.

Lately I have been working with ever larger batches of dough.  This is good training as it helps develop one’s eye in terms of dividing, does a little hand skill training on wrangling a larger volume, and because I have a tiny kitchen, ups the bar on mise en place and other organizational skills.

And while I am not in training for the Coupe du Monde (because I am too old, and frankly I don’t bake that well) – I continue to be very inspired by my two opportunities to attend and have decided to consider the judging criteria as I strive to improve my baking.  Baking to a schedule is part of that – and while the phrase “watch the dough not the clock” is good advice for most home bakers – inspired by the fact that the 2008 Team USA didn’t place because they finished late (geeez) I am practicing how to control dough temperatures and conditions so that I can hold to a schedule.

But then there’s that home oven.  I always knew that oven capacity is the big factor in getting bread out the door – but a commercial oven would simply not fit my space and to be honest, would not be a good investment in a state where there is only a remote possibility that someday I could operate a bakery from my home.

I’ve tried retarding the dough after pe-shaping and was not best pleased with how the dough felt during shaping. Additionally, my ever growing group of bread testers is beginning to want a little variety. So my challenge is to get decent loaves when I need to bake in shifts.

So after whomping up a large batch of my “bearguette” dough, I set myself to dividing up the dough.

Recently I had a little incident with wildlife in my home that required that I empty out and disinfect everything in my basement.  It’s an ill wind that blows no one any good, and indeed this exercise revealed that I have a large number of round cake pans inherited from my grandmother.  I knew in my heart that I had them – it just never came to front of mind.

I can load three pans at a time into my oven, so I gave my pans (6 total) a very generous coating of olive oil and sprinkled on a combination of dried herbs (oh, about 8-9 ounces of dough per 8 inch pan).  Dough was shaped into rounds placed in the pan “good “ side down and after a few minutes flipped to good side up.  This action coats the dough with olive oil and while there is no fat in the dough, the general taste and mouth feel is that of an enriched dough. (and then there are those herbs…)  This shaping is the least sensitive to over proofing and so is put somewhere cozy for as long as it takes to get the rest of the bread proofed and done.

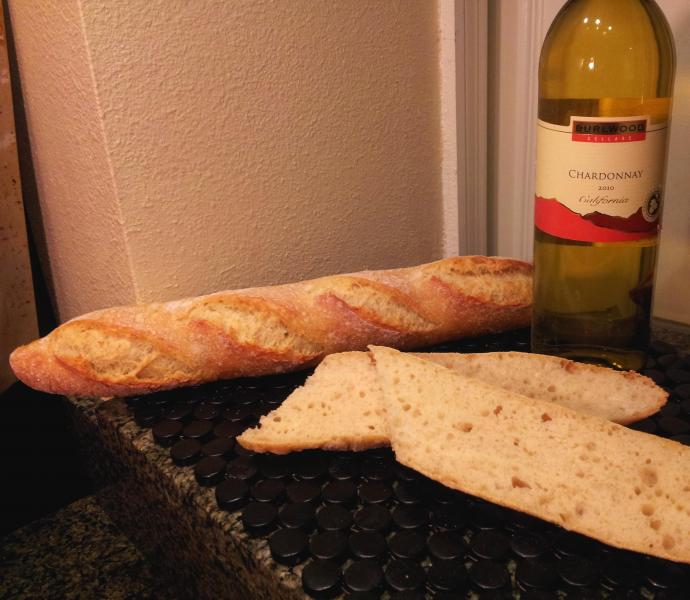
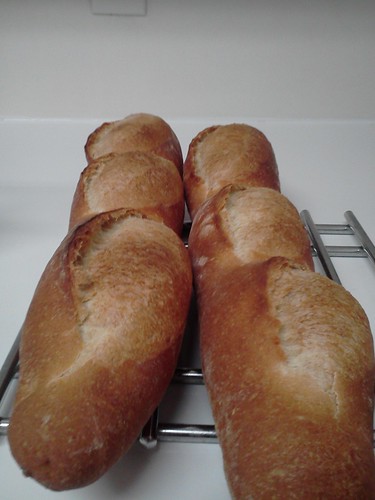
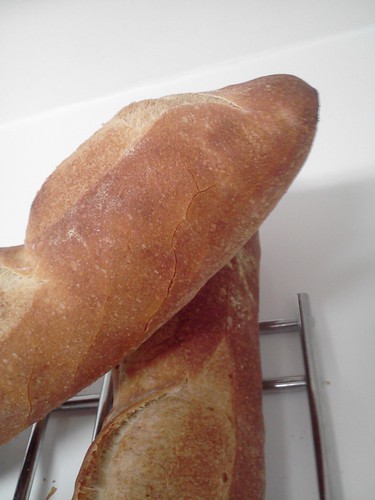
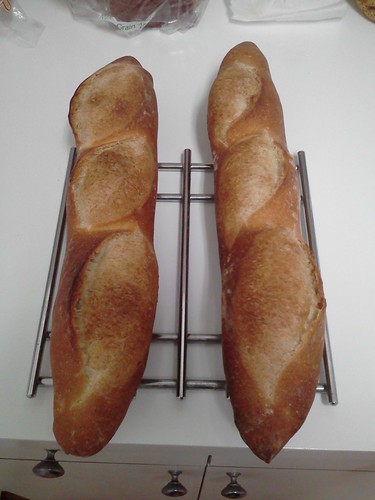
I’ve still got a lot of call for standard baguettes so a good bit of the dough is divided with that intent.

Again, lately, though I’ve been considering how I would create a” baguette fantasie.”

In the actual competition, these are baguettes that must be shaped by machine (to demonstrate that the baker has the skill to create dough that would withstand machine shaping) and then cut and shaped to form various fantastical patterns.  I’ve pulled some oddly cut lumps from my oven.  Oh sure, they look good when loaded, but oven spring takes its toll on some of that cutting.  I begin to understand why some classic shapes are, indeed, classic – they work.  I’ve also had some horrible loading accidents, since I continue to hold to the belief that parchment paper is cheating (for me, at least) and a beautifully cut shape can get – oh, shall we say “distorted” if the peel is not rendered completely non-stick. (Oh, for a loader!)

Also, I’ve been working on traditional regional French shapes.  I had quite a good run on Auvernats (and, of course, me being me took no pictures) and have gone on to some other shapes – providing I can do them quickly enough.

So, baguettes loaded and baked, then the baguettes fantasie (which can handle slight over proofing a little better), then special shapes, and then my bread in the pans. 

The bread in the cake pans is “dimpled” to give it the look of foccacia.  I also take one pan and flatten out the middle and top with sauce and cheese to create a type of deep dish pizza.  (Yes, yes, not completely traditional, but delicious with the good bread as a base, and the oil and herbs.  Also a meal for the busy baker.)

I complete on schedule.  The kitchen is clean and the couches are hung with care to dry. Having been assaulted by the smell of a moldy linen couche (not in my home, but elsewhere), I am even more meticulous about this than before.  It’s a satisfying feeling. All that is left is to bundle up the bread for my various “customers.” When I was in Okinawa I learned how to tie a square piece of cloth (called a furoshki) into various carrying containers and have used my vast collection of flour sack towels to be the transport for these loaves.  The fabric allows enough ventilation to keep the loaves crisp and the recipients can store the loaves in the bags for a day or so.  I have a friend who has become the self appointed “bread fairy” for a number of folks who will come at her phone call to get their weekly bread allotment. (And you all get the destination to which this will lead…)

All this baking leaves little time for photography – even if I liked doing photography or was any good at it – but this week the special shapes came out well – so they were worth a snap.  They are left to right – a baguette fantasie, an epi de ble, and a torsade.

The torsade was proofed “good side” down on linen that had been coated with “remoullage.” Remoullage is bran pulled from the milling process and re-milled until it is as fine as flour.  It makes a lovely coating on the surface of the bread rather than just dusting with flour and has almost better non stick properties than white flour.

So that’s what I do with all that dough.  It’s one mix, but a variety of products.  My testers are completely sure that I have made at least three different breads.  I just smile and say thank you.

People get grabby over the herb bread and it really is a low maintenance addition to a batch of baguettes – I highly recommend it.

Pages

Subscribe to RSS - baguette