-Update 14/09/11: added some photos of 100% WW and 70% WG Rye
-Update 15/09/11: added crumb shots of 100% WW and 70% WG Rye
Initially I only planned to bake two kinds of bread that fitted well into a family holiday schedule:
7.00 being woken by our 5 year old
7.15 to 7.30 preparing pre-ferment (rye sour or biga)
8.30 breakfast
9.30 to 19.00 being busy with having fun
19.30 to 22.30 baking time
As it turned out this schedule worked very well, but peer pressure from TFL and the family made me bake a much greater variety of bread, specifically: Bara Brith, Pain de Campagne with variations, 70% Rye sourdough with variations, Potato Bread, 100% Wholewheat Sourdough, Pizza, White French Bread
Unfortunately I can't post many pictures as the camera charger gave up during the holiday, but I will bake some of the breads again in the near future and post photos then.
Notes about the formulae (explicit formulae follow below):
Bara Brith: I used Elizabeth David's recipe – it is a very dry dough, so I added a bit more milk. The original uses 150 ml milk per 450g flour, I used 170g milk. I also used a different flour mix: 400g strong white flour (Hovis) plus 50g wholewheat flour (Tesco's strong stoneground organic). Very nice result. Below my first try, with a bit of Welsh countryside:
Pain de Campagne after DiMuzio (I have his “Appendix Of Formulas” on my phone). Once by the book and once with biga and 50% wholewheat. Both turned out nice, but the latter one could be tweaked.
Potato Bread (after Elizabeth David). I used the original formula – this uses 4.4% salt. As I had no idea how potatoes would affect salinity I went for it. Nice bread (smell, consistency), but too salty. Couldn't eat it. I'll retry with 2% salt.
French bread: 300g flour, 200g water, 6g salt, 2g instant yeast. Mixed and proofed in the evening, retarded in fridge and baked before breakfast.
100% Wholewheat Sourdough, inspired by DiMuzio and Andy, great result, formula given below.
70% Rye sourdough with variations. Details given below.
It was quite amazing to see how all of this baking fit in with our busy holiday schedule, without putting too much strain on family life.
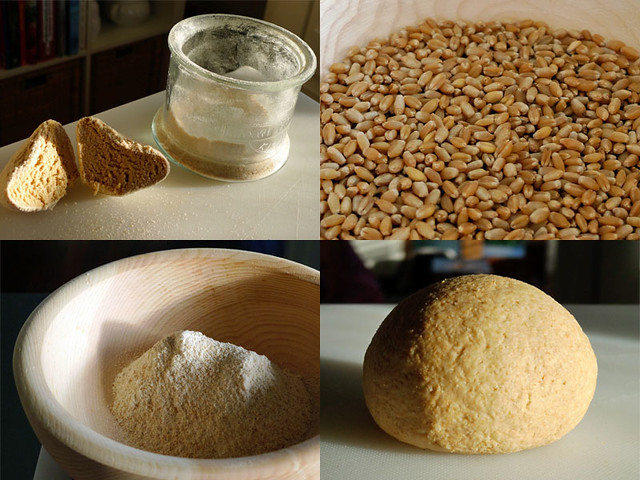
100% wholewheat sourdough:
Straight formula:
Wholewheat flour 423g (100%)
Water 317g (75%)
Salt 8.5g (2%)
Yield 748.5g (177%)
Flour from Soaker: 33% at 75% hydration
Flour from preferment: 33% at 75% hydration
Soaker (kept in fridge for 12 hours):
Flour: 141g
Water: 105g
Preferment (kept on bench for 12 hours, at 22C):
WW flour: 141g
Water: 105g
Mature rye starter (80% hydration): 25g
Adjusted Dough:
Flour: 141g
Water: 105g
Salt: 8.5g
Soaker: 246g
Preferment: 246g
Bulk proof at 24C: 1.5 hours
Shaped into loose boule,
Final proof: ca. 2 hours
Reshaped boule into loose envelope shape (as in some of the Pane di Altamura videos)
baked immediately at ca. 230C for 30 minutes without steam.
Complex taste and quite open crumb for a 100% wholegrain bread.
Photos of the bake on 14/09/11 (a 750g loaf)
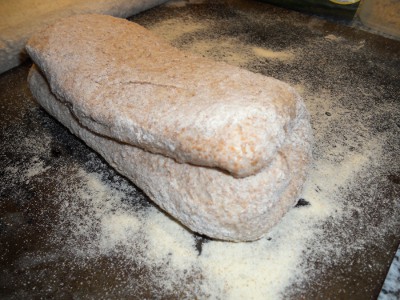
The dough after final proof (could have done a little longer, but started to get fragile)

After shaping (right into the oven from here):
And after the bake:

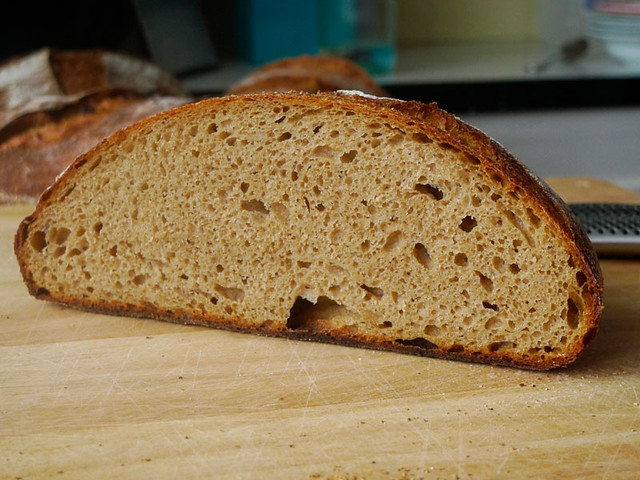
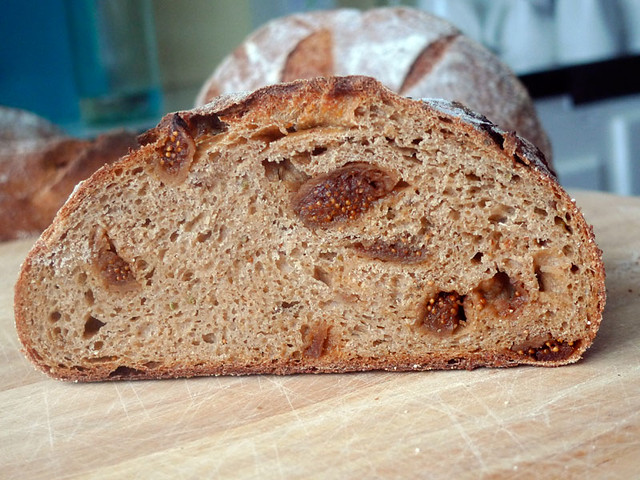
Crumb
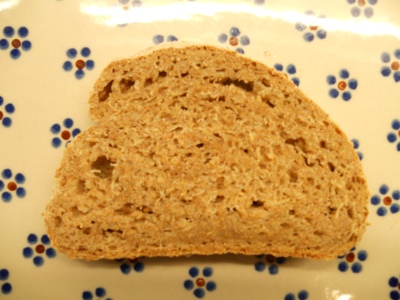
The crumb of the 100% wholewheat bread is not great, nowhere near the nice open structure of the bread I made in Wales, although I think this one tastes even better. I attribute the crumb appearence to a number of causes:
I rushed this bread (a mix of family duties and misjudgement of the dough development)
The starter was slightly over its maximum
The flours I used here were quite different: I am running out of stock and had to use a mix of Canadian high gluten wholewheat with low gluten wholewheat (both from Waitrose), whereas for the holiday bread I used Tesco's strong organic stoneground wholewheat.
I stretched the dough too much when shaping.
I'll work on this and report back in a separate post.
70% Rye with variations
Update 14/09/11: Got the percentages slightly wrong when I wrote my notes - this now reflects what I actually baked. Must have been tired ...
These breads are based on the German Mischbrot formula which I posted earlier
http://www.thefreshloaf.com/node/23830/german-baking-day
http://www.thefreshloaf.com/node/23956/detmolder-sourdough-and-without-yeast-comparison
Straight Formula:
WG Rye flour: 70%
WG Wheat flour: 30%
Water: 75%
Salt: 2%
Instant Yeast: 0.3% (optional)
WG Rye flour from preferment: 28% at 80% hydration, (using 10% ripe WG rye starter, 12 hours on bench)
WG Wheat flour from soaker: 30% at 74% hydration (12 hours in fridge)
WG Rye flour from scald: 22% at 80% hydration, after cooling kept in fridge
I used different amounts of instant yeast to stagger the breads – I could only bake one loaf at a time.
Bulk fermentation ranged from 45 min to 2 hours, final proof for 1 hour at 22C.
The loaves were shaped with wet hands into rounds for freestanding bake.
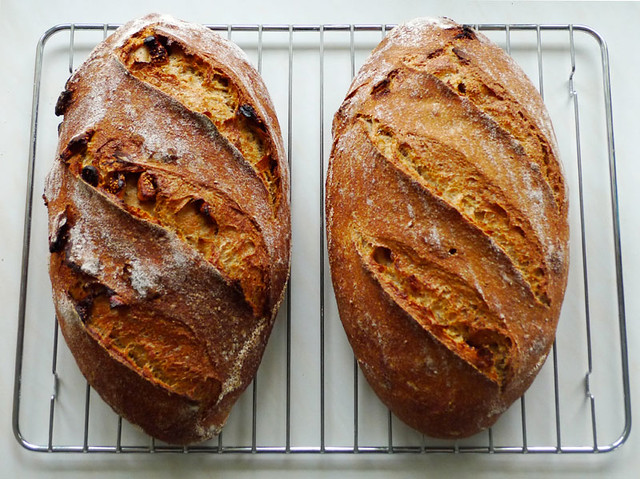
I made 4 variations of this bread; all had a wonderfully complex taste:
Without soaker and scald, with 20% sunflower seeds
as given
as given, plus 20% sunflower seeds
as given, plus 3% caraway seeds
Despite the quite strong taste these breads go very well with all sorts of foods, even jams. Stilton cheese complements the bread flavours especially well.
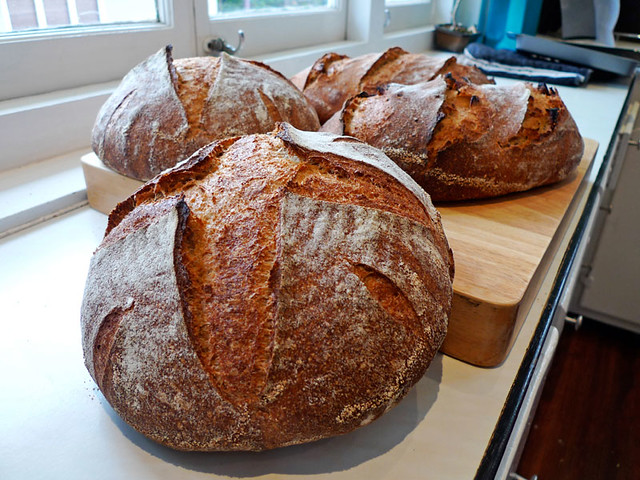
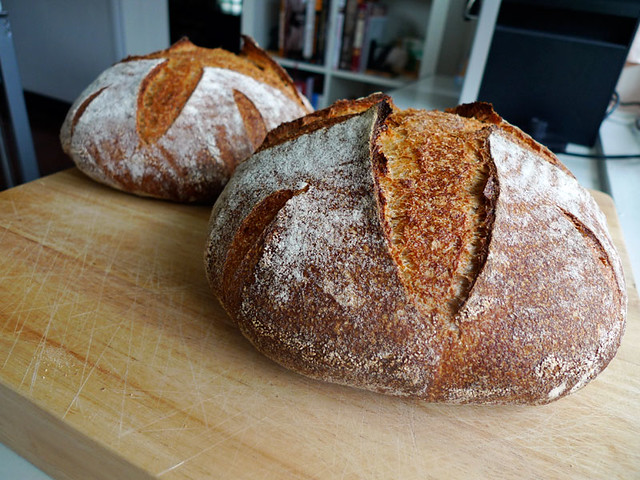
Photos of the bake on 14/09/11 (two 750g loaves)
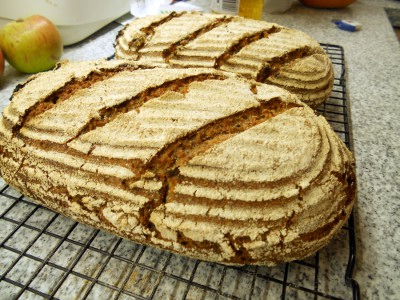
Crumb:

A very pleasing bread.
Juergen


 LEFT: Put whole wheat flour and salt in a midium bowl. Right: set the butter in a small bowl. Top: No.1.
 Put the flour and salt mixture in the food processor and hit pulse 5.6 times until combine.
 Add *dough mixture and the butter run until combine about 40 seconds or so.
 Take the dough out from the food processor, and clean *dough mixture bowl. Put the dough back in the food processor and run until combine.
 Time to knead by hand for 15 minutes. Push it down and stretch and fold and repeat over and over. This is very important to get strong gluten development.
 Put some shortening on a large bowl, and place the dough in. Proof at 28℃ or 32F for 50 minutes or until the loaf double in size.
 : Japanese bakery way
 : My way: to have taller loaf. Rolling on the second process. Take a look below.

 : Japanese bakery way ( This picture is white sandwich bread version →
 :My way

 100% whole wheat bread
 85% whole wheat bread