February 22, 2019 - 7:06pm

Bouabsa Experiment - Take 1
Hi Folks,
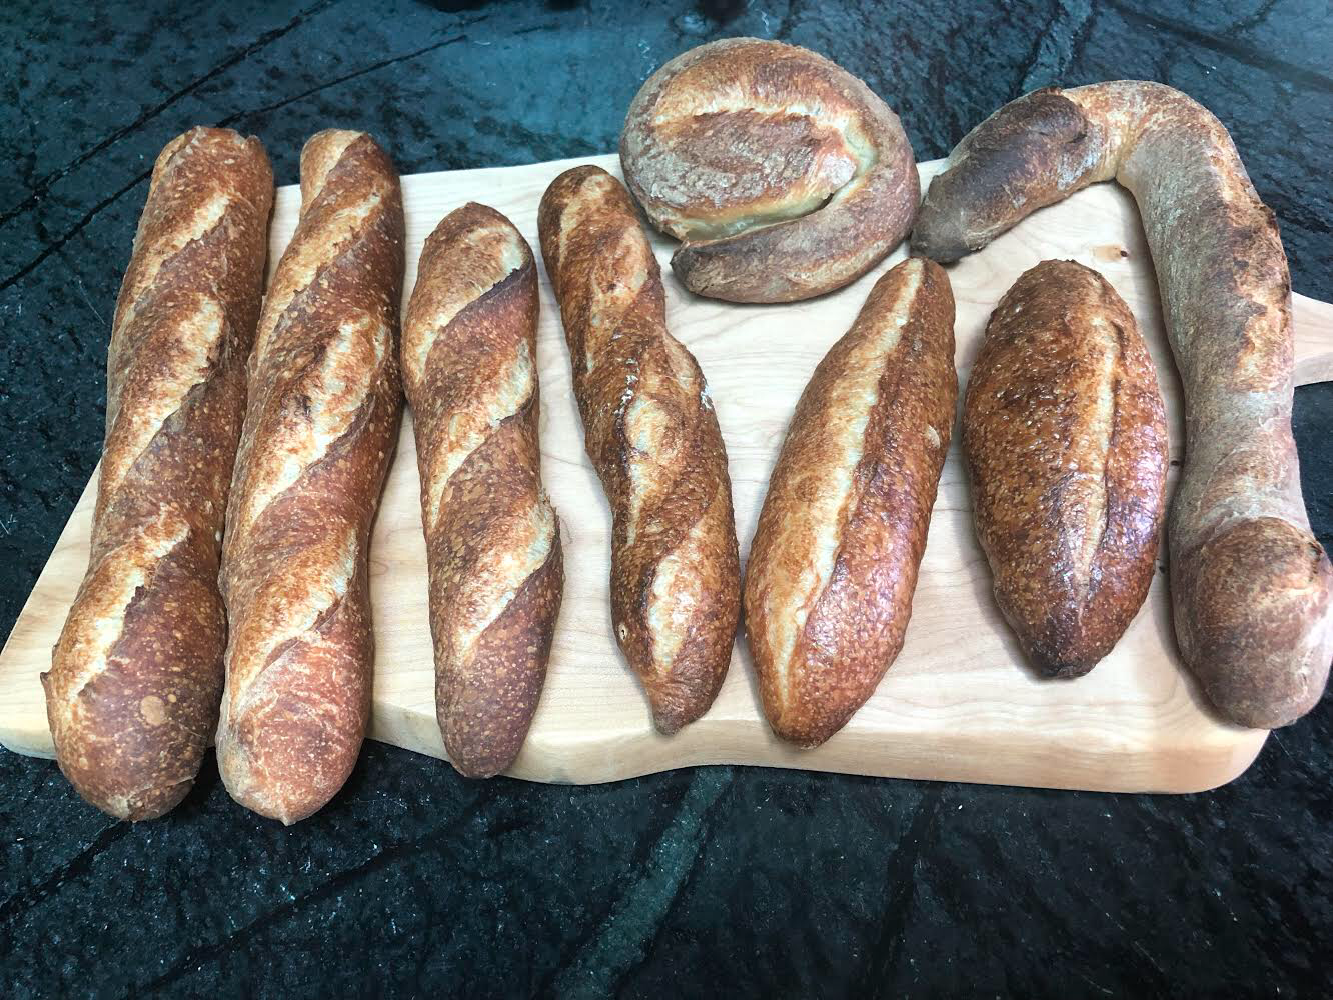
I attempted the Bouabsa high hydration dough shaped as ficelle. Here are notes on my experiment. Would appreciate some critique and guidance. Thanks to Alfanso and dmsnyder for detailed instructions and video. I especially need some help to resize the dough amount and proportions for my small steam convection oven (24in Gaggenau) and small baking stone (12" x 10"). I am planning to do take 2 this weekend and would appreciate any tips.
- I only had KA AP flour and KA bread flour. I used mostly AP flour but ran short and added about 1/4 cup of bread flour. All by weight. My kitchen was quite cold and took longer to rise.
- Day 1 - My dough did not look like a shaggy mass and was definitely tighter. I ended up adding a couple more tbsp of water in the second hydration to make it shaggier. Even then the dough was not stretchy Like the gorgeous french folds in Alfanso’s video.
- On day 2, my dough needed about an hour to get to room temperature. Here is where I started running into some trouble. As I have a small steam oven, I wanted to make smaller ficelle - small enough for a sandwich for 1 person, after googling, I decided on 2 sizes - 100gms for small and 130 gms for slightly longer baguettes. I looked at Breadhitz videos to see how he shaped the smaller sizes. Well, my dough was a lot looser and not as shapeable. In fact, it didn’t seem to have as much gas. I figured it was my cold California kitchen and let the dough rest for a bit longer to get the yeast going.
- Equipment - I had some makeshift equipment. The whole transfer to oven thing threw me off as I did not have a transfer peel. I used a plastic clipboard that was long enough for my baking stone. My baking stone was an Emile Henry enameled baking stone that is quite small - 12in X 10in. Moreover, it had a raised handle and this made the oven transfer complicated. First, I decided to use parchment and the backside of a quarter sheet pan to transfer to the oven. The first attempt was a disaster as the bread just fell off the edge and I had to somehow rescue it. This ended up in the 2 misshapen specimens. For the next 2 batches, I used a cutting board with a handle. I also made a mistake in using a glass Pyrex for the lava stones container. The boiling hot water hit it and it immediately cracked. I should have used a cast iron gratin dish or something that was sturdier. Given that I have a steam function in the oven, maybe I could avoid the kettle of hot water and just do the dish towel in water for extra steam and the rocks for added thermal mass. But if a burst of steam is needed for the initial hit, then I need the water on rocks.
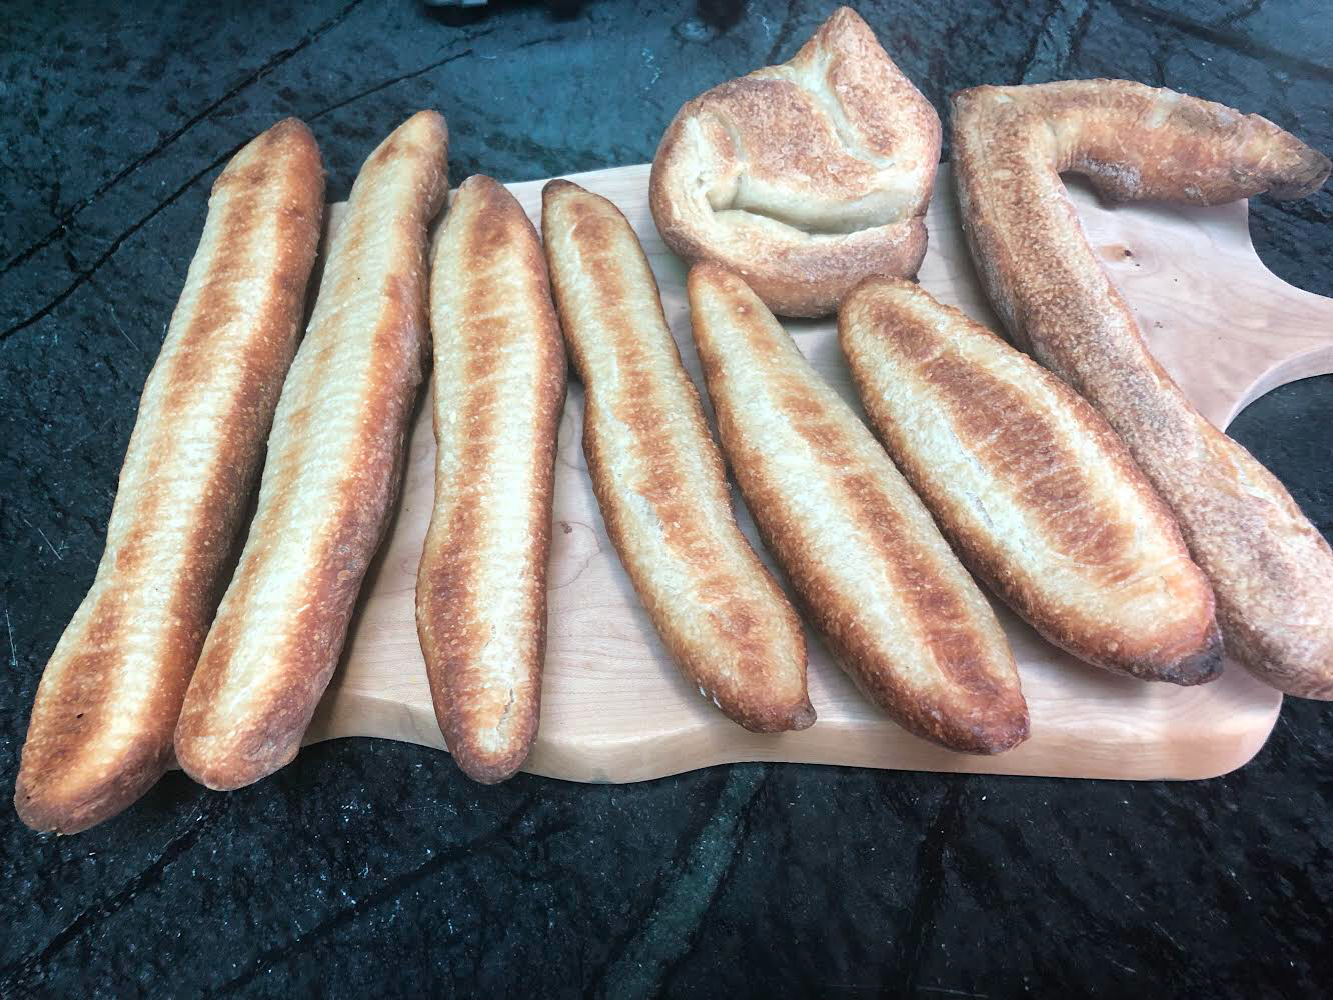
- Overall I needed to bake 3 batches and I feel that the skin got a little dry in the later batch. The second batch had a shiny crust but the third batch and the first batch look dull. Incidentally, the second batch was the one where the glass dish cracked, so maybe the burst of steam helped. I also feel that the underside is not dark enough. The scoring with the lame could be deeper maybe? The bread is not as holey as I would like and the crumb is dense - so maybe I needed to let it rise more or do different proportions or different flour? As I needed 3 batches, maybe I should bake a half batch or pop the dough back in the refrigerator and shape the second half later. Or maybe I should do 2 small baguettes and the rest as a batard or a boule?


Share


Newer Pyrex (as in, not 40 years old - I'm not sure when the change actually happened) is physically a bit stronger, but will essentially no longer handle thermal shock at all. I'm not sure how thermal-shock-resistant the older stuff was, but... better than now.
The newer stuff should be renamed POOG, for Plain Old Ordinary Glass, because that's what it is.
Roti - there is a ton of information in my analysis here. First and foremost, my knowledge is split between personal experimentation, the crowdsourcing of help and inspiration that goes on at Island TFL. And repetition! Secondly, if you are serious about baking baguettes, which I believe most would consider the more difficult of the standard shapes and scoring, then the key phrase here is practice, practice, practice. Anyone but the truly gifted would say the same thing. And now on with the show...
"I only had KA AP flour and KA bread flour. I used mostly AP flour”. This is fine, the Bread Flour will be much stronger, but at ~11.7% protein KA AP is way sufficiently strong enough.
"My dough did not look like a shaggy mass and was definitely tighter.” This is generally what you should expect for a “shaggy mass”, no disrespect for Sunday Church Services ;-) . We each have to judge what we anticipate, but at least this is a bit of a roadmap for you. Generally speaking, we want attempt to hydrate the flour in this phase and not much more.
"Even then the dough was not stretchy Like the gorgeous french folds in Alfanso’s video.” Ensure that you take careful precaution during the first 10-20 folds when the dough is truly lifeless and just looks a fright. French Folds are another easy skill to place in your bag of tricks, but may take a few runs to really get the hang of it.
"I looked at Breadhitz videos”. Ciril Hitz’ videos provide an amazing petri dish of visual and aural learning. There a lot of hacks out there on YouTube, but Mr. Hitz is among the really reliable resources for how-to knowledge.
"my dough was a lot looser and not as shapeable”. Welcome to the learning curve for getting a feel of how to craft a tight skin when shaping without compressing the dough or tearing the skin. Another in the pantheon of practice makes perfect. As David Snyder puts it we must learn to shape with an iron hand inside of a velvet glove.
"my cold California kitchen”. Most everyone who has attempted Mr. Forkish’s breads knows all too well just the opposite. His kitchen is cooler than most, and most others require less fermenting and proofing time than what he calls out. You ae in his category at least during the winter months, where longer is better. Every kitchen environment is different and every season bring new challenges to understand. I’m fortunate that my kitchen is a pretty darn constant 78-80 with modest humidity virtually all year round, so I typically don’t have to adapt to a regularly changing ambience.
"I did not have a transfer peel.” There is the transfer/hand peel and the oven peel. You could buy one of those fancy hand peel thangs from SFBI or someplace else. I use a piece of engineered wood floor board from Home Depot, but I’ve also used a piece of stiff cardboard. For an oven peel, I use a cookie sheet.
"My baking stone was an Emile Henry enameled baking stone that is quite small - 12in X 10in.” If you are serious about getting into baking anything other than one or two batards or boules, specifically in this case baguettes, long batards, ficelles or demi baguettes you should make the minimal investment in a real baking deck. I went to the local kitchen counter fabricator and purchased a 3/4 inch thick polished granite piece of scrap, cut to the size of my oven rack. $20 USD. If you do so, ensure that you measure slightly less than the full oven cavity size so that there is room for air/steam on all 4 sides of the deck to circulate.Also - know your oven depth before you acquire a baking deck. Over time your muscle memory will have you rolling out dough to just about that same length, give or take an inch, every time. Another point - your doughs are too close together in the oven and they are isolating and insulating each other from the heat. Keep as much space as practicable between the breads.
"I decided to use parchment”. I use parchment all the time. No need for any kind of corn meal or rice flour, etc. on the oven peel. If you have to, tip the peel toward the baking deck, while keeping your thumbs on the parchment until the peel is positioned and then slide the paper and dough onto the deck.
"I needed to bake 3 batches and I feel that the skin got a little dry in the later batch”. Time and temperature are easy things to control once you get the hang of it. Make sure that the remaining shaped dough is covered and cooled down again, else it will just continue to proof on the counter. When baking multiple batches, make sure that you give the baking deck and the oven sufficient time to recover. Every time that I open the oven door, upon closing it I reset the baking temperature on the control panel to force the oven into recovery mode.
"The scoring with the lame could be deeper maybe?” This is a high hydration white flour dough and therefore it is fairly “wet”. Generally, the higher the hydration, the more angle on the scoring tool. Scores should generally be no more than ~ 1/4 inch deep, and sometimes the lesser is the better. Some folks make the mistake of thinking that their errant scoring was not deep enough, the in many cases, it was too deep. Again, it all comes with practice.
Some resources (of mine) to review:
Keep us up to date on progress.
alan