
How I built a semi-professional retarder for under $600
So starting a small bakery is not easy you have to keep the budget as tight as possible.
We started in a shared commissary kitchen that allows us to bring and install our own deck oven but they supplied very limited area in the walk-in cooler, enough for some butter and eggs but definitely not enough to cold proof bread or do cool fermentation bulk.
Luckily they allowed us to bring our own up-right standing cooler, which with a bit of modifications inspired by Maurizio from The Perfect Loaf turned into a temp controlled retarder that holds 40 batards or 20 boules, or 20 sheets of pastry (which we also do sourdough only) or many bins of bulking dough.
The Fridge
First things first - we needed a cooler. Luckily another vendor was leaving the kitchen and sold a bunch of his equipment, he sold us an old Coldstream 24" reach-in cooler. Just to make sure it is going to work, I placed a sheet pan (18" X 26") on one of the 4 shelves, and the door shut all the way - this is going to work! The fridge was $500 and the guy recently installed a new seal at the door, sweet!
Later on I learned this model is very common in used restaurant equipment stores and you can often get them at an auction for pretty cheap.
The Shelving
The next thing on the list is sufficient shelving, the fridge has 4 shelves sitting on small hooks on the side walls, you can add more shelves and hooks but they are pretty hard to find. It wasn't long before my partner suggested the idea of sticking a bakers rack inside the fridge. We took the tape measure and realized that with very simple modifications it would be achievable.
So we got a bakers rack that holds 20 sheet pans. Now there are 2 kinds of racks, the welded one and the self-assembled one, so obviously don't get the welded one. We only used the sides and left all the connector parts and wheels in the box. We had to cut off the top curved part so it will fit. This metal was very easy to cut with a cheap hand metal-saw from the home-depot (a great tip is to put a bit WD40 oil on the blade when cutting, it works like a charm). The cut was very simple, just cut above the line of the top shelve, then file a bit to make it smoother and safer.
we took out the 4 original shelves and 16 removable shelf hooks (4 per shelf) but we left the 4 hook strips in place as they were not in the way. If you need to you can take them out, but we figured might as well leave them for any future owner. The baker's rack walls fit inside and each had 2 holes originally there to connect the rods that would assemble the cart, we used short wood-screws and secured the rack sides to the interior walls of the fridge. Now our cooler could easily fit 20 sheet pans! not bad at all!
Temperature Control
Of course this cooler comes with a very old non-digital thermometer and a manual turn-dial for temp control. not ideal at all for a proper retarder. But remembering this post from Maurizio I knew exactly what to do.
I went on Amazon.ca and bought the very recommended Inkbird ITC-308 Temperature Controller for about $50CAD.
Installation
Installing the Inkbird was a breeze, but it does require drilling so just
MAKE SURE YOU CALL BEFORE YOU DIG! & UNPLUG THE UNIT FROM THE POWER!!!
I couldn't get a parts diagram fro this cooler or a service/owners manual, so I called Coldstream and explained what I wanted to do. They assured me it was safe to drill in the side wall of this cooler model. The outside wall is made of stainless steel so I first used a tile drill bit that did a beautiful job piercing through that metal, then as it dented the inside wall a bit, I drilled with the same bit on the inside. After that just use regular drill bits increasing in size each time until you get a hole that the sensor can freely move through.
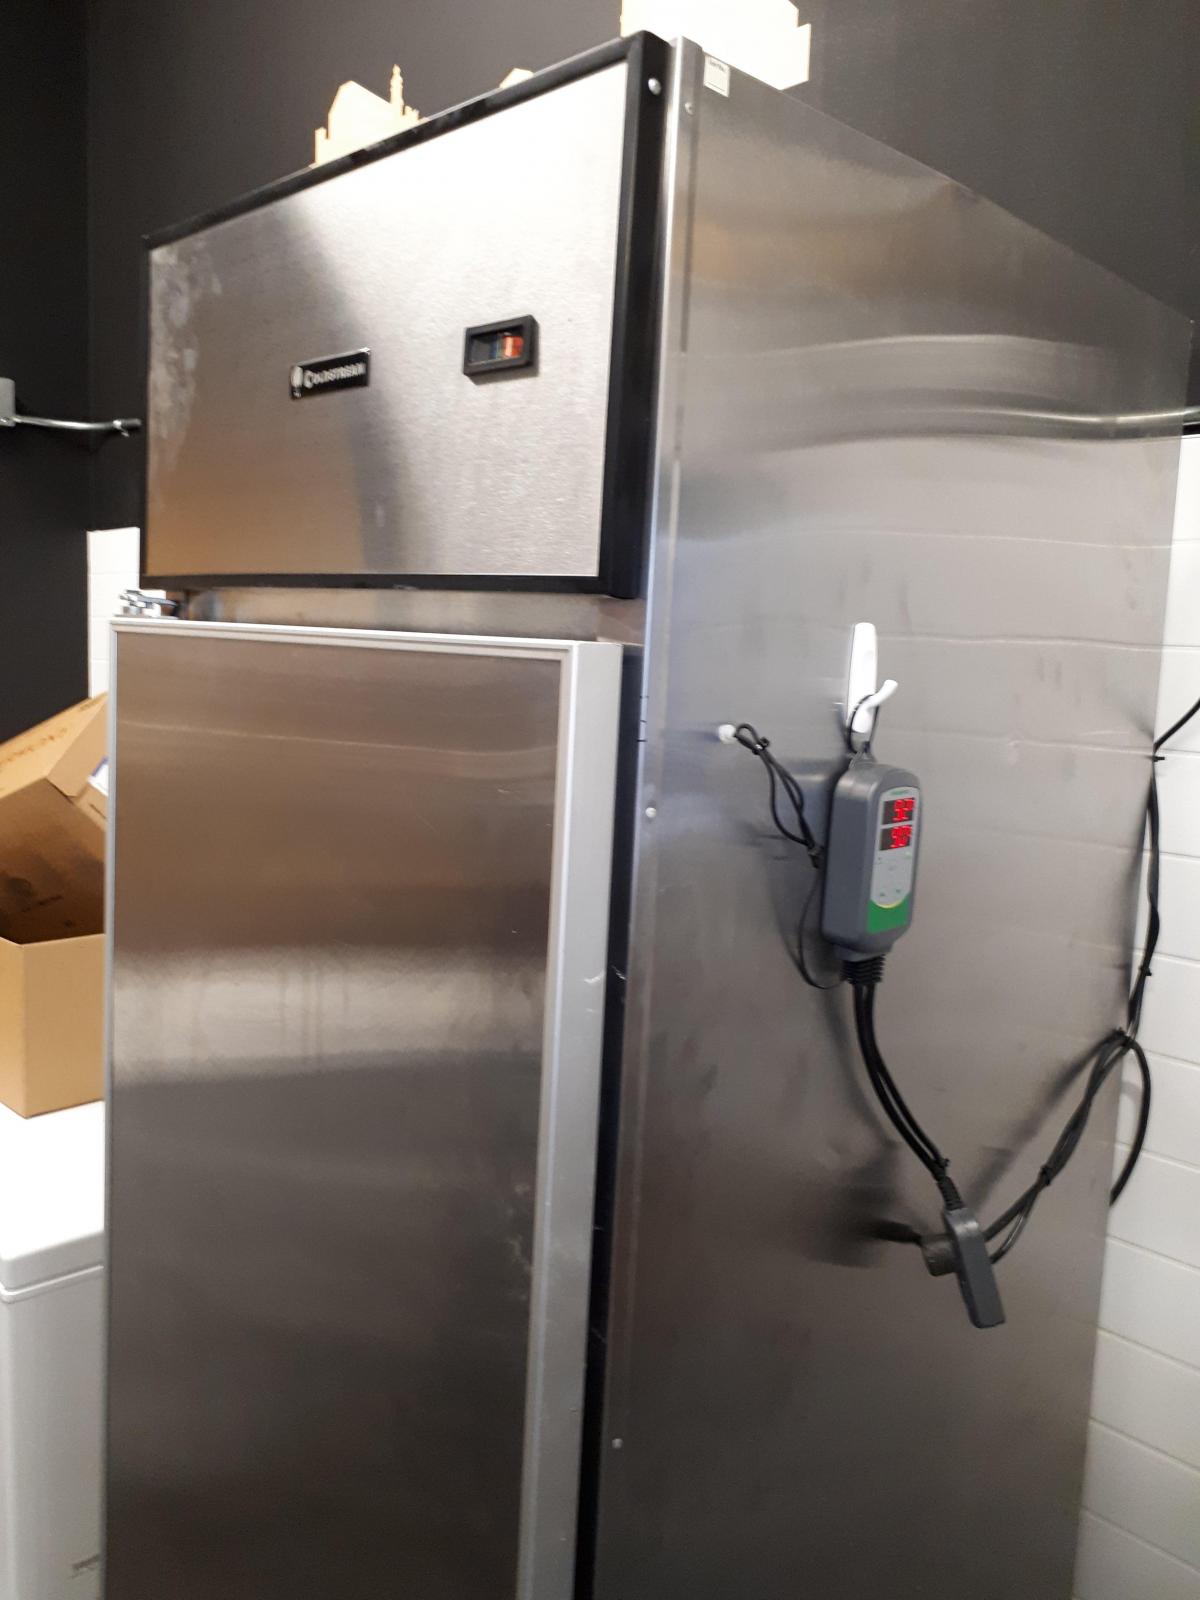
I inserted the temp sensor and used zip ties to secure it to the existing sensor. It is located at the top of the fridge on the right side close to the door. I figured I will go with where the manufacturer decided to place theirs. Later on i placed a sheet pan in the middle of the fridge and put a thermometer on it, there was a 3 degree variation between that temp and the one read by the Inkbird, but the module has a temp calibration option in the settings so I just adjusted it 3 degrees up. Easy!
Some recommend sealing the hole with silicone, But I really dislike working with silicone, so I just used a hot-glue gun and sealed both sides of the hole around the probe's cable. Then I used a 3M dual sided tape to secure the module to the side of the fridge, and some zip-ties around the cables to make everything look neat.
Turning it on
Now all I had to do was turn the cooler's dial to the max, plug the cooler's power to the Inkbird "cooling" outlet and plug the Inkbird to the power (the wall one)
We use various temp sets and it works great! Bread final proof at 8c or 6c, bulk at 12c, pastry proof at 19c. Just magic!
Happy baking!
Mendi from Two Bald Bakers
BC, Canada


Nice work, and a nice write up and photos as well.
Glad you liked it :)
going to use it to build a curing chamber
I'm not sure what temps that would require, but this module also has a heating outlet, so potentially you could plug a little lamp to it and it will switch between heating and cooling.
There is also a humidity controller unit very similar to this one, to which you could plug a humidifier. The possibilities are endless!
I already bookmarked your post and will replicate it. Yes, I will need a humidifier for curing the meats.
Thanks a lot for sharing.
and I also looked at Maurizio's blog to decide whether to go the wine cooler route or freezer as 'space' in my house is my main issue....
My fridge in the UK is very unpredictable and temps can vary from 37.4 (3C) to up to 48F....
I noticed that none of my bread books actually talk in detail about the relationship between how long to let bulk fermentation go and how this affects the best temp and time frame for cold retard...because I have overproofed a good number of my otherwise lovely loaves in my 'warm' and unpredictable fridge...
If you set your retarder to a warmer temp, does this mean you keep the bulk fermentation to 30%ish rise? I hope you don't mind me asking.... Kat