
closed slits and little oven rise with baguettes
i apologize for adding my lamentations to such a frequently voiced issue, especially when there are so many helpful forum threads on it already. I am a long time lurker, and let me say that you all are an inspiration and such an incredible and generous cache of knowledge and experience to grow from. so in advance, and for everything you've all done already, a heartfelt thank you.
now onto my issues of the day, these sad baguettes. oh the poor things! the crust sings and crackles when it comes out of the oven and is a nice shade of chestnut with a crisp crunch, the crumb is not something to complain about either. i am really at this point just working on the appearance and consistency of the baguettes. I've included some pictures below in which you can see that the scoring and rise of the loaves runs from bad to embarrassing. i have been using Hamemlman's Baguettes with Poolish recipe and have had some success in the past. unfortunately right now my kitchenaid is still in ny where i recently moved from so i made this batch by hand. to aid in the process i used an autolyse (45 mins, which i included in the time for the bulk rise), then i mixed in the salt and kneaded by hand for about 6 minutes. i don't think it was long enough to develop strong gluten network, but i thought the autolyse ought to help and couldn't bare the loud smacking at 8 am with the boyfriend asleep in the next room! i then let it rise for the remainder of the two hour rise time, with one fold after 30 mins. I let it rise an extra 15 mins on top of this because i wasn't fully convinced that the autolyse should be included in the bulk rise. i think that is where i first went wrong. the dough was fluffy and smooth but still pretty tacky (pic below). i was feeling positive when i preshaped. i let the preshaped loaves have a bench rest of about 15 mins, then proceeded to shape them into a few different sized baguettes because i have minuscule baking pans. i also don't have my scale so i am absolutely not claiming that the loaves are anywhere near consistent weights. once shaped i let them have a final proof in a makeshift couche for about an hour and a half, covered in plastic. here is where i think i went wrong for the second time. first of all, i can never prevent a slight crust from forming on the tops of my loaves, which drags and wrinkles when i attempt to score (i must, must invest in a spray bottle, amongst many other things, clearly), so that is quite unattractive in the baked loaves. also to add to the shopping list is a lame, because right now i am using a small serrated knife which i like to partially blame for my lack of scoring ability. so my main issues are this: once i baked (on parchment on sheet pans with steam) i got very little oven spring and the slits barely opened at all on most of the loaves. they were such a sad sight to behold!
so, do we think overproofing is the culprit? or, if it is the skin that formed on top and thus prevented the loaves from coming to a full rise in the oven- though i feel like that can't be the only reason, how might i better avoid that, in addition to misting once said water bottle is purchased? or, maybe initially a strong enough gluten network was never formed?
thank you thank you thank you in advance for any and all help you all can provide. I am attempting another batch as we speak which i kneaded for 14 mins after a 30 min autolyse, and will update with more pictures when I have a result!
below are some images of the first sad batch:
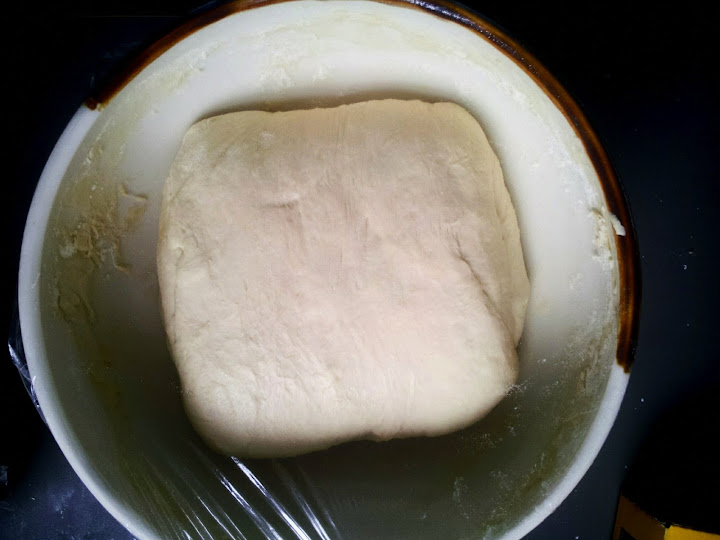
- the dough after one fold:
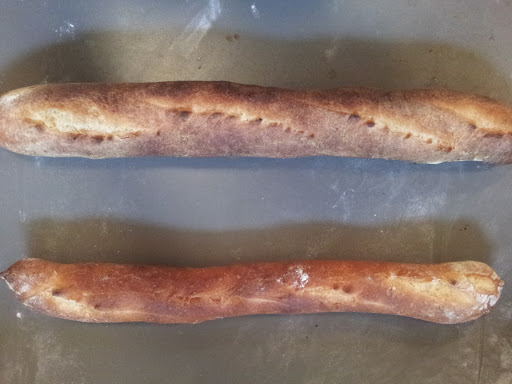
- worst to best from top to bottom (just a selection of three, there were plenty more!). the bottom was a much larger loaf to start.

- again, best and worst:
- a not so great shot of the crumb, post avocado attack:

thank you TFL for any wise words you can provide!


A couple of possibilities:
Overproofing may have had some effect but it's difficult to tell when you're relying on the clock to determine fermentation and proofing times. Use the finger poke test; you'll have better control.
Looks to me like your slashes weren't deep enough ... just my opinion
Is that dried dough I see on the edges of the bowl and is the bowl oiled?
You do not speak to your experience in baking but your post leads me to believe that you have made bread more than once before.
The humble and simple little baguette is a real test of any bakers ability. Do anything wrong throughout the entire process and this bread will reflect that error. From proper ingredients to mixing, fermenting, shaping, scoring, baking................Everything must be just right or this bread fails. I have used Hamelman's recipe with great success so I know that the problem is not there. Based on your pictures I would expect shaping (too strong of a hand and less than good uniform shapes) and scoring (too shallow, possibly not angled correctly). There may be other issues but it is hard to tell. Go back and read every word that Hamelman has written on the creation of a baguette, not just the recipe. Watch the KA Flour videos on baguettes, watch the Hitz video on the subject and pay very close attention to every single little detail. You are actually not far from success but you need to fine tune every aspect of your process.
Happy Baking, Jeff
once shaped i let them have a final proof in a makeshift couche for about an hour and a half, covered in plastic. here is where i think i went wrong for the second time. first of all, i can never prevent a slight crust from forming on the tops of my loaves, which drags and wrinkles when i attempt to score (i must, must invest in a spray bottle, amongst many other things, clearly), so that is quite unattractive in the baked loaves.
Don't cover the dough during proofing with plastic wrap. You actually want the dough to form a dry skin during proofing. The dry skin will actually make the slashing easier. I used to cover the proofed dough with plastic wrap, but the slashes always reseal themselves because the dough skin would be too moist! Let the skin be dry. When you slash with a sharp knife, it will be easier. Make about a 1/4" deep slashes.
also to add to the shopping list is a lame, because right now i am using a small serrated knife which i like to partially blame for my lack of scoring ability. so my main issues are this: once i baked (on parchment on sheet pans with steam) i got very little oven spring and the slits barely opened at all on most of the loaves. they were such a sad sight to behold!
Maybe shorten the proofing time to an 1 hour to 1 hour and 15 minutes. A well pre-heated baking stone will help in providing a good oven spring. There are other alternatives to a baking stone, like a griddle pan maybe, something that can hold heat very well. Or maybe a large cast iron skillet that you can place upside down and have the baking sheet sit on top of it during the bake.
thank you for all your helpful comments. my second batch was also unsuccessful, even when implementing certain changes that i thought might improve the final outcome (less rising time, one extra fold, covered final proof with bakers linen instead of plastic, used exacto knife for scoring). This time I had blowouts and no open cuts again. I know that the Hamelman recipe is reliable and many of you have had success with it, so I am certain that it is my own shortcomings. As far as my experience as a baker- i am relatively new to artisan bread baking, having worked primarily with pastry for the past few years. I am an intense researcher and have read all that i can get my hands on as far as baguettes go, so I have a good practical foundation of knowledge, more than someone you'd pull of the street, but as you all know, it's like trying to learn violin without ever picking up the instrument. I know that it will just take constant practice.
i am about to go assist in a bakery that will have a proof box, scale, lames, etc etc. all the goodies i do not, as well as bakers far more talented than i that will be the most useful tool of all, I'm sure. Until I start I plan on watching the suggested videos (again!) and practice practice practice! Trying not to get too discouraged. Thanks again all.
hello again friends! after a totally discouraging twelve hour day of baguette failure yesterday, i tried again today with Hamelman's Un-kneaded 6-fold French Bread (because i hadn't started the poolish last night). below are the results (i cut the recipe in half).
they are of course far from perfect looking, but such an improvement from yesterday's attempts. I think that making deeper scores and at a more appropriate angle had a lot to do with it. of course, it is an entirely different recipe but i am just happy to know that i can actually get some bloom in my oven even with it's crappy steam environment!
the photos show them in the sequential order that they were scored and baked (each one baked on its own for 20 mins with others waiting patiently in the fridge). i used an exacto knife for the first loaf (far left) and a serrated for the second two, going back after initially scoring and making sure the cuts were actually deep enough. i am still struggling with not dragging and wrinkling the surface as i score, but perhaps a sharper blade and a more confident hand would take care of that.
don't mind the ends on the middle guy, i had to curl them in thanks to baby sheet pans.
the flavor is creamy and delicious with some nice chew to the crumb, which you can see from the pic has some good irregular sized holes (73% hydration in the dough).
thank you for your suggestions. i will no doubt be practicing until i get far closer to perfect, but this was a nice nudge in the right direction.