The Fresh Loaf

A Community of Amateur Bakers and Artisan Bread Enthusiasts.

Blogs

Isand66's picture
Isand66

I was inspired to try adding some balsamic vinegar into one of my breads after reading about Karen Hanseata's Wild Rice bread on the Fresh Loaf this past week.  I have some cherry balsamic  that I love using so I was curious to see if it would have any affect on the taste of my bread.

While looking for some different components to add to my next bake I discovered that my wife had stashed some Toasted Almond Flour in the refrigerator so I figured why not give it a try.

I also used some Potato flour and Durum flour along with some hickory smoked sea salt and assorted all natural grains for this bake.

I cut back on the hydration slightly from my previous multi-grain breads and not counting the 359 grams of water used in the soaker it comes in at only 56%.  There is no doubt that the water from the soaker makes the final dough much moister than 56%.  I also did not count the soaker grains as part of the flour.  According to the BBGA (Bakers Guild of America) soakers including the water and other ingredients should be considered "hydration neutral".  This is obviously a difficult concept to control but none the less that is the prevailing rule in the industry.

For this bake I made a boule as well as a circular shape similar to a large donut.

The final dough came out very tasty. You can see the toasted almond flour imparted a slightly orange tinted color in the crumb and it gives it a very nutty flavor.  I can't say that I tasted the cherry balsamic vinegar but I'm sure it added to the overall flavor profile somehow.  The crumb is nice an open and moist and you can see some of the soaker grains melded together.

If you venture to try this, please let me know how your attempt comes out.

Ingredients

Soaker

28 Grams English Malted Flakes

60 Grams Bulgar Wheat

55 Grams Organic Oat Bran

55 Grams Cracked Wheat

285 Grams Boiling Water

Final Dough

425 Grams White Starter recently refreshed (65% Hydration Seed Starter)

200 Grams Durum Semolina Flour (KAF Brand-make sure  you don't use the Fancy Semolina flour which is too gritty)

250 Grams Bread Flour (KAF)

58 Grams Toasted Almond Flour (KAF)

35 Grams Potato Flour

14 Grams  Hickory Smoked Seas Salt or Table Salt

264 Grams Water, 90 degrees F.

12 Grams Cherry Balsamic Vinegar (Feel free to substitute any Balsamic you have or just add more water)

Directions

Mix all ingredients for soaker in a bowl and add boiling water.  Let it sit for 2-3 hours covered until the grains are soft.  (I actually only let it sit for 1 hour which was long enough).

Add the water and flours into your mixing bowl and mix for 2 minutes on low.  The dough should come together in a shaggy mess and should be relatively moist at this point.  Let it rest (autolyse) for 25 minutes and then add the salt, balsamic vinegar and the soaker and mix for 4 minutes more on medium low-speed.  If necessary you can add some additional water or flour but be careful not to make the dough too dry.  It should be relatively sticky but not soupy.

Remove dough from mixing bowl to work surface and do a stretch and fold.  You may need to wet or oil your hands and the work surface since the dough will still be very sticky at this point. Form the dough into a ball and let it rest uncovered for 10 minutes.  Let the dough rest uncovered for 10 minutes.  After 10 minutes do another stretch and fold and cover the dough with a moist lint free towel or plastic wrap sprayed with non-stick cooking spray.  Do another stretch and fold two more times letting the dough rest 10 minutes each time.

 After the last stretch and fold put the dough into an oiled bowl and cover it tightly.

Let the dough sit in your bowl for 2 hours at room temperature.  It should only rise slightly at this point.  After the 2 hours are up put in your refrigerator for at least 12 hours or up to 3 days.

When ready to bake the bread take your bowl out of the refrigerator and let it sit at room temperature for around 2 hours.  After 2 hours shape the dough as desired being careful not to handle the dough too roughly so you don't de-gas it.

To make the circle bread I formed half the dough into a cylinder and formed it into a circle.  I placed a small glass bowl in the middle wrapped in plastic wrap that I sprayed with cooking spray to prevent it from sticking to the dough.  I placed the dough into a large banneton and let it rest per below.

Let it sit at room temperature for 2 hours covered with oiled plastic wrap or a moist cloth.

Pre-heat oven with baking stone (I use one on bottom and one on top shelf of my oven), to 500 degrees F.

Slash loaves as desired and place empty pan in bottom shelf of oven.

Pour 1 cup of very hot water into pan and place loaves into oven.

Lower oven to 450 Degrees and bake for 25 - 35 minutes until bread is golden brown and internal temperature reaches 200 degrees.

Shut the oven off and leave the bread inside with the door slightly open for 10 minutes.  This will help dry the loaves out and keep the crust crunchy.

Let cool on cooling rack and enjoy!

hansjoakim's picture
hansjoakim

There are a few cookbooks that I have on my shelf that I find myself coming back to time and time again. The last few days, I've enjoyed browsing and re-reading sections in three such books, namely Jane Grigson's classic «Charcuterie and French pork cookery» and Fergus Henderson's more recent cult classics «Nose to tail eating» and «Beyond nose to tail».

These books have a few things in common: They're mostly, and in Grigson's case exclusively, dealing with pork. And I love pork. Every thing about it. Apart from a common love of pork, they also have that in common that their recipes are rather vague, oftentimes omitting measures and timings altogether. In a day where most recipes are measured with exactness down to the gram and braising times are given in minutes (rather than the more sensible «cook until the meat tender»), this feels extremely refreshing. They both use simple and cheap ingredients and cuts of meat, but manage to take an otherwise bland cut to another level by a deep respect for even the humblest of ingredients on hand.

Finally, both Grigson and Henderson convey a wonderful British sense of humour in their books. Henderson, for instance, compares shelled walnuts rolled up in salted fatback with «eating grown-up peanut butter». In his recipe for «duck legs and carrots», Henderson instructs to «press the duck's legs into the carrot bed, skin side upwards, season the dish and pour chicken stock over until the duck's legs are showing like alligators in a swamp». In her book, Grigson often paints a slightly negative picture of the food and ingredients available in her native England compared to the wonderful abundance found in France. I'm sure things have improved in England since she wrote her original text back in 1966, but it's her vivid and delightful descriptions of French preparations that gets me every time. Her book shares many similarities to those of Elizabeth David, I think, and her style probably owes quite a bit to that of David. In her description of Pieds de Porc à la Sainte-Ménéhould, pig trotters prepared in the Sainte-Ménéhould manner, Grigson writes «spiced with quatre-épices and rolled, like pieds panés, in breadcrumbs, they have been cooked for so long – 48 hours – that they can be eaten bones and all. This gives three textures – crisp, gelatinous and the hard-soft biscuit of the edible bones. ... One charcutière told me that it's the addition of a certain vegetable or herb that causes the bones to soften, as well as the prolonged slow cooking. Local sceptics tartly hint at 'produits chimiques'

In this day and age, I feel very lucky to live close to two first class butchers, that gladly take orders for more unusual cuts. Inspired by the two cookbook authors, I placed an order for a pig's head, some ears and a handful of trotters. The plan? Grigson's Fromage de Tête and Henderson's Trotter gear. The ears I were not sure of what to do with.

Both Henderson and Grigson advocate the use of a strong brine to pickle meat. Salting of most pork cuts greatly improves flavour, but a brine can be used for some limited storing of the meat as well. Time spent in the brine can vary from a day up to weeks – depending on the cut and dish that is to be prepared. Prior to collecting my order, I had cooked and cooled 12 liters of a classic English brine, after Henderson's proportions (150 gr salt and 100 gr sugar per 1 liter water – bring to a boil, then add a piece of tied muslin with peppercorns, juniper berries, cloves and herbs and leave to cool completely). In went the head, which was luckily divided in two equal halves, the ears and trotters. Below is the bucket used for the head and some trotters, the remaining bits and pieces went into a smaller bucket. It just fit into the fridge...

After pickling for 48 hours, I was all set to get things underway, heads and all.

It looks happy – I trust it had a happy and carefree time. I hauled out my largest casserole, and placed the two head halves and three trotters in it. Filled up with water, and brought slowly to a boil to flush skum and excess salt away from the meat.

Throw out the filty and salty water, clean the meat and the casserole, and put everything back along with plenty of stock vegetables and top up with water. Cook up again, and leave to simmer until the meat is tender, anything from 4 to 8 hours.

Now, while this is simmering away, I had ample opportunity to take care of the remaining trotters for the trotter gear.

The strategy is very similar – just get your court-bouillon going with whatever it is that needs to be cooked tender. These trotters were simmered in some of the duck stock from last weekend, so I guess this is the trotter gear royale version. I could in principle have cooked them in the pot for the Fromage de Tête, as there was room enough for it all in there, but I feared that too many trotters in there would bring about too much gelatine and cause the stock to become hard as rubber once cold; a nice Fromage de Tête is characterised by meat suspended in a firm, but giving, jelly. It should not be rubbery hard, but rather instantly melt on your tongue when you eat it. Thus, three trotters went into the pot with the head, and (I'm jumping a bit ahead here) this resulted in a perfectly set and giving jelly.

I threw a couple of ears in with the trotters for the trotter gear – the ears are done after roughly an hour, so they were fished out of the pot, flattened, sliced in two lengthwise, rolled in butter and lightly toasted breadcrumbs, pan-fried and enjoyed with a blue cheese salad with a lemon-walnut vinaigrette (i.e. a take on the Oreilles de Porc Grilées Sainte-Ménéhould - to further emphasise the poshness, the breadcrumbs were pain au levain breadcrumbs. Enough already).

I've had pig's ears on occasion before, and I'm usually more enthused about the contrasting textures in the ear than the flavour itself. The cartilage that runs down the center of each piece is a chewy contrast to the soft and giving flesh on either side. Oh, and pan-fried pig's ears is a perfect dish to make just before you're going to wash and scrub down your kitchen. It spatters and spits like you wouldn't believe, so that makes perfect sense.

By now, the trotters are just about finished, and ready for potting:

My fridge is now, as Henderson advises, no longer «without its jar of Trotter Gear». Just got to figure out what to do with the lipsticky goodness next...

It turned out to be a marathon day in the kitchen, but one that was hugely rewarding and rich in taste, smell and fatty pieces of pork (which I love). By now, the pot with the ingredients for my Fromage de Tête had simmered close to 5 hours, and the jaw loosened easily from the head itself. A sure sign of doneness according to Grigson. Using the sturdiest piece of kitchen utensils I own, I somehow managed to wrangle all the meat out of the scorching hot simmering liquid without making a mess or getting second-degree burns. *phew*

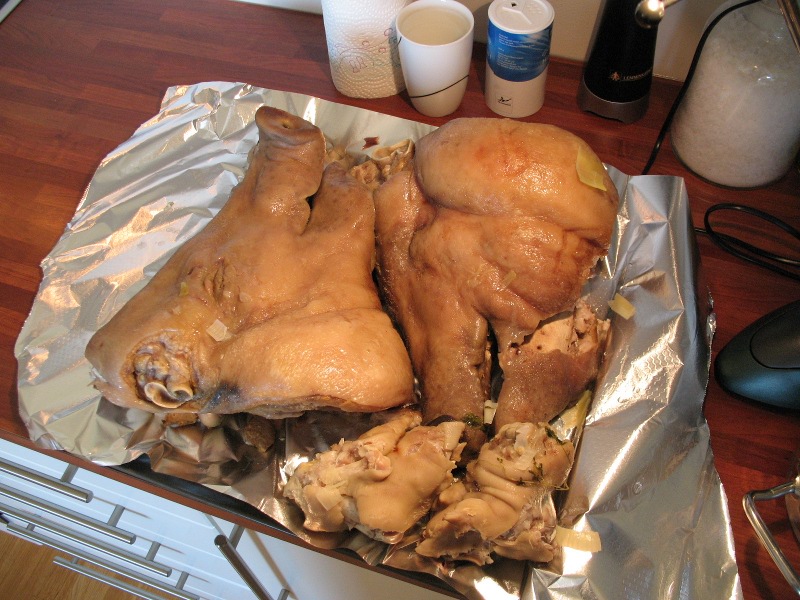
It's heavy! The whole head weighed in at roughly 8 kg, but both halves made it out of the pot okay. Now's when the real work starts: Tearing all the flesh from the skull while it's still hot (easier to do so then, compared to when it's cold), chopping it into fine dice, and adding a healthy glass of white wine to about a litre of the cooking liquor. This is reduced slightly to make sure it sets up properly once cold, and mixed with some lemon juice to help cut the fatty flavour of the meat. Most of the meat from the head comes from the two tasty pork cheeks, but there are also interesting bits from the snout – not all that dissimilar to the slightly spongy mouthfeel feel of a boiled tongue. Quite delicious. Season with some pepper and crushed cloves (or quatre-épices if you get it – in either case, go easy on it), and spoon into loaf pans lined with cling film:

Pour in enough of the reduced cooking liquor so that all the meat is covered, slam the loaf pans a few times against the kitchen table to make sure everything is well packed in, cover the surface and refrigerator overnight. I anxiously pulled the fromage from the fridge the next morning, carefully unmoulding it from the loaf pan... Would it collapse in a puddle or would it hold its shape and be sliceable?

Victory! This is my first attempt at this dish, so I'm not sure if it stacks up with the rest of them – I'm most uncertain about the dice; too fine? I was afraid that a larger dice would cause the fromage to collapse upon cutting, so I kept it on the small side. Size of dice apart, it is truly utterly delicious and one of the more rewarding dishes I've cooked up.

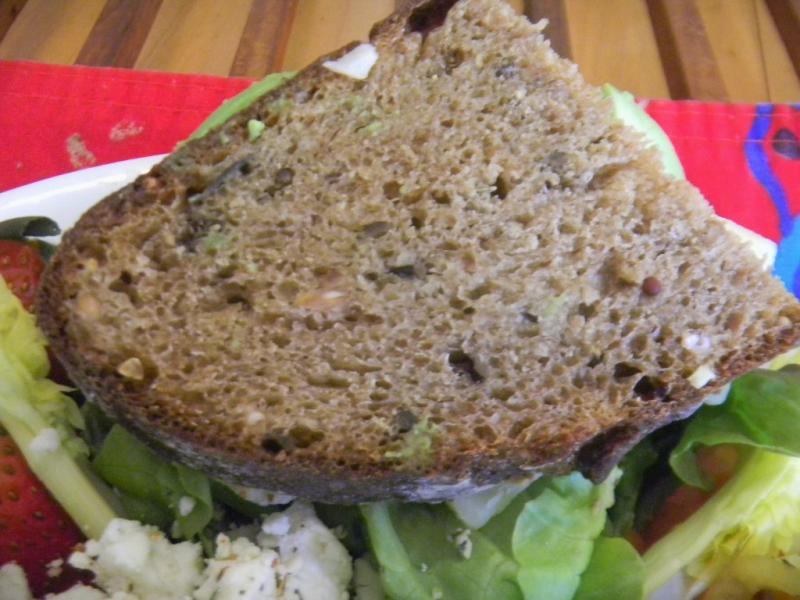
So, what to have with a cold slice of unctuous goodness that just melts on your tongue? Grigson recommends: "French mustard (to my mind essential with most pork dishes, particularly the smooth, gelatinous ones), hardboiled eggs, green salad dressed with 2 tablespoons of raw chopped mild onion and 2 tablespoons of chopped parsley as well as oil and vinegar and seasonings. Mashed potato is a standard accompaniment to charcuterie - slimmers might prefer thin toast, or wholemeal or rye bread." To be honest, I find the brawn plenty rich enough as is, so I didn't exactly jump on the idea of having this with a pommes purée. Mustard and rye it was for me, all the way.

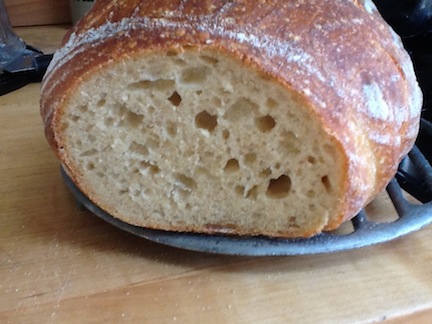
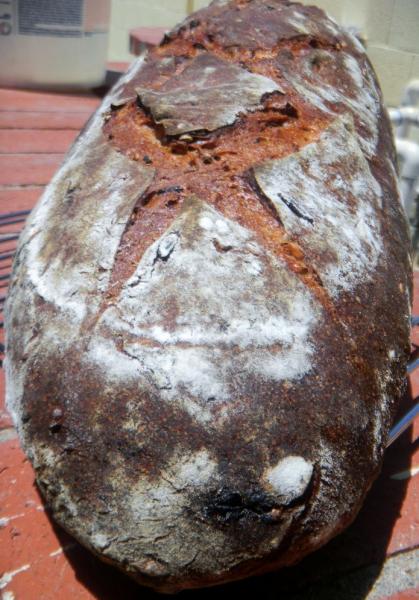
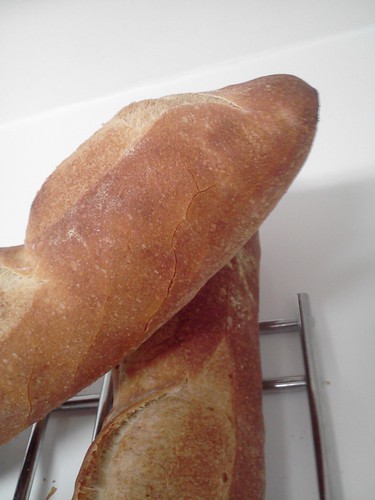
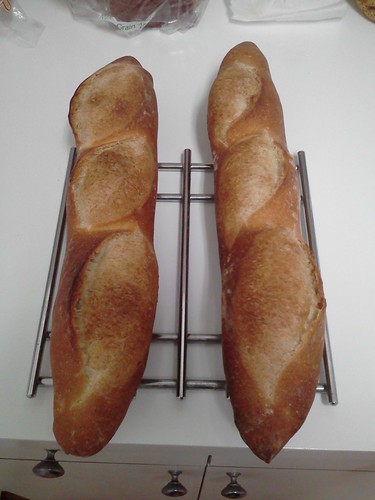
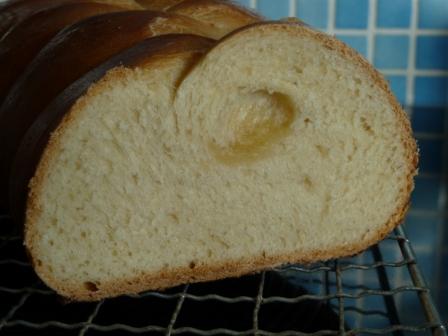
A celebratory meal was prepared with the fresh brawn: Accompanied with a loaf of rye sourdough, French mustard and a nice brew. A simple meal I enjoyed almost as much as preparing it.

PS: The rye sourdough was a slight modification of Hamelman's 80% rye sourdough with a rye flour soaker – I simply omitted the yeast, added some boiled rye berries and increased the hydration to about 90%. The perfect vehicle for the brawn.

dabrownman's picture
dabrownman

A real Brown Plate Special with 2 different tamals, chipoltle sauce, red curry mac & cheese, brown and black re-fried beans, corn tortilla chips, Baja grilled chicken and a touch of guacamole. Plus this weeks amber ale and our take on Hanseata's Wild Rice brown bread.

.


jamesjr54's picture
jamesjr54

Made this today in my new Cajun dutch oven

120 g 100% hydration starter (fed night before)

202 g KAP202 semolina (fine)25 g rye25 g oat bran10 g salt300 warm waterMix all but SaltAutolyse 30 minKnead 10 min w/saltProof 2 hours room temp with stretch and folds at 30 and 60 minutesPre-shape, shape, and proof in refrigerator 2 hoursPreheat oven to 500f with Dutch oven insideTake loaf out during preheatBake 475F for 20 covered, 25 uncoveredNotes: this was very wet, 72% or so. Starter is so active it's proofing like IDY. Temp today is >85F. Had to put it in fridge to slow it down. Could have baked right out of fridge. It's delicious!
Isand66's picture
Isand66

My first intention was to make some hamburger and hot dog buns, but as usual I couldn't resist the temptation to be more creative.  These rolls really didn't turn out ideal for its original purpose, but they do taste real good none the less.

I usually don't use yeast anymore in most of my baking since I prefer to use my sourdough starter, but in this case my starter was not ready for duty so I used instant yeast and a long cold slumber in the refrigerator to develop some nice flavors.

The end result was nice semi-soft roll with a nice crumb and simple clean flavor.  These rolls make great sandwiches and go well with a smear of cream cheese or butter!

Ingredients

453 grams Bread Flour (KAF is my brand of choice)

200 grams Whole Wheat Flour (KAF Organic)

80 grams Rolled Oats

155 grams Cottage Cheese Drained (I used 2%)

11 grams Olive Oil

55 grams Egg Yolks (about 3 yolks depending on your egg size)

405 grams Water (90 degrees F.)

7 grams Instant Yeast (If you have Active Yeast you need to convert from Instant and increase the amount.  You will also need to activate the yeast in the water first if you don't use Instant Yeast.  Instant Yeast does not require any activation and can be mixed with the dry or wet ingredients)

11 grams Blue Agave sweetener (Feel free to substitute honey or molasses if desired)

14 grams Table salt or sea salt

Directions

Mix the flours and oats with the water for 1 minute in your mixer or by hand in your work bowl.  Let it sit covered for 1 hour to autolyse.

After an hour mix in the cottage cheese, eggs, oil, yeast, agave and salt and mix on speed 2 on your mixer for 4 minutes or by hand.

Take the dough out of the bowl and place on your work surface.  Knead it by hand for 1 minute and form it into a ball.  Let it rest for 10 minutes.  After 10 minutes do a stretch and fold from all sides and form it into a ball again.  Let it rest another 10 minutes and then do 1 additional stretch and fold and immediately put it in a lightly oiled bowl.  Cover the bowl and put it in your refrigerator for 1-3 days.

When you are ready to make your rolls take the dough out of the refrigerator and keep it in its bowl at room temperature for 1.5 -  2 hours.  After its rest it is time to shape the rolls or baguettes or Boules, etc.  I decided to make rolls and mini baguettes.    Cut the dough into 3 oz. pieces and form round rolls making sure each roll is nice and tight. or form into small rectangle and roll into mini baguettes.  Place rolls on cookie sheet and cover the rolls with a clean lint free towel sprayed with water or a piece of plastic wrap lightly sprayed with cooking spray.  Let the rolls rest at room temperature for 2 hours or until they are at least 1.5 the size.

I was going to use an egg wash which would have been a nice idea had I not been trying to cook dinner and prepare another dough for today, so unfortunately that step was omitted.  Feel free to use an egg wash and add some seeds or bran flakes etc. for that nice finishing touch.

Around 30 minutes before baking the rolls, prepare your oven and pre-heat at 425 degrees.  I used my usual set-up for steam and added 1 cup of boiling water to a pan on the bottom shelf but for rolls you could omit this step and you will get softer rolls if that is what you desire.

It should take around 20-25 minutes to bake the rolls and they should be nice and brown on the bottom and top.  When done, let them cool on a wire rack and enjoy.This post has been submitted to Yeast Spotting at http://www.wildyeastblog.com/category/yeastspotting.

Enjoy!

dabrownman's picture
dabrownman

Hanseata’s wild rice bread looked so enticing we had to move it up to the top of the bake list.  To her recipe, which hardly needed any changes at all if one of us was sane and not barking, we used high alcohol ice beer for most of the water and upped the hydration about 10 %.  We didn’t use all beer for the liquid because it had to pass quality control to make sure it was not spoiled in some way.  It actually took two or three tastings just to make sure, but it finally passed.

We also added hemp (since wild rice is a grass), anise, fennel and coriander seeds, as well as, some prunes for their sweetness, cleansing reputation and black color to go with the wild rice.  For the balsamic vinegar we used a pomegranate flavored one.  Last but not really last we added some rye, WW, spelt and barley sprouts to go with the beer.  We also add some molasses and honey to go with the barley malt and some home made red and white non-diastatic and diasatic malts.   Then we moved the salt to 2% or we thought we did after we remembered we forgot to add it.  So, all in all, only a few minor changes were required.

 The batard doubled in the proofing basket coming all the way to the top after it doubled in the fridge overnight too.  The spring in the oven after a slightly deflating diamond cut was also good.  The batard only sprawled 1” in length and ½“ in width after coming out of the basket.

 The crust took on a dark brown color as expected, the bloom was good and was still unexpectedly a little crunch after it cooled.  This is the best slash job we have managed to date.  The crumb was fairly open for so much stuff inside, very moist due to the YW and the texture was just the way we like it. The sprouts, wild rice and seeds gave it an nice nutty, chew and flavor but the hemp seeds were a crunchy contrast and unexpected.  Don’t soak your hemp seeds for this bread!

 One can’t really make out the prunes other than a very slight sweetness throughout.  The anise, coriander and fennel smell and taste were muted, but noticeable, also way we like it.  A medium SD tang was also there and very nice.  Don't know what it would taste like without the beer.  All in all, this is the best looking and tasting bread I have ever been fortunate to make.  It is a delight to eat plain, toasted and buttered.  I’m guessing it will make some kind of special sandwich.   This bread takes 3 days to make but it is worth the waiting.  It is an A+.  Thanks Hanseata for the inspiration.  Formula and method follow the pix's.

This bread made for a nice ham and cheese sandwich for a lazy Saturday lunch with some of favorite lunch sides.

Method

Sprouts - The first thing to get started are the spouts.  Soak the seeds for 5 hours and them sprout between - damp paper towels covered in plastic wrap. Reserve unti;l needed about 24 hours.

Starter - Then get the combination YW and SD starter going in (3) 4 hour builds totaling 12 hours.  It should double after the 3rd build between the 8 and 12 hour marks.  Refrigerate overnight.  This bread can be made with SD starter alone just double the amount of starter.

Autolyse - Take all the flour and add all the beer and water, less 25 g of the water, add the malts, honey, balsamic vinegar, molasses and the VWG mix well and refrigerate for 24 hours.

Cook - the wild rice on low for 1 hour in at least twice as much as water as rice.  Reserve the cooked rice in the refrigerator.

Reconstitute the chopped prunes in 1 T of hot water and grind the seeds slightly in a mortar.

Then next morning combine the autolyse, the reserved 25 g of water and starter in the mixing bowl and knead with the dough hook on KA 2 for 5 minutes.  Add the salt (donlt forget like I did) and knead on KA 3 for 3 minutes.  Knead an additional 2 minutes on KA 4 for 2 minutes.  Move dough to a well oiled, plastic covered bowl to rest for 15 minutes.

Do 6 sets of S&F’s every 15 minutes on a floured work surface putting the dough back into the oiled covered bowl each time.  On the 5th S&F add in the sprouts, seeds, prunes and cooked wild rice.   After the 6th S&F form dough into a tight ball, place into a oiled bowl, cover with plastic and let rest on the counter for 1 hour.  Retard  the dough in the refrigerator overnight.

In the morning remove the dough from the fridge and let come to room temperature – about 1 hour.  Form into the shape you desire and let proof on the counter for 2- 3 hours in a plastic bag, or until it passes the poke test.  Mine took 3 hours total out of the fridge I formed the dough into one large 17” x 6” batard.

45 minutes before the dough is ready, preheat the oven to 500 F regular with steaming method and stone in place.  Bake the bread for 15 minutes with steam, the first 4 minutes at 500 F,  then 11 minutes at 450 F regular bake and then for another 20 minutes at 400 F convection until internal temperature reaches 205 F.  Rotate the bread every 5 minutes 90 degrees.   Leave door ajar with the oven off and the bread on the stone for 12 minutes to let the crust crisp.  Move to wire rack to cool to room temperature.

Wild Rice Multi-grain with YW and SD Starters, Sprouts and Hemp Seeds      
      
Mixed StarterBuild 1Build 2 Build 3Total%
SD Starter251010456.50%
Yeast Water3020106014.58%
Rye / Dark Rye - 5040205011022.92%
WW4020208016.67%
Water5020 7014.58%
Total Starter185909036576.04%
      
Starter     
Hydration76.47%    
Levain % of Total24.87%    
      
Dough Flour %   
WW7515.63%   
6 Grain Cereal102.08%   
White WW10020.83%   
Potato Flakes102.08%   
Dark Rye204.17%   
AP26555.21%   
Dough Flour480100.00%   
Salt102.08%   
Beer - 353 Water-6742087.50%   
Dough Hydration87.50%0.00%   
      
Total Flour692.5    
Total Beer / Water582.5    
T. Dough Hydrat.84.12%    
      
Hydration w/ Adds84.90%    
Total Weight1,508    
      
Multigrain Sprouts %   
Cooked - Wild Rice - Dry Weight234.79%   
WW153.13%   
Rye204.17%   
Barley51.04%   
Spelt102.08%   
Total Sprouts7315.21%   
      
      
Add - Ins %   
VW Gluten153.13%   
Hemp -20, anise, coriand, fennel - 6265.42%   
Honey153.13%   
Re-hydrated Dried Prunes357.29%   
Red Rye Malt51.04%   
White Rye Malt51.04%   
Balsamic Vinegar193.96%   
B. Malt / Molasses306.25%   
Total15031.25%   
Szanter5339's picture
Szanter5339

2 dl warm milk
3 tablespoons sugar
1 teaspoon salt
50 g butter, softened
2 egg yolks
100 g of yogurt
600 g flour
20 g yeast
+ 1 egg for lubrication
Leandro Di Lorenzo's picture
Leandro Di Lorenzo

Hey, I don't post as much as i should here, but I'm excited about the new way of steaming, at least for me, that I used today!

First, I'm from Brazil, so sorry for some misspell or something :)

I was looking for a better way to create steam for bread baking, than I came up with a photo (on thefreshloaf) of a pressure cooker connect to the oven (eletric) by a tube, I didn't even know that a eletric oven has a tube on top by the stove, and then I said to myself " what the heck, let me try this!"

I decided to bake a regular poolish dough.

Total flour: 400g

Pre fermented flour: 150g + 150g of H2O

I started with 65% hydration, but I had to add a bit more H2O maybe 68 or 69% total, got a really old flour (KAAP)

2% Salt

A bit of yeast

Only thing I did different. I mixed The poolish flour H2O, yeast and a bit more malt than normal and let it rest for maybe 2.5 hours, I went to the gym rsrs.

After this period, added the salt and a tiny amount of ascorbic acid. I can only bake batards on my oven, so I can use a little more strength.

Then kneaded just enough, let it ferment for 1:30 min with a turn (45 min), divided, pre shaped shaped proof and bake. ufff!!!

But I'm getting out of track... Wanna talk about the steam!!! Hahaha

The bakeing took 27 min. total

Here is a photo of my new steaming method

I steamed the oven before, don't know why cos when I opened the oven door all the steam came out lol, and after loading.

And for 15 sec in one minute intervals for 10 min.

After that let it bake for more 10 min, turn the bread and more 7 min in the oven, maybe a bit much, it burned the bottom :(

I loved the results!!!

Check it out!! Some pics...


I think is the first time than I bake with steam instead of vapor. I mean, I tried before with hot water, but I don't know if is the same, cos here I'm using the steamer.

I tried to show some cracks on the crust, I don't know if you can see it on the pics.

I think is worth trying, I will again tomorrow, with a bit of rye on the poolish ;) ....

So that's it!!! Hope you like it!!! Happy baking!!!! =)

BTW One last photo...

That's the layout inside my oven!!!

Regards,

Leandro Di Lorenzo


Olof's picture
Olof

I'd been meaning to make Challah for a long time but never found the courage. These breads always look so beautiful. Reading Carol Ungar's account of recovering her family's tradition, 'Grandma's Lost Challah, Found', I was inspired to have a go. I used a recipe from Maggie Glezer’s book, A Blessing of Bread, recited by TFL member Zolablue with photos from her own bake.

The bread turned out just fine, a little firm yet soft and tasted very nice. To keep complexity at minimum I opted for a three strand braid. Due to the sour dough, the bread kept pretty well until the next day. However, I sliced and froze most of what we didn't consume on the day of the bake. Lightly toasted, those slices were absolutely fabulous.


dabrownman's picture
dabrownman

We have been eating lunch well the last day or two with our last Pretzel Roll bake for sandwiches - P and J and Baja Grilled Chicken with Grilled Veggies.  The J is caramelized Minneola Marmalade.  There is part of a croissant, some nice red pepper hummus, cucumber salad and fruits and veggies of all kinds.  All very healthy and my assistant cleaned herself up for a photo with her new bow!

Baja Grilled Chicken, squash and eggplant and some new Kosher Dill Pickles - Medium Hot. 

Pages

Subscribe to RSS - blogs