The Fresh Loaf

A Community of Amateur Bakers and Artisan Bread Enthusiasts.

Blogs

mcs's picture
mcs

Sometimes when you find a recipe, it takes a little adjusting to make it turn out how you would like.  Sometimes after lots of adjusting, you come back to the original recipe and find out it was great how it was.  This is the latter.  If you'd like to find the recipe, and method, both Jane (janedo) and David (dmsnyder), among others, have written about it quite a bit here, and have both had much success with this recipe and variations of it.  Anyway, using that as a baseline, I'll mention the adjustments I made to the method, and/or explain the pics.  Oh, and just as a reference, i made (4) 16 oz baguettes in 24" wide pans.
-pic 1 during the first 60 minutes when it is mixed/folded 3 times, I left it in the mixing bowl for the entire period.  After the initial mix, I scraped the hook and bowl and covered them to rest for 20 minutes.  At 20 minutes, I put the hook back on and let it 'mix' for 5 seconds to allow the machine to do the folding.  I repeated this process for all 3 folds.  I was trying this in an effort to avoid adding any extra flour late 'into the game'.
-pic 2 shows the 4 baguettes after scaling and 23 hours in the fridge
-pic 3 directly after preshaping, they were placed on a canvas, seams up,  for 45 minutes and into the proofer (78 degrees, low humidity)
-pic 4 final shaping them 45 minutes later.  I shape them the same way I shape my loaves with the seam away from me.
-pic 5, 6  To experiment, I final proofed two on a canvas and two directly in the pans.  All 4 were placed in the proofer together and all 4 baked on the baguette pans at 415 for 23 minutes (convection).

-pic 7 The top two rose in the canvas, the bottom two in the pan.  It's hard to tell from the picture, but the bottom two are slightly wider with flatter bottoms, the top two look a little more 'uncontrolled'.  Probably could've used a longer final proof to mellow them out a little more.


Anyways, the flavor is great with these baguettes and they have replaced my previous recipe as 'The Back Home Bakery' baguette.  Thanks to Anis, Jane, and David for making this possible.

-Mark

http://thebackhomebakery.com

Pre Shaping and Final Shaping


Eli's picture
Eli

Levain Honey Oatmeal Loaf

Great toasting and breakfast bread. Very tender and soft. Converted this from a commercial yeast recipe I have been making.

Honey Oatmeal Loaf


Breakfast of Champions!

Second Loaf got much better rise, however I should try a larger pan. These are perfect gift size.Honey Oat Loaf Levain

Eli

www.elisfoods.wordpress.com

pmccool's picture
pmccool

This weekend's baking included Bernard Claytons Pain Allemande aux Fruits.  It's a marvelously fragrant bread, containing lemon zest, orange juice, anise seed, cinnamon, figs, raisins, apricots, prunes, almonds, hazelnuts, butter and other good things.  I made a double batch, since I tend to make a mess in the process of getting everything prepped.  Might as well have four loaves for my efforts as two, right?  Plus, I can give some for gifts and still have some for myself.  

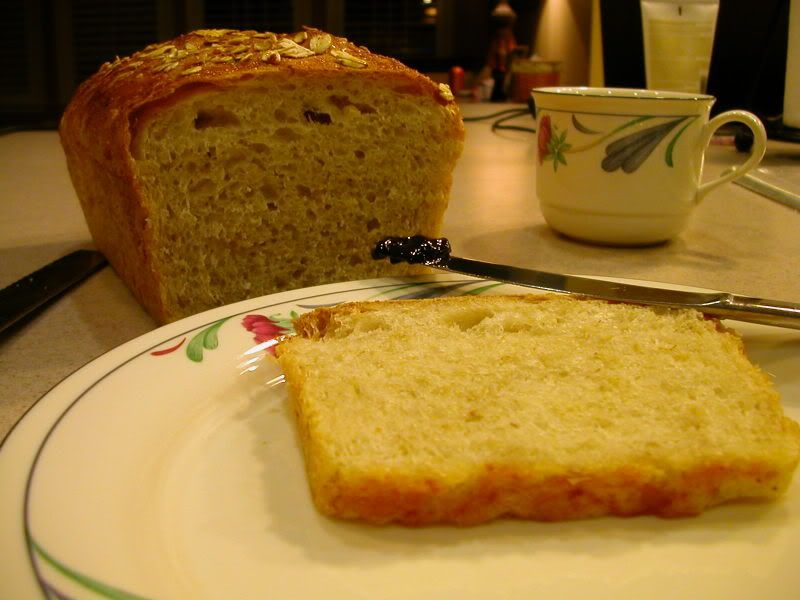
It is delightful with just a smear of butter, or toasted.  For me, it has the appeal of fruit and spice, without the cloying flavor or overwhelming sweetness of most fruitcakes.

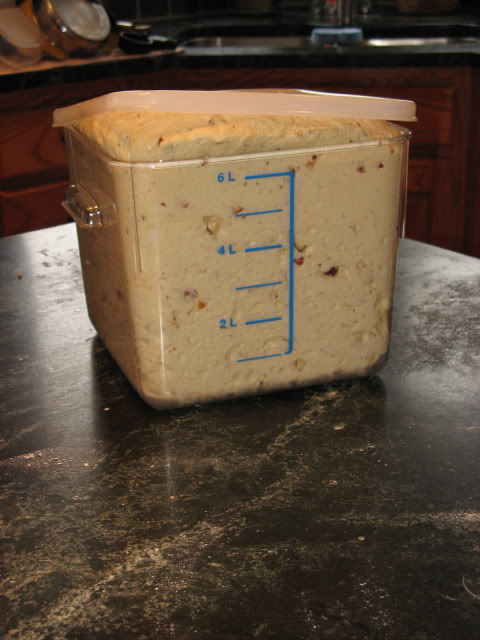
Here's the dough at the end of the bulk rise, just about to make a break for freedom:

Doubled, and then some

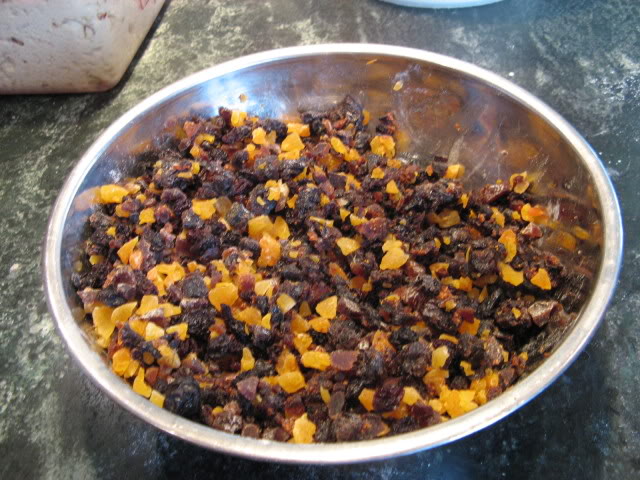
The fruit mixture: figs, apricots, raisins and prunes:

Frut mix


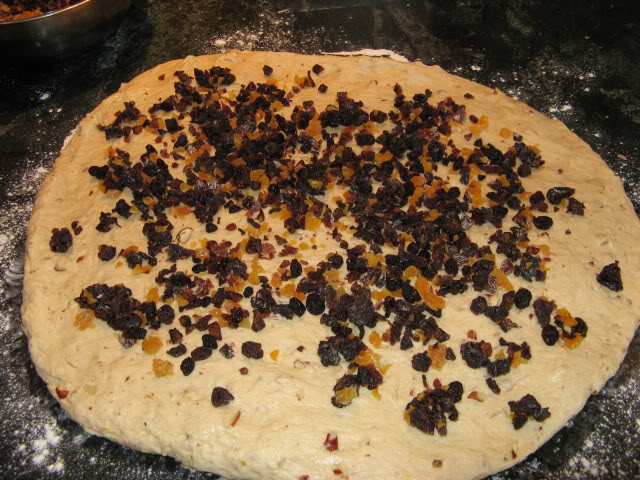
This shows the dough with the first one-third of the fruit, ready incorporation:

Dough and fruit

Fruit mixed in, dough shaped and panned:

The dough in the pans

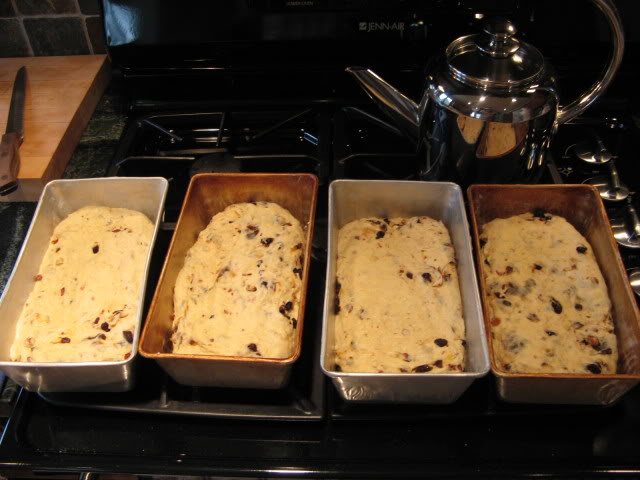
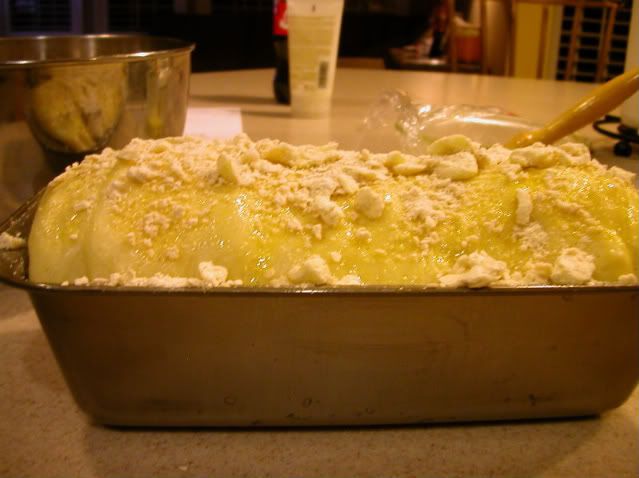
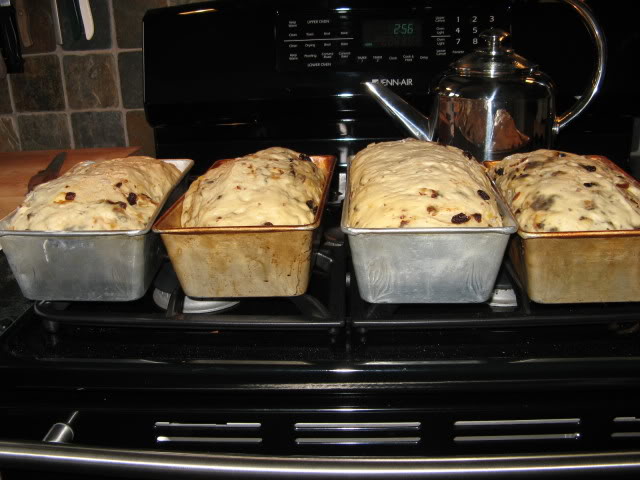
Second rise complete and ready for the oven:

Ready for the oven

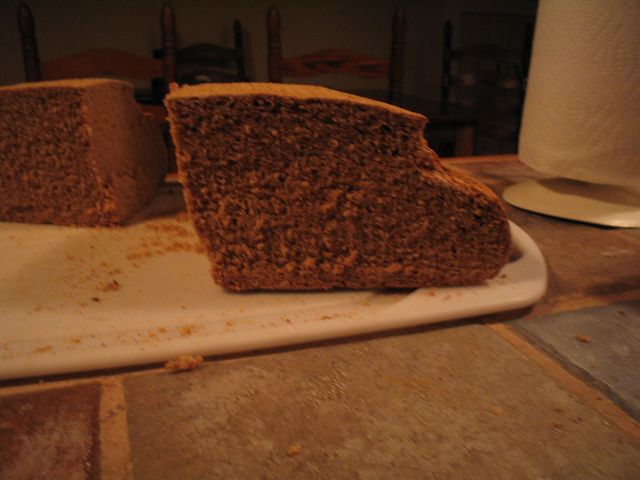
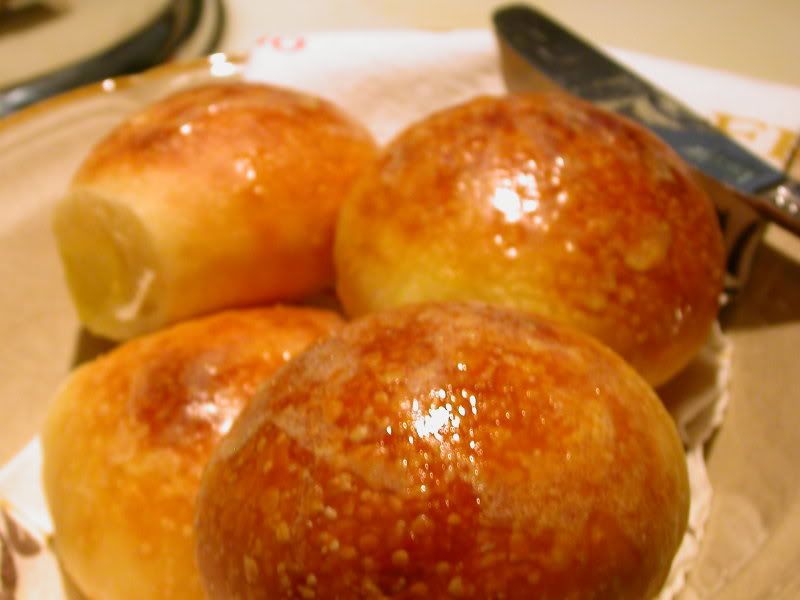
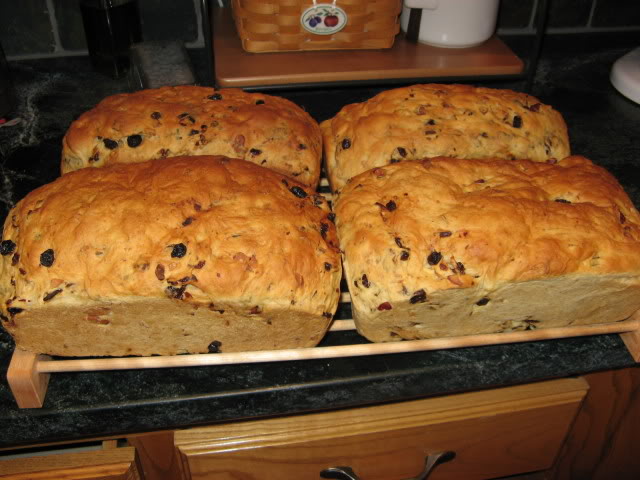
And the finished bread:

All done!


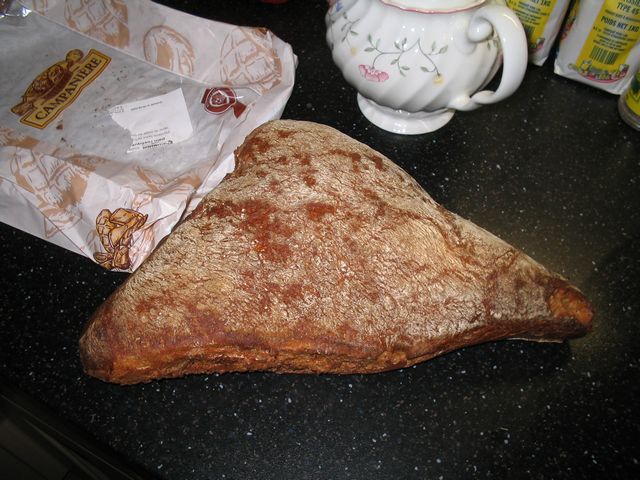
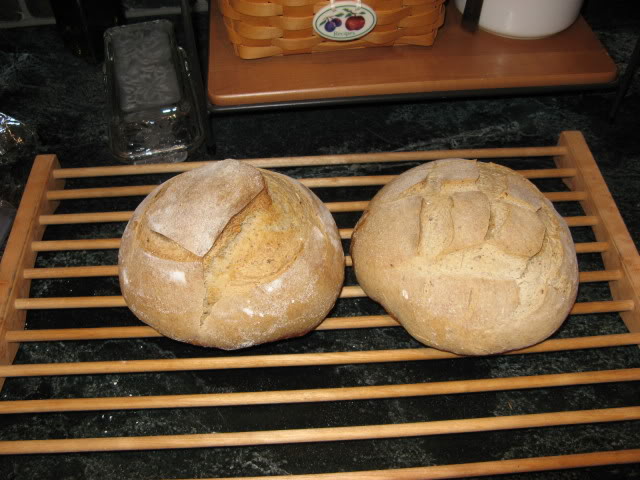
Oh, and I baked off Leader's pain de campagne that was begun last evening:

Leader's pain de campagne

Not a bad day in the kitchen!

dmsnyder's picture
dmsnyder

I've tried an awful lot of toys and tweaks in my quest for better bread. But Eric's (ehanner) claim that he doesn't see any benefit to using a baking stone and the recent post asking about La Cloche versus a Dutch oven got me thinking: Each new trick I've learned about has been added on top of all the other tricks I've adopted. It sounds like what happens with government programs - If the one we have isn't doing the job, we don't trash it or improve it. We just create a new one to run beside the old one. I call it "Planning by Acretion."

Sooooo ... I made a batch of Anis Bouabsa baguettes. I made them more highly hydrated than usual - about 80% hydration, rather than 75%. I used the same method of mixing and fermentation as usual. They proofed for 45 minutes. They were so slack, I didn't even try scoring them.

Now, here's the big difference: I did not use a baking stone. I did not humidify the oven. I baked on a heavy sheet with parchment, and I covered the loaves with a cheapo aluminum foil baking pan for 10 minutes at 500F, then baked at 480F for another 15 minutes.

Like this ...

Fully Proofed


Covered and ready to go in the oven

Baked and cooling

I'll add a crumb photo later.

Pretty nice results, I'd say. Certainly worth more trials with different breads.

On the other hand, there are other things that I would never want to make without my 7 quart Le Creuset enameled cast iron pot. For example, tonight's dinner.

Chicken & Dumplings

David

SylviaH's picture
SylviaH

I had two fairly large pre-frozen dough ball recipes from Neo-Neapolitan P.R. American Pie.  Pre-heated my oven and stone to 550...it was set to come on and be pre-heated automatic for one hour...dough balls were left out to thaw...so when I returned home later that afternoon....everything would be ready for a fast pizza dinner...well under 30 min. dinner ready salad and all.  I opened a can of crushed San Marsano Tomatoes...Albertson's carries the brand...also had a package of combination shredded Italian cheeses, provolone, parmesan, asiago, fontina, romano and mozzarella...I know some itailians don't believe in mixing cheese with the sea food...some like it...we like it.. cheese on pasta, pizza, ect..with shrimp!  I had a few nice mushrooms so sliced those up..added my spices/herbs/garlic...to my crushed tomato..not a white pizza with the shrimp tonite!  I had about a dozen frozen fresh shrimp...Trader Joe's taste great and so handy out of the freezer...picked some fresh basil from my garden.  Floured my wooden paddle, laid my dough on it and poked it out into small circle...lifted it and stretched/slapped it back and forth over my hands...using only flour on one side/bottom...I do not add any more flour on my dough...till I had a faily large 12" or so circle...laid it down on the floured brushed wooden paddel....ladeled sauce, added cheese mixture, topped with chopped shrimp, mushrooms, one with a little sliced basil one without the fresh basil...Shook the paddle with little jerks to make sure everything was slidding....sat the paddle front tip down..holding the paddle low from the stone and gave a forward/backward little jerk till the tip of the pizza came in contact with the stone and gently slid the paddle back releasing the pizza nicely onto the stone!  Less than 8 minutes everything was done!  Lifted the pizza out with the paddle onto my paper grocery sack...keeps the crust crisp, I never put my pizza on a plate to slice..gets to soggy..poured a little EVVOil on top and sliced...  This crust is fairly denser to support the heavy toppings and brown nicely on the bottom...delicious flavor from the pre-fermented dough..with a chewy, crispy crust...Made two pizza's in less than 20 minutes.  Just Beginning to Brown.

davidjm's picture
davidjm

I was up for a challenge recently, so I decided to try the Poilane-Style Miche from Peter Reinhart's "Bread Baker's Apprentice."  It's a 10 cup wheat, 100% wild yeast loaf.  It is also the cover picture of the book.  What a loaf of bread!

I ended up doing a variation on the recipe.  After 6 days of working on it, the final loaf turned out much better than I could have hoped.

As you can see, it rose much more than I expected.  I had made a deep cut in a pound-sign pattern, and the crust still broke at the edges from rising.  I have taken to using the "hearth-baking" steam technique outlined in Reinhart's book.  So the crust was thick and had two discernable layers on the pallate:  The outside was crispy, while the inside part of the crust was chewey (also a feature of sour-dough, as I understand it).

The crumb was somewhat irregular, but didn't have the big holes.  I don't think I could have expected it though given the style of loaf.  It was chewy, cake-like, and moist. 

The taste was really tangy, because I purposefully increased the percentage of starter.  I was concerned about it rising enough.  Although, next time, I think instead of doubling it, I'll only do 1.5 x's as much starter because it was a bit too tangy.  Here is my short version of the variation I followed:

Seed culture:

  1. One cup of rye to make seed culture
  2. next day (or when ready) add another cup of rye (1/2 cup water)
  3. Remove one cup of 2 cup mix and add another cup of rye
  4. Repeat step 3 on the fourth day

Barm:

  1. Take 2 cups of rye starter and add: 2.5 cups white and 2 cups water.
  2. Refrigerate overnight.  Ready next day.

Firm Starter:

  1. One-half of Barm (which amounts to 2 cups or more) + 2 cups wheat + 1/2 cup water
  2. Set it out and let rise.  Then refrigerate overnight.

Dough:

  1. Add all of starter + 6 or more cups of wheat + 3 and 1/4 tsp salt + 2 and 3/4 cups - 3 cups of water.  (My final loaf was an 8 cup total mix.  I followed the recipe, but it wasn't enough water for 10 cups.  So I've adjusted this variation to have more water and thus more flour.)
  2. I proofed it in a large mixing bowl with a towel lining.  It worked great.
  3. Two rises at 70 degrees F (it's about winter here) until it doubles.
  4. Punch back very gently.  I just lifted the dough out of the bowl and flipped it upside down to punch back.  Reinhart seems to think with these style loaves, it is best not to completely de-gas it.  It worked for me.

So there you go.  A great tasting loaf with nothing but flour, salt, and water.  Praise God!  Enjoy with a cup of Irish Breakfast tea and a steaming bowl of oatmeal.

Eli's picture
Eli

I started baking today and thought I would make a couple loaves of babka. Of course I started and didn't realize I did not have everything. I had no almond paste, no milk powder, or corn syrup. I ran to the store, actually 4 of them and not one had almond paste. Well, I decided (this recipe calls for almond paste, which I love!) I would substitue because I have a recipe that calls for pound cake crumbs. Made it home and then realized someone had eaten the rest of the poundcake. Anyway, I had no filling but my dough was rising. I made a filling out of Sugar Cookies crumbled, orange marmalade, oh yea, I was out of apricot preserves too, almonds, butter and cinnamon. It turned out pretty good as I don't like it too sweet anyway. I didn't put much in there to begin with. I made four but two are Orange marmalade and two are chocolate. I will freeze two and eat two.

I had some issues with rolling and even division of the dough so two are catywonkus in size and shape.


Babka Roll

Babka roll

Babka in Pan

Finish

Babka Orange Marmalade Filling

This recipe is based on Marcy Goldman's recipe. I made some changes and didn't use as much flour. I could have as this doug is tacky to sticky but once it bulk ferments it is workable. Great to refrigerate overnight.  This isn't a really sweet babka, I guess it could be depending on the filling.

edit:

Here is the Chocolate! It is one of my favorites too! This is the one that suffered from less dough.

Choco Babka

Chocolate Babka

Eli

www.elisfoods.wordpress.com

davidjm's picture
davidjm

Since most break-baking professionals tend to emulate French bakers, I thought it might be instructive to post this picture and present some questions I am unable to answer at this time. 

We recently spend three weeks in France (in Northern Brittany and Paris), which really raised the bar of my bread baking aspirations.  Take the following sour-dough rye loaf I purchased in the "inter-marche" (normal grocery store) in Brittany, France.  Notice the shape of the loaf.  It is triangular.  In France, each bakery has characteristic shapes, sizes, and slashing patterns.  This was the only time I ever saw a shape like this.  The crumb was light and hole-y, but still had the "cake-like" texture characteristic of good rye loaves.  There are a few things I would like to know:

1. How did the baker retain the shape of this loaf while still maintaining hydration?

2. There were no slashes, but the crust was also not broken.  How?  Is that a feature of hydration and extensibility?

3. In France, to be considered rye, they have to have a certain percentage of rye flour to white.  This bread had a crumb that I cannot replicate with the 50:50 rye:white mix I use in my siegle au levain.  How did they make a nice dark rye loaf and keep an airy crumb?


Siegle au Levain


Eli's picture
Eli

I have been making these yeast rolls for some time now. Usually for the holidays. I thought I would share. They are very good and light.


 Yeast Rolls

Ingredients:

494 Grams Flour (bread)

5     Grams yeast (IDY)

65   Grams Sugar

5     Grams Salt

50   Grams of Egg (beaten)

195 Grams Milk

49   Grams Shortening

49   Grams Water

* Optional - I add about 3 tablespoons of day old mashed potatoes.

   Sometimes I add Sesame seeds

Combine all dry ingredients except salt and add water. Mix and set aside 20 minutes. Beat together egg, shortening and salt adding milk and knead for 10 to 12 minutes. Dough will be tacky. Place in oiled bowl and set aside covered.

Allow bulk ferment till double.

 Remove and scale and shape into 1.75 to 2 ounce rolls. They will expand a great deal. Place on baking sheet and cover. (I do an overnight refrigeration) Then allow 1 to 2 hours for final proof. You may not get much rise but you will get it in the oven. Keep an eye on them and when you press one with your finger and it doesn't completely return they are ready.

Place in preheated oven 375 degrees and bake approximately 10-12 minutes. Remove and brush with butter.

Allow to cool. What is leftover can be frozen.

Yeast Rolls a1


www.elisfoods.wordpress.com


Pages

Subscribe to RSS - blogs