The Fresh Loaf

A Community of Amateur Bakers and Artisan Bread Enthusiasts.

Blogs

koloatree's picture
koloatree

hey all,

here are some pictures of 100% sourdough breads. i am trying to achieve the wonderful ears as seen in many breads here in this wonderful forum. i think my issues are in the shaping and cutting too deep. will try again this weekend! i also notice my breads dont get that nice golden caramelized color. maybe 500 is too hot?


SylviaH's picture
SylviaH

I love making pizza and it's done pretty often around my house..indoors and in the wfo.  So all these pizza's on TFL lately have really been giving me the craving!  I used the Neo-Neapolitan Pizza Dough recipe from PR American pie book.  I made dough with KAAP and KAB flours.  This is a recipe that makes a thin crisp crust with airy pockets in the crown.  Usually I make a thicker crust for use with heavier toppings like sausage or pepperoni and the extra cheeses and tomato that we like...but this time wanted the heavier toppings with the Thin and Crispy crust...It's a little sticky and a touch tricky to handle...as stated in the book..  Well, I've had enough practice now that it's become fun and consistant to make great tasteing pizza's.  Useing the KAAP flour makes the dough even a little more stickier...but with a little practice the dough can be shaped fast with only a little added flour on the peel!  Tonight I wanted a thin, crispy crust with extra's,...I used the AP flour dough balls out of my freezer.   I love the tomato sauce with the spices, herbs, garlic, several cheese blends, fresh garden basil, EVOO and sausage on this one pictured..the other 2 were devoured to fast to get photos.  I went pretty heavy on all the toppings and still got a great crust that stood up, crispy, crunchy and very tastey.  Also this dough was frozen and thawed.  Another plus for convenience!  One thing I do to assure the crust stays crispy is to always place it either on a paper sack..grocery bags are great...or saved cardboard.  I place the bag on top of a cutting board and slice...it then is served on paper plates...another plus for cleanup time..  If you put your pizza onto a pizza pan or a plate your going to get a soggy crust real fast.  The crust has a fantastic flavor!

Baked at 550F on 1 hour pre-heated stones indoor convection oven

Lot's of thick tomato sauce under the cheeses,  and carmelized on top of the bubbles!

Thin, Crispy, Crunchy enough to hold that piece of sausage and cheese on the tip without folding under...nice crispy, crunchy, bubble in the crown!

The dough was stretched out thin enough to see through and the crown left a little thicker..placed directly onto a lightly floured paddle after being shaped between my two palms and flipped back and forth over my wrists and gently stretched in my hands and topped and slid onto the stone and baked about 6 minutes.

Sylvia


TeaIV's picture
TeaIV

I made Pizza on Sunday, and had about a pound of grated cheese left. we also had potatoes, so I decided to combine the two!

the combination was very pleasing! I had a preferment going for 20 hours, about 10 of them in the fridge. I made the dough with 2 or 3 mashed potatoes. I cut off individual pieces, then flattened them, put the cheese on the middle, and rolled them up. In the end, they had a hole in the middle, with a layer of cheese in the middle. their texture was very good, I added about a tbs of olive oil and milk each as well, which might have helped. I think the potatoes and cheese mixed well. Sorry for the bad pictures!


P.S. made my first successful Ciabatta! (successful as in an open crumb). I used this recipe: http://www.thefreshloaf.com/node/2984/jasons-quick-coccodrillo-ciabatta-bread.


Yippee's picture
Yippee


This is my first baking project using rye flour.  It is a sourdough bread made with 20% rye flour, which was all used to make the water roux starter.  There are three objectives of this project:


  1. Practicing scoring techniques learned from David, in preparation for making his high hydration baguettes.
  2. Testing the vitality of my starter which was fed differently than before. This starter was immediately returned to the fridge after given  a 1:2:2 feeding.  I wanted to compare the activities of this starter to the ones that were refreshed several times.  
  3. Observing the effects of water roux starter in artisan breads.


I made three slashes, two according to David's instructions and the last one as a control and was done by the way that I'd been doing before.  The results were dramatically different.  The ones done following David's method were the pretty ones that I've always been envious of.


My starters performed similarly even though they were fed differently.  By adopting the 'immediately back to the fridge' methodology, I will be relieved of the workload of feeding and minimizing waste of flours. 


This crumb was softer and less chewy compared to the boules I've made.  Breads made with water roux starter normally have a longer keeping time. However, this feature has become less important as I have frozen my breads as soon as they cool.


 http://www.flickr.com/photos/33569048@N05/sets/72157619157537516/


        Yippee's portion  Brands/Hydration      
    (%)   (g)        
B -  bread flour 80 = 160 King Arthur      
R -  rye flour 20 = 40 Whole Foods bulk      
SD -  starter 40 = 80 100%      
S -  salt 1.7 = 3.4 Kirkland sea salt      
W -  water 68 = 136        
                 
1 Dissolve S in W.            
2 Mix R in 1              
3 Heat up 2 either on stove (keep stirring) or in microwave (stir halfway) to 65C / 149F  
  COOL AT LEAST TO ROOM TEMPERATURE before use      
4 Mix 3, B and SD until just incorporated        
5 Autolyze 20 minutes            
6 S&F 4-6 times, round up every time        
7 Dough in fridge overnight          
8 Dough out of fridge            
  S&F 4-6 times, round up every time, last 2 times shaped into a bartard      
9 Final proof on canvas            
  Yippee went to sleep and left the dough out in a warm kitchen for 5 hours    
10 Preheat oven to 550F            
  Slash, steam            
  Lower oven temperature to 500 for the first 20 minutes
  460 for the last 10 minutes          
  Leave loaf in the turned off oven for 10 more minutes with door ajar      


jolynn's picture
jolynn


This was the result of my daughter's first attempt at hand kneaded (very high hydration) sourdough olive loaf. Pretty impressive, huh?


nice crumb

Baker_Dan's picture
Baker_Dan

Thought I'd share a picture of my new baking tattoo. Got it last week. From now on, I'll never have to look for a whisk, there'll be one on my right forearm for good.


Haley's picture
Haley

The other day, I tried making bread for the first time. I chose Challah. It looked so delicious. Was this a bad choice for a first timer??? I have no clue about what breads are harder to make than others. My husband and I were left with a flat, dense braided loaf of solid dough.

Today...I tried it again...I just got up and checked my second loaf...and it didnt turn out. Ugh. That's frustrating.

I might try this method out: http://www.motherearthnews.com/Real-Food/Artisan-Bread-In-Five-Minutes-A-Day.aspx


Floydm's picture
Floydm

Beautiful spring weather in Oregon this year so I've been spending a lot of time outside and away from the oven. I did bake some delicious sourdough boules yesterday though.

In other news, the local berry stand down the block opened today. 

I'm looking forward to being able to pick up cheap flats of damaged jam berries soon and making Strawberry Freezer Jam, probably my favorite thing to put on fresh bread.

Bixmeister's picture
Bixmeister

For those that are tired of stopping your Kitchenaid mixer every few seconds to scrape the side of the bowl

check my latest entry on the Forum Topic labeled Stuck on Italian.  This really works.  All I do is spray the new

blade with oil, add my ingredients then mix until I need the dough hook which I also spray.

Bix

gothicgirl's picture
gothicgirl

Posted on 5/26/09 at evilshenanigans.com

Do you impulse buy?

 Chipotle Gouda Cornbread

I do.   My impulse buys are most often food related.  Last week I discovered a really great local cheese shop in Dallas and I could not help but go in and shop.  I got some terribly expensive, and very tasty, sea salt caramels, some disappointing dark chocolate, and two superb cheeses.  One was a sharp cheddar made in Texas, and the other was a raw milk Gouda, also made in Texas.

Chipotle Gouda Cornbread 

The cheddar has been easy to use in sandwiches, egg dishes and such.  The Gouda was different.  I had picked it on impulse with no plan for it.  So, I had a think and decided to add it to some cornbread along with some extra spices, and some left over buttermilk.

 Chipotle Gouda Cornbread 

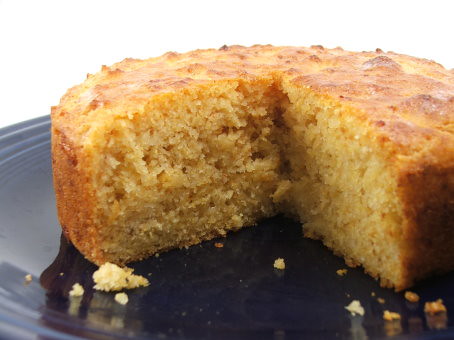
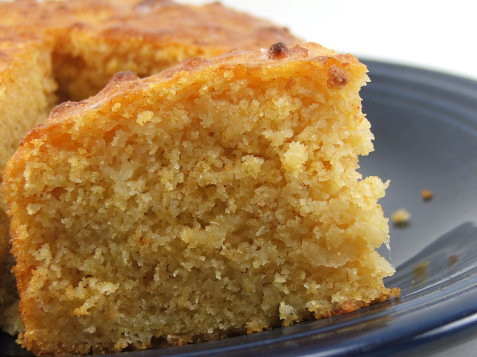
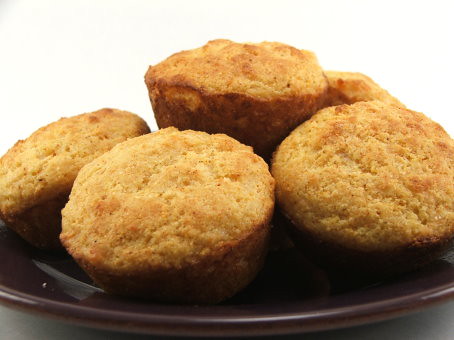
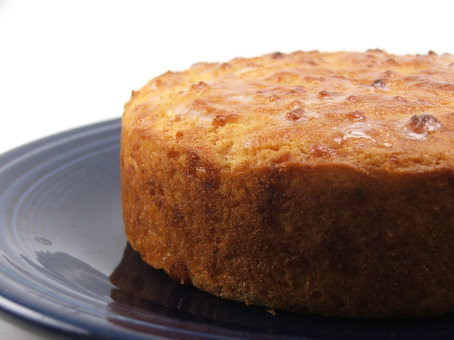
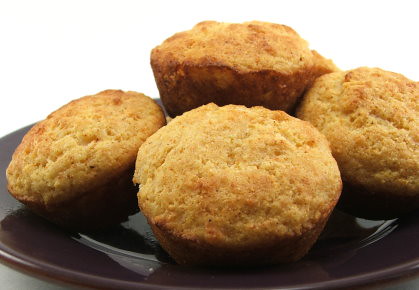
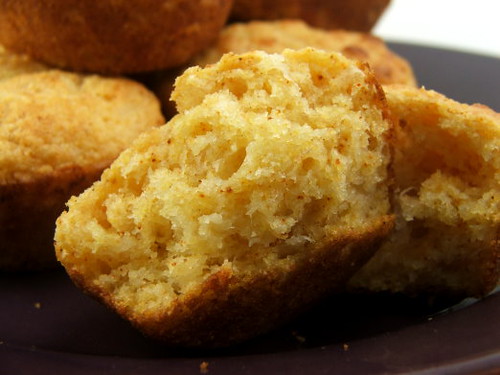
The texture is soft and creamy, there is a slight smokey flavor followed by a gentle spice, and it is some of the best cornbread I have ever had.

Chipotle Gouda Cornbread  Yield 18 muffins or 1 - 9″ round loaf

5 oz all-purpose Flour
5 oz corm meal
1 1/2 oz sugar
.5 oz baking powder
.75 oz non-fat dry milk
4 oz Gouda cheese, shredded
1 teaspoon dry chipotle powder
1 teaspoon chili powder
1 egg, beaten
9 oz buttermilk
.5 oz honey or corn syrup
6 oz butter, melted

Heat the oven to 350 F and spray a 12-cup muffin pan, or a 9″ cake pan, with non-stick spray.

 Chipotle Gouda Cornbread Chipotle Gouda Cornbread

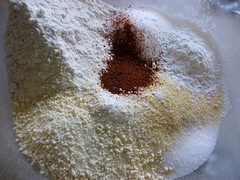
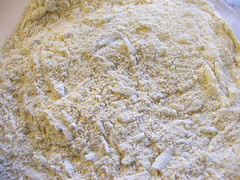
In a large bowl mix the flour, corn meal, sugar, baking powder, non-fat dry milk, and spices until well combined.  Add the cheese and stir to combine.

Chipotle Gouda Cornbread 

In a separate bowl mix the egg, milk, honey or corn syrup, and butter. 

Chipotle Gouda Cornbread 

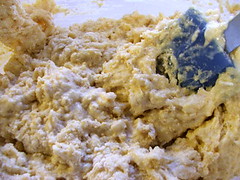
Make a well in the dry ingredients and pour the went into it.  Fold the mixture gently, mixing until the dry ingredients are just moist.  Do not over-mix.

Scoop into the prepared muffin pan, filling each cup half way with batter, or pour the patter into the prepared cake pan.

Chipotle Gouda Cornbread 

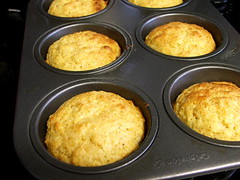
Bake for 18 to 20 minutes for muffins, or 25 to 30 for the cake pan.

    Chipotle Gouda Cornbread 

Allow to cool in the pan for 3 minutes before turning out of the pan.

Chipotle Gouda Cornbread

Serve immediately.

Chipotle Gouda Cornbread


Pages

Subscribe to RSS - blogs