The Fresh Loaf

A Community of Amateur Bakers and Artisan Bread Enthusiasts.

Blogs

Doc Tracy's picture
Doc Tracy

I found this recipe called "The Easiest Focaccia in the World" posted online and I have to say they may be right. I was looking for something really easy to accompany a thin sliced sirloin and freshly picked garden salad. (sorry Northerners!!) Anyway, it doesn't get any easier than this.

Here is my slightly modified version. (added the whole wheat)  I apoligize, I had to add some flour and I'm not quite sure what the end flour weight is so you'll have to add to the original amount until you get it to come off the sides of the mixer.

100 grams WW flour

350 grams AP flour

2 tsp instant yeast

1 1/2 tsp salt

13.5 fluid oz warm water

Mix in the KA blender on speed 4 for 10 minutes. During this time I watched and had to add about 1/2 cup off flour in small increments until the sides of the dough didn't stick but the bottom was still sticking to the bowl.

Let rise in oiled bowl until almost tripled. This took about 45 minutes.

Put on silpat with cornmeal (or oiled parchment, oiled baking pan). I put the silpat into a "half cookie sheet" as that is what will fit into my camper oven. Spread the dough out gently. This fit my half sheet perfectly. It will be about 1" thick.

Spread with about 1/4 cup olive oil. I used a mixture of 2 cloves fresh garlic, some fresh parsley/thyme (from the garden) and a little sprinkle of red sea salt. I spread the thyme/parsley/garlic mixture onto the bread and dimpled it with my fingers. Then a light sprinkle of asiago cheese. Let dough double in pan, about 30 minutes.

Into the oven (probably about 450 but who knows with the camper oven?) for about 20 minutes. Results, tasty light focaccia bread to eat with our tender, fresh garden salad, homemade Meyer lemon vinagrette and thin sliced sirloin steak on the grill.

Until next time. It's 65 degrees and sunny here at RV World, Mesa, AZ!

txfarmer's picture
txfarmer

Another formula from Dan Lepard's " The Art of Handmade Bread" (recipe can be found here: http://beginningwithbread.wordpress.com/2008/05/06/barley-and-rye-bread/ , but as always I encourage you to buy the book, well worth it.)


This is my first time using barley flour, it doesn't have any gluten, and this loaf also has a lot of rye, so it's not a light loaf to be sure, rather substantial. Straightforward to make, using Dan's "knead 5 to 10 seconds, rest 10 to 30 minutes" method. I did however halved the recipe and retarded the dough overnight in my fridge for proofing. Like always, my proof time is much shorter than Dan's, 90 minutes after taking out of the fridge. Judging from scoring marks, I'd say any longer would risk over proofing. (My house was 71F.)


I am happy with the crumb, it's not that open, since the loaf has 50%+ of rye and barley flour. However, it's definitely not dense or heavy.

Now the best part - the taste! I love how rye, barley, and wheat flavors all subtly mingled together, along with slight sourness from my starter. My idea of a good complex sourdough.


It's perfect for a grilled cheese sandwich, with some caramelized onion thrown in

louie brown's picture
louie brown

An original idea. The purpose of this entry is to ask about readers' experiences with flavored waters, stocks, etc. I'm not referring to milk, beer, apple cider, as these have been well covered. Other than the "Pain Marin" at restaurant Ledoyen in Paris, I'm not aware of other flavored breads along these lines.

First, the mistakes. I overlooked the fact that the tomato water has a good deal of solids in it. My dough needed extra hydration as a result, and could have used still more, in my opinion. It also seems to be underbaked, as there are a few gummy areas right through the middle.

This wound up as a roughly 70% dough, KA AP flour, some wheat germ, the seeds, the tomato water. A stiff starter was used. Bulk fermenting after a couple of stretch & folds was almost 14 hours at about 72 degrees. Preshaped, rested, shaped, into the fridge overnight, out for a couple of hours, scored (clearly unnecessary), baked under a bowl at 450 for 20 minutes and then without the bowl for a total of 45 minutes. I think another ten would have been fine.

While there are flaws to this early work in progress, the taste is exceptional; a deep, mellow tomato background with none of the acid. The seeds add nice garden notes. All of this seems very compatible with the sourdough.

Experiences with these sorts of flavorings are invited, as is comment and criticism on improvement to this loaf.

DonD's picture
DonD

Setting:

'Snowmageddon 2010', end of Round 1, waiting for Round 2. Between 10 to 20 additional inches of snow expected by tomorrow. We are digging out and digging in. It gives me a chance to try something new.

Background:

'Obelisk' is an excellent Italian Restaurant in Washington DC. The Chef/Owner, Peter Pastan is a brilliant self-taught Chef who has traveled extensively throughout Italy to bring back the authentic, simple and pure dishes of regional Italian Cuisine. I have had many memorable meals there and the one that stood out the most was a special 9-course dinner that he cooked for a group of us using a half a dozen different kind of wild mushooms that we had picked that day. He always serves homemade breads, beautiful Ciabattas, Focaccias, Tuscan Loaves, Dark Sourdough Whole Wheat Walnut Breads and his signature 24 inch long Grissini that he learned to make during a week-long stint in an Italian Bakery. Many times when we were the last diners of the evening, Peter would give us all the leftover Grissini which were always prominently displayed in a tall ceramic vessel on the serving table in the middle of the dining room. They would be great with a Capucchino the next morning. The long and slender amber colored sticks, dusted with semolina were crunchy with a slightly soft core and tasted nutty, slightly yeasty with a nice balance of saltiness and caramelly sweetness.

Recently, in the Food Section of the Washington Post, there was an article about local Chefs making their own Breads and Peter was featured with the recipe for his famous Grissini. I was thrilled that finally I would be able to duplicate those delicious breadsticks.

Peter Pastan's Recipe:

- 1 Cup Warm Water (90 degrees)

- 2 Tbs Active Dry Yeast

- 1 Tb EVOO, plus more for greasing the dough

- 1 Tb Honey

- 1 Tsp Salt

- 2 Cups Flour, plus more for the work surface

- Semolina for forming the Breadsticks

My Variations:

While mixing the dough, I had to add more Flour to get the right workable consistency so I also added a little more salt.  From my taste memory, I detected a touch of Baking Powder. I thought that the amount of Yeast would be too much so I reduced it slightly. Essentially, I followed the recipe except for the following variations:

I used 2 1/2 Cups KA AP Flour, 1 Tb Instant Yeast, 1 1/4 Tsp Grey Sea Salt and added 1 Tsp Baking Powder.

Procedures:

Combine Water, Yeast, Oil, Honey, Baking Powder and Salt and mix with Flour in a stand mixer using the paddle attachment. Beat at medium speed for 5-6 minutes until dough is smooth and supple. Transfer dough to floured work surface, do one french fold and roll out dough to a rectangle 6"W X 16L".

Transfer dough to an oiled baking sheet, brush oil on top, cover in plastic wrap and let rise for 30 minutes. Dust top with Semolina and sprinkle liberally on side of baking sheet. Using a 6-inch dough scraper, cut 1/2 inch  thick strips of dough, roll in Semolina and transfer to parchment paper stretching dough to about 14" long.

The original recipe calls for baking temperature of 450 degress for 12-15 minutes but I baked mine on a baking stone in a 400 degrees preheated oven for 10 minutes.


I was quite pleased with the results. They tasted pretty close to the original version.

Happy Baking!

Don

Boboshempy's picture
Boboshempy

Well, this is actually the Chocolate Cinnamon Babka recipe from Peter Reinhart's Artisan Breads Every Day. I followed the recipe to a T except I substituted the chocolate for dark brown sugar, as per the request from my girlfriend, who barely ate any after it was done, haha.

I really like how it came out and I love the look. A loaf doesn't get any cooler looking than this and you can't go wrong with a rich, sweet, cinnamony, streusel topped bread. I gave my parents half the loaf and I pretty much ate the rest by myself over two days, my girlfriend only had a taste and acknowledged it was fantastic, she considers herself a expert. She had to look good in a bikini the following week so she said "I should stop making bread!".

This is the first bread I made out of this book, I have made many from PR's other books. I have my eye on taking a whirl at the croissant recipe in this book but I don't know when I will get to that. This was easy, fast, and fun to make and I will definitely be making it again, next time with the chocolate. It is a cool bread to bring to a dinner party for desert, in my opinion.

Enjoy the pictures,

Nick


breadbakingbassplayer's picture
breadbakingbass...

Hey All,

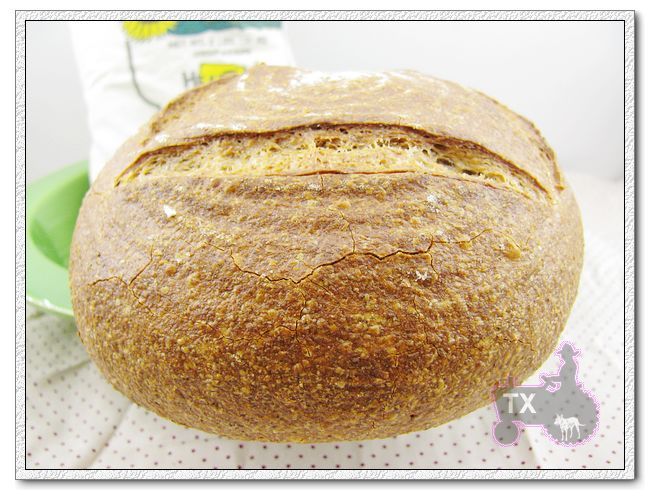
Just wanted to share with you some baguettes that I made last night...  Nothing fancy, but I think they turned out pretty nice except for the slightly burnt bottom on a few of them...  These are 65% hydration using a firm 60% hydration sourdough starter and active dry yeast...  I think it's a variation on Eric Kaiser's Baguette Monge, but using American flours, and a firm sourdough starter instead of a liquid one...  It's probably closer to Dominique Saibron's baguettes that do use the firm sourdough starter... 

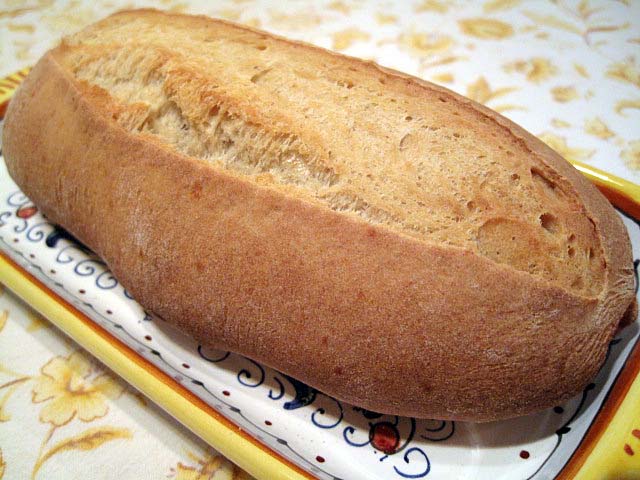
Also, the 2nd one from the right is the one I cut into.  It slid off my peel before I even opened the oven door.  I caught it before it hit the ground, but in doing so stretched it out, and ruined my slashes...  It tasted fine, but looks a little skinnier than the other 7...  Posting the recipe below.  Enjoy!

Tim

Ingredients:

Total Dough Weight: 2850g

Yield: 8 x 15" baguettes at 280g weight after bake

75% AP - 1140g (Whole Foods 365)

20% BF - 304g (KA Bread Flour)

5% Graham Flour - 76g (Bob's Red Mill)

20% Firm Sourdough Starter - 304g (straight from fridge fed day before)

65% Water - 988g

2% Kosher Salt - 30g

0.4% Active Dry Yeast - 6g (1 1/2 tsp)

Directions:

Day before:

Feed sourdough starter, or convert liquid starter to firm starter.  Leave on counter at room temp for 4 hrs, refrigerate until ready to use.

Bake day:

1.  Measure out all ingredients.

2.  Place water and sourdough starter cut in pieces in large mixing bowl.  Then, add all dry ingredients at once, mix with wooden spoon until all is combined in a shaggy dough, knead in bowl with wet hands for about 5 minutes, cover and autolyse for 30 minutes.

3.  After autolyse, knead dough 50 strokes in bowl with wet hands, cover and let rest for 30 mins.

4.  Turn dough in bowl, cover and let rest for 30 mins.

5.  Turn dough in bowl, cover and let rest for 1 hr.

6.  After rest, dough should have doubled in size.  To test, poke dough with a floured finger.  If impression remains, dough is ready.

7.  Divide into 8 pieces approx 356g, preshape and cover with cloth and plastic, let rest for 15 minutes.

8.  Final shape baguettes, place 1st 4 in (lightly floured) linen couche on a tray, place in plastic bag, and retard in refrigerator for 30 minutes.  Shape remaning 4, and proof for 30-45 minutes in linen couche.  Also place these 4 in large plastic bag so they don't dry out.  Arrange 2 baking stones in the oven along with a steam pan, and preheat to 500F with convection.

9.  When oven reaches 500F and 1st set of baguettes are proofed, carefully turn baguettes onto wooden peel, slash 5 times, place in oven.  When all baguettes are in, pour 3/4 cup of water into steam pan (use oven mitts), close door and bake for 8 minutes at 480F with convection, rotate and bake at 450F with convection for another 12-15 minutes or until internal temp reaches 210F.  Take out 2nd set of baguettes from fridge while these are baking.

10.  When first set of baguettes are out of the oven, preheat oven to 500F with convection.  When oven reaches temp, bake the 2nd set.

11.  Cool for 1 hr before eating.

Notes: I preheated my oven to 550F with convection...  This probably caused a few of them that were started on the bottom stone to have slighly burnt bottoms...  Also, my firm sourdough starter was started with organic rye flour, and then at some point converted to AP or bread flour.  Now it has some graham flour in it...  I feed it every few days with either 50g AP, and 30g water, or 100g AP and 60g water, leave it on the counter for 4 hours, feed it again, and return it to the fridge.  I usually use it 1-3 days after the last feeding...

Also, I have been seeing a few thread suggesting that you can bake breads in cold oven without preheating it to 50F to 100F above your desired bake temp...  I just have to say that that is bull-crap! at least for making baguettes, which need that initial high heat from the oven/baking stone to get the full oven spring, and rich carmelized crust...

 Submitted to Yeastspotting on 2/9/10

Mebake's picture
Mebake

Yesterday was a milestone in my Bread Baking quest. The seemingly defiant Wholewheat has been brought to its Knees, Well at least to me.

This was a 100% Whole Wheat Sourdough Boule i Baked yesterday. Constituted of 100% White Whole Wheat flour i milled, and baked under stainless steel bowl on a stone. It is very mildly sour, and very tender and creamy/ nutty somewhat moist crumb.

Credit and props go to:  thefreshloaf.com, and its members: David (dmsnyder), and ShiaoPing (ShiaoPing), for enlightening me on the stretch and fold method.


 Scoring did deflate part of the dough, as evident from the second slice.

Mebake


OldWoodenSpoon's picture
OldWoodenSpoon

Inspired by Shiao-Ping's Miche, Pointe-à-Callière from mid-January, and by the excellent efforts of other bakers here, I decided to try my own hand at this loaf.  My wife requested some loaves for her sister's birthday coming up soon, and it seemed a good opportunity to try this.  I have never had Hamelman's book in hand, and have not baked this loaf before, so I followed Shiao-Ping's excellent instructions for this bake. My only departures were to blend my own flours from home-milled hard red ww and hard white ww plus KA AP flours,  to extend the bulk fermentation to about 14 hours due to limitations of life, and to bake the dough as two smaller loaves, which resulted in much shortened baking times, so we could keep one at home to try for ourselves.  I was reassured to find my impressions of the dough development to be almost exactly in parallel with Shiao-Ping's observations from her blog post referenced above.

At the same time, in need of more gift loaves, I continued to push my exploration of higher hydrations in my own straight sourdough formula, with this bake done at 70% hydration.  The resulting loaves had amazing oven spring, and the flavor is just excellent.  The crumb is tender and creamy, and has a very distinct but subtle flavor.  This dough was also bulk fermented in the refrigerator for about 14 hours alongside the Pointe-à-Callière.  This resulted in very good flavor, but not a strong sour.  The higher hydration had me worried during the development of the dough, but after the bulk fermentation the dough had come together almost startlingly firmly.  Formation and proofing resulted in loaves with very good integrity despite being the highest hydration dough I have made thus far in this exploration.

Here are the loaves together.

and a better look at the Pointe-à-Callière

Here is the straight sourdough

I must admit I am quite pleased with the results of both of these breads.  The miches had wonderful spring in the oven compared to my previous attempts at a whole wheat loaf, and the sourdough was also a very good performer on that score.  I wish I had pictures of the miche loaves before baking because they looked almost dead to me.  I was not only pleased but quite surprised at the spring and life in them in the oven.  They taught me a great deal about judging dough for future reference.

The crumbs of both are also quite nice.  I succeeded in getting much better gelatinization in the crumb of both loaves in this bake than I have accomplished previously.  Now, if I can just zero in on the factors that led to it!  I am focusing on the high hydration levels as the primary contributors at the moment, together with the La Cloche baker.  I baked all of these loaves one-by-one en cloche.  I also extended the time under cover to 20 minutes, and left the oven at the full 500F temperature for the full 20 minutes.  I lowered the temperature to 460F just before opening the oven to uncover each loaf.

Here are crumb shots of each, beginning with the Pointe-à-Callière.

and the sourdough looks like this

While I am feeling pretty proud of these loaves, and especially of the Pointe-à-Callière, I am not sure if this is the way the loaf is "supposed to" come out.  For one thing, I wish I had floured the loaf a bit prior to baking.  As it is, it finished with that "wet sandstone" finish I find very typical of my past high hydration whole wheat efforts.  I have seen the same thing in pan loaves I have baked, and I don't find it very attractive.  Shiao Ping's presentation is much more winsome!  Also, the flavor is pretty mild, and I was expecting a much sharper sour flavor after the long cold bulk fermentation, similar to other Hamelman loaves I've tried.  Could this just be the nature of my starter?  I don't object, but it was not quite what I thought was expected here.

Thank you for reading this far!  Happy Baking
OldWoodenSpoon

dmsnyder's picture
dmsnyder


When I first baked bread back in the late '70's, one of my favorites was the “Pane all'Olio” or “Mantovana Bread” from Marcella Hazan's “More Classic Italian Cooking.” Even then, Hazan referred to this bread as one that “used to be common” in Northern Italy. I have no idea how common it is today. Perhaps Giovanni (JoeV on TFL) can tell us.

The Pane all'Olio is a low-hydration bread. In Hazan's recipe, half the flour is in a biga which has the same hydration as the final dough. I had some biga naturale left over from the Sourdough Italian Bread I made yesterday, so I decided to use it to make a sourdough version of Pane all'Olio. I did boost the hydration from 56% to 61%, to suit my taste. The dough is still very much drier than that of most breads I've been baking recently. Otherwise, I maintained Hazan's ingredient proportions.

The procedure for making this bread is unusual in that, after the biga is added and the dough kneaded, it is allowed to ferment until doubled, then divided and shaped and baked, without proofing. It has a long bake in a relatively cool oven, to give it a thick, crunchy crust.

Biga:

Baker's %

Weight

Flour

100

314.76

Water

75

236.07

Salt

0

0

Yeast

0

0

Starter

50

157.38


708.21

The biga can be made the night before the baking day and fermented for 12 hours at room temperature. It can also be made the day before, fermented for 12 hours and then refrigerated overnight. If refrigerated, you should let it warm up for an hour at room temperature before mixing the dough.


Final Dough:

Baker's %

Weight

Flour

100

314.76

Water

47

147.94

Salt

2

12.59

Olive oil

3

18.89

Yeast

0

0

Pre-Ferment

200

550.83


1045

Note: The original starter is backed out of the biga before mixing with the other Final Dough ingredients.

Note: Recommend reducing the salt to 1.8%.


Procedures

  1. The day before baking, mix the biga ingredients and ferment.

  2. On the day of baking, disperse the biga in the Final Dough water.

  3. Add the flour, salt and Olive Oil and mix thoroughly, using the paddle blade on a stand mixer.

  4. Mix at Speed 2 until moderate gluten development.

  5. Transfer the dough to a lightly floured board and give it a couple stretch and folds.

  6. Form the dough into a ball, and place it in a lightly oiled bowl. Cover tightly.

  7. Ferment the dough until doubled in volume. About 3 hours.

  8. About an hour before baking, pre-heat the oven to 450ºF with a baking stone and your steaming apparatus in place.

  9. Transfer the dough back to the board, divide it into two equal pieces and form each into a loaf. Hazan describes the loaf as “a thick, cigar-shaped roll, plump at the middle, slightly tapered at the ends, and about 7 to 8 inches long.”

  10. Pre-steam your oven.

  11. Transfer the loaves to a peel. Make a single lengthwise slash along the top of each, about an inch deep.

  12. Transfer the loaves to the baking stone and steam the oven.

  13. Bake for 12 minutes at 450ºF.

  14. After 12 minutes, turn the oven down to 375ºF and bake for 45 minutes more, or until the loaves are done.

  15. Transfer the loaves to a cooling rack and cool completely (at least two hours) before slicing and serving.


The loaf had a nice crunchy crust. The crumb was tender. The flavor was “good,” but, besides being a bit salty to my taste, it seemed rather dull and uninteresting compared to the breads I've been making and eating of late. (My wife's comment was, “It's good … but ... not like your other bread.”)

Arrrrgh! My palate is ruined for white bread!

Oh, well. One must always have a back-up. Mine actually came out of the oven before the Pane all'Olio was baked.


The Cinnamon-Raisin-Walnut Bread from BBA is always a palate pleaser at our house. (My wife's comment was, “Did you leave some out for breakfast?”)

David


makebreadnet's picture
makebreadnet

After reading this site (and many others) for some time, I have read and learned many tricks and tips from fantastic bakers on how to make a better loaf.  My goal is to just keep improving and making my loaves a little better each time.  I don't really make them for anyone in particular.  My wife will have a piece once in a while but I usually make bread for myself.  I think I've achieved a pretty consistent recipe that yields a fairly consistent loaf, and I would like to use this blog spot to discuss the different cooking vessels for baking the bread.  Although the cooking vessel won't necessarily improve the flavor of the loaf, it's interesting to see what kind of difference these things make while baking. 

In the next few post, I plan share with you all the results of my baking so that we can all see what an average (or sub-average) baker with readily available (and relatively inexpensive) tools and equipment can make in his home kitchen.  In particular, I will use my standard recipe as a control and will bake the loaves in: a sheet pan, on a pizza stone, in a dutch oven, on some newly-acquired fire brick, and maybe even on my grill with some of the aforementioned vessels so that we can all actually see what we get when we cook bread using these different techniques.

I hope to start in the next few days and will use the following "Plain as Jane" white bread recipe for all future loaves in this series:

4 cups AP flour (unbleached, of course)
1 1/4 cups water
1 tbs sugar
1 tbs salt
1 packet of yeast

This has produced a somewhat bland but soft and tasty loaf for m and I will use it as a control in my upcoming "experiments".

After this series is over, I will explore different recipes in order to expand the flavor of the loaves but, as Alton Brown says, that's another show.

Pages

Subscribe to RSS - blogs