The Fresh Loaf

A Community of Amateur Bakers and Artisan Bread Enthusiasts.

Blogs

breadbakingbassplayer's picture
breadbakingbass...

Hey Pat,

I'm dedicating my latest batch of baguettes that I made last night to you...  These are very simple 58% hydration baguettes made with Gold Medal Unbleached AP Flour, water, Kosher Salt, active dry yeast.  The crust and crumb turned out pretty well.  The last one I put in was a little overproofed, but it turned out OK.  These are very simple tasting with a very light crumb and a crunchy crust.  I think next time I will put the yeastless Poolish in the refrigerator instead of leaving it out on the counter.  That might give them a sweeter taste...  Enjoy!

Tim

PS: I'm still grinding...

Ingredients:

1366g - AP

792g - Water

28g - Kosher Salt

8g - Active Dry Yeast


Directions:

Yeastless Soaker (Poolish)

683g - AP

683g - Water

8:00am - Mix all, cover, leave on counter for 8-12 hrs.


Final Dough:

683g - AP

109g - Water

28g - Kosher Salt

8g - Active Dry Yeast (2 tsp)

1366g - Yeastless Soaker

Directions:

6:30pm - Mix all ingredients, knead for 5 minutes with wet hands in bowl, cover let rest for 25 minutes.

7:00pm - Knead briefly, place in oiled tub, cover, let rest for 25 minutes.

7:30pm - Turn dough.

8:00pm - Turn dough.

8:30pm - Divide into 6 equal pieces, preshape, cover let rest for 20 minutes.

8:50pm - Final baguette shape, proof ln linen couche for 30-45 minutes.  Place 2 baking stones on 2 levels in oven along with steam tray, preheat to 500F with convection.

9:30pm - Turn baguettes onto peel, slash, place directly on stone (3 per level) add 1 cup of water to steam pan, close oven door, bake for 10 minutes at 450F with convection.  Rotate, turn down oven to 425F with convection and bake for another 12-14 minutes or until internal temp reaches 210F.  Cool for 1 hr before cutting.


OldWoodenSpoon's picture
OldWoodenSpoon

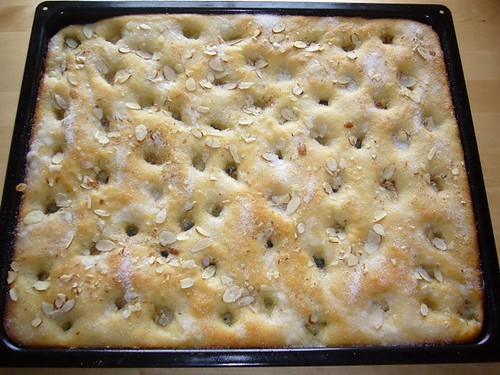
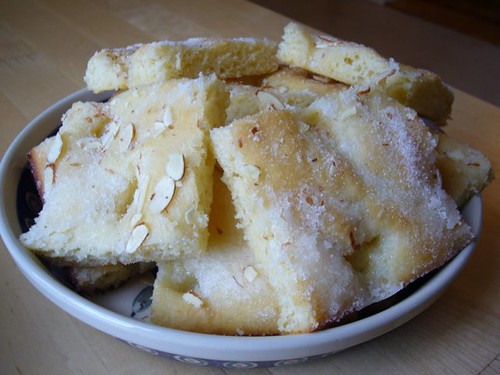
I have been able to make time for baking recently, but not so much for other things like keeping up with my bread blog.  During the silence I've been pushing myself to higher and higher hydration levels on my straight sourdough bread formula, testing my own limits in handling high (to me anyway) hydration doughs, and learning about how it affects the finished loaf.  I think I've learned a lot, but the most important lesson has been:  I still have a lot to learn!

I have baked this dough recently at 72%, 74%, 76% and finally at 78% hydration.  This post is about the latest, at 78% hydration.  The others (72%, 74% and 76%) we have eaten happily, but I've not had time to post about them, and did not take pictures either.  My bad, mea culpa. 

As I have progressed up the hydration levels with this bread I have kept virtually everything else as consistent as I can.
. My flour mix has stayed at 5% Organic Rye, 15% KAF Bread flour and 80% KAF All Purpose flour.
. I have used my home-grown 100% hydration starter expanded in two successive expansions to provide a 25% preferment when making up the final dough. 
. I have used 85F water by thermometer for all water additions to both the preferment and the final dough, but have not controlled for final dough temperature, taking what comes. 
. I have used a variation on dmsnyder's San Joaquin Sourdough process of stretch and folds in the bowl followed by same on a lightly floured board.  I do 40 "strokes" in the bowl at 30 minute intervals, repeated four times, followed by two repetitions on the board at 45 minute intervals.
. After the dough is developed it is retarded in the refrigerator for 14 to 20 hours depending on life.
. Dough was divided evenly and shaped into 2 oval boules with only a short bench rest between pre-shaping and  final shaping.
. Proofing was done at room temperature (roughly averaging 66F-67F) in heavily floured oval willow baskets till my poke test is satisfied (I continue to over-proof.  Slow learner I guess.)
. Baking has been in a La Cloche in a tile-lined oven, preheated for 30 minutes at 500F using 10 minutes under cover and then 20-25 minutes (at 465F) uncovered, with finished internal temperatures always in the 209F-210F range.

This bake has followed the above, and the results have tracked consistently with my previous efforts.  First, this dough is wet!  It is very soft and sticky starting out but develops easily throughout the stretch and fold regimen, and then is surprisingly easy to handle after the retard.  It is too soft to really hold a shape very well, but not so soft or sticky as to be impossible to put into a shape initially.  Does that make any sense? 

Here are a loaf and a crumb shot.

As you can see, the very wet dough captured a great deal of surface flour.  Even so, it stuck in the willow basket a bit and took a firm rap on the board to jar it loose.  That resulted in some spreading of the loaf that was not overtaken by the oven spring.

The crumb gelled nicely, and is very, very tender. Perhpas even too tender for our taste.  This bread is almost "fluffy".

My focus has been on crust and crumb, perhaps at the expense of flavor, and perhaps not.  This bread tastes good, but is very mildly sour, and not really tangy at all.  I will work harder on that eventually.  The two biggest impacts I have noticed in this bread as I have progressed up this hydration incline have been on the crust and crumb.  First, the higher I have pushed the hydration the thinner and lighter the crust has become.  At lower hydrations with this same bake the crust has been more satisfyingly leathery and chewy.  At the highest level it has become thin and soft. 

I actually have baked this 78% hydration dough twice in the last week.  The first time I steamed (left covered) for 20 minutes, and then uncovered it at reduced temperature for another 15 minutes.  The crust was so unsatisfying that I tried it again as pictured here, going back to steam (covered) for 10 minutes and then 25 minutes uncovered at reduced temperature.  There was no discernible difference between the crusts on these two bakes.  The crust on both were thin and of lack-luster character.  The oven spring of both bakes were consistently high, and my starter remains rewardingly energetic.

The second observation I have gleaned from my experiments so far is that as I have pushed up the hydration level (without modifying the flour mix), the gelling of the starches in the crumb has improved (a goal of mine) and the texture has become more and more tender.  This latest 78% hydration iteration is so tender in the extreme that it lacks the firm tooth I desire in my sourdough bread.  This is the reason for my questioning title to this post:  How high is too high, or is there such a thing?

I have also been unable to get this dough to caramelize the way I want it to.  It does color up nicely, but I cannot get it as dark as I tend to prefer.  I am suspecting that my tendency to over-proof is leaving too little sugar behind to provide good color.  In addition to pushing myself to bake sooner to avoid the over-proofed syndrome I'm stuck in,  I plan to also lower myh finishing temperature even more in order to bake longer before getting the internal temperature up so high.  I have hope for some help on the character of my crust from this as well.

I am now debating with myself over the next direction.  It appears to me that I have two clear choices among the many options:  Either back down the hydration level or increase the bread flour in the mix.  I am leaning toward the option of increasing the use of bread flour in hopes of keeping the gel I've attained but increasing the tooth of the loaf by virtue of the stronger flour.

If you have insights on these thoughts I'd love to hear them.  Links or suggestions for reading on these topics will also be appreciated.  Thanks for stopping by.

OldWoodenSpoon

dmsnyder's picture
dmsnyder

Pat, who has is enduring earthquakes, tsunami warnings and, worst of all, no access to bread baking this week shared with us the thought that having some bread to critique might lift her spirits. What better bread than that made from her own baguette formula?

In anticipation of Pat's need, I baked a couple baguettes this afternoon. For the formula, see Baguette crumb - 65% hydration dough. I used some leftover levain with the G. Rubaud flour mix to seed the levain. The rest of the flour was KAF European Artisan-Style flour. This is a supposedly the same protein content as KAF AP flour, but it always seems to absorb a bit more water than AP. I didn't add any extra water, so the dough was quite dry - not even tacky after a couple stretch and folds in the bowl.

So, Pat, have at it.

The baguettes

Grigne

Crumb

The crust was deliciously crunchy and sweet from the caramelization of a bold bake. The crumb was chewy with a nice, baguette flavor, but the taste of the tiny fraction of whole wheat flour used in the levain was discernible. It seemed a bit "out of place." However, this didn't stop me from consuming half a baguette with dinner.

David

dstroy's picture
dstroy

Time for my semi-annual birthday cake update, right? This year's cake for my son was LEGO themed!


I guess I never posted last years cake -my son was super-into his Mad Magazine Spy-vs.-Spy comics and asked for this theme on his cake. I was really busy with planning the event which was at a roller skating rink, so the only thing I really did was to buy a plain undecorated sheet cake and decorate it to make it match.

This was the result. (The wick of the bomb was a curly candle - the best part was when my son went to blow it out, dad (Floyd) popped a paper bag behind them all. You should have seen the kids jump!)


This year, the boy has become a Lego-maniac. Naturally, a Lego cake seemed to be in order.

I started off with marzipan, because I'd seen the professionals make stuff out of fondant and I can't stand the taste of that stuff - to me, it's like someone mixed marshmallows with wax candles. The little potato shaped marzipan balls are particularly tasty, so I went ahead and got a bunch of those and did some smashing until they became claylike, and then put them in little plastic sandwich bags and added various food coloring gels to mash in. Then it was just a question of painstakingly playing with the resulting clay, and wishing I had some sort of Lego mold which I'd seen some folks mention but which I couldnt find around here (though I dont know that it would have worked with the sticky marzipan anyway!)


If I were to do this again, I'd make one Lego minifigure for each invited guest, because that would have saved a lot of arguing at the time when cake cutting came! Every single kid really wanted one of the little guys. ;)

For the cake, I made a very very basic chocolate cake which always comes out really tasty when I use the good chocolate cocoa.

Basic Chocolate Cake

(This is for a 1 layer, 9 inch round pan - for the cake I made, I used this recipe x3, 2 for the larger 9x13 pan, x1 for the 3 mini-loafs)

  • 1 cup all-purpose flour
  • 1 cup sugar
  • 1/4 cup unsweetened cocoa (I use Drost - it makes a difference to splurge on better cocoa)
  • 1/4 tspn salt
  • 1 teaspoon baking powder
  • 1/4 teaspoon baking soda
  • 3/4 cup milk
  • 1/2 tsp vanilla
  • 1/4 cup butter
  • 1 egg

To make, combine all the dry ingredients, mix till well blended. Then add the milk, vanilla, butter and mix on low until combined, then beat on medium for about 2 minutes. Add the egg and beat 2 more minutes. Pour into pan and bake at 350 for 30-35 min (for 9 inch round pan) or until toothpick comes out clean.

Remove right away and let cool before icing.


I made one large sheetcake in a 9x13 pan and then split a single-layer recipe into 3 small sized loaf pans, giving me some extra cake to work with. The third loaf got destroyed when I tried to get it out of the pan - oops! But it gave me bits to work with and some extra to eat when I was done!)

Then I just split the cake up into a tiered tower, using little bits of cut cake to make them into stacked "lego blocks".

Then it was just a matter of frosting, which probably would have worked better with a less fluffy icing than the cream cheese/whipped cream frosting which I used (though that was non-negotiable because the family definitely loves that frosting best) and arranging the little guys and blocks on top.

That frosting recipe, by the way, is simple:

Take 8 oz cream cheese and 1 cup confectioners' powdered sugar in a mixing bowl, and whip with an electric beater until smooth.
Then add about 1/2 cup of heavy whipping cream and beat again until you have a spreadable consistency.

I doubled that for the amount of cake used here.

The only non-edible bits were the candles, including a figure-8 one I found at the last minute.

Add candles, and voila!

LindyD's picture
LindyD

Grissini are pencil-thick bread sticks, 14 to 16-inches long, and easily made in a few hours.  The dough is mixed, bulk fermented for an hour, then divided, rolled, and baked at 380F.

I tweaked Jeffrey Hamelman’s formula from Bread by using garlic infused olive oil and adding two ounces of freshly grated Parmigiano-Reggiano cheese. 

Some Grissini were plain; some were rolled in sesame seeds, and some were rolled in a mix of Parmesan and sesame seeds.  Before starting, I removed both the stone and my steaming pan from the oven as the Grissini are baked on a baking sheet without steam.

Place the following ingredients in your planetary mixer bowl:

507 grams, bread flour

263 grams, water

60 grams, olive oil (garlic infused)

51 grams, unsalted butter

2 tsp, salt

1/2 tsp, instant yeast

57 grams, Parmigiano-Reggiano cheese, freshly grated

Mix at speed one until the ingredients are well mixed (about three minutes). Increase the mixer speed to two and mix another four or five minutes.  Dough temperature should be 76F.  The dough will have a lovely scent from the infused olive oil and is very easy to handle. 

Bulk ferment for one hour, then divide the dough into 24 squares, each weighing  37-grams.  Set the divided dough on a very lightly floured surface, cover with plastic, and allow to rest for around 10 minutes.  Place parchment on your baking sheet(s).

Roll each 37-gram square of dough into a thin log measuring 14 to 16 inches long.  You do not need to flour your bench: the dough contains butter and olive oil and is not at all sticky.

Once you have rolled to the length you wish, you can scatter more grated cheese and sesame (or other) seeds along the length then do a final roll over the seeds to cover the dough.  Or leave them plain, as shown in the photo.  Your call.  

(Yeah, I got carried away with that long one!)  Continue rolling until you have filled the sheet, allowing sufficient space between each bread stick, then place the pan into the preheated oven and bake at 380F for 20 minutes.  The bottoms are going to be a deeper brown than the tops, which provides a nice contrast.

While the first batch is baking, continue forming the remaining portions and cover them with plastic until they’re ready to go into the oven.

Allow the Grissini to completely cool, to allow the flavors to develop.  They have a lovely taste of cheese with a hint of garlic, are crunchy, and wonderful with dinner, as a snack, or with your favorite dip.  Keep them in an airtight container for up to five days.  

Check out Bread for some delicious variations. Or experiment on your own.  They're a wonderful canvas to highlight your favorite flavors.  I might try bleu cheese next!


La masa's picture
La masa

So, I happen to have a lot of rye flour, because of a communication problem when placing my order :-/

I usually add a small percentage of rye to my flour mix, but now I'm forced to try 100% rye loaves in every bake.

This week rye loaf was loosely based on Dan Lepard's 100% rye bread from "The Art Of Handmade Bread",

I soaked 50 gr of wheat berries in a bottle (330 ml) of Guinness Special Export overnight, and then boiled them for 45' on a very low heat, till the berries were tender.

Beat in 65 gr of rye flour and let it cool.

Then I weighted the thing to calculate how much liquid had been lost 'cause of the simmering, which happened to be 120 gr   8-o

I intended to make a 100% hydration dough, so added 170 gr water, 200 gr rye sourdough starter and 300 gr rye flour.

Mixed the whole sticky thing, shaped a (more or less) batard, put it on a baneton end let it rise overnight.

I think it overproofed since we reached 19ºC tonight, quite surprising in this season, but I have little experience with 100% rye doughs, so I can't really know.

It stuck to the baneton as you can see, but the loaf turned out beatiful enough for me.


A very easy, great tasting bread. Great with butter and smoked salmon, btw.

Brotfan's picture
Brotfan

Butterkuchen is a classic German cake that you can find in any German bakery, often eaten in afternoon with a cup of coffee. Whenever I feel homesick here in the American diaspora or get invited over to a German friend's house for Kaffee und Kuchen I bring a Butterkuchen. A sheetcake full of butter and topped with sugar it can often be dry. But this recipe makes a quick and delicously moist cake.

400g flour

1 tsp salt

100 g sugar (or more depending on your taste)

2-3 packages of vanilla sugar

225 g butter

125 ml milk

40 g fresh yeast or 4 tsp instant

some slivered almonds


Mix flour with salt in a bowl. Melt 125 g of butter with 3 Tbsp of sugar. Add 125 ml of cold milk and the yeast. (Milk has to be cold, otherwise the dough will become sticky). Stir and add to the flour. Knead with hook for about 5 min or until the dough comes off the sides of the bowl. Spread the dough out on a greased baking sheet ( the recipe is for a German size 15x18 in) and let rise in a warm oven (120 F) for 40 min. Take the cake out, increase temperature to 400 F and dimple the risen dough all over with your index finger. Use the rest of the butter and put it in little pieces in the dimples. Sprinkle the sugar over the dough.( How much depends on your sweet tooth. And don't worry if you can't get the vanilla sugar. I see it sometimes in specialty stores but it is not absolutely necessary). Scatter a few slivered almonds on top if you like. Bake at 400 F for about 10 min. It is ready when the edges and the top begin to colour. Don't leave it in too long or it will become dry.


jennyloh's picture
jennyloh

http://www.thefreshloaf.com/recipes/painauxraisins

Followed the recipe above from Floyd,  I had a lot of fun doing this, especially the shaping of the dough.  Somehow the 1st method of shaping caused the middle to rise more than it should, perhaps I shaped it too tightly.

The 2nd with raisins,  I think I put too much raisins,  all the raisins started to spill out.  


Interestingly, the dough didn't turn out as sweet as i thought it would be. The dough had a good oven spring.  It was so nice to watch it "grew" in the oven.  And I learnt about sugar glaze and egg glaze from this experience.  It was nice to see the shine,  just that the hands get sticky handling the bread after that.

Thanks Floyd - for the great recipe.


proth5's picture
proth5

So,this is off topic and I am somewhat sorry.  I've hit baking deprivation in a big way (which is demonstrated by the fact that I just bought a cute little pullman pan with the rationale that I have already committed to having to ship a few things from the Ryukyu to home and that I've never seen one that size in the US) and I'm only one month in.  Sigh.

But, yesterday my wakeup call was the shaking of the earth and the tsunami warnings.  This is not my favorite way to wake up.  But I figured that the weekend's excitement was over.

As I type, Okinawa is on tsunami alert due to the Chilean earthquake.  It is one thing to be shaken awake.  It is another thing to prepare for and speculate on disaster as it approaches.  My limited Japanese keeps me mostly in the dark, but I do know that places where I normally work/play/shop are closed and evacuated.  Fortunately my hotel is on the East China Sea side of the island, and I am more than 30 feet up, but it is strange and stressfull to think  tsunami may be hitting this tiny island. Obviously I have been glued to the internet, but we don't seem to be newsworthy.  The one English language TV station that we have is not helpful.  I'm used to weathering the weather of the Rocky Mountain region.  It is frankly freaky to me to have these threats coming from the earth itself.

Although the Japanese stations continue to flash a map (with Okinawa in red - that can't be good) what numbers I can understand (and it is amazing how desperation is a fabulous language teacher - these were just sounds to me a matter of weeks ago and now I can figure out some words - and I used my first Japanese words to get what I wanted rather than pointing today.  Hooray!) tell me that while I have typed and fretted the worst was not as bad as it could have been and has probably passed.

I'm not sure that I will ever be able to process news reports about earthquakes around the world in quite the same way ever again.

Please remember the victims of the Haitian and Chilean earthquakes. 

And bake a loaf for me...

Chausiubao's picture
Chausiubao

So I worked my first eight hour shift today, and I had some difficulties, learned some interesting things, and in general came home smiling. The two main things that I learned deal with double hydration and venting an oven. When I was first shown oven venting, my eyes were pretty glazed over; I'd never heard of venting, and pretty much didn't know what it was, why you might do it, and in general was confused. A few days later (today, as it were) it was explained to me. Venting is, as its definition implies, removing air, or things in the air, from a space. You vent an oven at the very end of the bake, in order to remove steam and ensure that a good crust forms. But more then that, venting ensures that your crust will last, and stay long past its time immediately out of the oven.

Venting is the key to creating crusty breads. 

We baked off baguettes today, but we also baked off some baguette dough cut for sandwiches, and these didn't get vented. The reason being rolls aren't supposed to be hard and crusty, but rather softer and easier to take a bite out of when you're enjoying a sandwich. If you don't vent, the moisture from within the crumb will move into the crust, softening it (diffusion!), but if you do vent, there is less moisture within the crumb to allow this. The moisture gets baked off during the vent period and is carried out of the oven. When I finished my shift, I walked out to my car and I said aloud, "well, I learned something today". The only thing left to determine is whether venting can be done in the home baking environment, which it may or may not be able to. 

Secondly, double hydration. I personally have never been exposed to such a technique, or at least not by this name. You mix a stiff dough, then when the gluten is already formed, you mix in water to complete a high hydration. The dough is extremely slack and gets several folds to strengthen the dough. Now that I think about it, it is identical to making brioche or certain types of foccacia where you mix the dough to develop the gluten, then knead in butter or olive oil to enrich the dough with all the qualities large amounts of fat contribute. Additionally there is no shortening of the gluten that occurs when mixing large amounts of fat with wheat flour. I'm not really that blown away by double hydration, but its an interesting way to hydrate dough, and its amazing how similar ciabatta is to making foccacia, its just a different ingredient is being kneaded in. 

Pages

Subscribe to RSS - blogs