The Fresh Loaf

A Community of Amateur Bakers and Artisan Bread Enthusiasts.

Blogs

wayne on FLUKE's picture
wayne on FLUKE

I recently purchased Peter Reinhart's artisan breads every day. I have been kneading by hand and wanted to try the minimal mixing, overnight cold ferment sytle recipes he provides to see what kind of rise/crumb structure I could get. We were having company for dinner last night whose diet required only whole wheat bread so I decided to make a half batch of each of the Lean Bread and 100% WW Hearth Bread. I had never made a 100% WW.

Since I can never seem to keep the variables to a minimum, here are some of the things I did different from my usual style in addition to the new recipes. We are not on the boat so I baked in a real oven that will preheat to 550 as recommended. I used quarry tiles and parchment paper and a metal baking pan for steam. I also used KA White Whole Wheat flour for the first time. I also decided to try some new shapes. I made a WW boule (inpired by David's shaping help) that I proofed in a towel lined 8" plastic bowl and decided to try some rolls for part of the Lean Bread. I made two 75 gram knotted rolls (fake Kaiser shape) and a couple of 100 gram Faux Braids (from Ciril Hitz, Baking Artisan Bread). The shaping of the Lean Bread rolls was tough because the dough was very sticky, but I stuck with it :-)

Here are the results:

Lean Bread (dusted with semolina flour)

Lean Bread

100% Whole Wheat Hearth Bread, I like the shape on the boule.

100% Whole Wheat Hearth Bread

Crumb Shot for Lean Bread. I was pretty happy with this, critiques welcome.

Lean Bread Crumb

100% Whole Wheat crumb. Is this what it should look like??

100% Whole Wheat Crumb Shot

The other big question is always taste. The lean bread was good after warming/crisping in oven before eating with pasta. The rolls were OK, a little chewy for tuna sandwhiches.

The whole wheat has a nice flavor. My wife even liked it and she doesn't like much WW. It is heavier than the white, but I assume that is to be expected. Maybe will try a variation with seeds and multigrain.

Any and all comments welcome, especially suggestions to improve.

wayne


breadbakingbassplayer's picture
breadbakingbass...

Hey All,

Me again.  This whole baking and blogging thing is a little nutty...  It's something one of those things that's fun, tedious and addictive...  Anyway, let's get on with this post...  How long can you cold bulk retard a dough and still have some good bread?  I've done 24 hours with good and bad results.  How about longer?  Why cold bulk retarding vs cold retarded proofing?  Well, from my experience, cold retarded proofing in a linen lined banneton seems to dry out the surface of the dough, so after baking, the crust becomes thick and tough...  This is my experience.  Also, I have a small under the counter refrigerator that has enough room to bulk retard maybe 4kg of dough in 2 X 4L plastic tubs.  So bulk retardation is my only option short of not sleeping if you've been following my baking schedule these days...

Here's my recipe:

Liquid Levain:

150g White Whole Wheat Flour

50g Rye Flour

50g Liquid Sourdough Storage Starter (100% hydration)

200g Water

450g Total Liquid Levain


Final Dough:

1000g AP

616g Water

30g Kosher Salt

450g Liquid Levain

2096g Approx Total Dough Yield


9/14/10

8:15pm - Mix liquid levain, cover and let rest on counter overnight.

9/15/10

8:00am - Mix final dough (in large mixing bowl put in water first, then levain, flour, salt).  Mix with rubber spatula until shaggy dough forms.  Cover and let rest 20 minutes.

8:25am - Knead for few minutes with wet hands until relatively smooth dough forms, transfer to lightly oiled container at least 4L, cover and let rest.

8:45am - Turn dough in container (stretch and fold), cover, place into refrigerator (40F), go to work.

9/16/10

6:30pm - Come home and take the dough out of the refrigerator and find that it was working on escaping the container

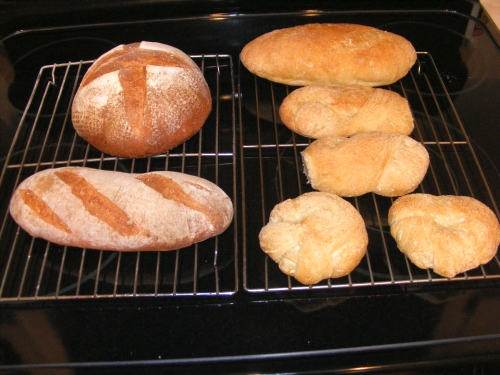
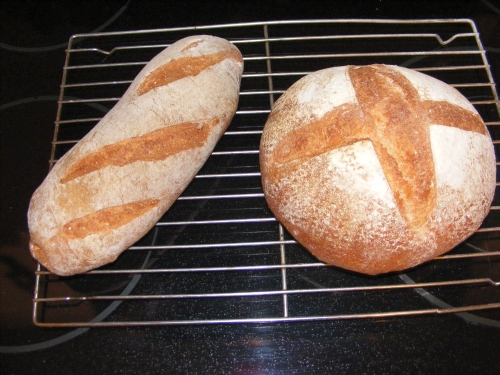
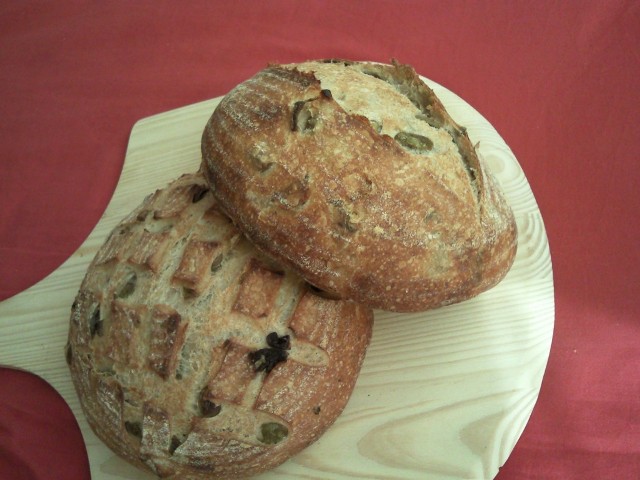
Divide into 2 equal pieces, shape into boules and place into linen lined bannetons and proof for 3 hours.

8:40pm - Arrange 2 baking stones on 2 levels, put steam pan in oven, preheat to 500F with convection.

9:45pm - Take bannetons out of plastic bag, lightly flour and give poke test...

10:00pm - Turn off convection. 

Turn boule out onto a lightly floured peel, slash as desired and place into oven directly onto stone.  When last loaf is in, pour 1 1/2 cups water into steam pan, close oven door.  Turn oven down to 450F and bake for 50 minutes, rotating between stones half way.  Then turn off oven and leave loaves in for another 10 minutes.

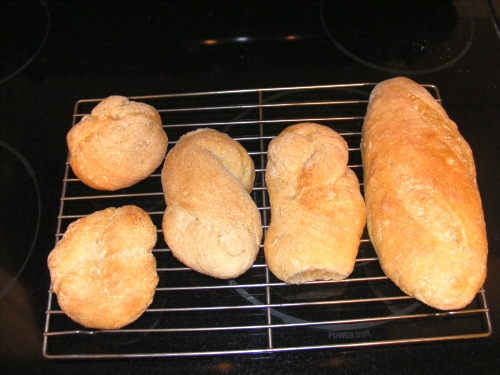
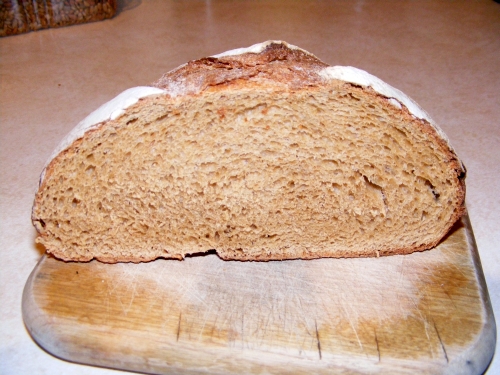
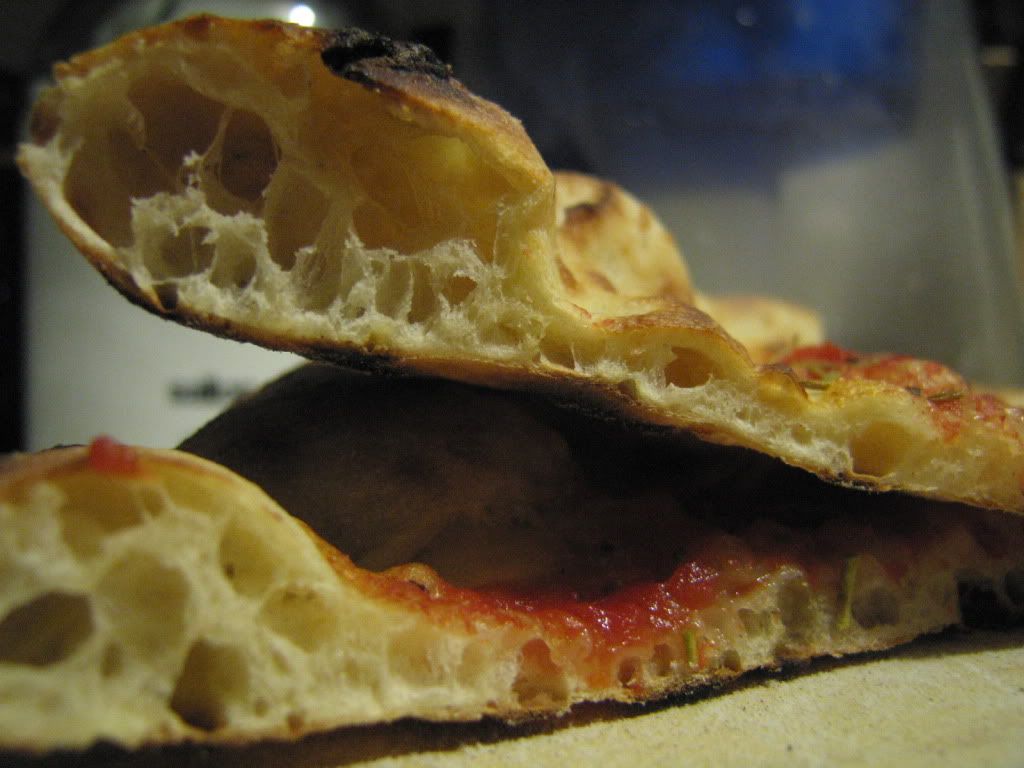
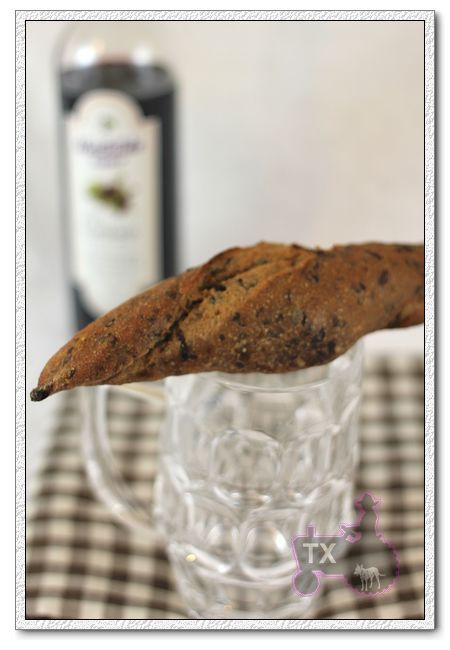
Loaves are done when the internal temp reaches 205F or higher (210F preferred), and they weigh at least 15% lighter than their prebaked weight.  Mine were 1050g before baking, and around 870g after, which is about a 17% weight loss...

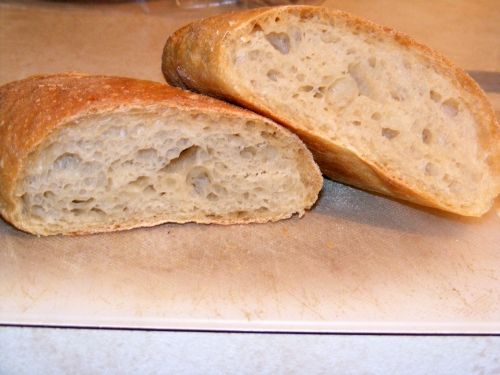
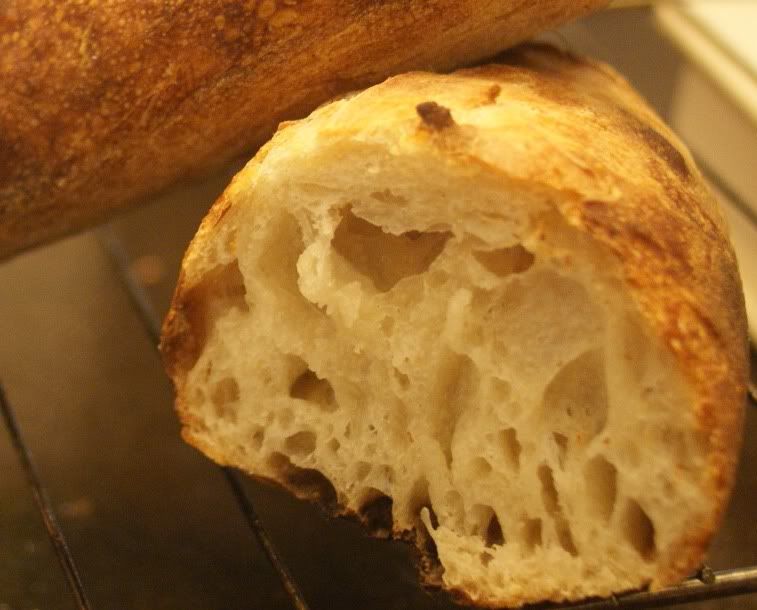
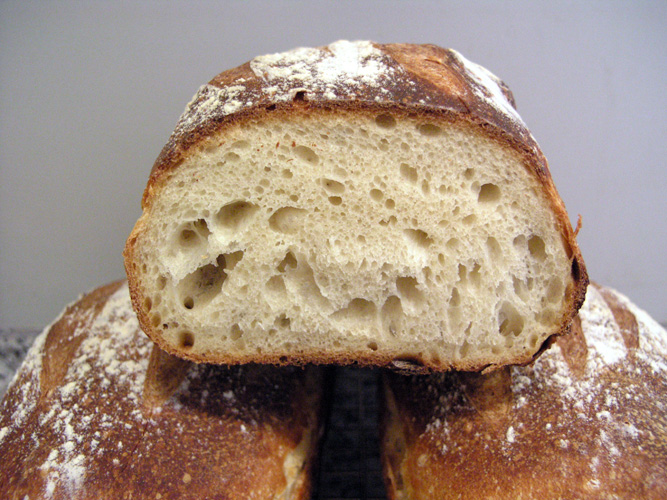
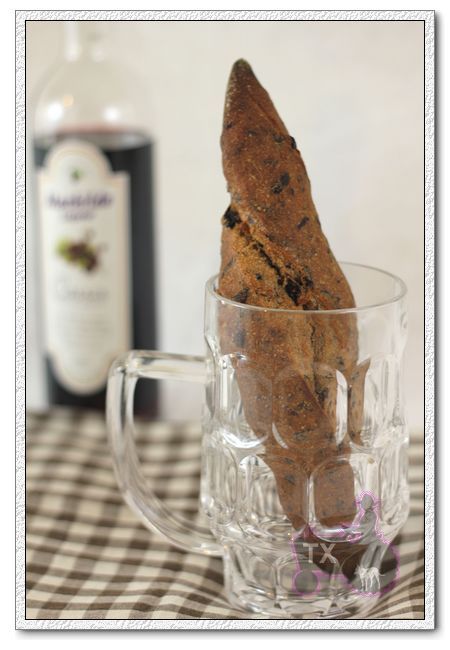
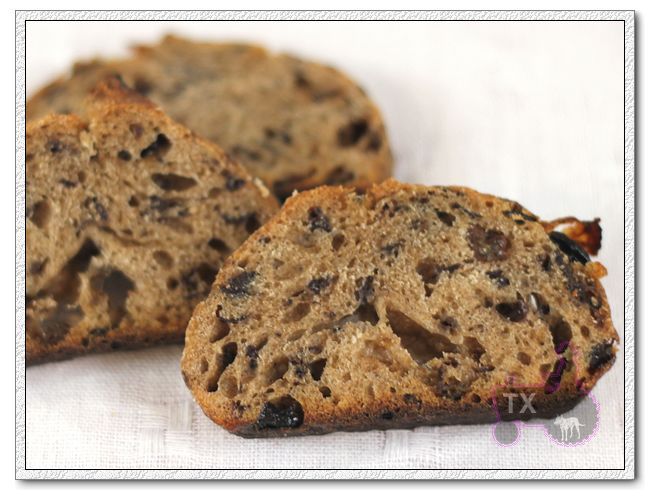
Cool completely before cutting and eating...  Crumbshots tomorrow morning...  I wonder it this is a less stressfull baking schedule...  You tell me...

Tim

Terrell's picture
Terrell

I've been making a lot of bread lately. Had some extra that I either needed to throw away or make something out of. They won't let you feed it to the ducks in Portland, you know. So, I used my remarkable internet research skills to look for recipes using leftover bread. Apparently, many people just make bread crumbs and put them in the freezer. I was looking for something a little more exciting. The New York Times happened to have a recipe for panade published last week in an article about young yuppy farmers (you may have to register to see the article.) It was interesting but it uses a lot of cauliflower, not one of my favorite foods, so I kept looking. Epicurious had a strata recipe with spinach that got a ton of comments but it was one of those recipes that you have to make eight hours ahead. I rarely know what I want for dinner until I get right up to it so I hardly ever plan that far ahead unless I'm cooking for company. The strata sounded good though so I checked around for something similar and came across this recipe from Martha Rose Schulman, also in the New York Times. Her recipe just mixes all the ingredients and pops it right in the oven. It sounded perfect, so I stopped at the grocery store on my way home and picked up the cavolo nero or black leaf kale that I was sure was in the recipe. I checked the dried mushrooms she calls for, was appalled at the price and decided to substitute fresh criminis instead. Last night, ready to cook, I pulled up the recipe again. Hmmm, her recipe is for cheese strata with chard. Why was I so sure it was black kale? Ahh, the kale was in the panade. OK, another substitution. Of course I was also using my leftover whole grain bread for her french baguette and some random bits of cheese I wanted to clear out of the fridge instead of the Gruyère she listed. I guess we'll see how it comes out. An hour or so later and I was pretty pleased with myself. I had accomplished my goal of using up some of that bread and made myself a pretty tasty dinner. Here's the recipe...

Strata with Cavolo Nero and Mushrooms (seriously adapted from Martha Rose Shulman)
  • 4 or 5 thick slices of whole grain bread (I used about 4 cups of my Pilgrim's Bread)
  • 1 tablespoon butter
  • 1/2 pound of crimini mushrooms, coarsely chopped
  • half bunch (about 8 ounces I think) of cavolo nero/dark leaf kale, stemmed and cleaned
  • 3 garlic cloves, 1 cut in half, the other two minced
  • 2 cups of milk (I used 2%)
  • 3/4 cup of grated cheese, tightly packed (I used what I had in the fridge, about half goat cheddar and half kasseri)
  • 1/4 cup Parmesan cheese
  • 2 tablespoons olive oil
  • 1 teaspoon dried rosemary
  • salt and pepper to taste
  • 4 large eggs
  • 1/2 teaspoon salt
  • freshly ground pepper

Cavolo Nero   Crimini

Preheat the oven to 350. Oil or butter a two quart baking dish or gratin pan. If the bread is soft, as mine was, toast it lightly and then rub each slice front and back with the halved garlic clove. If your bread is really stale, you can skip the toasting. Cut into 1 inch dice. Place in a large bowl and toss with 2/3 cup of the milk. Set aside.

 Mix

In a large skillet, saute the mushrooms in the butter for 2 to 3 minutes, just until they smell good. Remove from skillet and set aside. Add the still wet kale to the skillet and cook over medium high heat until it starts to wilt. Cover the pan and let the kale steam until it has collapsed, about 5 minutes. Add more water if needed but just enough to steam not boil it. Uncover and stir. When all the kale has wilted, remove from the pan and rinse in cold water. Squeeze to get out the remaining moisture and then chop and set aside. Add 1 tablespoon of the olive oil to the skillet and quickly saute the minced garlic over medium heat. Stir in the mushrooms, rosemary and kale. Stir together and season with salt and pepper. Remember that the cheese and bread both have salt in them so adjust your seasonings with that in mind (my dish turned out slightly too salty because of this, I think). Remove from the heat and add the kale mixture to the bread cubes. Add the grated cheeses (not the Parmesan, that comes later), toss to mix and then arrange in the prepared baking dish.

Saute

Beat the eggs in a medium bowl. Add the remaining milk, the 1/2 teaspoon of salt and some freshly ground pepper. Pour over the bread mixture. Press the bread down into the eggs. Sprinkle the Parmesan on the top and drizzle the other tablespoon of oil on top of that. (The oil thing is in Martha's recipe. I have to admit that I couldn't tell there was oil there and will probably not waste the effort next time I make the dish.) Place in the oven and bake 40 to 50 minutes until puffed and browned. Serves 4 to 6.

Cheese Strata with Kale and Mushrooms

Martha says you can do all the hard work ahead, up to the egg step, and it will keep, covered, in your fridge up to a couple of days. Add the egg and milk when you're ready to bake. Next time I make this I will probably halve the recipe and bake it in a small dish. It's way too much for one person to dispose of. I'll likely let the bread sit out to get a little more stale before toasting. And as I said, I will cut the salt a little bit. The crimini were fabulous, great flavor. It was, however, the rosemary that really made it.

Dinner time

sourdoughboy's picture
sourdoughboy

Prehistory: waaaay back in 2007, I was obsessed with making Neapolitan pizza at home--self-clean cycle, quarry tiles, Jeff Varasano. That's where I first learned about autolysing and slow fermentation. And it explains my unhealthy preoccupation with getting the wide open crumb. During this time I also made some nice lemon rolls (from a sticky bun recipe, minus the cinnamon, minus sticky topping, lemon zest in place of cinnamon:

Pizza crumb

After baking at least one pizza a day for 40 days, I was baked out.

Fast forward to 2010. Somewhere between having delicious bread while on vacation this August in Los Angeles (homemade by my friend Daisy, and also from Breadbar (alpine loaf!!!)), baking a few disappointing loaves for an office event, discovering The Fresh Loaf, watching this video of Richard Bertinet masterfully kneading super-sticky dough, and dating a woman who loves bread, I caught the baking bug...

Day 1: Stock up on King Arthur flour (bread and AP). Order sourdough starter from Breadtopia...

Day 2: Feed starter...

Day 3: Wait...

Day 4: Baking test day! Sourdough baguette I and Brioche I

For the baguette, I roughly follow the method outlined in this post by dmsnyder, along with the baguette shaping technique shown here. Since I'm now obsessed with Bertinet's slap-fold technique, I knead more than is called for in the recipe. I'm very pleased with the resulting mini-baguette: it's got a nice sourdough tang (thanks Breadtopia!), chewy moist open crumb, and a crunchy crust:


I'm simultaneously working on a test brioche--have plans to make the real brioche the next day to impress gf--using this recipe (but kneading by hand, a la Bertinet). Delish! I eat one slice, feed the rest to my housemates.

Day 5: The brioche loaf that counts + baguette take 2

Though Brioche I was very tasty, I decide that I'd like a little airier texture. So I let the loaf proof for an extra 30 minutes or so, till it's really truly doubled in bulk, though being semi-careful not to let it overproof (not that I really know how to prevent that). I may be imagining things, but I think Brioche II is slightly airier, as I was hoping for. Gf is very pleased.

I also do a second baguette, taking more care in the shaping this time. Happily, I get an even more open crumb this time around:

Day 6: Reinhart's Artisan Breads Every Day arrives in mail. I have designs on making babka (for gf), sourdough hamburger buns (for house bbq) and an assortment of breads for my best friend's foodie mom... (and, now that I take a closer look at these pics, fixing the white balance on my camera!)


janij's picture
janij

I have been gone from baking and TFL for a LONG while.

In January we got to move into the little farmhouse we bought in East Texas.  It is an old farmhouse and it needed MAJOR repairs.  This is not the cause of my bread baking hiatus though.  My oven was the issue.  The previous owners took the electric oven with them.  I saw this a a wonderful thing since I HATE electric cooktops.  As in I burn everything on them.  Now electric ovens I don't mind, but I am also a cheap soul by nature.  So I lucked out and got a new, but very generic propane stove.  I was so excited.  I brought my quarry tiles, all my bread making supplies and dove in.  The dough would be perfect and the oven would not cook hot enough for me to get decent results.  That is frustrating.  To say the least.  I brought my sourdough starter from Houston and it worked so much better here.  But still the oven would not get hot enough to cook right.  I gave some of my starter to a friend who had never baked and he got wonderful results.  Now I have had MAJOR issues with sourdough.  It would turn to chewing gum basically.  I think it got too acidic in Houston.  Or like me it just thought the place sucked, pardon my language.  Now that I had a lovely starter and a not really working stove I got occupied painting, gardening, canning, making beer and wine, and buying and raising chickens, donekys and cows.  But I kept wanting to bake.

So I went back to square one on the oven.  I knew that the whole thing just didn't get hot enough, burners and all.  So I went back to Lowes, talked with a plumber, etc.  Then finally I started to get low on propane and called the prpane man out.  He is in his 70's at least.  I told him my problem and he said he would look at it.  Come to find out, the conversion kit for the lp to propane had not been done right by my husband.  I wanted to kiss that man.  As a matter of fact I have $50 for him in my drawer the next time he comes out.

So now I have a working propane ove.  And propane gets hot!  Plus I have an awesome starter.  And I finally, I mean FINALLY bake true sourdough bread with out having to spike it with yeast.  I have made a sanwich type loaf and Vermont Sourdough from Bread.  Or I should call it Berryville Sourdough.

So thanks to everyone here.  I kept checking in, and drooling over everyone's breads.  And it would make me sad.  But i am so happy to have figured out the problem and also to have a working sourdough!!!

I can't get the pictures resized so I am attaching a Flickr link.

http://www.flickr.com/photos/38926746@N02/sets/72157624965216728/

As alwys this is a fabulous forum and I am blessed to be a part of it!

Jani

breadbakingbassplayer's picture
breadbakingbass...

I've been doing a lot of thinking lately, and here's what I've come up with:

Sourdough: A device made from flour and water used for cultivating natural yeast.

Bread: A balloon like device made from usually wheat flour and water used for capturing "yeast farts". 

So based on this definition, bread is a "Yeast Fart Balloon".

Tim

Mebake's picture
Mebake

This is a late bake of Hamelman's "BREAD" under levain breads. It is 90% White flour vs. 10% Wholwheat with 230g of Pitted olives.

The loaves were fermented for 2.5 hours bulk, and immedietly retarded for 8 hours overnight at 50F (10c). I suspect the crumb will be tighter than i wish, because i believe the loaves needed an additional 1 hour fermentation prior to retarding.

Any ways, today i'll cut into them and find out!

khalid

breadbakingbassplayer's picture
breadbakingbass...

Hi All,

So I was up really late waiting for some Pain au Levain to rise...  Maybe a little too late, which is why I don't feel so hot right now and should be getting to bed early...  Way, way before 2:00am like this morning...  Anyway, just wanted to share with you some Pain au Levain in a pan that I baked very late last night...  They turned out really well, but I should have used smaller loaf pans...  Enjoy!  Recipe and method will follow the pics and the obligatory crumbshot...  Also, this recipe was inspired by one of the Pain au Levain recipes in Le Pain, l'envers du decor by Frédéric Lalos.

Tim

Ingredients:

Final Dough:

1110g AP (KA)

555g Stiff Levain (63% hydration)

700g Water

38g Kosher salt

2400g Total Dough Yield (approx)


Stiff Levain

304g AP

192g Water

60g Sourdough Starter (I used a stiff one)

556g Total Stiff Levain Yield


Method to the Madness

9/12/10

3:50pm - Mix stiff levain, place in covered container, let rest on counter.

430pm - Place stiff levain in refrigerator.

9:13/10

6:50pm - Mix final dough in large bowl using a large rubber spatula, plastic scraper, wet hands.  Knead for 5-10 minutes.  Cover bowl, or place in plastic bag and let rest.

7:30pm - Knead dough for 2-3 minutes in bowl with wet hands.  Do not add any extra flour.  Cover and let rest.

7:45pm - Turn dough, cover and let rest.

8:45pm - Line loaf pans with parchment paper, or grease them if you like.  Divide into 3x800g pieces, and shape into loaves, place into pans, place pans into plastic bag, proof for 4 hours.

9/14/10

12:00am - Place baking stone and steam pan in oven, preheat to 500F with convection.

1:00am - Turn convection off.  Lightly dust loaves and slash as desired, place into oven on stone.  When all pans are in oven, pour 1 cup of water into the steam pan, close door.  Turn oven down to 450F and bake for 45 minutes.  Halfway through bake, remove loaves from pans and return to oven and place directly onto stone.  Turn oven down to 425F for remainder of bake.  At end of baking, check internal temp and weight loss.  Should reach 210F and lose approx 15% weight.  Turn oven off and put loaves back in for another 10 minutes.  Cool completely before cutting and eating...  Also, get some sleep...

Franko's picture
Franko

This past Sunday I was in the book store browsing...where else.. but through the cooking section. One of the books that interested me the most was Richard Bertinet's 'Crust', in particular for some of the unique recipes in it. It also included a DVD of Bertinet demonstrating his techniques for hand mixing and kneading brioche and levain. The book has some very good photography as well and the price was reasonable so I went for it. Mr. Bertinet has been mentioned a fair bit lately on TFL so I was curious to see what I could learn from him. While the book is not particularly technical, primarily being meant for an advanced home baker I think, his methods are that of an expert baker who has a clear and easy style of explaining a formula or procedure.

When I mentioned in a thread on Sunday http://www.thefreshloaf.com/node/19547/richard-bertinet-wins-major-uk-award that I'd picked up the book a couple of members replied mentioning that they had it as well and thought it was a good one to have, although they both thought the hydration for his Ciabatta formula was too low. I looked at it and didn't think it seemed out of range but decided to try it for myself and see. Now normally I'm not a real stickler for being exact when it comes to scaling water, but going more for the feel of the dough as described by the author or any included photos. This time though I weighed out all the ingredients right to the specified gram and followed his times and oven temps fairly close as well. Of the half dozen or so ciabattas I've made over the last eight months I think this is one of the better ones. It may be partially due to having used a lower protein flour (10%) for this one than I have in the past or maybe because I spent more time developing it by hand than I normally do, but whatever the reason it made a good loaf. The crust is fairly thin and splintery and the crumb while being a bit more open than I prefer, has a good chew to it for an all white bread. The flavour is just what I expect a ciabatta to taste like, wheaty, toasty, with a bit of richness from the extra virgin olive oil coming through. Very tasty!

Franko


txfarmer's picture
txfarmer

Another very tasty bread from Dan Lepard's "A Handmade Loaf", I mostly followed the formula, but left out the instant yeast, using rye starter only, which means the bulk rise was 3 to 4 hours at room temp, then shaped and retarded the loaves in the fridge overnight. The next morning, took out, warmed up for 1 hour, then baked.


Made "twisted fendu" rolls (each around 210g), inspired by wildyeast's post here. Came out pretty good.


Since currants soak up different amount of liquid and they are added at the end of kneading, it's hard to know how much extra water to use. The first time I added extra 30g, the dough was still on the dry side, the 2nd time I used the same amount, yet the dough was unbelieablely wet and sticky. The wet dough did lead to a more open crumb - even though it had 50% of ww flour and rye flour, as well as a lot of currants.


Something new I learned while researching about this bread, "dried currants" are made from a kind of small grapes, not fresh black currants; while cassis is a liquor that's indeed made from black currants, so Cassis and currants in the bread are in fact not "related" as I had imagined. Doesn't matter though, they complement each other perfectly, resulting a very rich tasting bread.


My old cheap point and shoot camera died during the Africa trip, so I bought a new DSLR, this is my first batch of bread photos with the new camra/lense. A lot of learn and get used to, the pictures are definitely a working progress.


Pages

Subscribe to RSS - blogs