The Fresh Loaf

A Community of Amateur Bakers and Artisan Bread Enthusiasts.

Blogs

wassisname's picture
wassisname

I found one lonely six-pack of Oktoberfest at a local market and gave it a home and a higher purpose.  To make it extra festive I threw in a shot of  Jaegermeister, too.  I've made bread with beer and I've made bread with liquor, but this is the first time I've used both.  It began as something of a novelty idea, but it actually works.  The aroma during baking was incredible.  That alone was almost worth it.  And it's loaded with flavor!  A little sweetness from the malty beer and sugary liquor, and a little anise/spice from the liquor, on top of the whole wheat / rye  / sourdough combo - there's a lot going on.  Not a subtle loaf.

Snapshot:  About a 70/30 mix of whole wheat/whole rye.  Sourdough.  Beer and liquor for all the liquid.

The Formula (This is for 2 loaves):

Day One

Soaker:  454g WW bread flour, 1 tsp sea salt, 2 shots of Jaegermeister and enough beer to total 340g liquid.  Mix 2-3 min., place in covered container at room temp. 12 hrs.

Starter:  140g WW starter @ 75% hydration, 300g whole rye flour, 120g WW bread flour, 325g beer.  Combine and knead 3-4 min.  Place in covered container at room temp. 12 hrs.

Day Two

115g WW bread flour, 1 ¼ tsp sea salt, all of the soaker and starter.  Combine and knead gently with wet hands 7-8 min.  Ferment at room temp about 3 hrs.  Shape.  Proof at room temp about 2 hrs.  Preheat stone to 500F. 

Top with caraway seeds if desired.  Bake @ 475F for 10 min. with steam (I covered them with a stainless steel pan).  Bake @ 415F for about another 40 min.  They had an internal temp of 190F.  Turn oven off, open the door and leave loaves in for another 15 min.

 The result:

Critique:  Beautiful, thick, crunchy crust, if you're into that sort of thing (and I am).  The crumb, however, is denser than I was hoping for.  This is going to be sturdy bread under any circumstances, but I think it could have been more open than this. 

The rise was very sluggish compared to when I make this bread with water.  I may have been asking too much of my sourdough to overcome all the booze in the dough.  I don't ever feel like working hard after a shot and a beer either!  Instant yeast in the final dough would, I think, be a big help, and I'll definitely add some next time.

Marcus

Ryan Sandler's picture
Ryan Sandler

I didn't get around to posting yesterday, but I made my 5th weekly batch of Hamelman's baguette's with Poolish.

I had a whole story about what I changed from last week and why, but accidentally hit reload and lost it all.  So I'll be brief.  The changes this week:

I forgot to turn the oven on when I meant to and did a final proof of 75 minutes instead of 60, while raised the preheat temperature to 550 for only 30 minutes to compensate for the stone being cold.

The Results: Exterior


Results: Crumb


I had a lot less luck with scoring this week--the lame kept dragging rather than cutting cleanly.  I'm not sure if this was from proofing longer--I also didn't cover the baguettes as thoroughly with the folds of my make-shift couche as I have been doing.  Crumb is clearly pretty tight, which is probably my fault; I still need more practice at being sufficiently gentle with these baguettes (or could that be over-proofing too?).  That said, the crumb had a nicer texture to it than I've been getting, and better flavor as well.  The crust was great--crisp all around, and just a little chewy.  A little over-dark on the bottom on account of overheating the stone, but even that wasn't too bad.  If I never get my crust any better, I think I could live with that.

I'm really not sure if this week's batch  was overproofed, or if other problems led to my scoring and crumb issues.  I'm going to stick with the 75 minute proof and see what happens if I do everything else right.  So my plan for next week is to change nothing except a) Be even more gentle when shaping, and b) be more careful about covering the baguettes while proofing.  I'll see how it goes.

Happy baking, everyone.

-Ryan


foodslut's picture
foodslut

I was inspired by how simple this 1-2-3 Sourdough recipe was,  but my first try was less than successful (OK taste, but dense brick crumb).  So, taking the advice everyone was kind enough to offer, I tried again.

I used the same levain (100% hydration, nothing but water and Brule Creek Farms dark rye flour).  I keep it in the fridge, so I took it out and fed-and-dumped it once a day for three days until I had a doming rise and levain that (according to the Tartine test) floated in water.

Based on previous advice, I started with more all-purpose flour and less rye than my first try to give the loaves more of a chance - here's the formula I used (PDF).  This led to a dough with an overall hydration of about 71%, something I'm used to.  I mixed the ingredients, and left them to ferment for about 15 hours (before I went to bed, 6 hours after mixing the dough, it had risen maybe 20%, so I left it overnight at about 64F - this led to dough that had more than doubled overnight.

Next day, formed the dough into boules, and set myself to proof the dough for 4-5 hours.  Two hours later, though, the dough looked risen enough, and passed the "poke and 1/2 way back" test...

... so I scored them...

... and loaded them into the oven.  They baked at 500F for about 5 minutes (steam with water squirted on the inside wall of the oven), then 30 minutes at 400F.  Here's what they looked like right out of the oven....

... a FAR cry from my first attempt:

After letting it cool, the crumb & taste test:

Although not as airy as some sourdoughs I see, I'm very happy with the crumb.  The sourness is about mid-range:  not the sourest I've tasted, but not subtle.  I think I'll be using this to accompany strongish lunch meats or cheese.

It was about 14 hours between the last feed before the dough and my using it - I wonder if using it sooner might make the sourness a bit more subtle?  Don't get me wrong - I like the reasonably assertive, but not overwhelming tang, but I'm thinking of ways to make it a bit less tangy.

Thanks to everyone who helped me get to this point - I'll let you know how future loaves turn out.

Vogel's picture
Vogel

Yesterday I made another Vermont/Norwich Sourdough. I basically followed the recipe, but used medium dark rye flour instead of whole rye. When I was about to shape the 1 kilogram piece of dough into a boule (see this great tutorial) I noticed that there weren't any clean kitchen towels left. After a few moments of panicking I decided to do the final rising on a plastic wrap, which I lightly and evenly brushed with flour and put on a solid sheet (like this). Since this wasn't a rye bread and the shaping was tight enough for the dough to stand on its own, I didn't even need a banneton-like construction to support it. I was surprised that it worked really well and was much easier and less messy than with a towel. I could just turn the dough on my bread peel and then slowly remove the wrap from the top. A very convenient method, indeed. One visible difference was the lack of a structure that results from the pores of the towel.

The only question left is: Which does more harm to the environment? Having to wash an additional towel or throwing away an additional piece of plastic wrap? Well, next time I will try the following: I have a non-solid/flexible foodgrade plastic mat. It's basically a cutting board, but not in a solid form but more like a thick flexible plastic sheet (something like this). So it should be easy to release this from the dough, too.

Apart from the techniques it was also the first time I managed to successfully make two of the same kind of bread in a row, without any major mistakes resulting in the second attempt to be a total failure after the begginner's luck during the first try. It was also my best crumb in a sourdough bread so far. Very very soft, without any major dense spots or gigantic holes. Yay!

rising on a floured towel, showing the structure of it

Crust 1

rising on floured plastic wrap, showing a "cleaner" crust

Crust 2

crumb of the second loaf

Crumb

louie brown's picture
louie brown

Karin's post was so tempting and seemed clear. I did my best to follow her method. I do think that the proofing times were a bit long for my kitchen temperature yesterday (80F,) which only emphasizes the lesson about being able to judge these things for oneself. The cold soaker, the whole wheat starter and the spices combined into a very tasty loaf. Constructive criticism welcomed. Thanks, Karin.


Mebake's picture
Mebake

This is a seeded levain bread baked from Hansjoakim's recipe here. Boy was it tasty! Rye, though at 15% was pronounced, and had a wholewheat aftertaste. The seeds i used where flax, and sunflower.

I involuntarily differed from Hans recipe. Due to my hectic schedule, my rye starter was overripe, and so was my Rye levain. I had to add commercial yeast to get this bread going, so the sour tang was not as intended by hans' recipe.

All in all, this bread is versatile, and appeals to many tastes including mine. I shall make it again, once i get the Rye levain happy again. Thanks Hans for sharing you recipe!


 Khalid

GSnyde's picture
GSnyde

I planned to try proth5's sourdough baguettes this weekend, per Brother David's recommendation.  And that turned out to be an especially good idea.  It's rainy.  My wife and I both have colds (or maybe we each have half of the same cold).  Perfect time for chowder.  And we have several pounds of Alaska Halibut in the freezer, caught by our neighbor.  And chowder just needs to be accompanied by baguette.   

My previous attempt at baguette was with the Anis Bouabsa formula.  It was a very trying experience for a near-novice working with that high-hydration dough (though the results were really good).  My wife wanted something a bit sourer, and I wanted to believe that Pat's 65% hydration formula would also make a superb baguette.  Now I believe.

IMG_1716

IMG_1720

]IMG_1722

I followed proth5's formula, as reported in David's blog (http://tfl.thefreshloaf.com/node/10852/baguette-crumb-65-hydration-dough), using KAAP flour.  I wanted to make three 9 oz baguettes (about 14 inches in length), so I increased the formula by 30%.  And I used Sylvia's magic-steam-towel technique (http://www.thefreshloaf.com/node/20162/oven-steaming-my-new-favorite-way) for pre-steaming and supplemented it with the usual lava rocks in cast iron pan. 

The dough was much easier to work with than the Bouabsa dough.  And the result is just the crispy-crusted-creamy-crumb-slightly-sour baguette I was going for.  I think I'm becoming a better baguetter.  The hot towels were also helpful in clearing my sinuses.

The chowder was exceptional, too.  A variation on my favorite clam chowder (Taddich Grill recipe), but with meaty chunks of Halibut.

Hasn't cured the common cold, but I'd feel worse if I didn't have such good soup and bread.

Thanks, Pat, and David, and Sylvia.

Glenn


txfarmer's picture
txfarmer

Yet another variation on my 36 hour sourdough baguette dough, only this time, it's not baguette at all, it's pizza! Of couse it's nothing new to make high hydration baguette dough into pizza, but I didn't realize how convenient it is to combine the two. Same dough, but pizza doesn't need to proof, it bakes at the highest oven temp (which is the same temp I preheat my oven for baguettes), it bakes for only 8 minutes (way shorter than the proofing time for baguette dough) - all this means I can use a part of the dough to make and bake pizza while the rest are made into baguette and being proofed. The pizza is made and mostly consumed before baguettes are scored and sent into the oven. How convenient, that's what I call stream-lined baking!


The basic 36 hour baguette formula can be found here, and the rye starter variation I used for this dough can be found at the end of this post. I will breifly outline the process again:

AP flour, 425g

ice water, 325g

rye starter (100%), 150g

salt, 10g

- Follow the basic 36 hour sourdough baguette formula here until dividing the dough into 4 parts, each around 230g.

- Preshape one piece of dough into round for pizza, the rest into cylindar for baguettes

- After relaxing for 40min, stretch the pizza dough into a 11inch round, put on parchment. I find that it's hard to stretch the dough into desired size in one shot, so I stretch as far as I can, then let it rest on parchment. In the mean time, I go ahead and shape the other 3 pieces into baguettes and and it proof on parchment. By the time I get back to the pizza dough, it's easy to stretch.

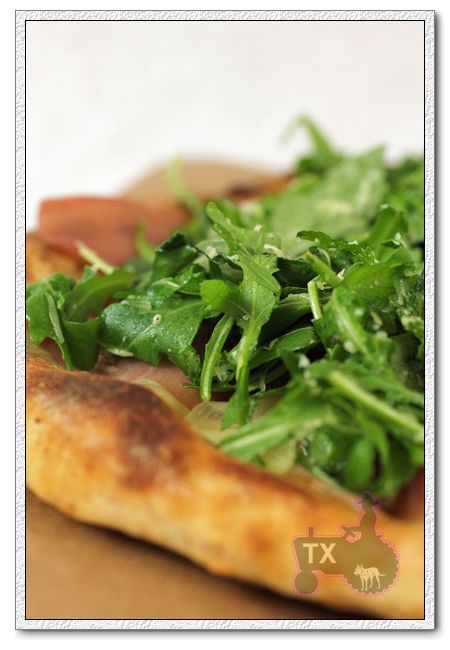
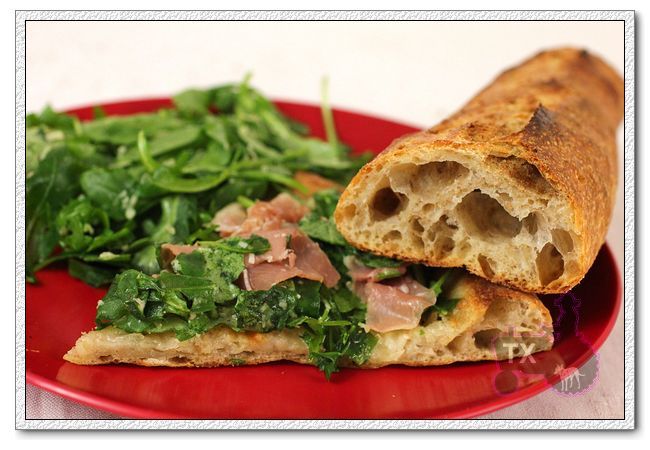
- Add topping. This time I first drizzle olive oil, then added fresh mozzarella, and grated cheddar. Send the pie into oven to bake at 550F (the highest temp my oven would go) for about 8min. When taken out, the cheese is still bubbling, put on a layer of prosciutto, then a layer arugula (which was tossed with some olive oil and grated cheddar first). Prosciutto tend to get tough went it's baked too long, so it's added afterward, the residual heat is enough to blend all the flavors.

- Score and bake the other baguette doughs as usual when it's finished proofing.


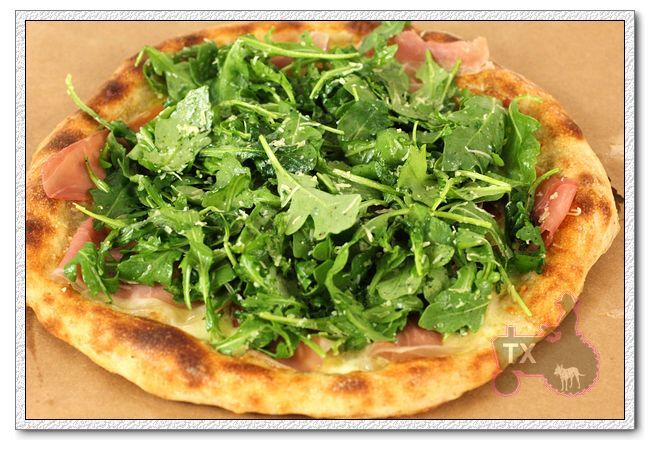
I really like the slight bitterness of arugula, a perfect match for prosciutto, and the cheese. The cheddar cheese I used was pretty salty, so I didn't add more salt.


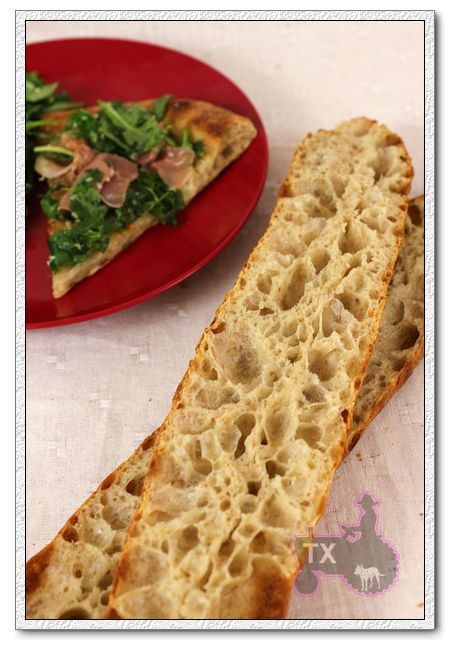
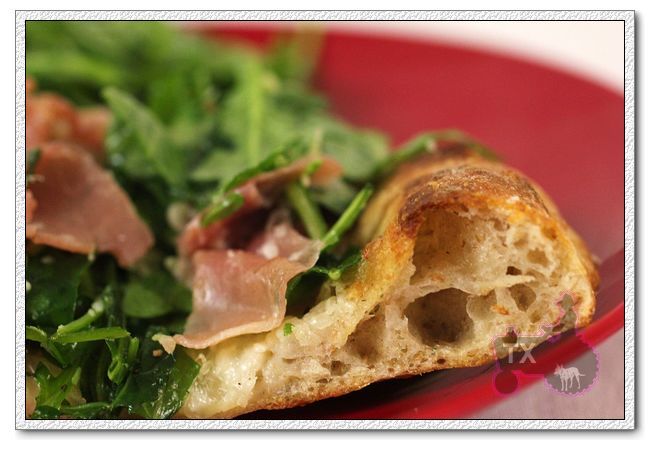
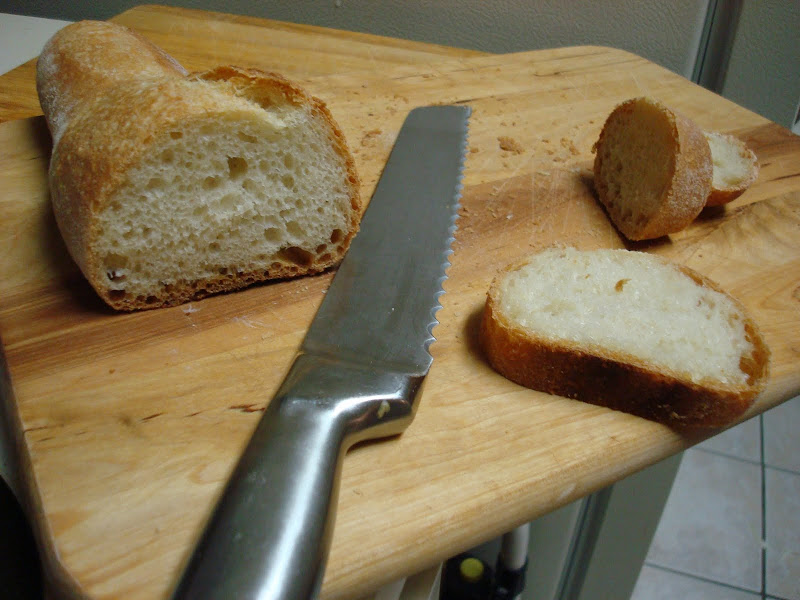
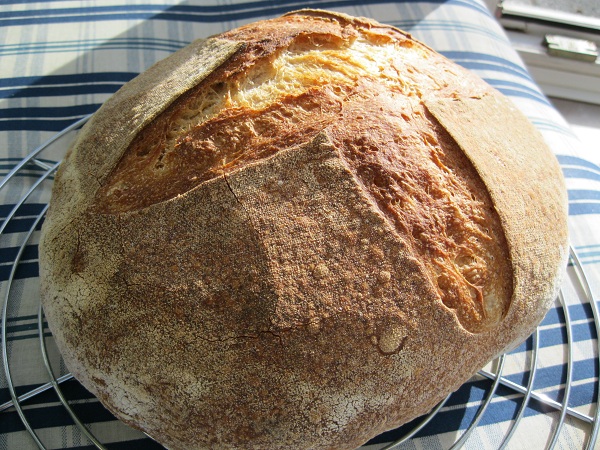
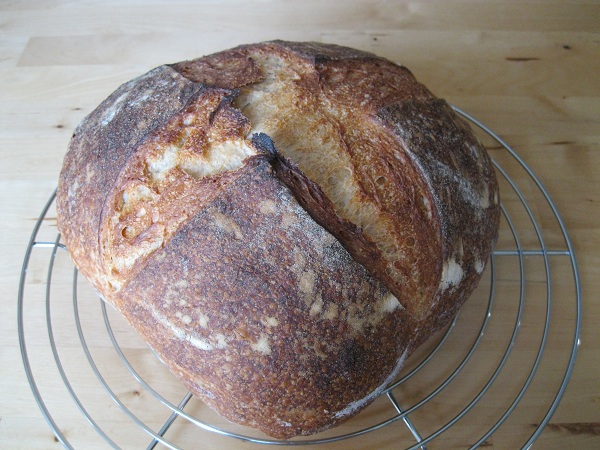
That, is what I call a good crust!


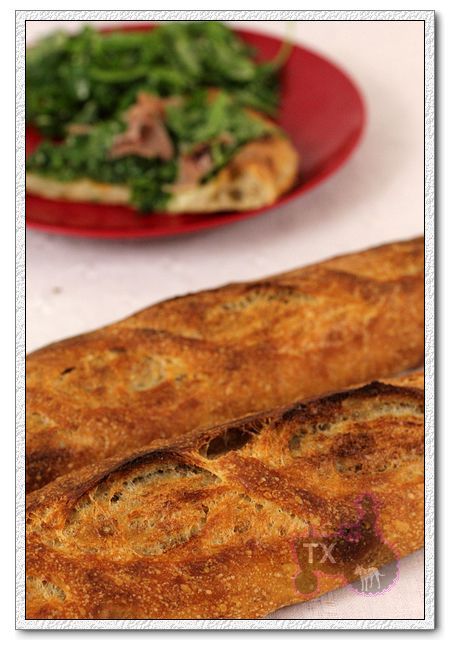
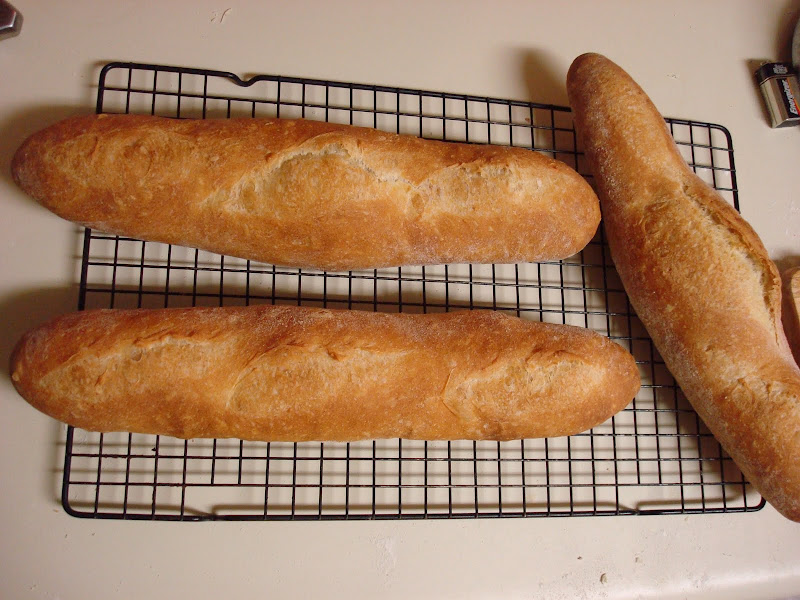
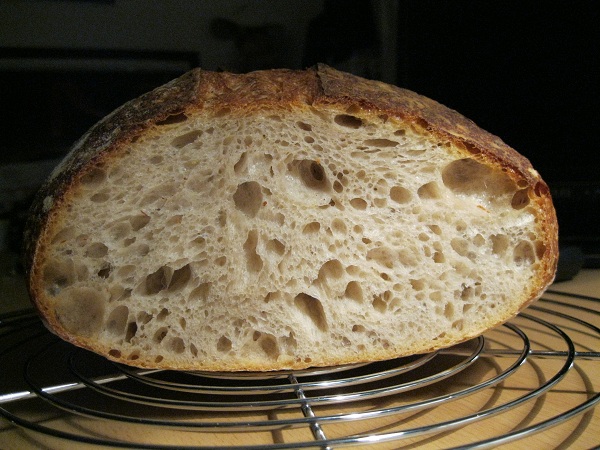
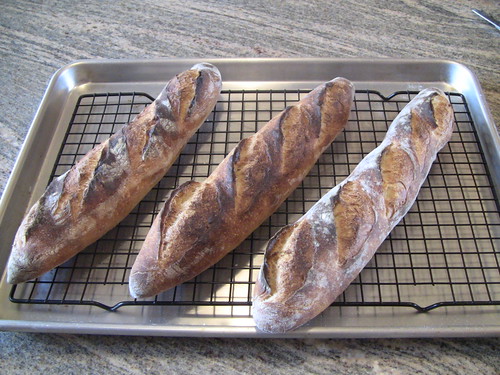
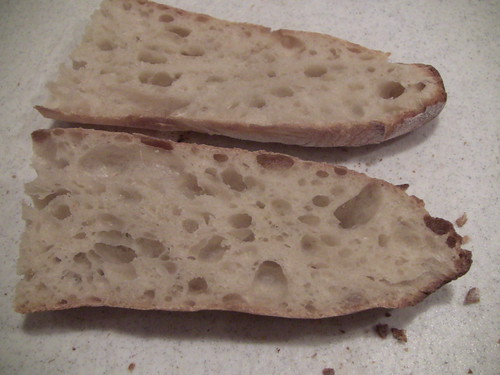
The baguettes weren't half bad either, did I meantion how much I like the rye starter variation? The flavor is outstanding.


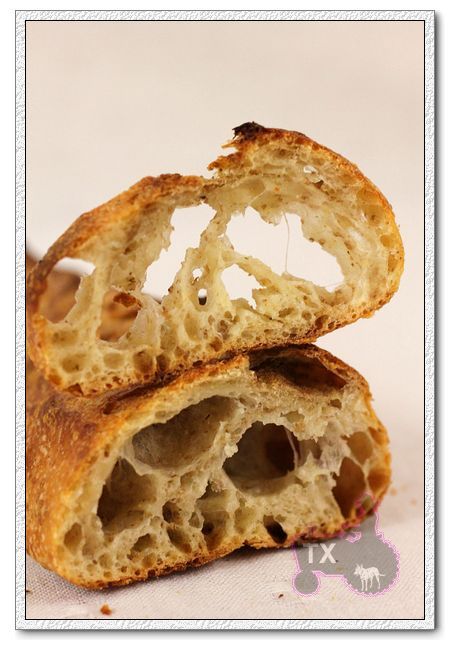
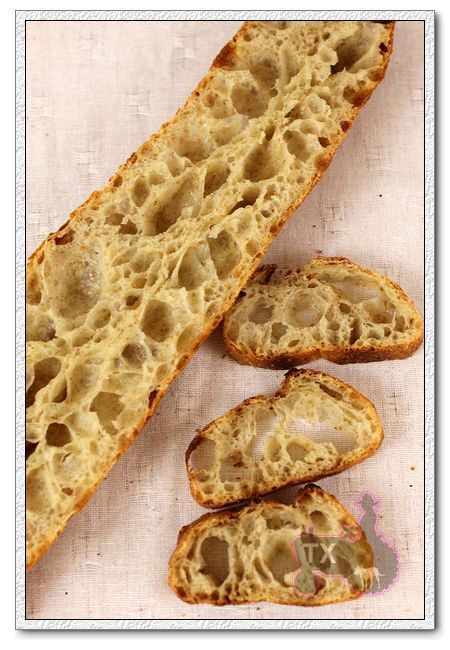
I even got some "ears"! Getting a bit more confident with scoring the 80% dough.

Who knew baguette and pizza are so similar?


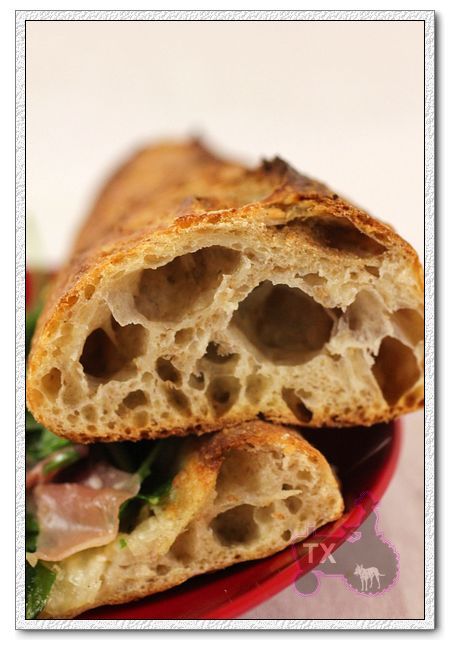
The process worked out so smoothly that I think I will always use one piece for pizza from now on - it would mean faster dinner and more room on baking stone for the baguettes.

Sending this to Yeastspotting.

Father Raphael's picture
Father Raphael

Is there any advantage in making a sourdough starter using Nancy Silverton's labor intensive method or Peter Reinhart's more simplified one?

copyu's picture
copyu

Hi all,

I'm getting tired of repeating myself on "Pretzel-Related" threads where discussion of "Lye" is concerned and I always have to resist the temptation to turn the whole discussion into a Chemistry lecture. I decided a few days ago to do a little "Kitchen Science" and do an incomplete, but slightly more detailed explanation of what alkalis are all about

What I wanted to do was examine some of the claims I've read here, and on many other pretzel-making/baking/soap-making sites. I got tired of reading YahooAnswers, where someone says "If you can't get Sodium Carbonate (Na2CO3), use Sodium BI-Carbonate, because they are very similar chemicals..." This is a true, but totally vapid and rather stupid statement. Common Salt, Sodium Chloride, (NaCL) is also a 'similar chemical' to Sodium BI-Carbonate, (NaHCO3) and similar to Caustic Soda, (NaOH) because they all have only one sodium ion, per molecule, when in solution...It doesn't mean they will perform similar chemical reactions on your bread or noodle dough, however

Understanding pH in detail isn't that straightforward or easy, but as a guide-line, pH7.0 is completely 'neutral' (or in balance) and it's the measurement you should get from pure distilled water. Lower numbers are found with sour, acidic foods, such as lemon juice and vinegar, around pH3-4. Numbers above 7.0 indicate a 'basic' or 'alkaline' property. Any liquid you test will be either acidic, [low pH, well-under pH7.0]; neutral [pH7.0 or pretty close to it]; or alkaline [pH higher than 7.0]

The problems arise when people fail to realize that the pH scale is "logarithmic" [or negative logarithmic] in the same way that dB [deciBels] are in electronics. This is an "engineering solution" to dealing with ridiculously big numbers. What this means is that the difference between one point on the pH scale represents a difference of a power of ten: pH8.0 is about TEN TIMES more alkaline than pH 7.0; a solution of pH9.0 is 100 times more alkaline; pH10 is 1000 times more alkaline, and so on...A tap-water reading in many cities around the world could be as high as pH8.5, which is also the most-often quoted pH figure for Baking Soda. Caustic Soda, or 'Pretzel Lye', on the other hand (one of the strongest known alkalis), is at least 5pH points higher, meaning that it is at least 100,000 times stronger than baking soda. It is this which allows the alkali to attack the surface starch of your pretzel dough quickly and that gives the brown color and the perfect crust that many pretzel fanatics love!

What I did was make solutions using 'Aqua Purificata', the nearest thing you'll find to pure, ion-free, distilled water at a reasonable price. I measured 3g each, using my most accurate scale, of Baking Soda, Kansui Powder (the ingredients of Chinese Lye Water) and Caustic Soda (or 'Pretzel lye') and mixed the powders with 100g of purified water. I mixed each solution for two minutes in brand-new plastic containers, rinsed with the pure water and dried with heavy paper towels. I measured the pH using an $80 pH meter that is fairly well-calibrated. After 3 minutes in each solution, I took photos of the meter readings. I now think I should have delayed the photography until 5 minutes had passed, but the pics I have will give you an idea of the differences among the three main chemicals I tested

http://www.flickr.com/search/?q=different+alkaline&m=tags&w=71323838%40N00&z=m&s=int

I hope this is clear enough and useful to somebody,

Best,

copyu


Pages

Subscribe to RSS - blogs