The Fresh Loaf

A Community of Amateur Bakers and Artisan Bread Enthusiasts.

Blogs

Jo_Jo_'s picture
Jo_Jo_

This is by far the best tasting whole wheat bread I have made so far. It is soft, tender, and very light. I soaked the ground flax and fresh ground Hard White Winter Wheat flour in the kefir and water in my recipe for 20 hours. I then added the rest of the ingredients and mixed them together, plus kneaded for 6 minutes in my mixer.  This is the first test to the theory that soaking the freshly ground whole wheat flour for 12 to 24 hours makes it easier to digest.  I have had problems in the past with large amounts of fresh ground wheat making my stomach hurt, and have come across a lot of info both for and against soaking the entire amount of fresh ground flour in the liquid of the recipe.  I started with the soaking method, just to make sure that I don't upset my stomach by not soaking.  I have eaten this bread since yesterday and haven't had any problems at all, so maybe there is something to this.  Just have to see...


I formed it into a boule, it was slighty tacky and not sticky at all.  Nice looking flecks of the flax meal, and a nutty smell.


Allowed the dough to ferment for 1 1/2 hours, till double.  Then shaped and measured the dough into 2 two pound loaves, and 3 small rolls. 


I then let it rise for 45 minutes for the rolls, which I cooked first. 


I then put the loaves into the oven @ 380*'s for 30 minutes, and then tented it with foil for 15 minutes. I pulled from the oven these huge wonderful loaves.


The last whole wheat bread I made I also used 2 lbs of dough per loaf pan, and they were about 1/3 smaller than these.  This is just amazing bread, great taste, and light and fluffy.  Andy says it's the best whole wheat I have made so far.....

From WWFlax
  Posted by Picasa
MadAboutB8's picture
MadAboutB8

I finally got around to make the famous SFBI (San Francisco Baking Institute) Miche the past weekend. I have been wanting to try this recipe for sometimes after reading so much rave reviews from the TFL members.  

The recipe was posted by David (dmsnyder). Many of the TFL members have made this Miche and all reported fantastic results (many thanks to David and all TFLers who baked the bread and share their results). 

The bread has a mixture of bread and whole-wheat flour in the starter. The recipe also contains wheat germs, which was toasted before the mixing. I have never baked with wheat germs before, or have any wheat germs for that matter. The aroma of toasted wheat germs was fantastic. It has nutty and sweet aroma and give the earthy flavour to the bread.

The original recipe yielded one 2-kg Miche. It was suggested not to scale down the recipe, or you'll be sorry if you do, as the bread was really nice. I didn't scale down the recipe, but instead, I scaled it up to 3-kg batch for two of 1.5-kg Miches.

The dough was soft, silky and nice to work with. I was surprise how well the gluten has develop with little effort. I almost did ZERO kneading but the gluten seems to develop itself from the very beginning, which I was wondering if it was the result of high hydration.

It is one of the tastiest bread I made so far. I love its chewy crumb, crackling crust, and pronounced sourness (which I wonder if it has anything to do with whole-wheat flour in the starter).

I have also posted about this bake in my blog, here.

Sue

http://youcandoitathome.blogspot.com 


leighbakes's picture
leighbakes

If you enjoy my blog, please check out the original at leighbakes.wordpress.com!

Thanks for reading!

leighbakes's picture
leighbakes

Read the original blog post here!

On Valentine's Day, I rediscovered a heart-shaped cake pan in the back of my pantry and knew I had to put it to use. Since it was my first cake attempt, I wanted to use another fairly simple recipe, so I found this recipe for dark chocolate cake on allrecipes.com: Dark Chocolate Cake. It got some pretty excellent reviews from the site's readers, including one person who wrote, "I am a pastry chef, and this is the only chocolate cake that I will make from now on." Awfully high praise! When I pictured the finished cake, I couldn't get the image of a glossy chocolate ganache-covered heart cake out of my mind...so I dug up a recipe for red wine chocolate ganache I'd seen on cupcakeproject.com. What could be more sexy and romantic than dark chocolate cake with red wine ganache for Valentine's Day? Okay, here's something you should know about me (if you haven't already noticed): I'm a chocoholic. This means that I often don't consider a dessert worth eating unless it contains a fair amount of chocolate. This also means that I'll need you guys to urge me to try recipes that aren't all about chocolate. I'd gladly welcome any non-chocolate recipe suggestions any time! I didn't really run into any problems mixing the batter, although it did take a long time to prepare the chocolate mixture, sift all the dry ingredients, and beat everything together. I tend to be a slow worker, but I also lack some of the tools that would make all this a lot easier, like a freestanding mixer. The cake came out looking good, though I found those big cracks down the middle distracting. Is that normal for a cake? Maybe I filled the pan too high. Because I wanted to cover this cake with poured ganache instead of frosting, I knew I had to flip it over to hide those cracks. I did, and it looked pretty great. Because I had a lot of extra batter (the recipe fills three cake pans, which I don't have), I made some extra cupcakes. These looked nicer than my last ones, but just like last time, one oozed in the oven. Seriously, why does that happen? Of course, the oozy cupcake became my taste test. I liked this cake a lot, and I can see why it got good reviews: it had a delicate texture and a nice chocolate flavor. It wasn't as moist as my last batch of cupcakes, though, so I think I'll stick with that other recipe the next time I make chocolate cupcakes. But if you're looking for a classy dark chocolate cake, this is a lovely one. More on those cupcakes later! Back to the cake... The ganache was a breeze to make. I liked the way it tasted, though it's not for the faint of heart--that stuff is rich. The very thin layer I poured over the cake turned out to be plenty; if I'd spread it on, it might have been overwhelming. As for the pouring process, it went well except for two snags. Because the cake was so rounded on the bottom, it cracked a little when I flipped it over, which showed through the ganache. Second, it was difficult to coat the sides of the cake as thickly and neatly as I'd have liked. If I were to do it again, I'd make a little more ganache for that purpose. Here's a photo of the cake covered in ganache, plus an ill-advised decoration attempt. I've learned my lesson: ganache and edible red gel do not look good together. I wanted to make a border of gel hearts, but they barely showed up on the dark background. Should've known better. As you can see, I ended up with more of a broken-heart cake than a heart cake...which seemed a little more cynical than what I was going for. I decided to cover up my bad decoration and the crack down the middle with a design using pecans. It was very experimental, but I'm pleased with the outcome. The result was a tasty cake with just the right amount of tasty ganache. The pecans didn't hurt a bit, either. My mom, who loves all things rich and chocolatey, was in love. This was the first thing I'd baked entirely from scratch that I was truly proud of! I'll save my stories about frosting those cupcakes for my next post. As always, thanks for reading and thanks for commenting! It's great to have supportive readers to keep an eye out for me as I stumble through this self-taught baking course.

Read more...

varda's picture
varda

After struggling with several formulae which never seem to come out right, I decided to change things up a bit.   First, I completely changed my starter routine.   Second I found myself at the counter with an empty mixing bowl and no idea of what I was going to make, so I made something up.   I'm not that good at computing percentages in my head, so I kept it simple, basically going with a fairly simple sourdough, but swapping in some white rye.   The results were less than stellar - the loaf exploded in the oven - basically jumping to around three times its unbaked height.  The second time all seemed well in the oven but halfway through, suddenly it slipped a gasket and a huge cancerous growth leaped out the side, almost as big as the mother loaf.    The third time, I could probably have waited another half hour on the final proof but it was way past my bedtime.   It may have opened too much but it didn't explode, so I call that a victory. 

The addition of white rye (which incidentally Hamelman says is not fit for bread baking) makes some pretty interesting but subtle changes in taste an texture.   My husband, who generally will only eat a slice or so of my more obviously rye breads eats this as if it were an all white bread which I guess it is.  The crumb is denser than a lower percentage rye sourdough, you can cut extremely thin slices without tearing the loaf, but still quite open.  

In general, the taste is such that I wouldn't mind having this as my everyday loaf.  

One of the things I've been working really hard at is trying to control the temperature of my dough.   I came upon a very simple method.   I take a pot and fill it with very hot water directly from the sink, and put the lid on upside down.   Then set the bowl or proofing basket on top of it.   I replace the water after the second stretch and fold as by then it has cooled down a bit.   I have found that I can maintain dough temperature in the mid 70s F by using this method.    Even so I still underproofed because it just seems to take so long to ferment this dough all the way through.   Here is my set up:

Finally the formula - simple but good if you throw in a little patience:


Final Dough


Starter


Percents

KAAP

400


90


82%

White Rye/Dark Rye

100


4


18%

Water

350


59


69%

Salt

11


1.9%

Starter

153


15.9%


Total grams/ estimated pounds

1014


2.0


Instructions:

Autolyse flour and water for 20 minutes.   Mix in salt and starter.   Bulk Ferment for 3 hours with three stretch and folds.  Proof for AS LONG AS IT TAKES.   Bake at 450F with steam for first 15 minutes, without for 17 minutes.

Anonymous baker's picture
Anonymous baker (not verified)

Hi I tried mixing some of the bread mix and letting it rise, then let it sit in the fridge overnight.

The next day I mixed in some more yeast and some more flour (quite a lot actually) and this monster came out :D 

(Ingredience are strong flour, 1 egg, some veg oil, full fat milk, dry yeast, demerera sugar)

:) I think it could have done with a little more time in the oven, so I popped it back in - I also covered it with a tea towel to try to soften the crust - it's worked pretty well.

The initial rise looked excellent, so I think I'll try baking it the first time around.

Having fun :) 


oceanicthai's picture
oceanicthai

I live in Thailand where many specialty baking items aren't available.  Improvising has been interesting, sometimes fun and occasionally quite frustrating.  Pictured is what I found at a local kiln to bake my breads in.  I would have loved a La Cloche, but this is working wonderfully.  To acheive an extra steamed effect I soak the lid of this unglazed terra cotta pot in water before I bake. 

I preheat it all in my oven and when I take the lid off to slide my bread in, steam wafts out.  I use a metal pizza peel made locally that I was really excited to find.  I can't buy a banneton so I use a stainless steel bowl.  For a couche I cut up an old thick cotton apron & it is working great!

This is a traditional style terra cotta pot used for food.  I have lived here in Thailand for 12 years now.

Postal Grunt's picture
Postal Grunt

I've been trying to improve my whole wheat loaves as a project for this year. The Italian breads I thought I'd master have been put on the shelf while I work with some home milled flour that I purchased from a local farm. My results with the 1-2-3 formula have been good but I wasn't satisfied in that I felt I could do more.

So I borrowed a copy of Reinhart's "Whole Grain Breads" from the Tonganoxie, KS Library through the NEKLS and cleaned my glasses before cracking open the book. So far, so good, I appreciate the added knowledge I gleaned from the pages. The concept of "epoxy breads" is interesting but I didn't want to get into that as much as I just had to figure out soakers for myself. It must have been all that talk about enzymes working over the starches that got me. It has turned out to be worthwhile.

That's what I call my first successful soaker loaf. I used 50g of whole wheat and 50g of WheatMontana's multi grain cereal, 100g water, 2g salt for the cold soaker . Some bread flour, a little more WW, water, 180g of starter, and 7g more salt ended up with very tender and flavorful crumb. I thought the crust tasted a little bit salty in the first slices but that hasn't been the case since. I have no explanation for that.

I've already got another loaf started for tomorrow's session with the flours. Since I don't have to bake for a living or for a schedule, I'm tweaking the procedures already. I'm sure that it will be edible outcome. If I can do this, everyone that is willing to try can do it too.


proth5's picture
proth5

I may have mentioned somewhere in passing on these pages that I have a koi pond in my backyard.  It is a beautiful and peaceful thing in the warmer months, but can be just a little grim in the clutches of a Rocky Mountain winter and fatalities among the inhabitants can occur.  Since I am an omnivore, I try to be unsentimental about this, but there are always two factors that come into play in any fish death.  One, even though fish must die some time, as with all living things, I always feel that it has been some failure on my part to provide them with the right environment that caused their demise.  Two, these are not small fish.  Death involves finding a place and digging a fairly large hole to dispose of the remains. Pulling the body from the water in winter conditions cannot accurately be described as being easy.

So it was with sinking heart that I saw the tail of one of my 10 year old fish projecting from the rocks at the edge of the pond moving limply with the movement of the water.  Thinking there was little I could do, I went about more urgent business and mulled over where the burial would take place.  It seemed like the coldness of the water had preserved it well and the death had been recent since the scales still had a sheen to them.

My house sitter dropped by to tell me a fish had been missing for three days. As we surveyed the protruding tail, I saw real movement.  "That fish is alive," I said, "But stuck in the rocks." (Koi are not over intelligent, but they do have creative ways of getting into jams that will eventually do them in.) Without a moment's hesitation I lifted the heavy blocks that hold down the winter netting and began to remove rocks.  The pond is a beautiful thing to look at, but was not built with rock moving in mind.  Rock moving has to be done with one hand - one hand in water that in some places was still crusted with ice.  If you wish to try this at home, take a large bucket of water and drop in a rock about the size of your head.  Let the water stand in a warm sunny area until surfaces are uniformly covered in algae.  Then chill the bucket until a crust of ice forms.  Break through the ice with your non-dominant hand and attempt to pick up the rock.  Imagine that if you drop the rock you will crush the life out of the creature you were trying to save.  Let me know how it turns out.  For bonus points have a small cut on one finger.

In the end, the rocks were moved, the fish spent a few moments collecting itself, and then simply swam away to join its buddies.  They're tough little spuds.  My finger got some extra special attention (the infections one can get from pond water are many and can be quite nasty) and is recovering nicely. 

Life - Death - Life, again.  A miracle on the pond.

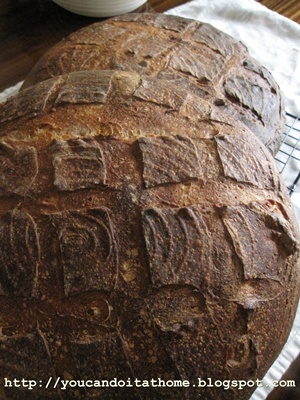
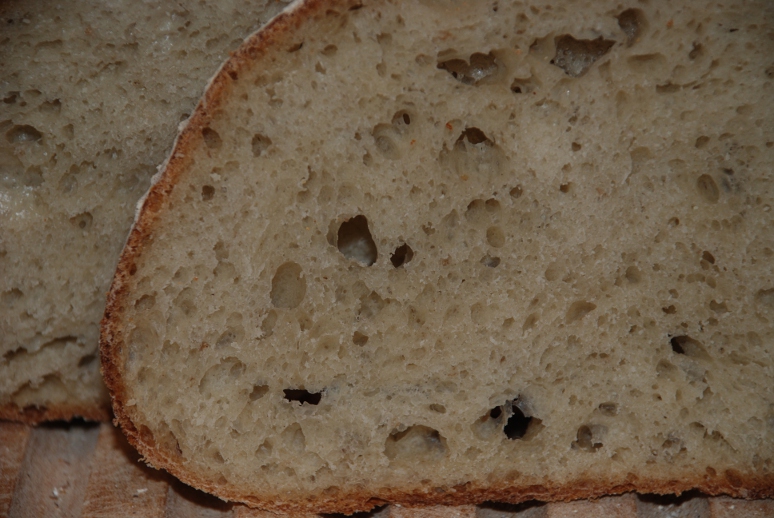
So what does this have to do with formula development?  Well, a second miracle occurred at the Crumbled Abode on that day.  I really liked the flavor of my developing formula.  With the formula math corrected it turned out to be a lovely balanced bread with both the flavor of the grain and the sweetness of the molasses.  I even liked the color which with the return of the molasses had turned back from tan to brown (which is not really shown well in the picture.)  I really think that I have achieved contentment with the base ingredients. Perfection?  No.  But contentment. Yes, the doctors at "The Place" would call it a miracle.

The crumb remains a bit too fragile, but I am still reluctant to try higher gluten flour.  Examining a loaf that I had shaped using a different method, I am convinced for now that the fault, dear readers lies not in our gluten, but in ourselves.  After years of light handed shaping, I think I am not putting enough oomph into forming the simple loaf.  Also I transitioned to a larger pan at some point during my formula addling and I may be over proofing to compensate. Perhaps I will need to beat myself up for a few weeks over this until I give in and use bread flour or high gluten flour or perhaps I will just give in and steal from the best sooner rather than later, but I don't want to turn this bread into a chewy textured bread.  (Geez, back to struggling to get the crumb right...)  If anything, though, this bread rises too well and the crumb is too airy - which would seem to indicate that gluten itself is not a problem.

But contentment with the base flavor frees me to consider inclusions.  This bread already has some visible inclusions in the form of the steel cut oats and I don't want to turn this into seedy, nutty bread, but I think it could use just a little jazzing up in the form of another inclusion.  Since the mighty Diamant stands ready, there are any number of cracked grains to consider.  I've thought about millet - which is something I used to add to a beer flavored quick bread, but I'm not sure I want the crunch.  Although I know that nuts would be flavorful, again, I am reluctant to put them in a sandwich loaf.  I kind of feel the same way about dried fruits (although I ponder that once I get the base dough right loading it up in this way would be a tasty variation.)  Well, I have time to consider.

This week's formula:

Total Dough Wt


64.098

oz

Levain


Ingredients


Percent of Flour in Levain

0.1


Final Dough


%

Wt

UOM

%

WT

UOM

Ingredients

Wt

UOM

Total Flour

1.00

27

oz

1

2.7

oz

Total Flour

24.30

oz

Whole Wheat Flour

0.30

8.1

oz


Whole Wheat Flour

8.10

oz

KA AP Flour

0.60

16.2

oz


KA AP Flour

16.20

oz

Triticale Flour

0.10

2.7

oz

1

2.7

oz


Additional Water

0.13

3.618

oz

0.6

1.62

oz

Additional Water

2.00

oz

Rolled Oats

0.17

4.59

oz


Rolled Oats

4.59

oz

Steel Cut Oats

0.11

2.97

oz


Steel Cut Oats

2.97

oz

Boiling water

0.74

19.98

oz


Boiling water

19.98

oz

Shortening(leaf lard)

0.03

0.81

oz


Shortening(leaf lard)

0.81

oz

Molasses

0.06

1.62

oz


Molasses

1.62

oz

Agave Nectar

0.05

1.35

oz


Agave Nectar

1.35

oz

Milk Powder

0.04

1.08

oz


Milk Powder

1.08

oz

Salt

0.03

0.756

oz


Salt

0.76

oz

Yeast

0.004

0.108

oz


Yeast

0.11

oz


Seed

0.008

0.216

oz

0.08

0.216

oz

Levain

4.536

oz

Totals

2.074

55.998

oz

1.68

4.536

oz


64.098


Mix pre ferment and allow to ripen 8-12 hours

Pour boiling water over the two types of oats and allow to cool to lukewarm.

Combine oats and pre ferment with the remaining ingredients and mix for 6 minutes on the sole speed of a spiral mixer (or use your preferred mixing method) 

Bulk ferment 4 hours at room temperature (warmer this week...). One fold.

Shape. Proof 1.5 hours.  Bake at 360F for 45 minutes.


Have fun!

oceanicthai's picture
oceanicthai

Many thanks to you all for your helpful posts and long discussions on the processes of breadmaking.  I have spent hours and hours reading your post and learning.  As a result of the all information I've gleaned I've been able to culture a sucessful sourdough culture and have had the pleasure of making beautiful, nutritious and delicious breads for my family. 


My whole wheat 7-grain sourdough boule.

Pages

Subscribe to RSS - blogs