The Fresh Loaf

A Community of Amateur Bakers and Artisan Bread Enthusiasts.

Blogs

codruta's picture
codruta

I didn't even finished my last rye bread (the one I wrote about here) and I was eager to do another one. This time with rye chops in it. Or...at least  I think they are rye chops... I took some rye berries, soaked them overnight in warm water, and next morning I chopped them with a sharp knife. I guess that makes them rye chops...doesn't it? As a difference from last time, I used british rye flour (last time it was austrian) from Doves Farm. I increased the hydration (from 83% last time), but I can't say for sure how much, I can't estimate precisely how much water was absorbed by the rye berries, but I think overall hydration was somewhere between 88%-89%.

20% strong white flour (doves farm), 80% rye flour, 20% rye chops, some caraway and fennel seeds, toasted and crushed. (sorry about the quality of the picture, it was taken very early in the morning, but I want to show you the "rye chops")

Everything seamed fine until I put it in the oven. How can this beauty:

turn into this "beast":

After 24 hours I cut it in two, and the crumb was a bit sticky. I thought the bread is compromised, but I let it sit another 24 hours until I sliced it and taste it. It is quite delicious. When toastes, the rye chops gets a nutty wonderful flavor. The bread is sweet from rye, and sweet from berries. I feel like I'm on the right track, but I want to have more volume in my rye breads than this:

I am happy that I don't have to trasform this bread into altus (that was my fear when I first cut it), but I'm dissapointed that I didn't get more volume. It has only 6 cm height :( What did I do wrong? the dough was not overproofed, that is for sure. Maybe a bit underproofed? I worked it too much when I shaped it? And why does the crumb feel a bit sticky when the internal temperature after baking was (again) 98C?

Codruta


dmsnyder's picture
dmsnyder

Three years ago, I made Double Knotted Rolls from a formula provided by nbicomputers, AKA Norm Berg, AKA co-author with Stan Ginsburg of Inside the Jewish Bakery. (See: Norm's Double Knotted Rolls) We enjoyed these rolls a lot, especially for sandwiches made with leftover Thanksgiving turkey.

When I received my copy of Inside the Jewish Bakery yesterday, I had already planned to make these rolls today. However, the book had no specific recipe for these rolls and no indication which of the three formulas for rolls should be used for them. I was pretty sure it would not be the "Light Enriched" dough, because that is the one used for Kaiser Rolls, and Norm specifically distinguished between the "soft roll" dough formula and that used for "hard rolls," like Kaiser Rolls. That left two formulas. Neither was the formula I had used in 2008, but I decided to use the "Sweet Egg Dough," because that looked closest. Here is the result (in photos):

Rolls shaped and ready for proofing

Mixing followed the general instructions for mixing roll dough, and it worked well. Instructions (in Norm's words) for shaping can be found in this topic: Double knot roll. There are numerous YouTube videos of this technique, many erroneously presented as the method for shaping Kaiser Rolls. In addition, both Hamelman's Bread and Greenstein's Secrets of a Jewish Baker have good roll shaping illustrations. I scaled the rolls at 3 oz, with one bit of dough left over to make a sort of Figure Eight Roll.

Rolls proofed and egg-washed

Inside the Jewish Bakery has an enlightening discussion of how different degrees of proofing were used for different products made with the same dough. For the Double Knotted Rolls, a 3/4 proofing is necessary to get the right crumb texture.

These rolls can be baked plain or with poppy seeds or sesame seeds. (Onion rolls are a whole other genre!) My wife much prefers sesame seeds. I can go with sesame or poppy.

Rolls proofed, washed and seeded. Ready to bake.

I baked at 350 F for about 15 minutes. The rolls were slow to brown. Next time, I'll use the oven's convection setting, probably at 330 F.

Baked and cooling

These rolls were less rich than I remember, but still very good.  Next time, I believe I would return to the formula Norm provided in 2008. Who's counting calories?

David

Submitted to YeastSpotting

dmsnyder's picture
dmsnyder

I finally got around to making Hamelman's "Pain au Levain with Whole Wheat Flour." For comparison, I also baked his Pain au Levain. The former was cold retarded overnight. The latter was not. However, I did retard the firm sourdough starter used for both breads overnight, and I believe this resulted in a tangier pain au levain than my previous bakes. 

On to some photos:

Pain au Levain boules

Pain au Levain crumb

Pain au Levain crust

If I were nit picky, I'd say this dough was slightly over-fermented, and I think the loaves were slightly over-proofed. However, it had a thin, crisp crackly crust that I wish I could reproduce at will, and the flavor was delicious, with more of a tang than usual, as mentioned.

Pain au Levain with Whole Wheat Flour

Pain au Levain with Whole Wheat Flour crumb

This bread had a more complex flavor that the "regular" pain au levain when tasted 2 hours out of the oven. There was a slight WW grassiness, which I do not enjoy, and a lingering sourdough flavor, which I do enjoy. This type of bread usually tastes better to me on the day after it was baked, and I trust this bread will follow the pattern.

It's hard for me to say which of the three version of pain au levain in "Bread" is my favorite. Experience suggests it's whichever one I'm eating at the moment. I really, really like all three.

David

loydb's picture
loydb

I broke out the metal 'stones' for my Retsel and made cornbread tonight. The corn was organic blue corn from Heartland Mill. The wheat flour in the recipe was a mixture of hard red and hard white wheat from Pleasant Hill. These, plus some butter and jam, were all we needed for dinner tonight.


sam's picture
sam

Hello,

Here is my most recent attempt/experiment of baguettes.   Even after reading articles, watching youtube videos, I am still pretty horrible at shaping a baguette properly.  :-)  I haven't given up, but after the last 3-4 attempts, I may go back to simpler shapes for a while.

This one is a 33% poolish, 33% sourdough levain, no flour soaker or mash, overall hydration 66%, everything at ambient room temp.   All flour was organic KA AP flour.   The crumb is decently open, and the flavor is good.

I took two pictures of the same thing, in different lighting conditions in my kitchen at the time..


Happy baking!


Juergen Krauss's picture
Juergen Krauss

Hi,

For the harvest festival at my son's school I revisited Andrew Whitley's formula for Russian Rye, an inspired by Varda and JanetCook I used some of the surplus starter to make two variations of his "Really Simple Sourdough", both from his book"Bread Matters".

Both formulas call for baking in tins.

Here the results, from left to right: Wholegrain Spelt, Shipton's Swiss Dark Flour (high extraction), Russian Rye ...

And the crumb, in the same order:

The Starter is a 200% hydration starter wich I had going for over a year  now. I keep it in the fridge; for baking I essentially follow Andrew Whitley's instructions - I make a "production sourdough" with 100% wholegrain rye, 200% water and 25% starter from the fridge (The book recommends 100% starter). My kitchen was about 22C, and I left it ferment for ca. 16 hours. (At the end it was a bit frothy with a slightly sour taste)

I prepared the starter to bake the Russian Rye on Tuesday evening so that the bread would have time to set and develop character until Friday, the day of the festival. I put thje surplus starter into the fridge on Tuesday afternoon after mixing the Russian Rye,

The "Really Simple Sourdoughs" (RSSD) were mixed on Saturday evening (9pm) with the starter coming right out of the fridge - this formula calls for just 40g starter for a 500g loaf. They proved overnight in their tins at about 17C and were  baked on Sunday morning at 10am.

The Russian rye has been slightly underbaked and tasted watery at first, but fr Sunday's supper it was excellent with chicken liver pathe. The spelt variant of the RSSD tasted a bit bitter after the bake, with a distinct nutty note. On Sunday evening the bitter note had disappeared.

The RSSD with Swiss Dark Flour became an instant favourite of my wife - the crumb is springy, the taste is wheaty, but not nominating.

I'll keep this in my repertoire (I hadn't made RSSD since joining The Fresh Loaf, I think)

** UPDATE: The Formulas **

Both breads are shaped with wet hands right after mixing and proofed in tins.

Russian Rye for 2 hours to 8 hours at 24C or more,

Really Simple Sourdough for up to 12 hours at 20C

Russian Rye

Production Sourdough (Dough Temperature 30C)

Wholegrain Rye flour 31%

Water 62%

Yield 92%

Final Dough (DT ideally 28C)

Wholegrain Rye flour 69%

Water 42%

Salt 1%

Production Sourdough 92%

Yield 205%


Really Simple Sourdough

Rye Starter (can be taken from fridge if not too starved)

Wholegrain Rye flour 5%

Water 10%

Yield 15%

Final Dough (DT 20C)

Wholegrain flour (Wheat, Spelt) 95%

Water 66%

Salt 1.5%

Rye Starter 15%

Yield 178%

That's it.

Cheers,

Juergen


raqk8's picture
raqk8

Hello! I am a new food blogger at Ovenmittsblog.wordpress.com. I am writing a series on beginning breadmaking. I know the majority of people on this site don't really need the tutorials, but I'd love some feedback! Here's the intro. Please see the website here at Ovenmitts for the whole post!

Breadmaking 101 – An Introduction to BreadPosted on October 23, 2011

I was going to post one of my favorite bread recipes today when started thinking about how I got into bread making. Let me tell you – it wasn’t easy. I did a little research, found a whole wheat sourdough recipe, and dove right in. Sounds like a good plan, right?

Wrong! It took me quite a few complete fails, numerous “just alrights,” and many “almost there’s” before I was able to make a loaf I was satisfied with. It was definitely a journey, but an addictive one. I would constantly think about how I could improve my loaves, what kind I could try next, how to make my sourdough taste sour. I bought books and tools and ingredients. I spent hours on end reading recipes, tips, and advice. I made loaf after loaf after loaf, and finally, after all my efforts, I made something I was pleased with. It was nowhere near perfect. I could still think of many things I could change to make it better. But it had good flavor, good texture, and was something I was proud of.

I’ve come a long way since then. I never buy any bread at the store anymore because I love the stuff I make at home. I consistently make bread that I am happy about, and I feel proud every time I eat my PB&J.

Just for reference, I eat PB&J almost every day.

I understand the ingredients – what they do, how they react with other ingredients, how they will affect the flavor. I’ve made – many times – a sourdough bread that my boyfriend calls home about (no, I’m not joking!). And I LOVE making bread. It takes a while, sometimes up to two days, but it is totally worth it.

So, I thought I’d share my two cents with you on beginning the process of bread making....

Again, please see my website for the whole post and to leave feedback or ideas. Thanks so much!

GSnyde's picture
GSnyde

I received my copy of Inside the Jewish Bakery a few days ago, and fairly quickly settled on the Bear Claws as the first recipe I wanted to try.  I’m kind of an almond paste freak .  You could call me a “MarziFan”.  

I made Bear Claws the first time a month or so ago, using the recipe from Fantasia Bakery.  That one used a Danish pastry dough—which was delicious—but the filling wasn’t right…too thin and eggy.  Stan and Norm’s filling, using a good portion of cake crumbs, looked promising.  The Bear Claw recipe in Inside the Jewish Bakery uses what they call “Coffee Cake Dough”, enriched with egg, sugar, shortening and milk powder, but not super sweet and fatty.

I’m not going to post the recipe, unless Stan says I should, but I’ll give you a bit of a narrative.

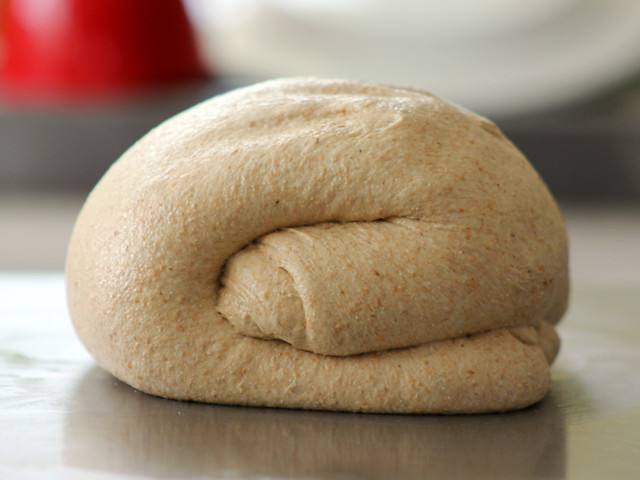
The dough takes a long time to come together.  It’s fairly batter-like.  It may be that my Bosch is not the ideal mixer for a dough like this; a KitchenAid might work better.  After about 20 minutes of mixing, the dough took almost two hours to double.  Then I punched it down, formed it into a ball and put it in a covered bowl in the fridge overnight.  The next morning it had doubled again and was nice and poofy.

.

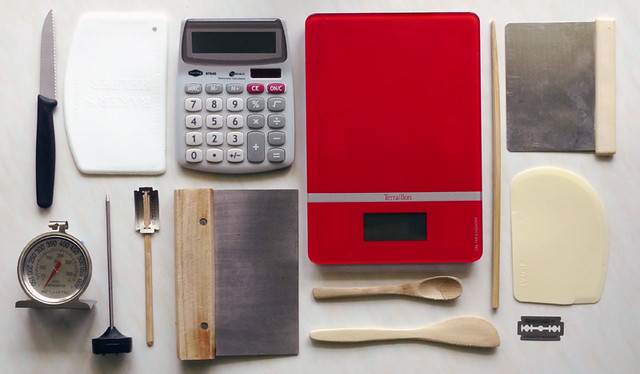
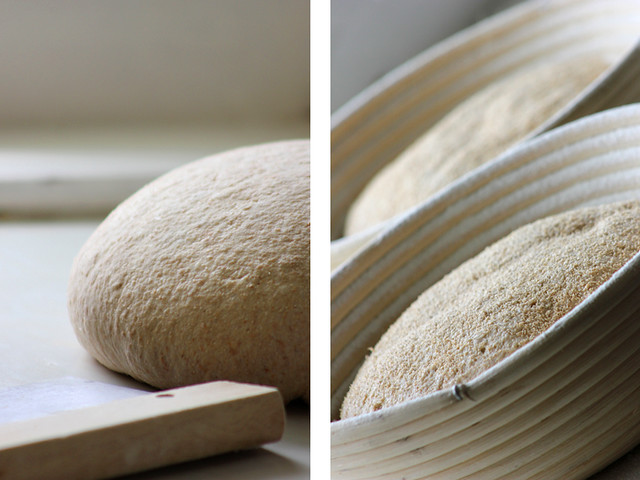
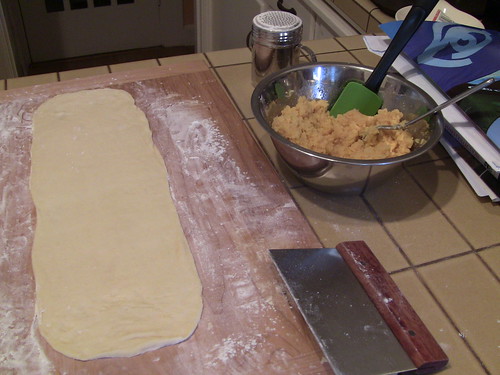
This morning I made up the filling (almond paste, sugar, egg, cake crumbs, water, milk powder, salt) and divided the dough ball into three (the recipe says divide in three, but then refers to two batches making six pastries each…confusing).  The dough had a very nice texture, it is soft even right out of the fridge, and needed lots of flour on my prized New York Bakers kneading board.   But it was extensible enough to roll out to quarter inch thick strips.

The dough sheet is brushed with butter and the filling is spread over half (ok, I admit I made a bright yellow Pillsbury cake mix cake for the crumbs).

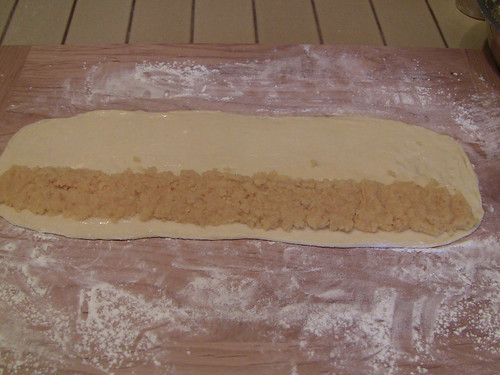
Then, its folded and sealed and stretched and divided.

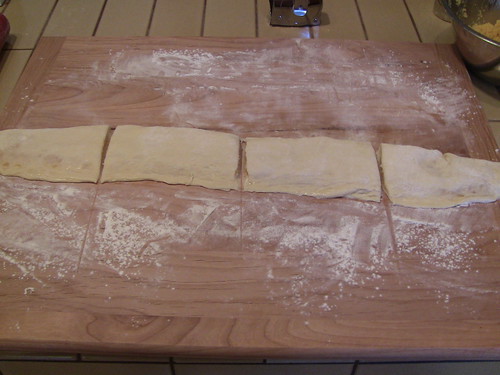
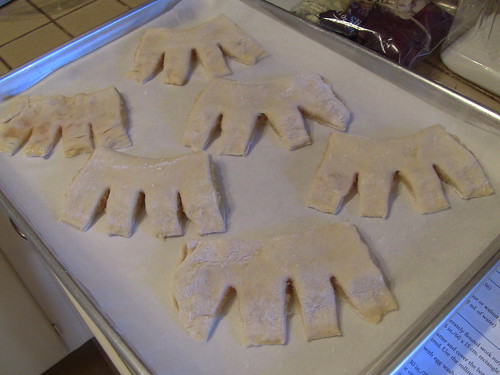
Then the pieces are cut and bent to make the bear claw shape (some nicer than others).

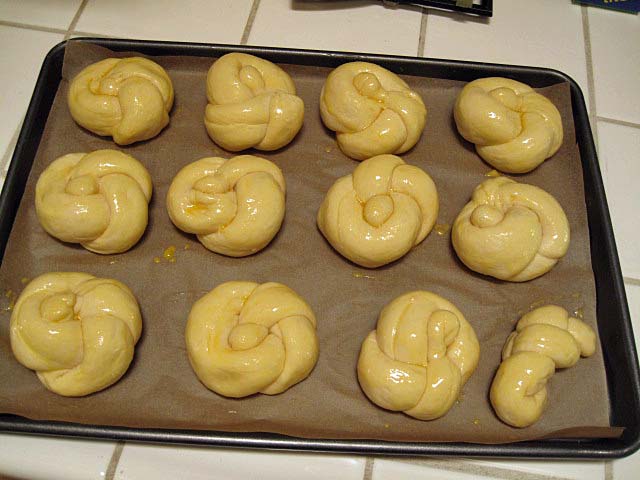
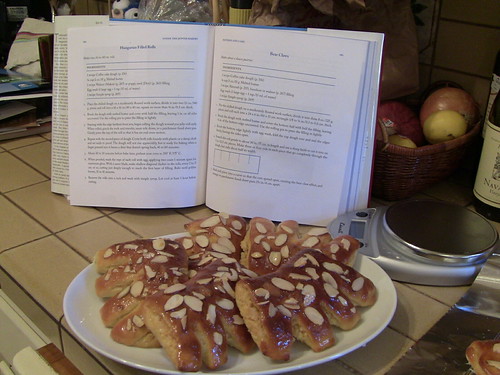
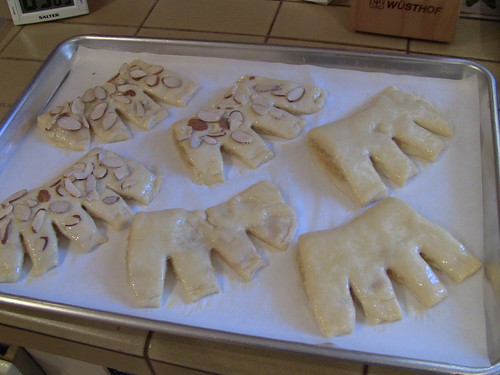
After about a 75 minute proof, the pastries are brushed with egg wash and sprinkled with sliced almonds (the recipe omits the almonds, but I don’t like my claws bare).

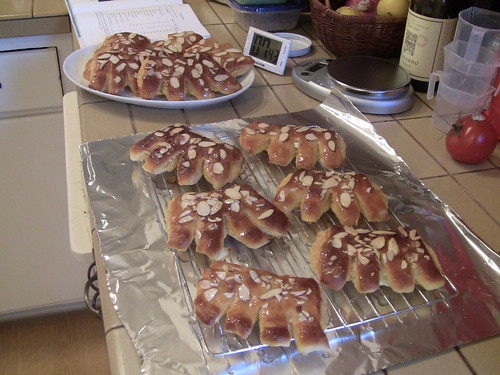
After baking, they get a brushing of simple syrup.  And they’re ready for their close-up.

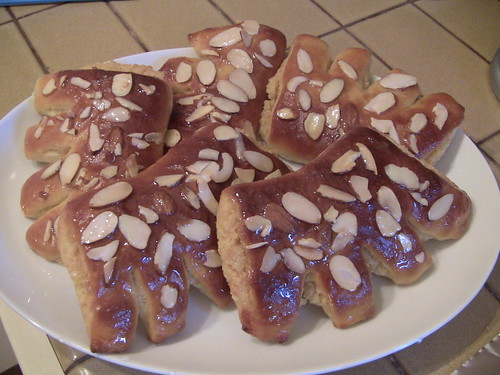
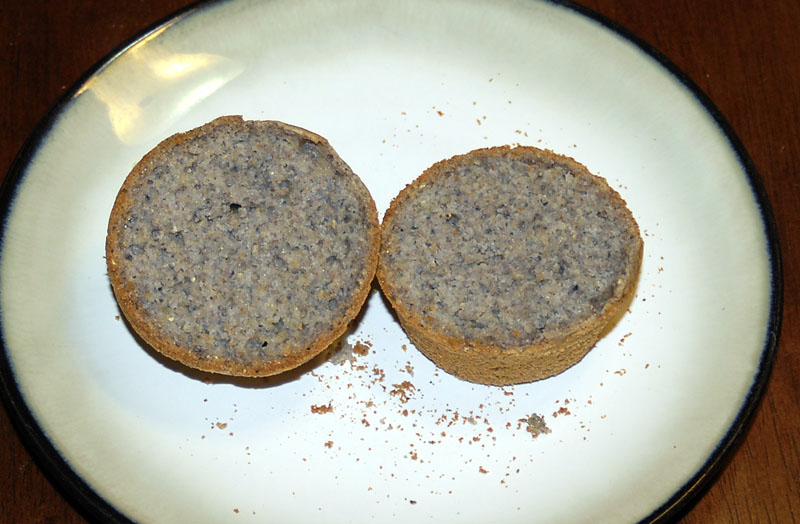
These are delectable!  The filling is just like the best bakeries’.  The dough is not too sweet and has a nice moist texture, but with an eggy crust.

One recipe into my experience with Inside the Jewish Bakery, I’m happy, and looking forward to trying more.

Thanks, again, Norm and Stan.  Good work!

Glenn

suzyr's picture
suzyr

Whole Wheat Bread with Raisins

1 tab of dry yeast

2 1/2 cups of water, tepid

1/3 cup of honey

4 cups of whole wheat flour

2 cups of bread flour

3/4 tab of salt

1 cup of raisins

2 tab of cornmeal


Dissolve the yeast in the water with the honey, let it proof 10 minutes. Then in standing mixer add flours and salt, then add in raisins.  Knead well til stickiness goes away. I like to hand knead, not in mixer.  Then I can feel what is going on with the dough.  Place in oiled bowl and put a new white trash bag around the bowl and set in a draft free area.  Let this rise 2 hours.  The trash bag acts as a humid warm tent.  Punch down and shape into a round loaf and place on baking mat or parchment.  Sprinkle with cornmeal and cover again for another 1 1/2 hours. Make beauty cuts in the top and place in a preheated 425 oven.  Bake for 25 minutes then reduce to 400 and bake another 25.


PiPs's picture
PiPs

Saturdays are my day of play in the kitchen. I rise early in our quiet house to bake bread for the week. A boiled kettle, a cup of tea, then I start mixing and planning my day just as the sun pokes through the kitchen window. After mixing, we enjoy a lazy breakfast while I watch the dough and wait. By midday the baking is done, enticing me to cut a slice (or two) for lunch.

Last weeks Dark Rye disappointment also fuelled a rye test bake, but I will save that for another post in the next few days as I am waiting for the crumb to set.

With the rye bake keeping me busy both mentally and physically in the kitchen, I decided to be kind on myself and bake a simple adaptation of the country bread with two starters by using a proportion of wholemeal spelt in the final dough. I think I have found a winner both with flavour and texture.

Milling and Sifting

While last weeks light rye was certainly delicious and moist (with the soaked cracked rye) I found the sharp flavour of using only the rye starter too assertive. The overnight rise in the fridge compounded this further and the sourness became quite pronounced a few days after baking. Using a combination of the two starters and a room temperature proof seems to restore a balance that I felt was lacking in last weeks bread.

I prepared the flour the night before. The wheat was milled and sifted. The caught material was remilled and sifted again before being used in the final flour with the caught bran set aside. The spelt was milled and then added to the final flour mix without sifting while the rye grains were milled coarsely and fed to a hungry rye starter for use in the morning. My usually wholewheat starter was fed sifted wholewheat and 30% wholemeal spelt before being mixed to a 50% hydration and placed in a cool spot overnight.


3 grain country bread with two starters

Formula

Overview

Weight

%

Total flour

1100g

100%

Total water

900g

82%

Total salt

25g

2.3%

Prefermented flour

167g

15%

Desired dough temperature 23°-24°C


Final dough


Rye starter @110% hydration

115g

12%

Sifted wholewheat starter @ 50% hydration

168g

18%

Sifted wholewheat flour

603g

65%

Wholemeal spelt flour

330g

35%

Water

784g

84%

Salt

25g

2.6%

Last fold, shape and proof

Method

  1. Autolyse flour and water for one hour.
  2. Incorporate starters by squeezing into dough with wet hands until smooth and feel no lumps then knead for 5 mins (I used a gentle slap and fold because of the amount of spelt). Rest dough for five mins. Incorporate salt and knead for a further five mins.
  3. Bulk ferment three hours with three stretch and folds 30min apart in the first 1.5hrs.
  4. Preshape. Bench rest 20 mins. Shape.
  5. Final proof was roughly two hours at room temperature (23°).
  6. Bake in preheated dutch oven for 10 mins at 250°C then a further 10 mins at 200°C. I then removed it from dutch oven and baked for a further 25 mins directly on stone for even browning.

 This is such pleasant dough to work with. Spelt and rye bran are flecked throughout. The kneading and folding gives strength so the shaped loaves hold themselves proudly before being placed in bannetons.

I had massive oven spring considering the amount of freshly milled wholemeal flours … the “Pip” was very pleased.

I played again with the scoring this week. My partner’s nickname is “Rat” so in her ratty honour I scored one of the loaves with a giant “R” … the “Rat” was very pleased.

The flavour for me is a balance between the tang in the rye and subtleness of a wheat starter. This not a boring bread, but it does not dominate the senses either.

… and after a busy day in the kitchen I prepared a simple lunch before we headed outside to continue the rest of our day in the spring sunshine.

Cheers, Phil (and the Rat)


Pages

Subscribe to RSS - blogs